

stryke
-
Content Count
70 -
Joined
-
Last visited
Posts posted by stryke
-
-
Tiling for Living, Kitchen, Service Balcony
I was away for my fishing trip in Rompin, Malaysia for 2 days.
Went over to see the place on Saturday, tiling for major area already done. Very happy.
-
Piping
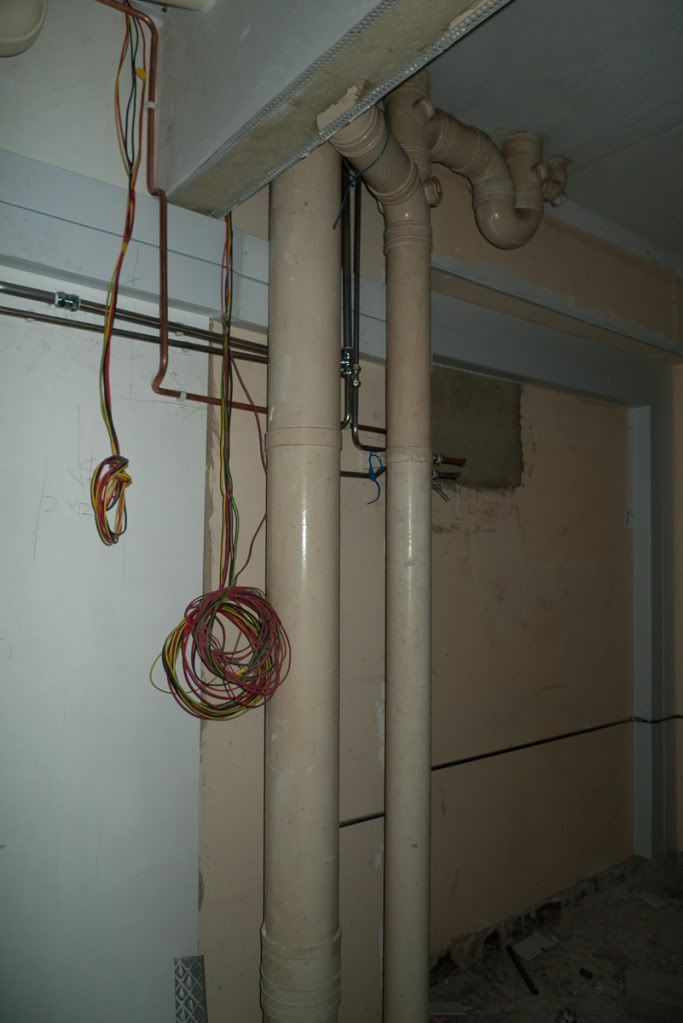
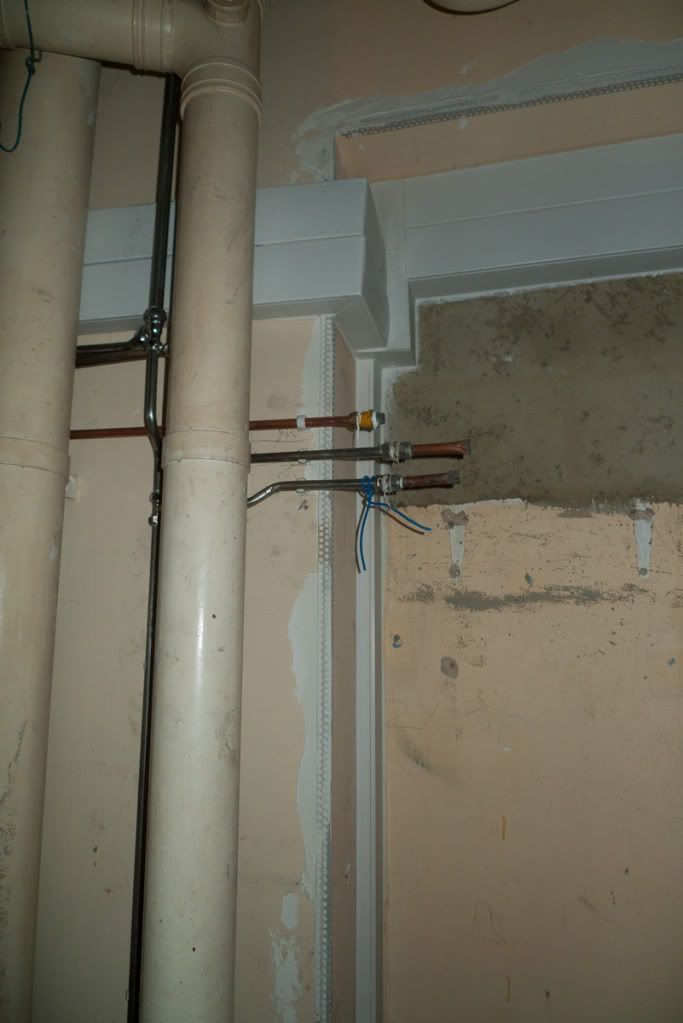
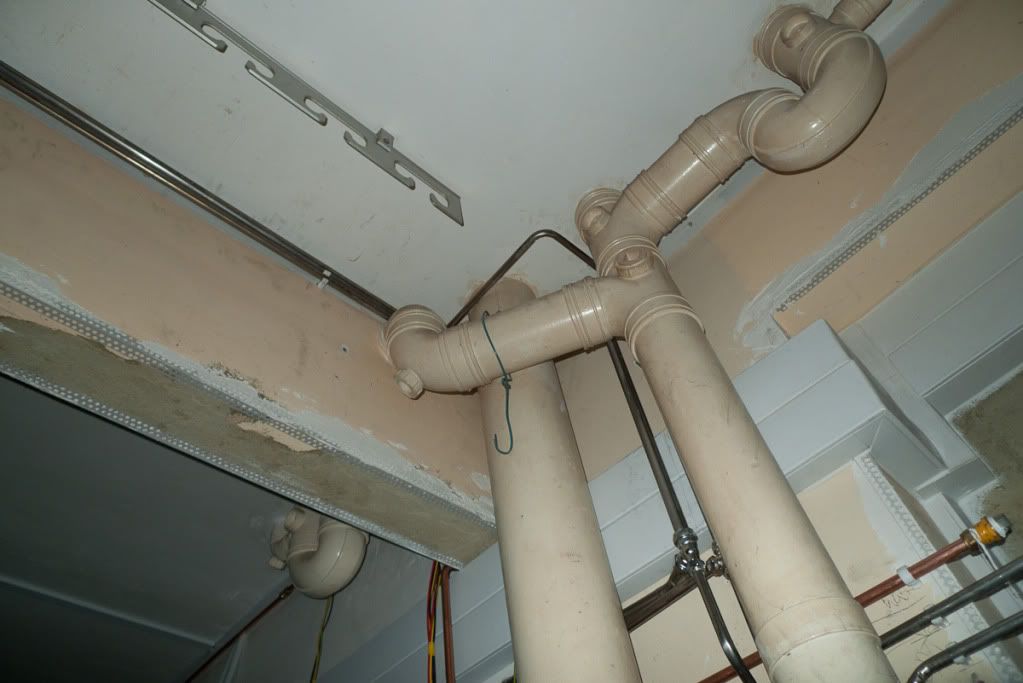
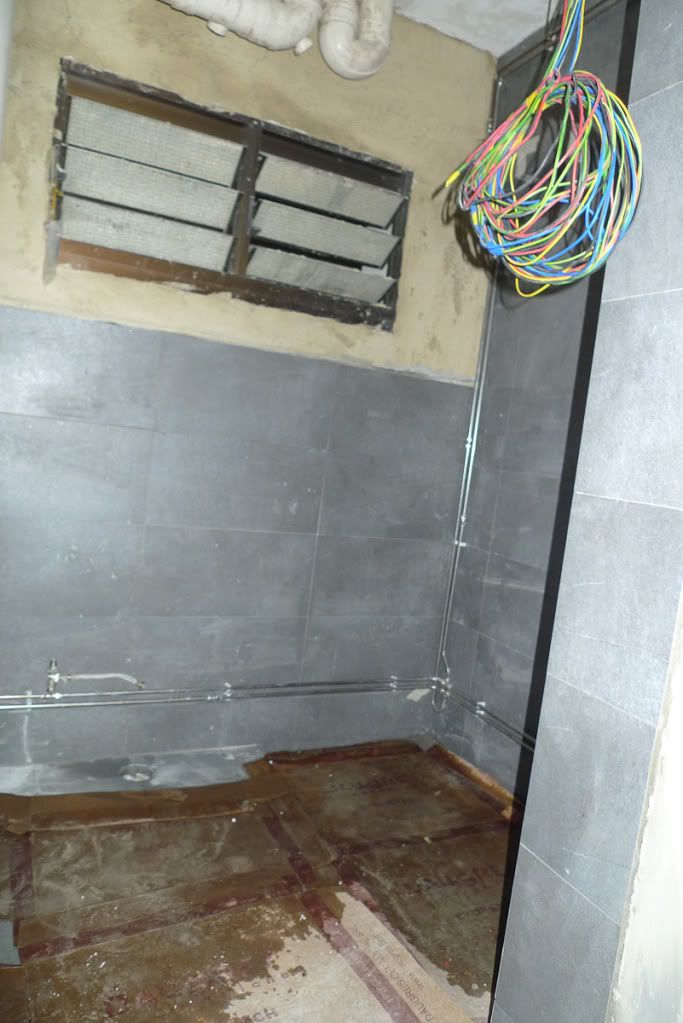
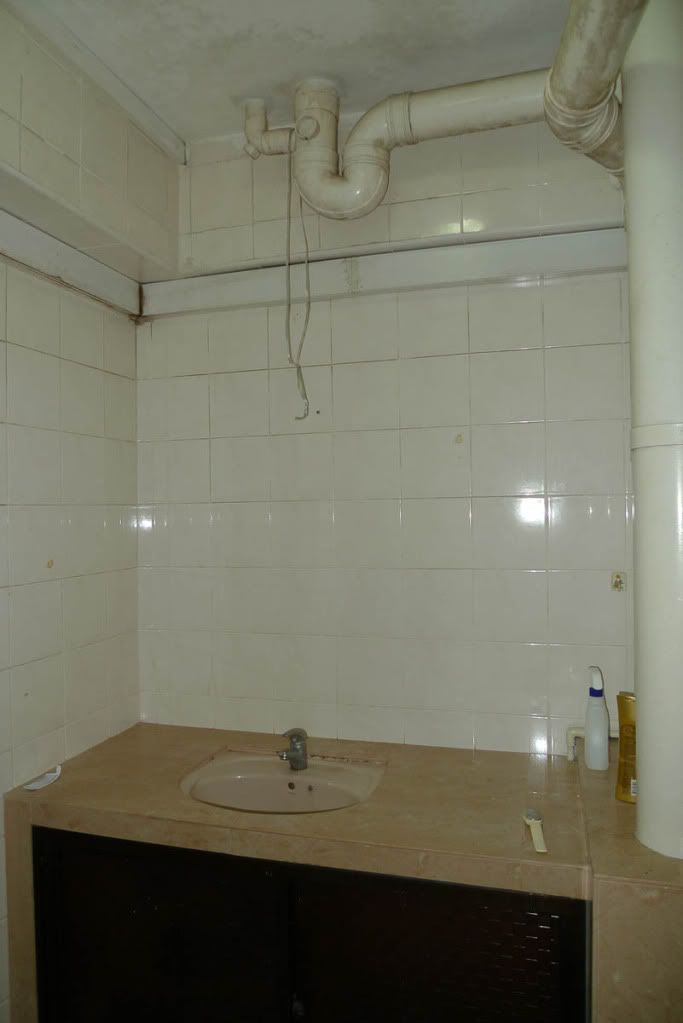
I find that the piping, especially at the main pipes at service balcony, very poorly ran. some parts do not even sit on the brackets properly. Although those area are gonna be boxed up, it still irks me to know underneath its so messy and unsightly.
-
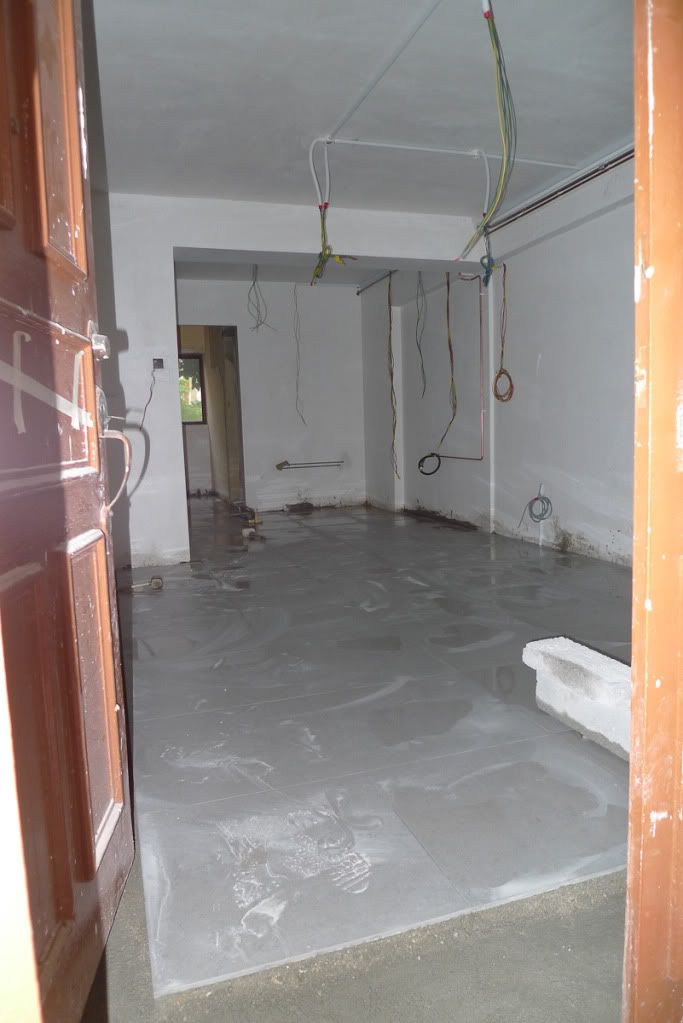
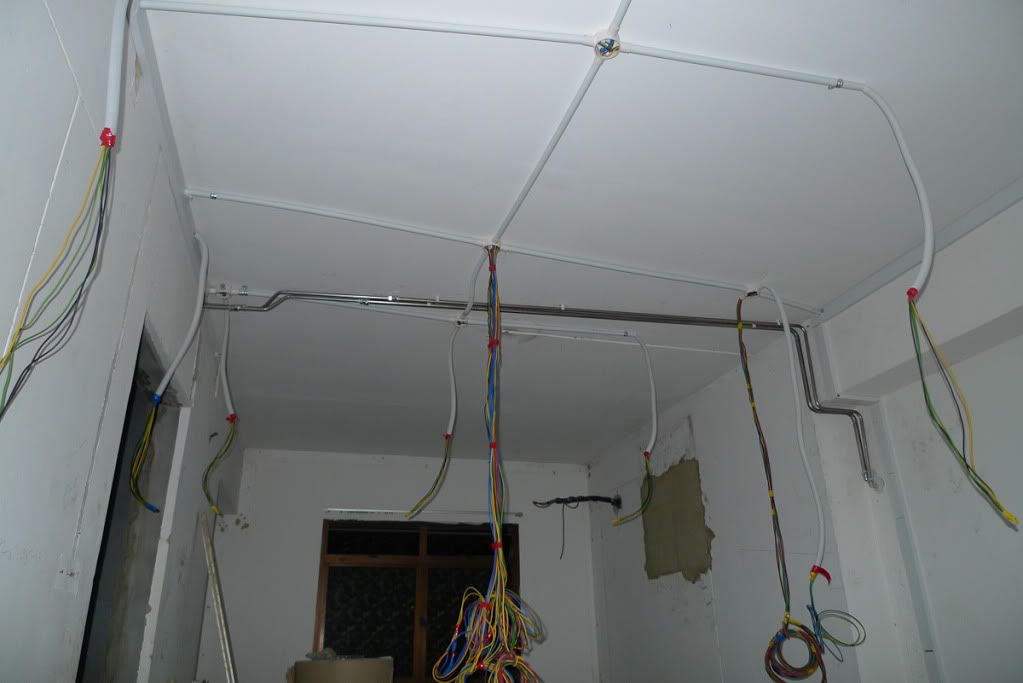
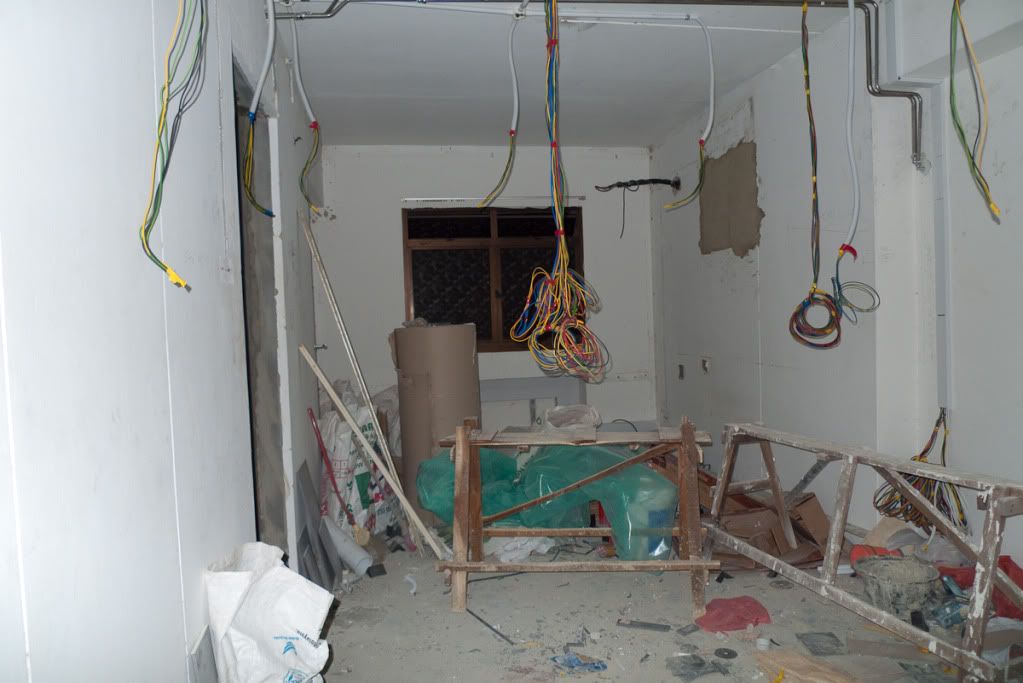
Wiring Works
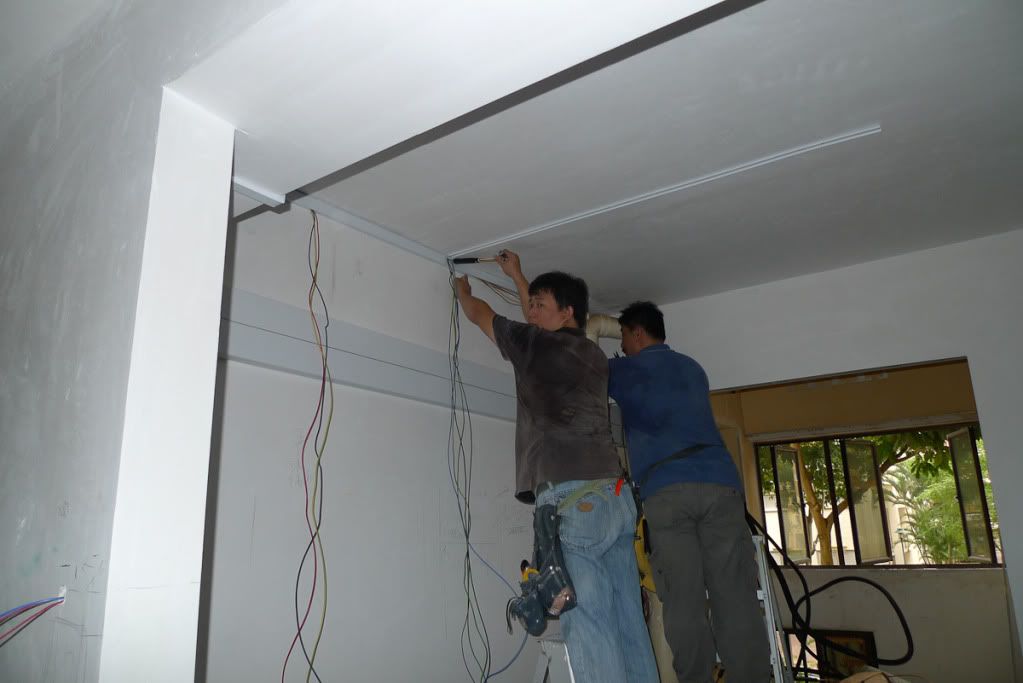
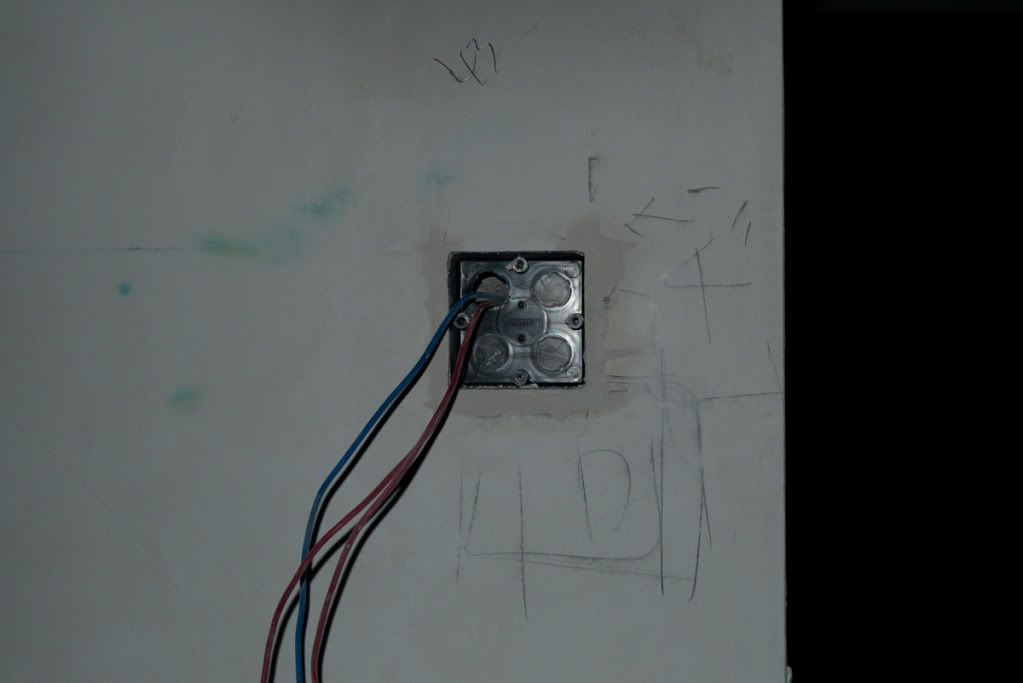
Now I am quite happy with the speed and workmanship of the electrician. The Tan brothers. The elder Tan, who I believe is the boss, was very friendly and explained to me why they prefer to use Haager switches instead of Legrand Mallia, which was what I requested. The Legrand 4-ganag switch tend to have a problem, such that the rockers will not align properly. I checked with Choo Chiang and they said they have had complains from customers before as well. Well anyways I think Legrand are okay bah, since I already bought the Cat6 sockets and I need to have 4 gang light switch, that Haager don't have.
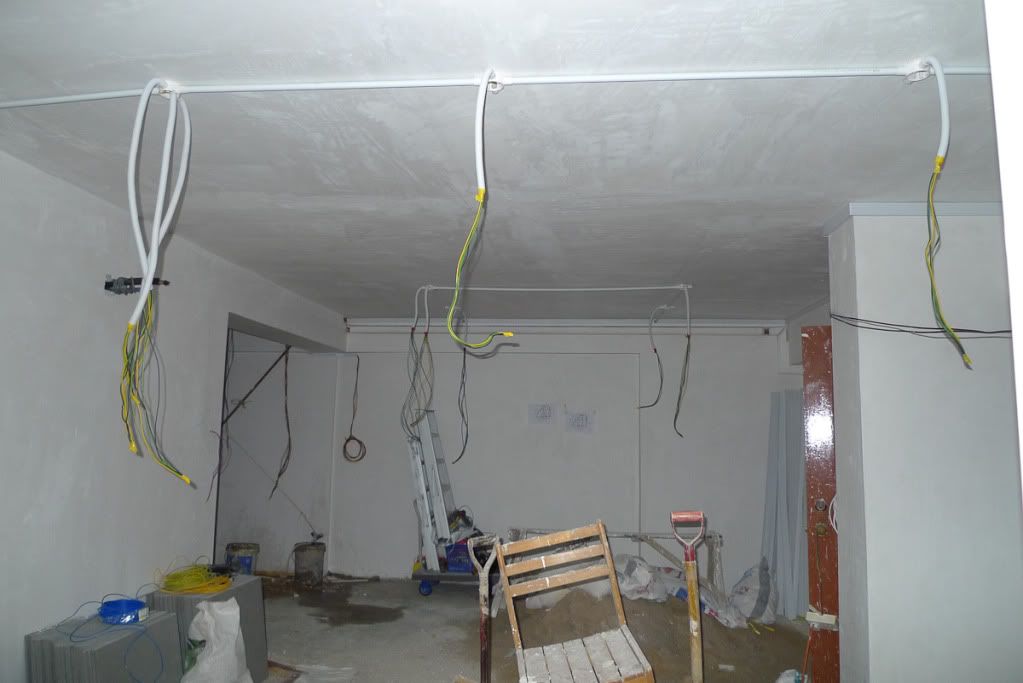
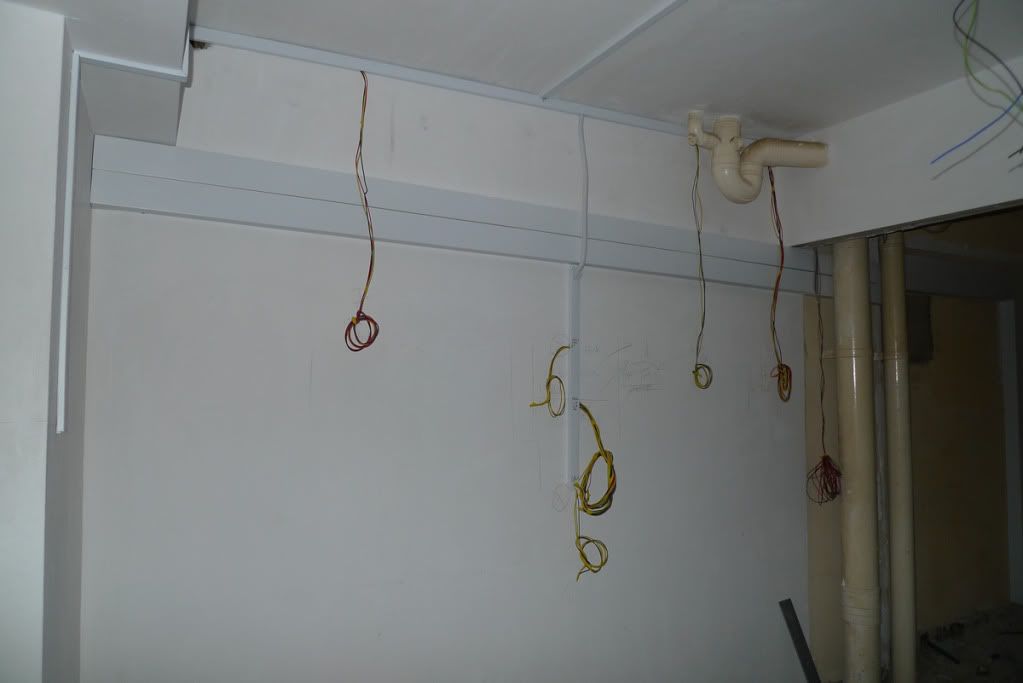
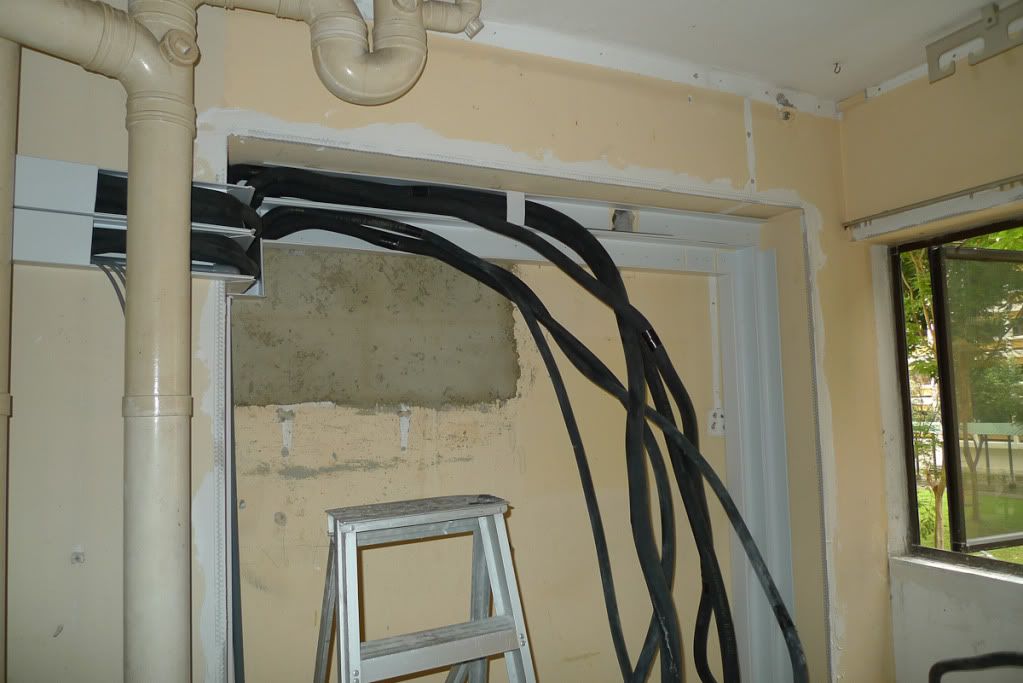
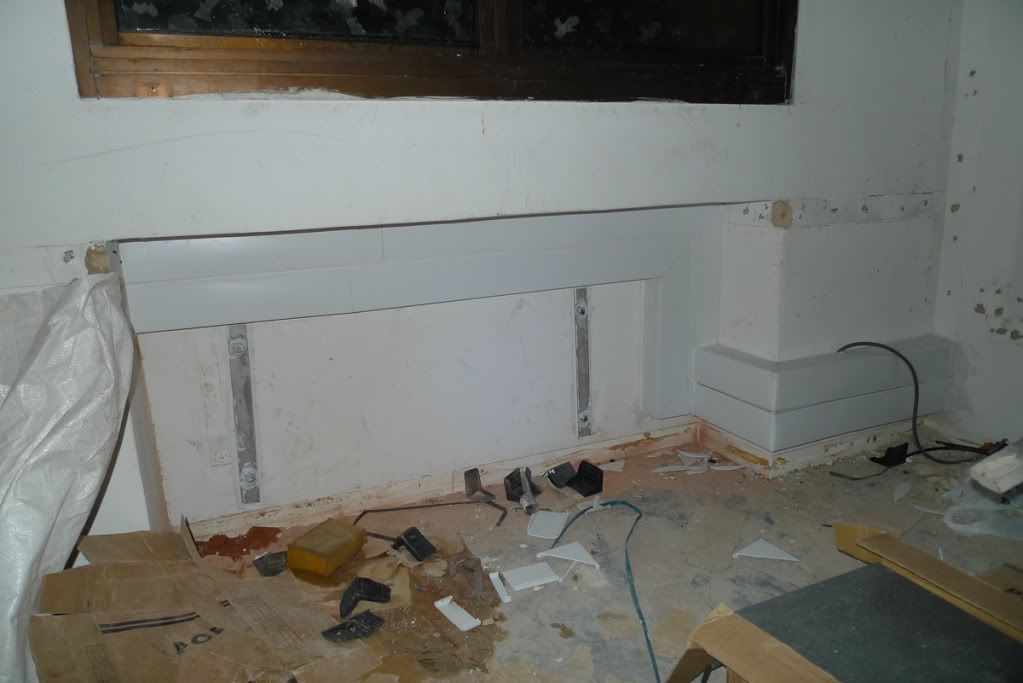
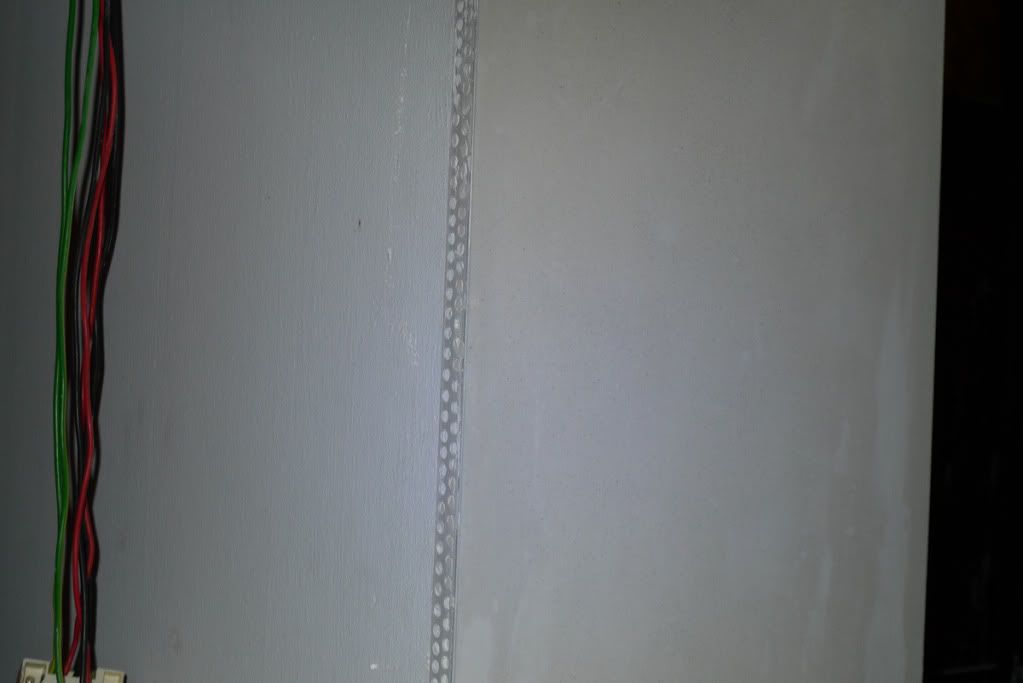
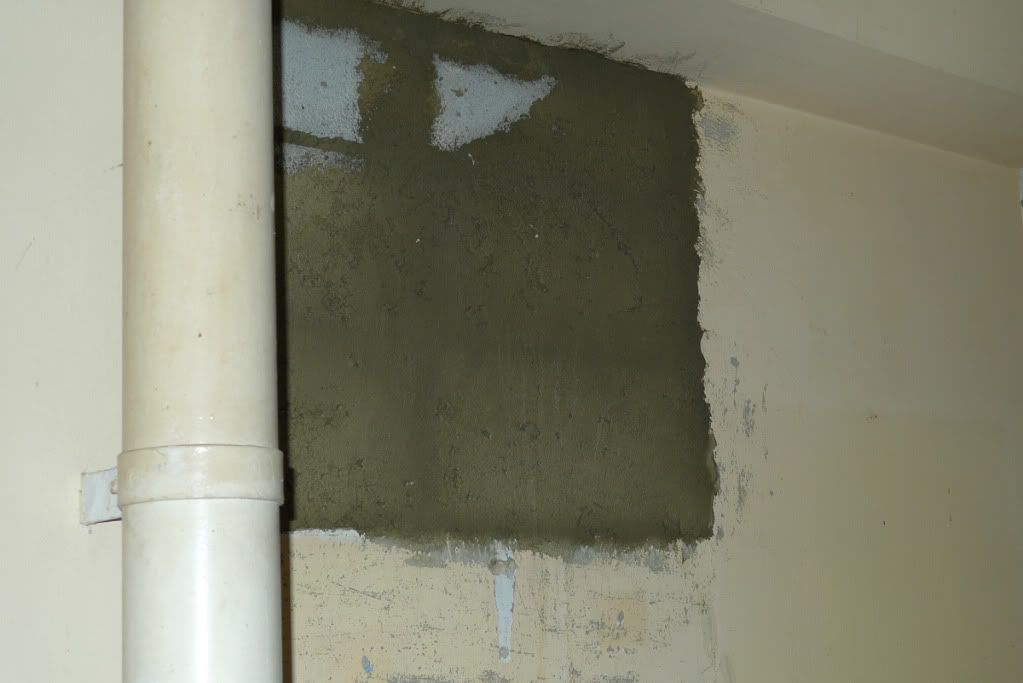
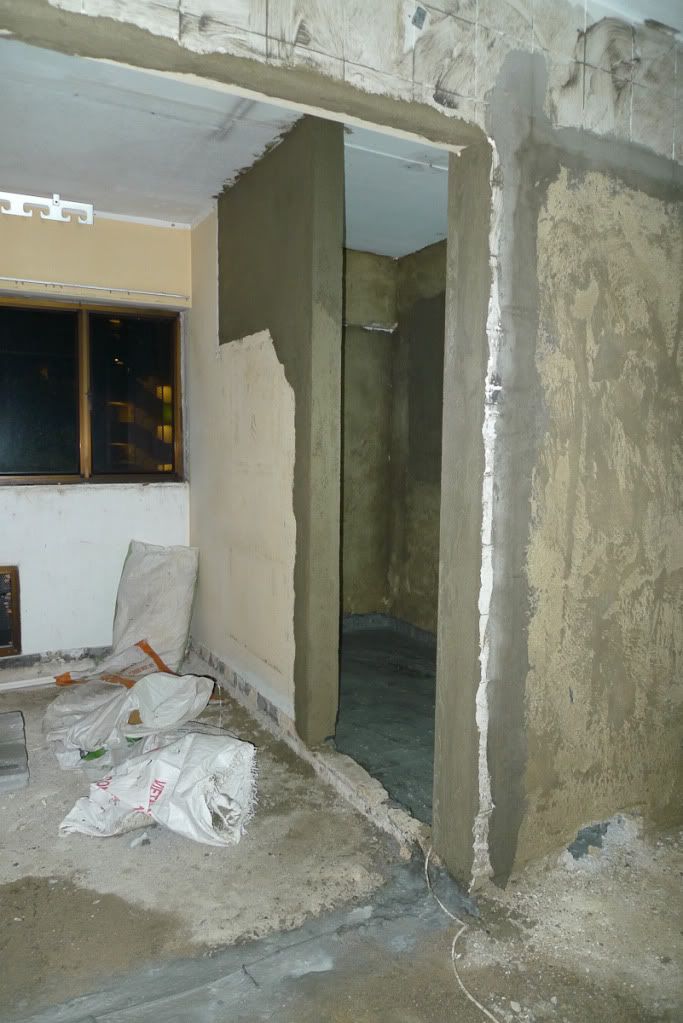
What I find disatisfactory is that the wiring works are complete even before plastering is complete, which means my MBR and service balcony is not going to have fully plastered walls and ceiling. True enough, the plastering guys left the MBR false ceiling area unplastered. I am not happy.
Also the water pipes were run before they can finish plastering for the service blacony. And the result of which is not satisfactory surfacing.
Pictures in next post.
-
Air-Con Trunking

The air cond guy came to my place yesterday to patch up the holes that was leaking water. I insisted that he should come do it before i install my laminate flooring. He was very glad to oblige. To my knowledge, if there is any fault in the installation workmanship, the workers's incentives will be deducted. By insisting they do a good job and finishing, I'm kinda helping them too lah.
-
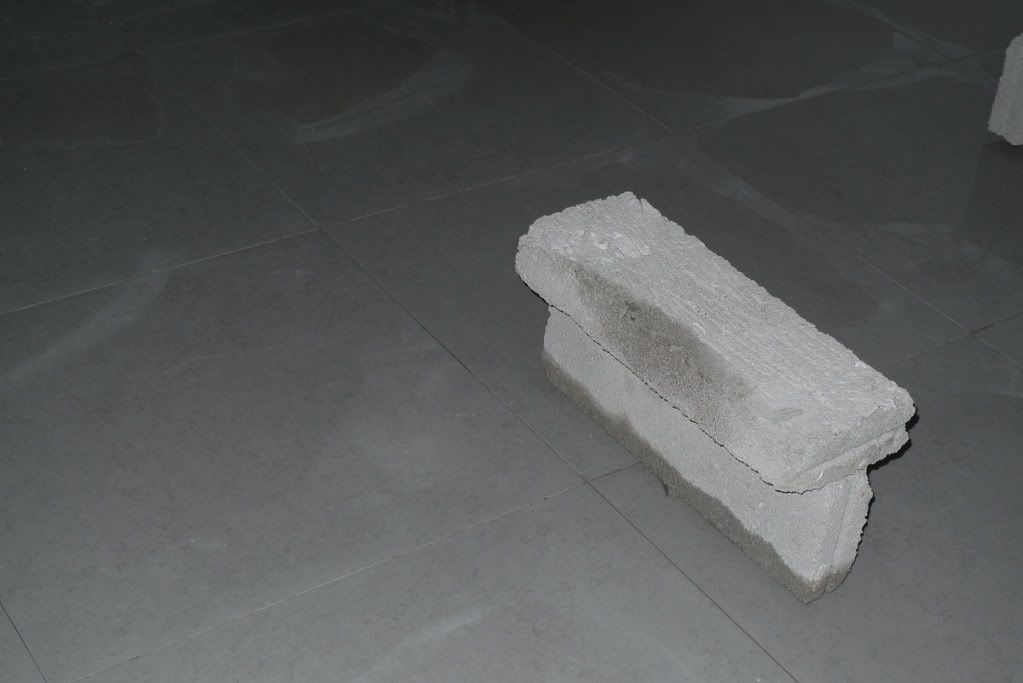
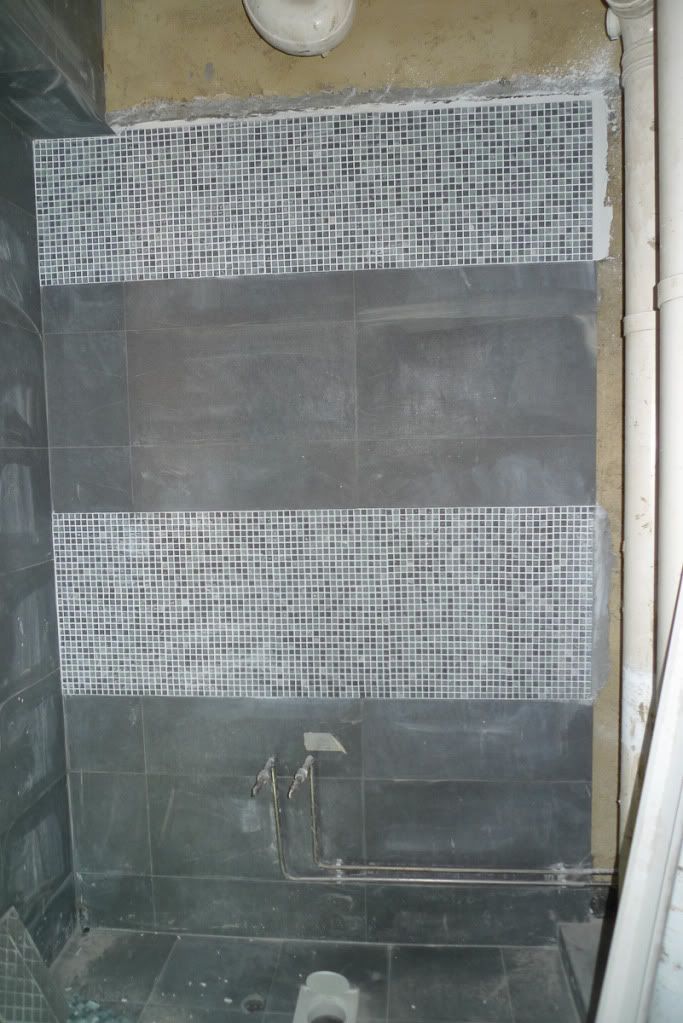
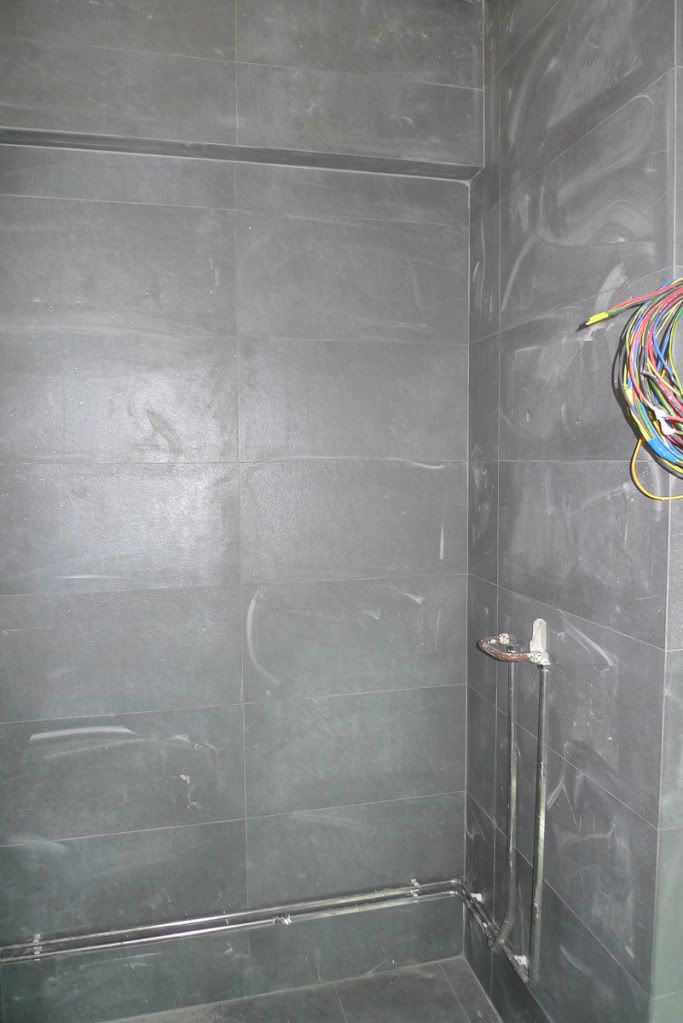
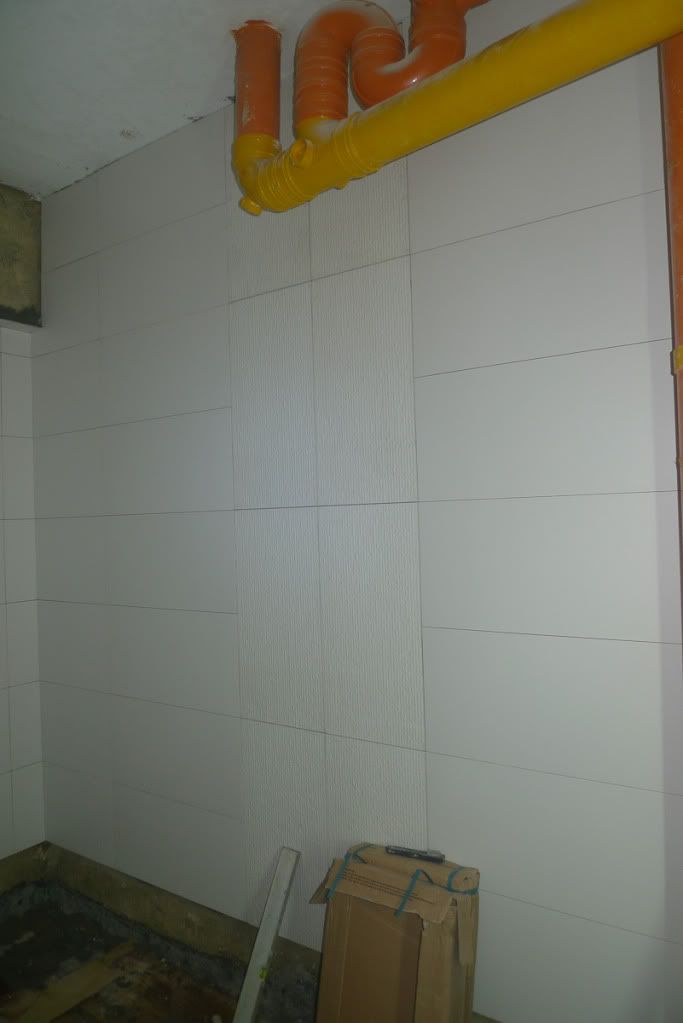
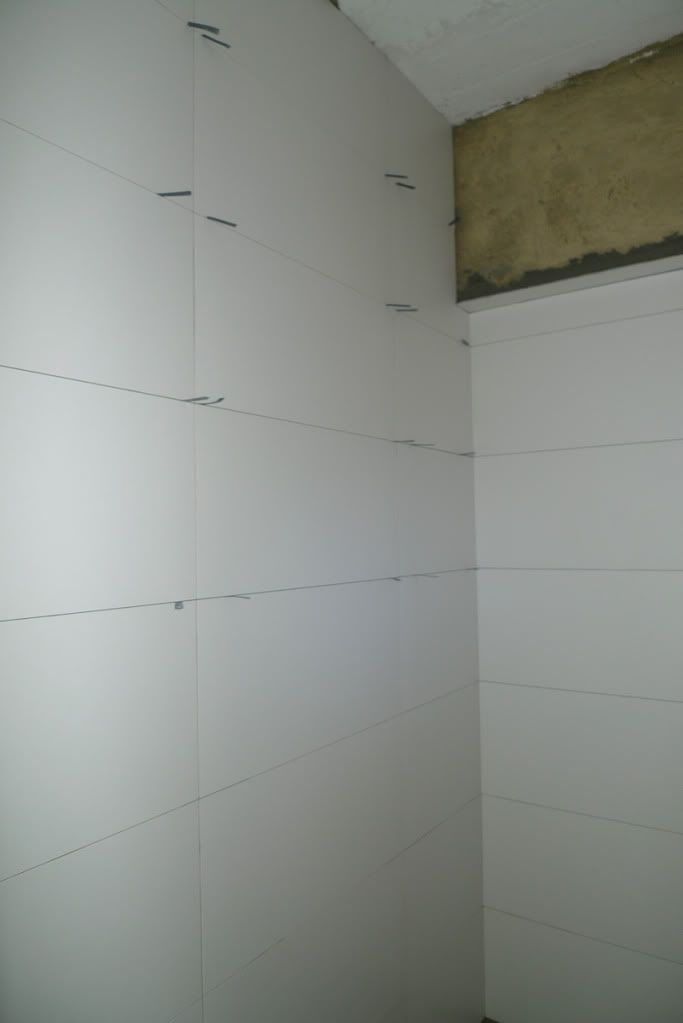
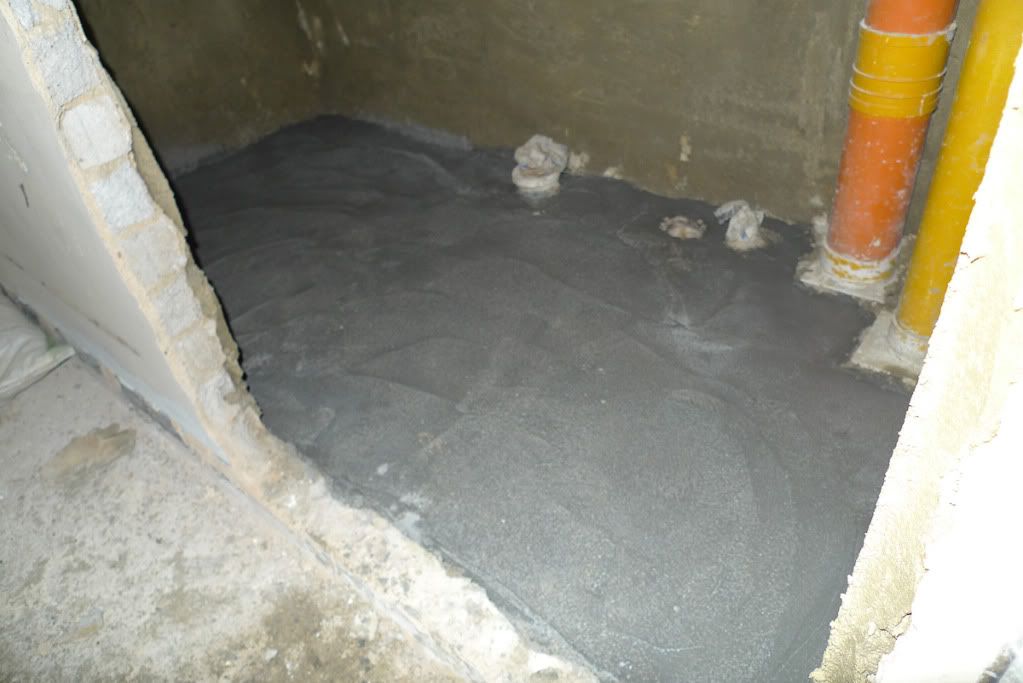
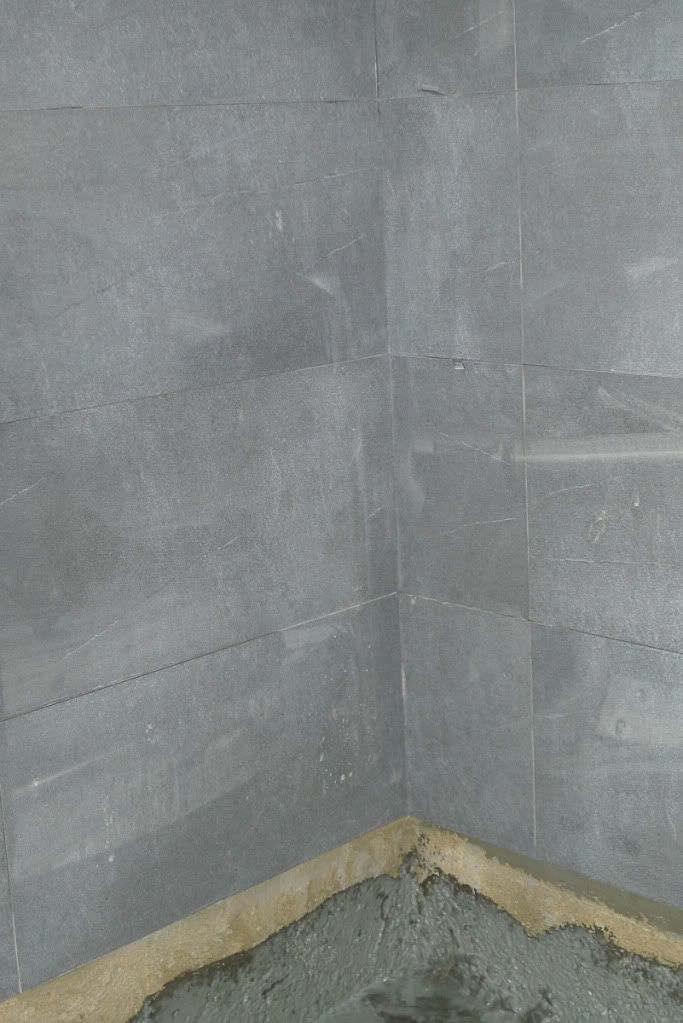
Tiling Works for Common Toilet
COmmon toilet tiling progress was much faster. Done in about 2 days. I'm quite satisfied with the workmanship and speed. Also am very happy that we chose light tiles that ID recommended as the bathroom has no natural light coming in after we sealed the windows.

-
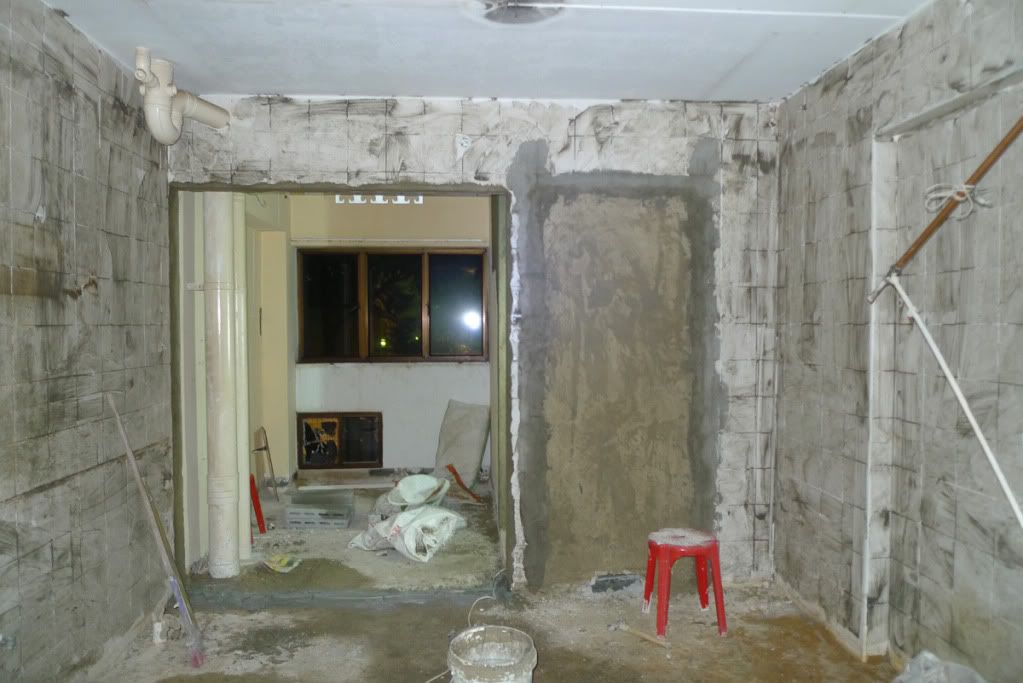
Plastering
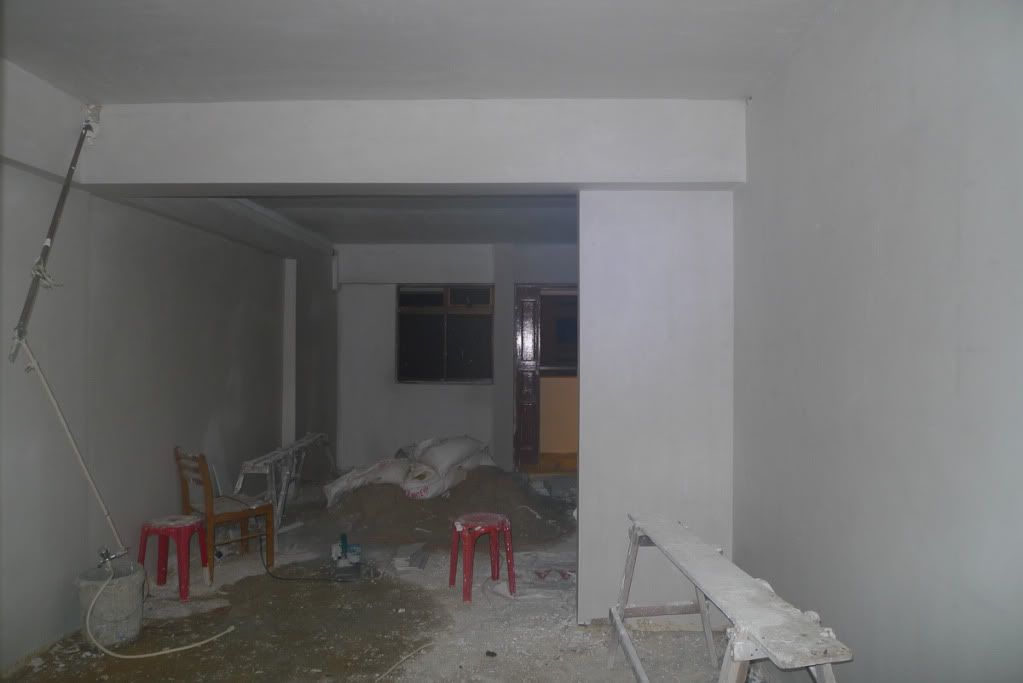
Plastering for living/dining, kitchen, 2 bedrooms took about 2 days to finish, and not fully completed, as building materials were in the MBR. So the plastering workers have to come back another day to finish the toilets, MBR and service yard. I think that beyond this point the workflow has started to cock up.
What followed was wiring work and piping, even before whole house plastering was completed, which resulted in some areas not being plastered to my satisfaction as those area are being hindered by the pipes and trunking etc.
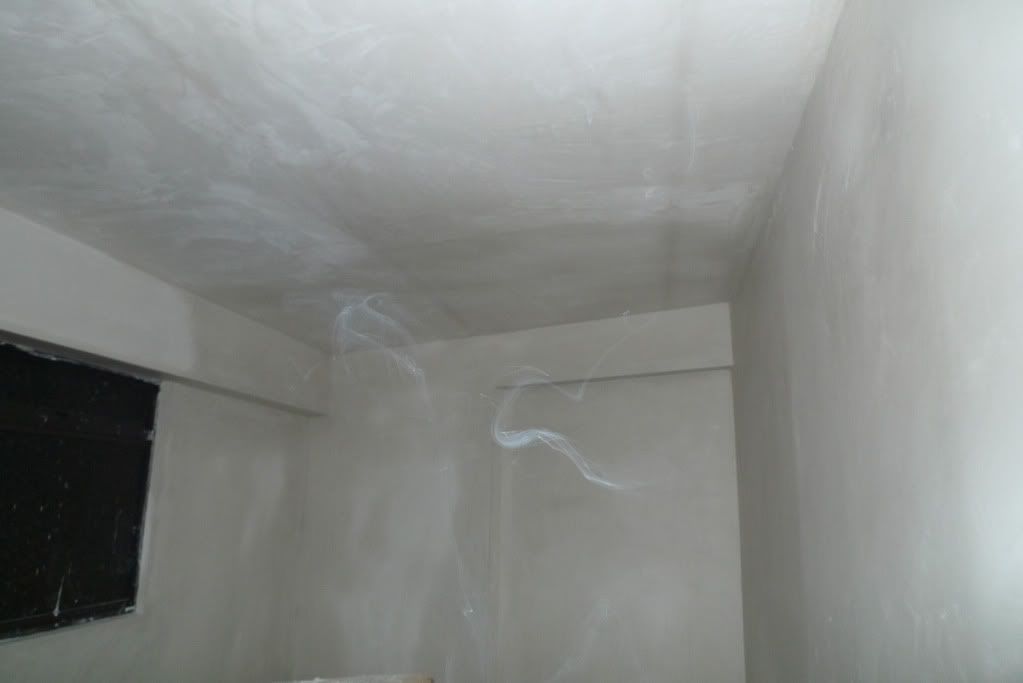
Generally speaking the plastering workmanship is quite good, except that i find some uneven patches here and there but ID said these will be rectified during painting stage, as the painters will sand down the plaster to make the surfaces even.
-
Wetworks
The started with the MBR tiling first, followed by the common toilet.
I felt that the whole progress was a tad slow. When I go up to check almost every day, there was only 1 tiler working on the flat.
ID said no choice as his workers are involved in 5 concurrent projects with him, but he assures everything will be on schedule.
-
Hi all,
Sorry haven't been updating for so long.
So a little bit of updates on the progress:
• tiling is almost complete
• plastering is completed except for some touching up
• wiring is also complete
• all windows installed (i'm very unhappy with the workmanship, but more on that later)
• ceiling works and boxing up is ongoing
• air cond trunking is done
• water/gas pipes done (i'm also not happy with water pipes workmanship)
So here are the images of WIP:
Hacking Works

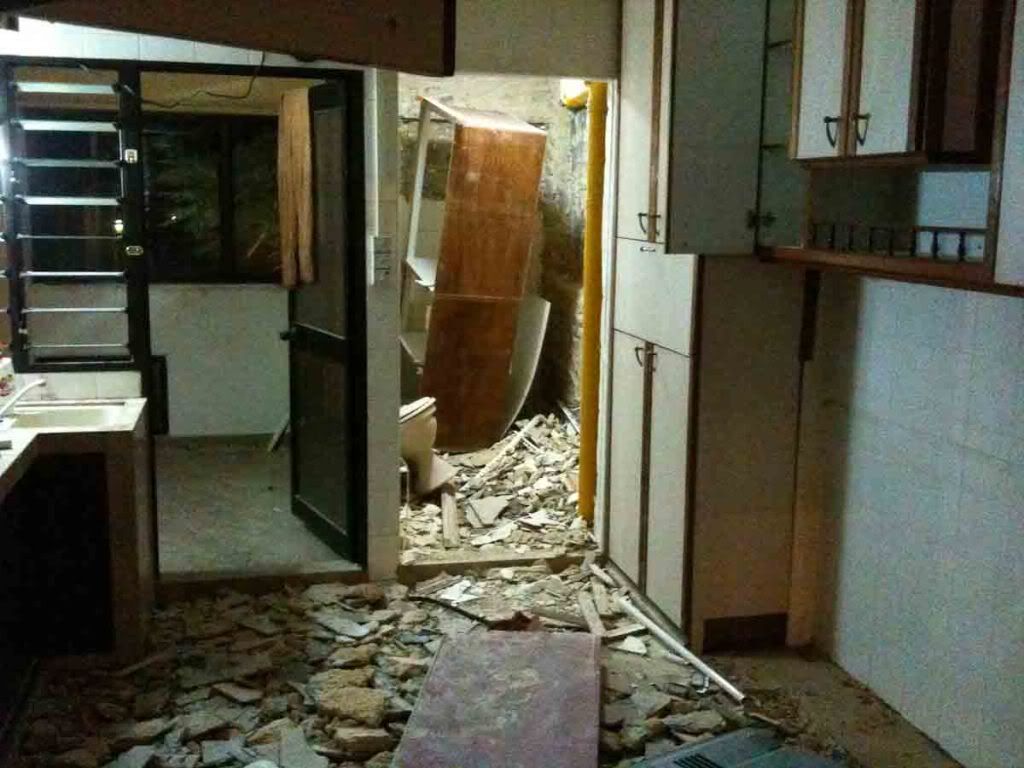

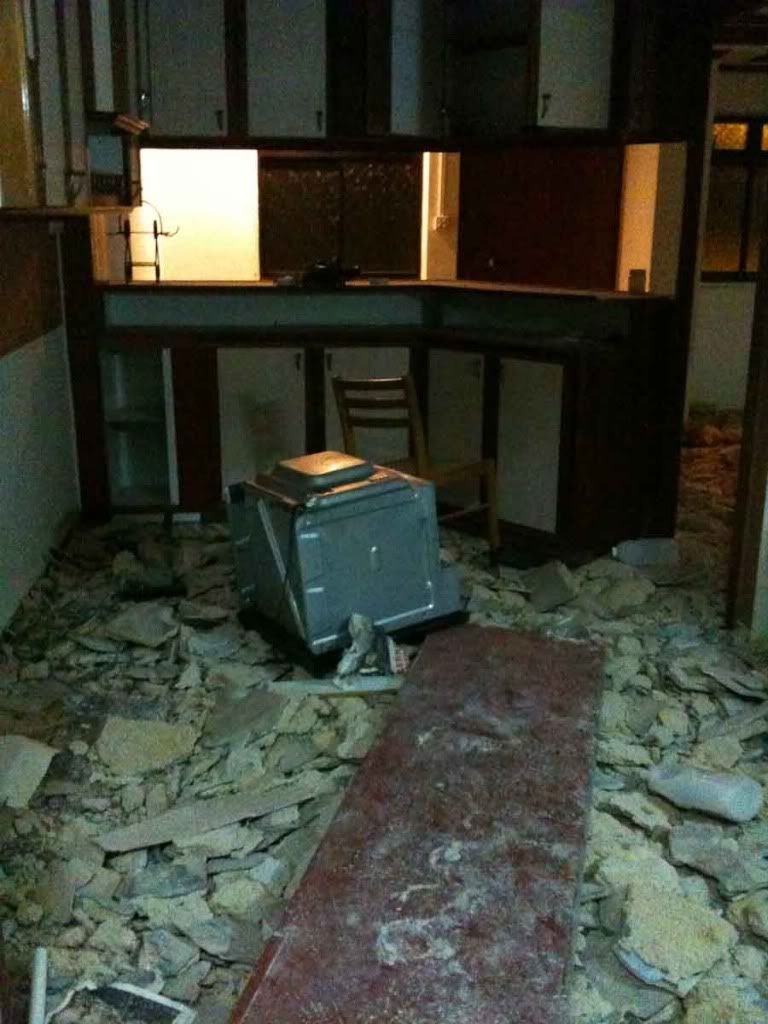
Hacking works were quite quick. By the end of 2nd day all hacking were complete. Contractors even removed all my window grilles and air con left behind by ex owner. Probably sold them for a handsome scrap price.
By the 3rd day, the debris are removed and the materials for wetworks were loaded up, including my tiles.
-
my ID suggests install glass back splash first as 1 whole piece, then install the electrical mounting boxes, but they will have a triangular profile and the boxes will be screwed to the underside of my top hung cabinets. When asked why he said that I am using tempered glass, any drilling/extra force will cause the glass to shatter.
My reno still ongoing so I hav not seen the results yet but one of my friends who is an interior designer did mentioned to me before about this method of mounting. Nicer as we'll not see too much of the mounting box.
-
hey stryke, may i know how much you paid for your KDK ventilation fan? and also, how do you plan to install it? will you need to change your windows?hi, I paid 118 excluding GST for each fan, 20WHA. as I am changng the windows for my whole flat, my ID already gave the cut out dimensions to the window fabricator to do. They will be using laminate safety glass. HDB requirement.
He electrician will install it for me
-
Took leave today as the guys from Gain City were coming to install the pipes.
There were so many things going on today, tiling, wiring, air con piping etc the whole place was like a warzone!
Well, in between, went to Taman Jurong to purchase my bathroom faucets; Jalan Besar to put down deposit for kitchen sink & tap, went to Choo Chiang at Bendemeer to pick up my Cat 6 sockets and KDK ventilation fans; THEN sent wife to her old polytechnic to pick up her transcripts, BEFORE going to Kronotex to make payment for laminate flooring. Phew!
When I got back to the flat late afternoon, the boys from Gain City were almost done and they were sealing up the trunking with silicone... till i discovered there was a leak coming from area where the pipings were coming in from the outdoors... they forgot to seal the BIG HOLE from the outside! As it was raining very heavily outside they said will come another day to seal it up. I am very concerned as I am afraid that there is water accumulated in the trunking or something. I asked one of them to stop the seepage by sealing the gaps between the inner wall and the trunking first. Should I be concerned? If they come back to seal the hole from the outside, will it be good enough? Should we take extra measures to seal the inside as well? That will mean they have to dismantle the trunking, pipes and all.
I hope someone is kind enough to advise me, as I will be installing laminate flooring in my bedrooms, and I will be boxing up the area under my window (where the air con outdoor unit will be outside), and building a wall to wall headboard there. If there is a leak I will not be able to tell in the future until the wood start to rot...
Would it be better if I ask those guys to pump some silicone into the hole first before sealing up the outside with concrete/plaster?
Well, I shall call one of the installers tomorrow and ask that he do it ASAP. The weather being so unpredictable these days.
Anyways, back to reno progress, tiling for both bathrooms are almost done.... wiring is half done.
ID said by the time I come back from my fishing trip on Sat the living room/kitchen floor tiling should be complete too. I highly doubt so.
This is the 3rd week of my reno and only the 2 bathrooms are 'almost' done!
I hope things can speed up.
Will post images of progress soon.
Shalom.
-
Just put down deposit for the Yale Gateman 3109 digital lock....... pain! but so swee.... now i burst my budget even more liao.
-
Oh do u have the url for illustrator? how much is formica charging for the 2mm gloss laminates. Was drooling over it's shine though.Illustrator is one of the softwares from Adobe that I use for my work, along with Photoshop etc. Its not a free online software, need to purchase.
If I remember correctly from the catalogue the 2mm laminates from Formica is about $98 per sheet 8'x10'
-
i believe the 3D is done by his ID. you can try using floorplanner or google sketchup for ur DIY 3Ds.Yes the 3D is provided by ID.
However the floor plan was draw by me using Illustrator. I find that Floorplanner is not so precise but for rough layout its okay.
As for google sketch, I have not figured out how to use it yet. Haha.
Anyways as far as getting the stainless steel look goes, although all our main laminates will be from Formica, we will be using either Lamitak or EDL laminates for the silver trims. FOrmica has very little to choose from in terms of metallic finishes. And the very nice ones are way too expensive.
We're pretty sure the whole thing will turn out nice and sleek, just that I'm concerned about the laminate join lines....
-
like this part of ur kitchen....
look sleek....
Thanks! We will be using Formica 2mm glossy white laminate for the main facade, and most like Lamitak or EDL Dark Silver for the carcass and trims.
Since can't afford a 100% stainless steel kitchen just use laminates but not so much that it becomes overwhelming and too trying. Moreover our flat is really dark even in the daytime, so using mostly white will help to lighten up the atmosphere.
Will post images of WIP real soon.
-
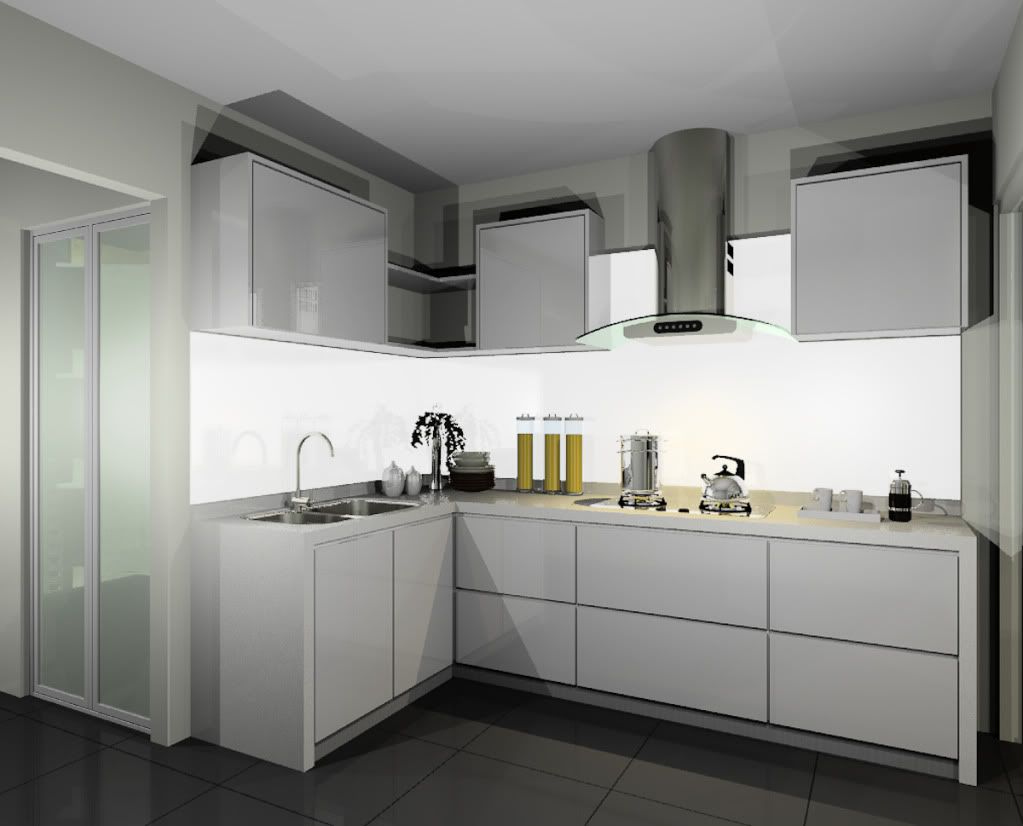
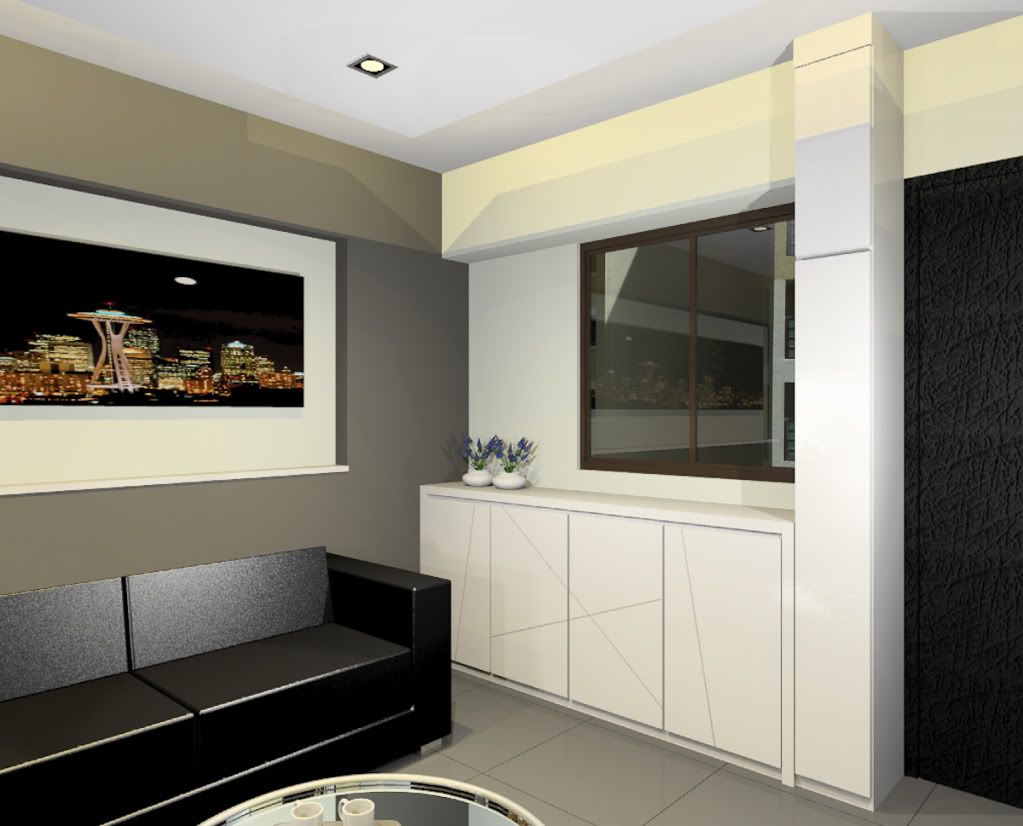
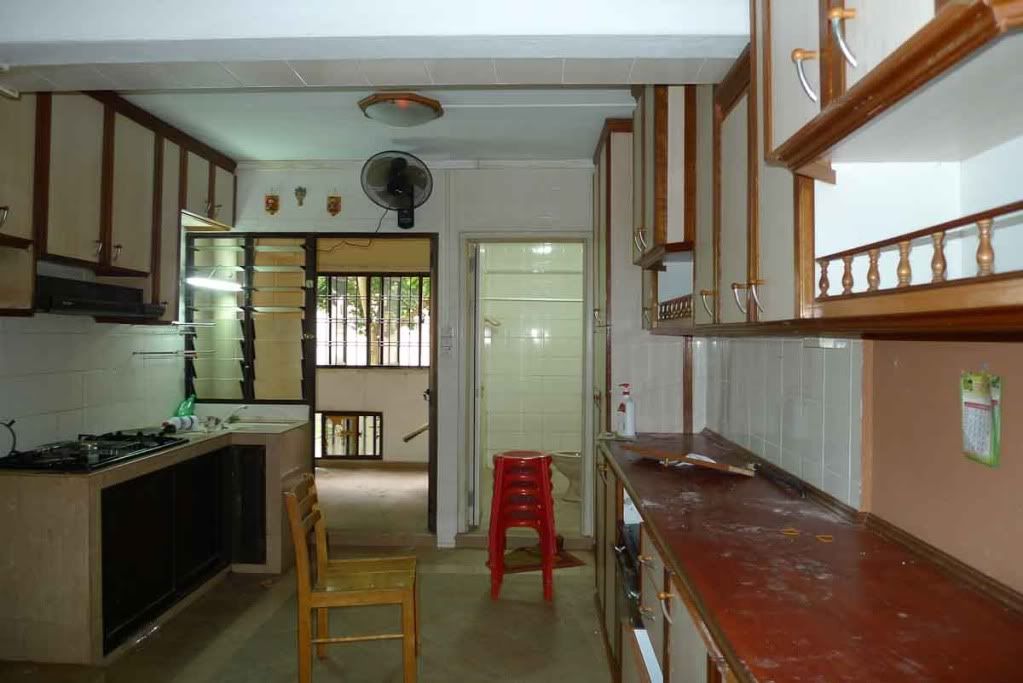
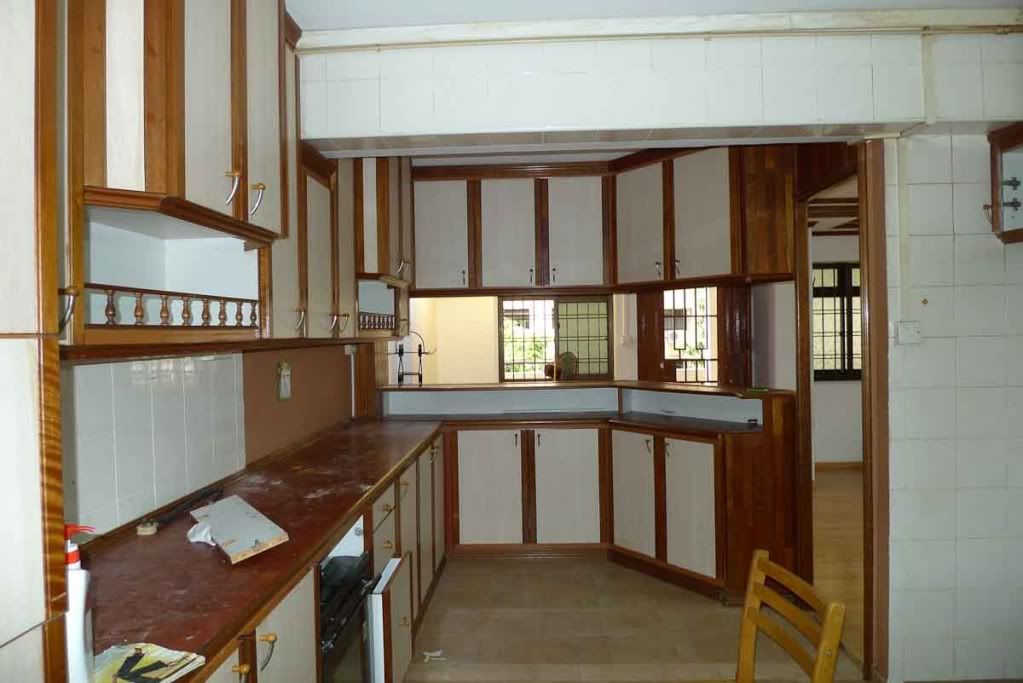
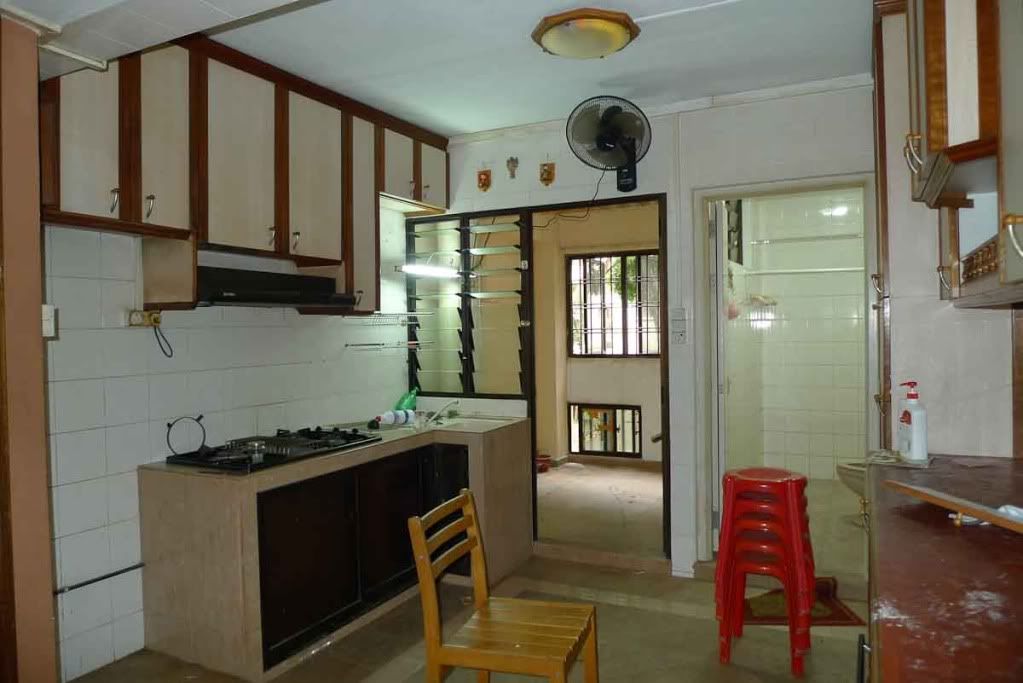
Kitchen:

MBR:
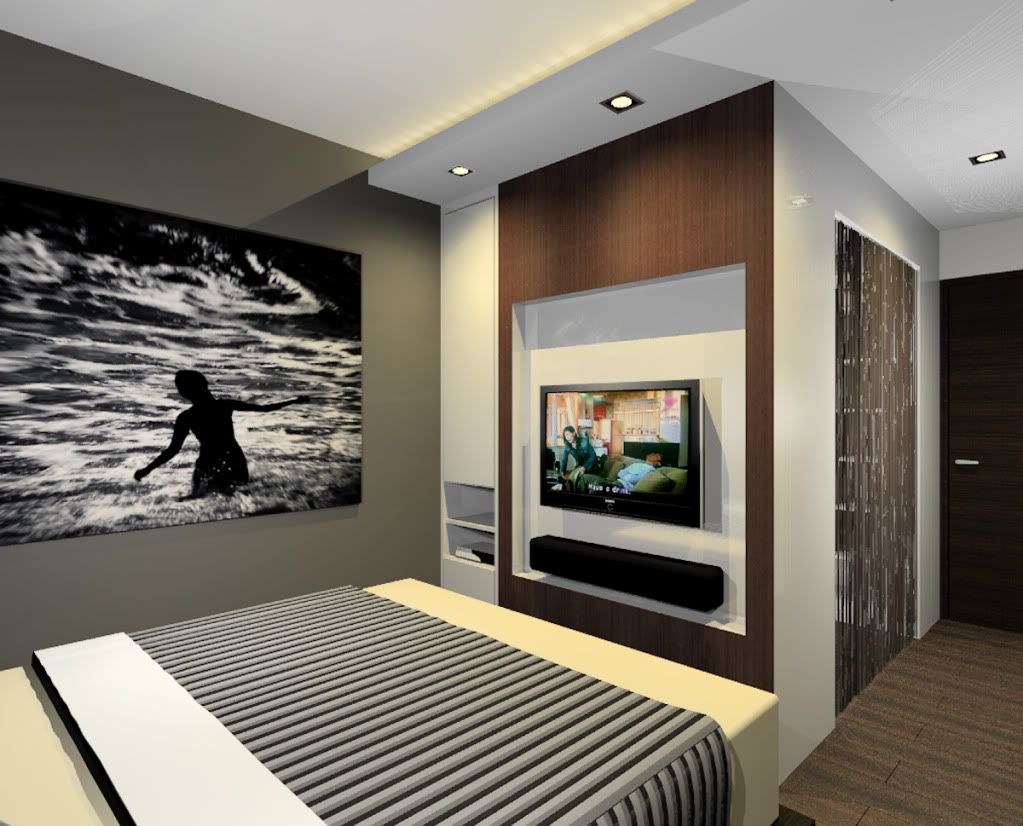
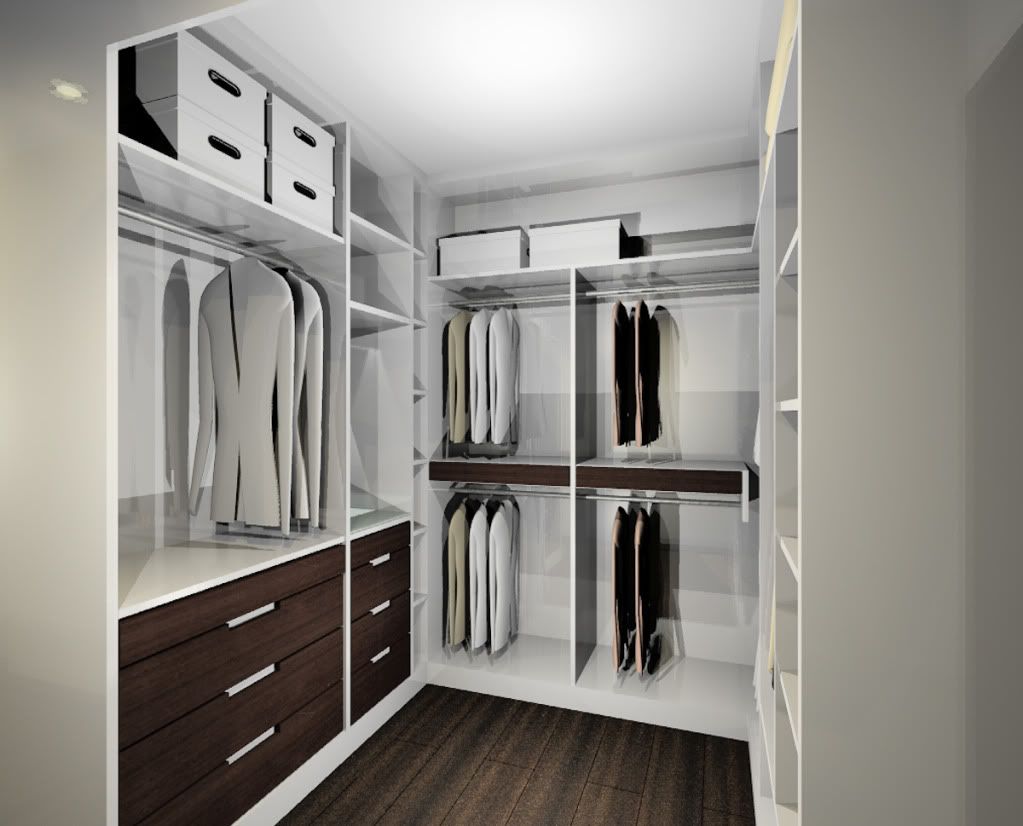
Well the colors are more or less there, but more details in terms of materials and colors to be decided.
The 3D drawings are only a rough indication of what to expect.
-
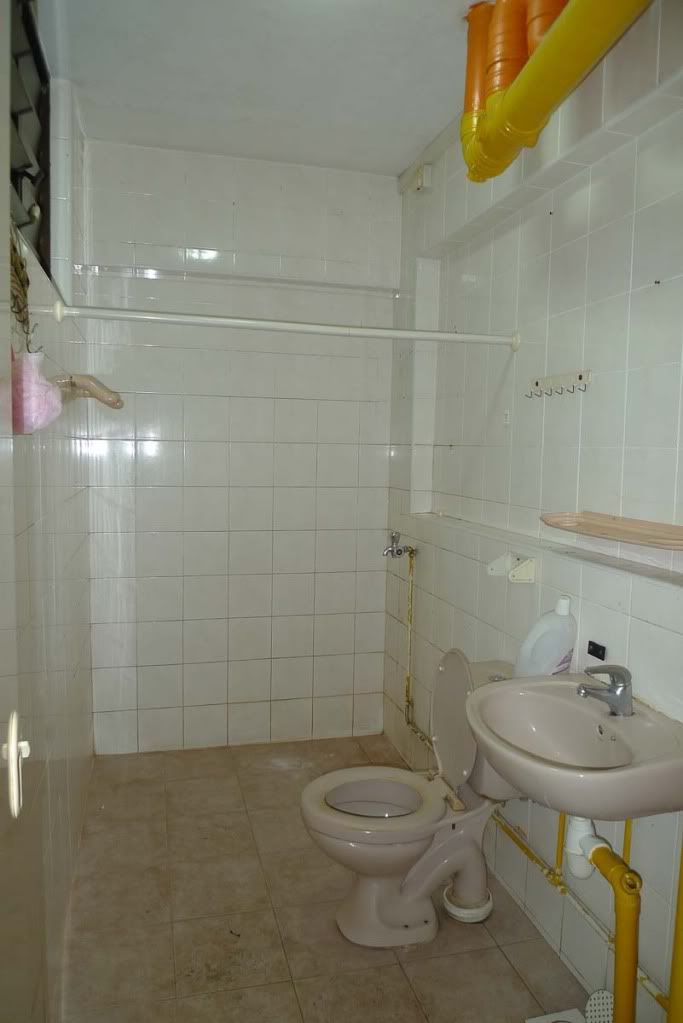
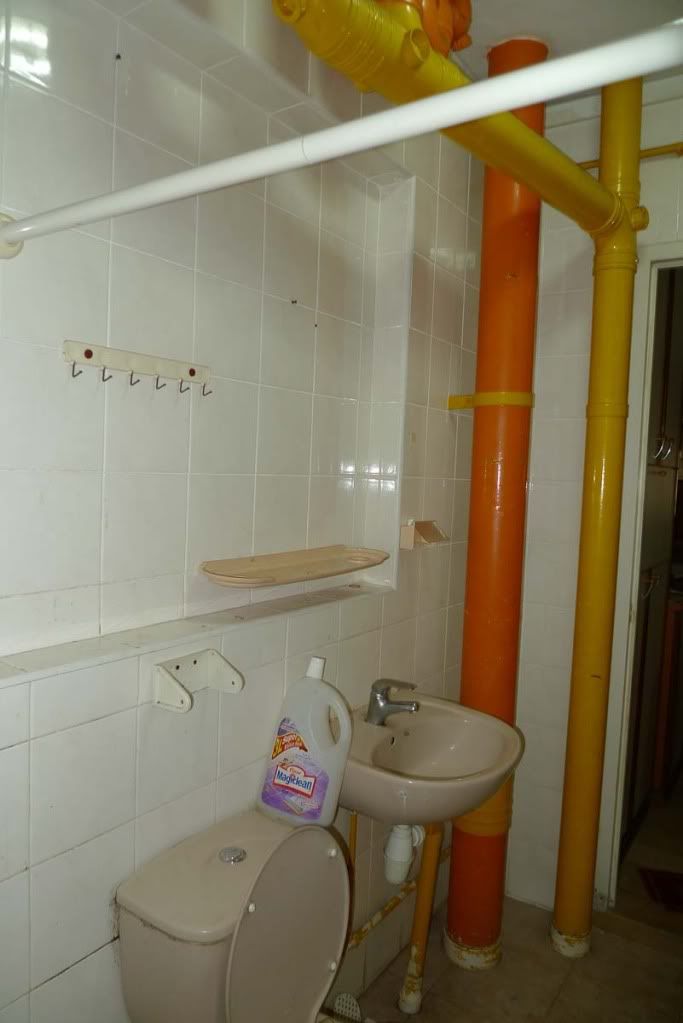
wow, i sure hope u are going to remove the wooden cornies, they give me a headache...
the ex-owners are so cute, yellow and orange pipes... haha...
reno started already... can share with us what you are going to do?
i am attempting the minimalist style, its damm hard to be truly minimalist...
Yeah its really difficult to achieve the minimalist concept. Reasons being you need ample space and an interior designer/architect familiar with the style, not to me tion a lot of moolah as well.
I wanted to have a stainless steel kitchen for starters but the costs are really beyond my budget so we settled for an all white with silver trimmings concept.
Also my wife does not like to have concrete screed for the floors, so we chose a 'screed' looking grey tile for the flat.
Yes of course we removed the cornices. Those you see are so 80s, including the cabinets.
Well to paint a better picture, here are the 3D images:
Living room:
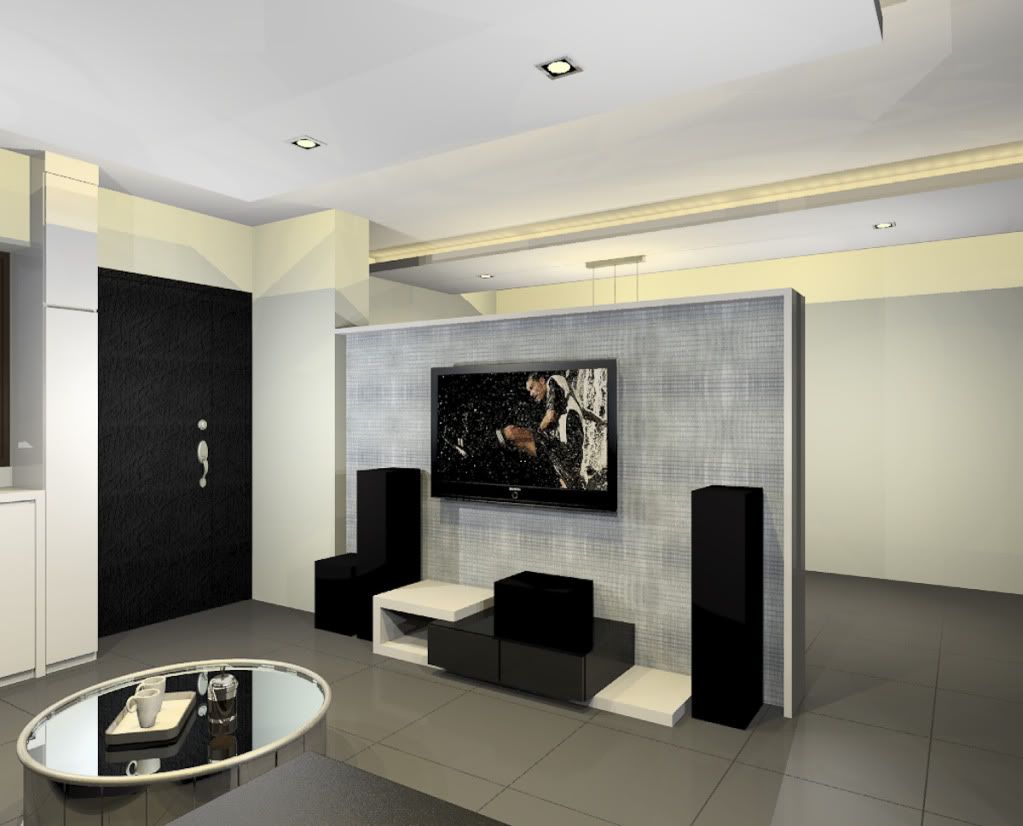

-
As you all can see, this place needs a lot of work. As we are planning to stay here for the long term (die also won't leave Toa Payoh!), we decided to do a complete overhaul including the re-wiring and plastering, and I really wanted a proper functional kitchen as I'm an avid foodie and like to cook, well, plan to do more in the future anyway.
Reno has already started but its only the first week so I will post the progress images in time to come.
Shalom
-
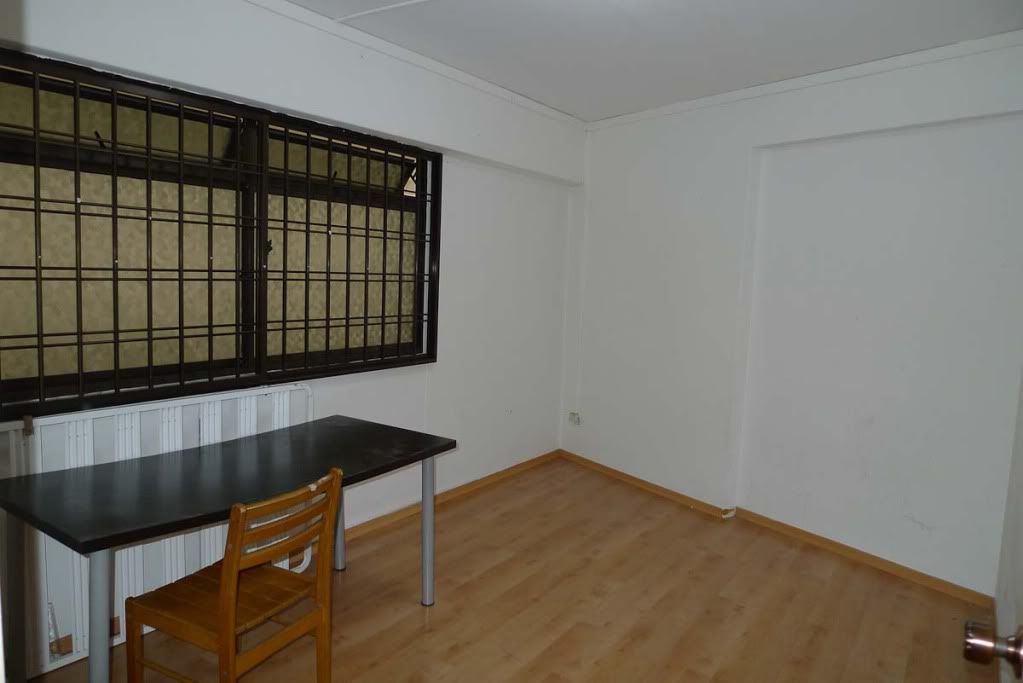
MBR and other rooms:
-
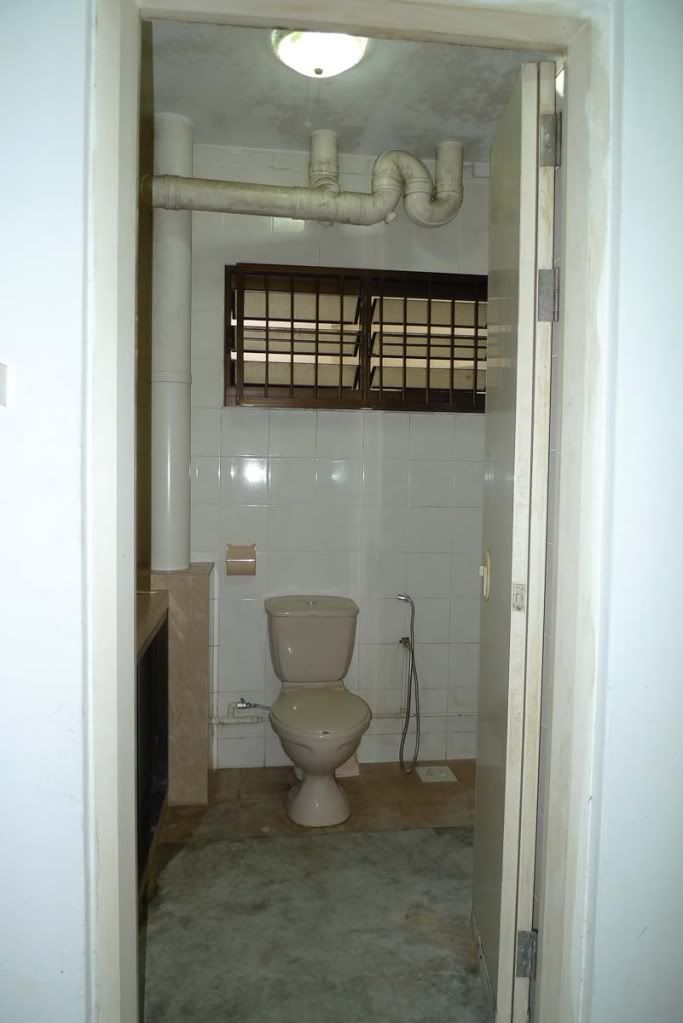
Bathrooms:
-
Kitchen:
-
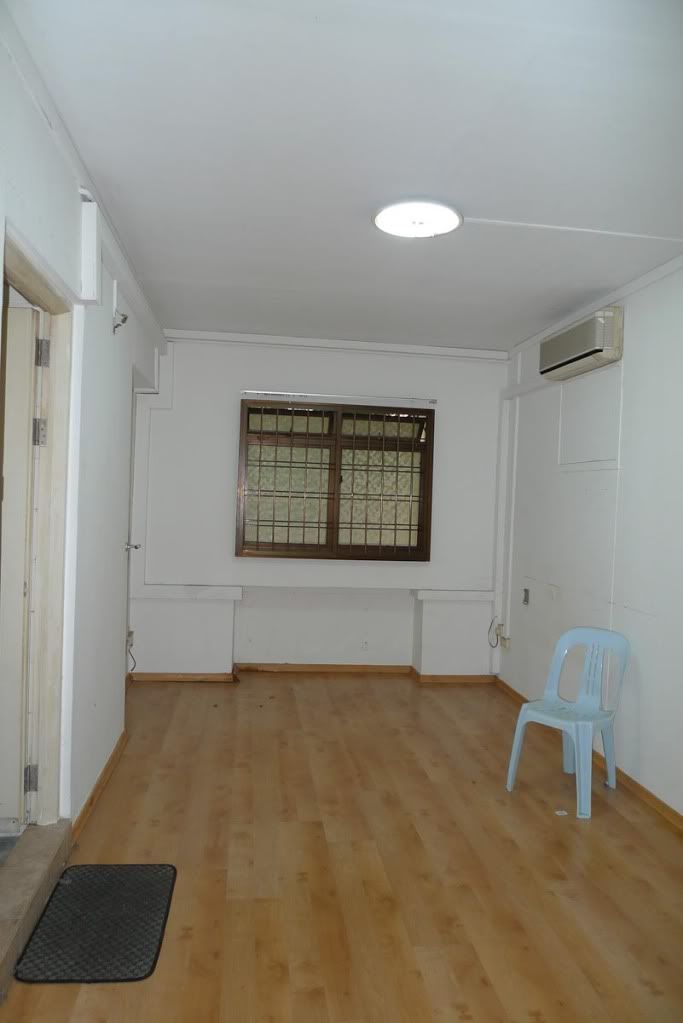
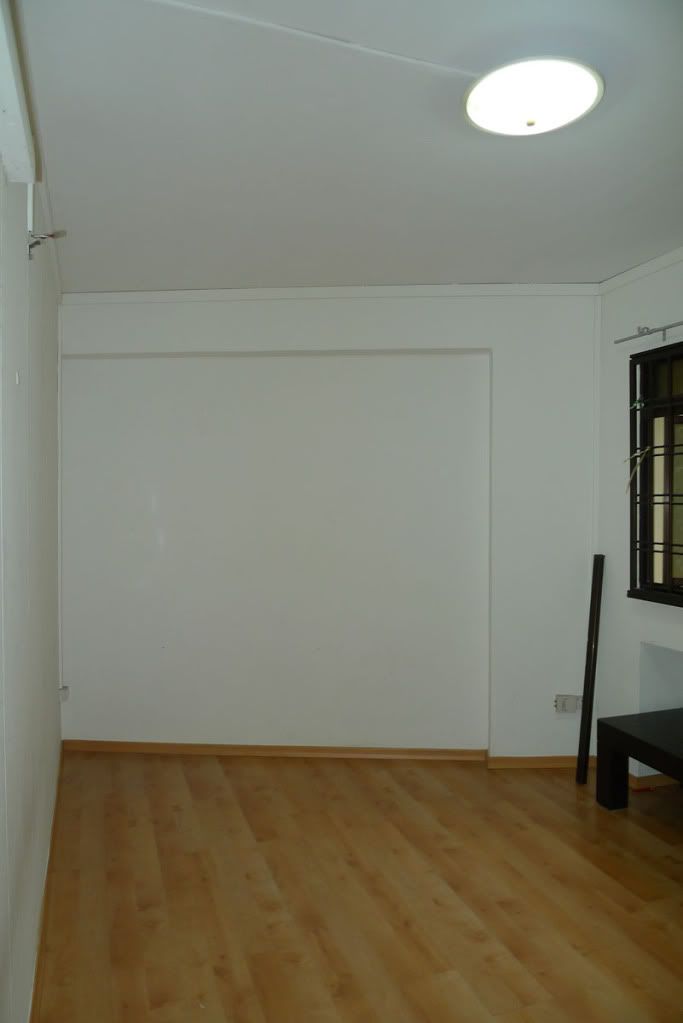
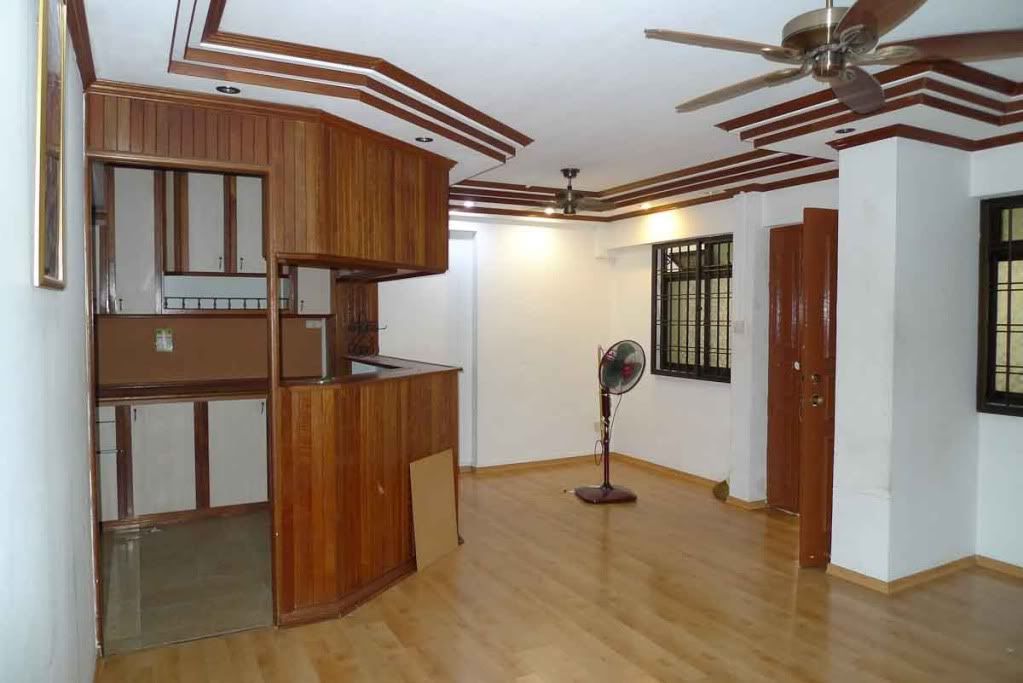
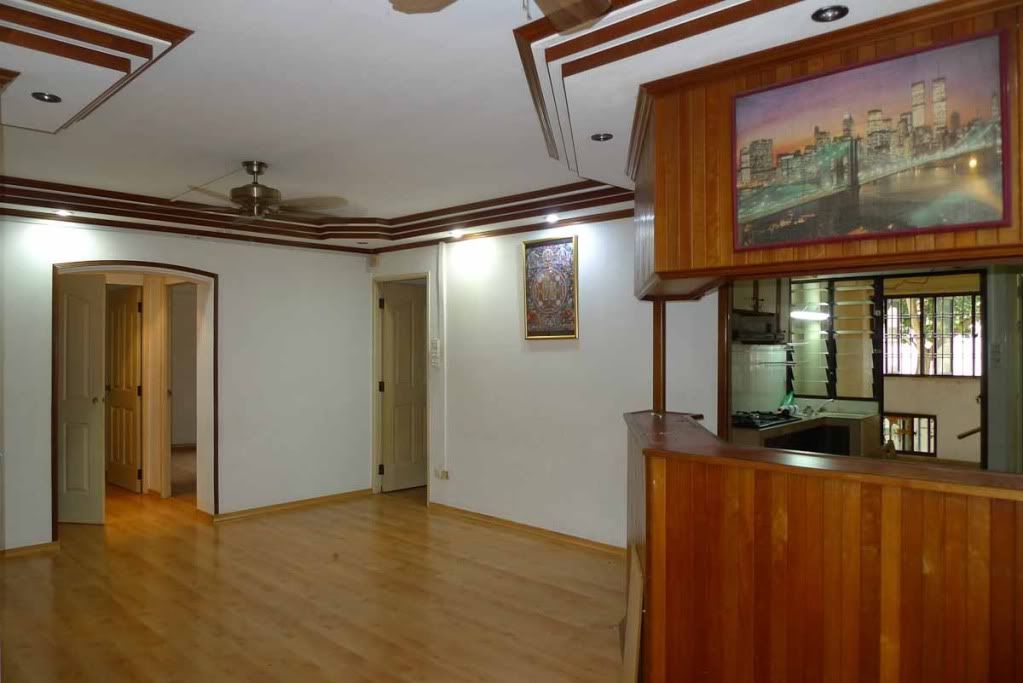
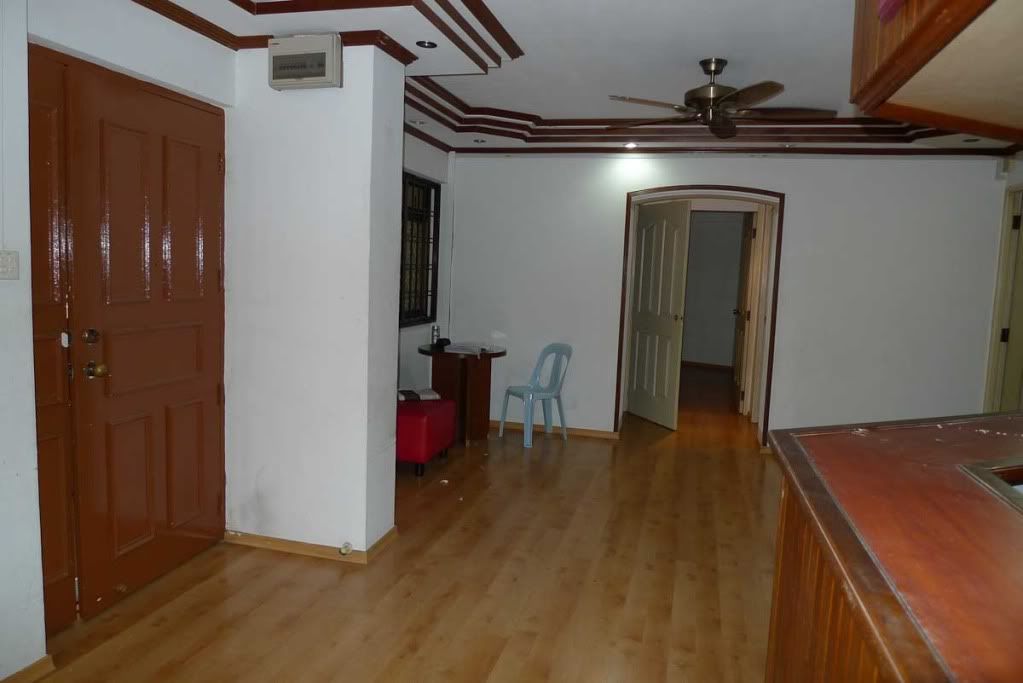
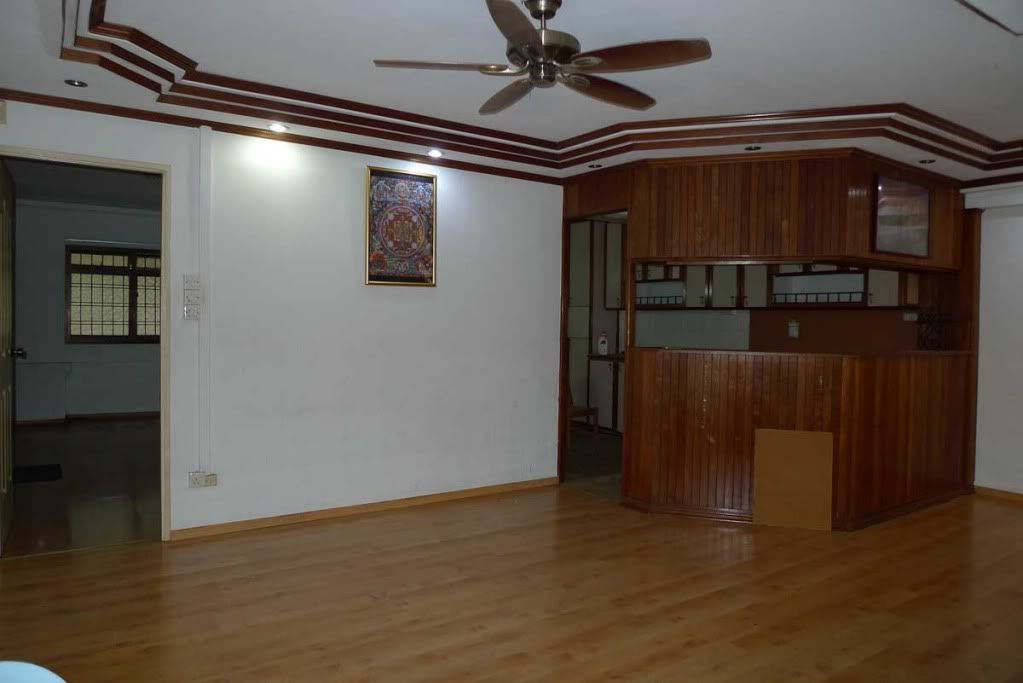
Here are the pictures of the flat before renovation started:
Living Room:
-
hihi, almost minimalist? going for minimalist style? Looking forward to your plans..
Yah, almost minimalist cos we got no budget to do much...hahah.
Seriously, I want a minimalist lofty look with an island kitchen but alas there's too little space and too many restrictions from HDB to do much, so we decided to keep it simple.
-
30K for 1st timeradditional 10K for near parent
5k for housewhole income less then 5k but above 4.5k
All sum up to be 45k
correct me if i am wrong Btw stryke , welcome to RT-blog
supersimon is right. That's how we got the 45k grant from gahmen. Our block is jusy a spit away from my mum's.
i know that 408k is still a lot to pay for a flat, but compared to the new ones that the HDB is churning out in central area, this resale is much more worth it than the pigeon holes that cost almost the same. My fren bought a unit in Pinnacle during the second phase and paid 500k for a 85 sqm flat!
also considering that my office is 10 mins drive from home... or $6 cab ride.... i can even give up my car for the long run and save 1k a month from car ownership. I also recently discovered that the new Bartley Road viaduct takes me from Toa Payoh to Tampines in less than 10 minutes! excellent! not that I go to Tampines a lot lah...
anyways....
I started looking at ideas and planning and speaking to IDs, researching way before completion of sale. We finally decided to engage Steven Tay from Ideal House ID. He comes recommended by many forummers and I must admit although he's not our first choice in terms of design, his price is definitely the best. In addition we like his attitude and pro-activeness and fast response time. Truth is, I've done so much research looking for ideas and planning the whole layout and design of the flat even before we met Steven, that when I first met up with him, I more or less told him what I want, and showed him a lot of references. At the end of the day, although I did not give him much chance in the essential design, he still came up with a lot of very practical and useful suggestions and was quite helpful in advising me to save costs (I tend to go overboard). I was very very shocked when he quoted me as his quote was almost 10k less than all the rest, and with more items included! In fact I recommended Steven to one of my close friends who is also gonna renovate his new flat, even before I signed on the dotted line!
He was very patient throughout the whole process of discussing and quotation stage, and answering my questions. Believe me, I am a very demanding and meticulous person. Every little detail in the quote was scrutinised by me and every other minute I will be emailing him or texting him to double check. I will reveal a breakdown of the reno costs in future entries when I have more time.
For now I'll just attach the final layout plan, which was more or less a combination of proposals from several IDs, friends and a lot of time in front of the computer playing with the layout.
Plan was drawn by me in Adobe Illustrator. We went through many rounds of amendments for the layout and quote before signing on the dotted line.
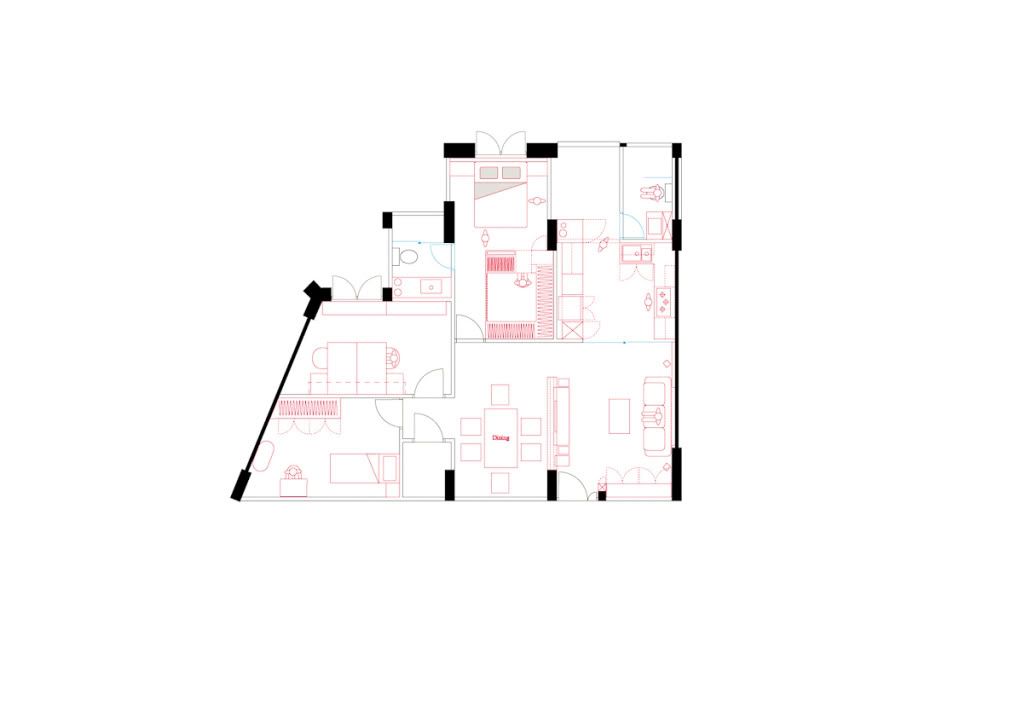
Later I will upload images of the flat.
Shalom

Almost Minimalist 4a In Toa Payoh
in Reno t-Blog Chat
Posted
Yesterday was Ceiling works and windows installation.
At the end of the day when I visited the place to check, most ceiling works are done. TOday will be the boxing up works.
However, I find the windows installation workmanship very unsatisfactory. They patched up the walls around the window frames very sloppily, leaving rough lines, destroying the work of the plastering workers. some of the windows are not even aligned properly to the wall. Some of the locks are faulty (cannot lock), also the locks are fixed such that the moment I turn the knob, the white powder coat got scraped off? WTF. UNACCEPTABLE.
Am meeting ID on site later to show him and will take pictures.