Ecnalx 4 Report post Posted June 4, 2017 (edited) Greetings! Wifey and I applied for a 5RM HDB @ Canberra, which is situated between Yishun and Sembawang. Canberra is a non-matured estate with growing facilities. We hope that things will get better, especially when the new Canberra MRT is operational. So let's start off with our floorplan. As ours is from a SOBF: 1) No flooring is included for living and bedrooms - No issues as we wanted a different tiles design. 2) Kitchen wall is included - We wanted an open & close concept kitchen, so this wall must go. 3) Sanitary fittings are included - After looking at the HDB sanitary fittings (toilet bowls, toilet basins, shower heads), they are acceptable and we will not be changing them to save costs. Here is a video of the "Before" reno: Defects Rectification Fortunately, the number of defects are minimal. We had minor defects. The more notable ones are; hairline cracks on wall, rusty door hinges, low water pressure at service yard. BSC took 2 weeks to do the rectifications. Before planning for renovation, I read through this thread which contains useful knowledge from other home owners. This has helped shaped my plans and is a must read for all first time home owners. https://www.renotalk.com/forum/topic/19954-materials-that-u-regret-using-installing/ We wanted to make our home look bright, open and lively. We did not want our home to have a "hotel" feel. Therefore we would be going for a bright woody/scandi feel with shades of white, brown, grey. Below is an example of our moodboard, some of which were obtained from other Renotalkers here. Edited June 11, 2017 by Ecnalx Share this post Link to post Share on other sites
Ecnalx 4 Report post Posted June 4, 2017 (edited) Contractor vs ID The search for the One is a simple task for us. We wanted to have full control of how the home should look, feel and function, and therefore we went for a Contractor. Various Contractors were considered, but we filtered them down and shortlisted the below 3. N** from R******* One of the famous Contractors used by Renotalkers. Got his contact from one of the bros here. Sent him our requirements and asked for a quotation. Reply was fast but the quote was too expensive for our liking. Therefore, we decided not to engage his service. E***** from D* I******* Another well-known Contractor. Similarly, sent him our requirements and asked for a quotation. Reply was slow (and only thru Whatsapp instead of email), and needs chasing from me before he responded. He did not provide a quotation via email based on the requirements that we prepared. Instead, he suggested to meet him at his office. Went down to meet him and discuss the renovation requirements. E***** said that he will prepare the quotation and send it to us. To test him, I did not send any chasers and waited for his quotation. It has been more than 3 months and not a single email/whatsapp/call. He may be too busy with his other projects. As we think that it is important for our contractor to be pro-active instead of reactive, we decided not to engage his service. PTL from M*** S*** C*********** (ACCEPTED) Got to know of this Contractor via a close relative who also engaged his service. Not very famous on Renotalk but has a facebook page that allows me to view his projects. Similarly, decided to send our requirements and asked for a quotation. Reply was fast (no chasers required) and quote was lower than N**. Decided to arrange for a meeting to discuss the renovation details. PTL looks young but he has many years of experience. He is also the "boss" of the company which I feel secure and is able to clique well (maybe due to same age). A separate check from HDB (https://www20.hdb.gov.sg/bn25/isos118p.nsf/List by Company?OpenView&Start=1&Count=15&RestrictToCategory=M) revealed that M*** S*** C*********** is a Registered Renovation Contractor since 1981 and had no Infringement History in past 24 months. Finally decided that he is the One. PS: For those who are interested, I have moved in for several months now and I am not actively checking Renotalk anymore. Anyway, for those who are interested, my contractor is Phua Tiong Lee from Ming Sing Construction. Tel: 98357831. FB: Just search for Ming Sing Construction. Edited November 20, 2017 by Ecnalx 2 Share this post Link to post Share on other sites
Ecnalx 4 Report post Posted June 4, 2017 (edited) Design & Decisions Below is a 2D layout that we designed. And below are the (outdated) 3D renders made by yours truly. As we are using a Contractor, all the details are to be thought out by us. There are some major decisions to make which have high impact to the renovation. I shall list them here. 1) Whether to have a "walk-in" wardrobe. A "walk-in" wardrobe can be achieved by 2 main methods; Some hack and combine the adjacent room to the MBR, others create a mini "walk-in" wardrobe in the MBR itself by using the wardrobe to separate the sleeping and changing area. In the end, we went with a L-shape wardrobe as we wanted to retain the number of rooms and a L-shape wardrobe in MBR gives a larger walking space, which would be useful if we wanted to put a baby cot in future. 2) Whether to have false ceiling. The usual HDB floor to ceiling height is around 2.6m. As we wanted our home to look bright, spacious and airy, we went for no false ceiling. This would also meant that if there are any changes to the lights location, it needs to be determined early so that the electrician can shift them. 3) Position of TV (and other entertainment devices) in living room. The default TV position is on the right hand side of the living room. The default sofa would be facing the right wall and the study area would be between the common bedroom and the Sofa. However, this would mean that if someone approaches the living room from the bedrooms or kitchen, I would not be able to see them. I dislike this feeling of discomfort and would think that there would be occasions where wifey or myself would be startled by each other. To solve this, we switched the position of the TV console to be on the left wall of the living room. It is important to decide this early as this would mean that the contractor would need to relay the wires to shift the TV digital socket from the right, to the left. Another advantage of having the TV console nearer to the bedrooms/kitchen is due to the Smart Home concept. In one of the below posts, I wrote about having a voice controlled speaker. It is beneficial to place it in the middle of the home for it to hear your commands properly (either from the living room, dining room or kitchen) . Otherwise you would need to purchase an additional device. I will be also placing one of my Google Wifi node at the TV console area so that it can communicate better with another node which I will be placing in the MBR. The Google Wifi (or any wifi routers) will provide a better coverage if it is placed near the center of the home, compared to placing on the far right wall. 4) Electrical works (power sockets, Lan points, light switches) Electrical works needs to be finalized early as it is the first step of the renovation if you wish for the wires to be concealed. When planning for electrical works, always keep in mind the ergonomics of use, with the vision of you living in your home after renovation. Personally, I added quite a number of power sockets in the kitchen, shifted the power sockets higher for better ergonomics, and added a number of power sockets for display cabinet (for lights and printers etc). 5) Whether to have open or close concept kitchen. This is a tough question. The pros and cons for each can be found via a Google search. I shall not repeat them here. Wifey and I discussed for a long time before deciding on an open/close hybrid concept kitchen; we will hack away the kitchen wall and replace them with full height, top hung, sliding and folding glass doors. We will leave the doors open usually, and close them if we were to cook or if we were to switch on the living room aircon. 6) Whether you will overlay your bathroom and kitchen tiles. Some people may find the Hdb default tiles for bathroom and kitchen to be unsightly, and may choose to overlay them. Just remember that you need to decide this early and it will affect the height of the screeding for the living and bedrooms. 7) Type of flooring (Tiles vs Vinyl vs parquet vs marble vs cement screed). Parquet is not resistant enough for me. Marble is too expensive. Cement screed does not fit into our theme. We then filtered down to tiles vs vinyl. I did quite a lengthy research before eliminating vinyl; vinyl is not as water resistant as we thought. In the end we went with tiles, homogeneous tiles. Initially we did not know that there are differences in the type of tiles. There are mainly 2 types; ceramic and homogeneous. A quick Google revealed that homogeneous tiles is the better one, but with higher costs. 8) Whether to do an under-mount or over-mount sink. Similarly, there are multiple articles on the web comparing the pros and cons of under-mount vs over-mount. This decision needs to be made early as it would affect the preparation of the sink. Additionally, this decision will also affect your costs of renovation (under-mount costs more due to the additional work involved). For us, we went with an under-mount sink. Edited July 28, 2017 by Ecnalx Share this post Link to post Share on other sites
Ecnalx 4 Report post Posted June 4, 2017 (edited) Smart Home As the topic suggests, we are going for a Smart Woody theme. "Smart" refers to Smart Home. I (Mr) am personally interested in tech stuff and have been using several smart devices in my room now. Smart devices that I have include Google Home, Google Wifi, Philip Hue lights, Samsung Smartthings. Using a combination of these allows us to automate my home and makes our life easier. For example, I can use voice command (Google Home) to control my lights (Philip Hue). I can use voice command to control my switches (Samsung Smartthings). I can use voice commands to ask Google Home to set alarms, ask questions, play music etc. Feels like I am 1% Tony Stark. Am writing more as requested by readers. Implementing a Smart Home is an expensive hobby. Be prepared to fork out at least hundreds of dollars before you can start to see the effects of a Smart Home. I will list down the various level of home automation in my personal opinion. For most home owners, you switch on the lights/electrical devices manually by pressing on a switch. The highest level of smartness are most likely controlling the power/channels of your TV/Fans/Home entertainment devices via a remote. Some people may use several mobile apps to control their electrical devices (eg lights, switches, aircon). Some may also install touch-based switches to control their electrical devices. However, I believe that this is not smart enough; at least not for me. Picking up a phone to control your other electronic devices (which is similar to Logitech Harmony series) is also a chore itself. Instead, I went for a more convenient and futuristic method, which is via voice control. I can now command most of my electrical devices by speaking. If you are interested in using voice command to control your electrical devices, read on. Voice Controlled Speaker This is the brain of your Smart Home; they control the remaining smart devices based on your voice commands. There are 2 main Voice Controlled Speakers in the market today; Google Home vs Amazon Echo. <PS: for Apple fans, Apple will be releasing a Siri-enabled voice controlled speaker called HomePod in end 2017.> There are plenty of articles on the web comparing these 2 voice controlled speakers. I shall not repeat them here. In summary, I chose Google Home as 1) I am using a Google account (android phone, gmail, drive, calendar, etc), 2) Better AI (backed by Google search engine), 3) Aesthetically pleasing (personal preference), 4) There are plans for Google Home 2 to double up as a router similar to Google Wifi. Note that both Google Home and Amazon Echo are not officially on sale in Singapore. They are however, sold via many of the online shopping websites. Setting up the Google Home is easy. 1) Plug in the power socket (you need to buy an adapter), 2) Download the Google Home app, 3) Using the app, connect Google Home to your wifi. That's it. Once done, you can now explore the functions of the Google Home. To give command to Google Home, always start with "Hey Google, ..." or "OK Google, ...". As at point of writing, you are unable to name your Google Home, which would be a nice and possible future feature. Here are some commands that I usually use: - Hey Google, what time is it? ... Google will tell me the time. - Hey Google, play eg 933 FM. ... Google will play the radio.H - Hey Google, what is 4 feet in meters? ... Google will do the conversion for me. Very useful, especially when renovations lengths are always in feet and inches. - Ok Google, set alarm at 5pm. ... Google will set an alarm - Ok Google, tell me a joke... - Hey Google, sing a lullaby... - If you are in the US, you can even make calls, order food, shop online via Google Home! Really nice features. Almost like a real personal assistant at your command. For more Google Home commands, visit https://madeby.google.com/home/features/#?filters=answers,entertainment,manage,plan,home,fun. Integration with Smart Devices Now, this is the part where things get more interesting. If the standalone Google Home amaze you, this is just the beginning. The next step of achieving a Smart Home, is to integrate other smart devices to your voice controlled speaker (so that you can control them using your voice). There are many smart devices in the market today; Smart lights, smart wifi, smart speakers, smart plugs, smart TVs, smart aircon, smart locks, smart security system, etc. All these smart devices can be integrated with your voice controlled speakers. For Google Home, there is a small but growing list of partners whom have direct integration (https://madeby.google.com/home/partners/). This meant that your commands need not be specific; Google Home can understand your command as long as the meaning remains the same. For example, Philips Hue is a partner of Google Home. For you to control the Philip Hue lights, you would need to purchase a Philips Hue Bridge, which acts as the brain that controls all the Philips Hue lights. Normally, the Bridge would be sold together with some Hue lights as a base to kick start your smart lights journey. The basic Bridge + 3 Hue bulbs has a RRP of $289. You can get at a cheaper price during the Philip Carnival Sale or online websites. In our new home, we will be using a combination of "normal" lights as well as "smart" lights. So I bought a Bridge, several E27 Bulbs, 1 Hue Go, and 4 Hue Lightstrips. I am currently using the Hue Go in my room. The basic commands for lights that you can control via voice are: - Hey Google, turn on/off lights. - OK Google, change XXX lights to YYY colour. - Hey Google, brighten/dim XXX lights to ZZ%. In your Google Home app, you can rename your smart devices so that Google Home can recognise the specific device to control. For example, you can name lights as "Left TV lights" and "Right TV lights". Google Home is smart enough to understand the difference between "OK Google, change Left TV lights to red colour", compared to "Ok Google, change TV lights to red colour" (which will change both left and right TV lights). Other than Philip Hue lights, I am currently using Samsung Smartthings, which is also a partner of Google Home. Similarly, to control all the smart devices, you would need a "brain" device which in this case is the Smartthings hub. This must be connected to your wifi for it to work. Setting up is easy; just download the Smartthings app and create an account. After which, you would need to add the smart devices that you have. The most useful smart devices in my opinion would be the smart plug. It is the 3 pin thing that looks like a travel adapter. How it works is that you can control whether to allow electricity to flow through the smart plug; when the smart plug is off, means no electricity is passed through, and if the smart plug is on, electricity is passed through. Now, how you intend to use this device is up to your imagination. For wifey and myself, we are currently using it for our TV and Steam link. By default, this meant that we can switch the smart plug on/off via the Smartthings app. However, with the integration with Google Home, it means that we can now switch the Smart plug on/off via voice. To add the device to Google Home, you need to log in to your Google Home app and authorize Google Home to access/control your Smartthings devices. The authorisation is done by logging in to your smartthings account via the Google home app. Once done, you will be able to control the devices via your voice via Google home. Remember earlier I wrote about how you can rename your smart devices? By renaming my 2 smart plugs to "Bedroom TV" and "Steam link", Google home can understand the following commands: Ok Google, turn on/off TV. Hey google, on/off the steam link. Ok, google, turn on Fan. Conclusion And finally, my favorite command: "Hey google, turn on/off everything". This will turn all the lights and all the smart plugs on/off. I always use this command when arriving/leaving home, and when we rest for the night. To summarise, using a voice controlled speaker for your smart home is really convenient. However, the downside is that your have to speak clearly with good pronunciation. Voice control also does not work well in a noisy environment (eg, when the TV volume is high and/or there are people talking). To us, the pros outweigh the cons, and we would continue with our smart home project by extending it to other devices. My future purchases would include Logitech Harmony, Blinds control, and Smart Doorbell. These are "good to have" rather than "essential", and I would purchase them progressively. Good luck to those embarking on a smart home project! Edited July 24, 2017 by Ecnalx 1 Share this post Link to post Share on other sites
Ecnalx 4 Report post Posted June 4, 2017 (edited) Renovation Journey Step 0: Uni-arm The first purchase that we made was the Uni-arm for the main door. It acts as both 1) a door stopper (so that contractors need not hold the doors when moving in/out, and 2) a soft closing mechanism. A good purchase. Step 1: Aircon First thing to do is to decide the brand. After reading through tons of feedback and reviews from Renotalk, HWZ, and friends, the current 2 aircon brands are Mitsubishi Electric and Daikin. Furthermore, there are 2 different types of "ticks" for each. This can be summarised as per below: 1. Mitsubishi Electric (2 Ticks) 2. Mitsubishi Electric (5 Ticks) 3. Daikin (3 Ticks) 4. Daikin (5 Ticks) After deliberating for sometime, we finally decided on the Mitsubishi Electric (2 Ticks). Reason being; 1) ME Aircon spare parts is easier to get than Daikin, 2) ME aircon is quieter than Daikin, 3) the 2 ticks is the "older, tested and proven" version, while the 5 ticks is the "newer, more energy efficient" version. However the tradeoff is the price as well as the 5 ticks takes a longer time to cool down the room. Next is to source for an Aircon supplier/installer. From my research, most of the time when there is an issue with the aircon, it is always due to the installation (and not the aircon itself). Therefore I began googling on the reviews of the various Aircon supplier/installer. Finally found 1 whose price is reasonable (not the cheapest), but did not have any adverse reviews. I then contacted them and arranged for a site visit, and followed by a 1st installation (of the aircon trunkings). The 2nd installation (install aircon units itself) will be done at a later stage. Workmanship of the 1st installation looks fine so far. Would have to really test the aircons after I move in before I can attest to their installation skills. Step 2: Hacking & Electrical works Step 2 was fast and furious. The kitchen wall was hacked clean within a day. All the electrical works (including relaying of wires) were done together. Did not take much photos as it was over in a flash. Step 3: Tiling We went to Hafary and Soo Bee Huat to choose our tiles. Both of them have a wide selection of design. We wanted the look and feel of a wooden flooring and this floor tiles will be placed in the entire living+dining+bedrooms. Below is a sample of the tiles that we shortlisted. We compared it against the kitchen flooring which was provided by HDB. After double and triple confirming the tiles selection, works for the flooring began. Screeding to ensure that the floor tiles will be leveled with kitchen and bathroom tiles. In the middle, you can also see the sink that we bought. We wanted an undermount sink and to achieve this, the sink needs to be "wrap" by a layer of cement. Pretty interesting. Preparing floor tiles for laying... At the same time, cement base for kitchen cabinets are done up. Likewise for the cement base for sink support. Tiling started. For those whom are also using rectangular shaped tiles/vinyl, you will need to decide on the orientation of the tiles/vinyl. Did some research via googling. The longer side of the tiles/vinyl will make your home appear longer. For example, we laid our tiles so that the longer side of the tiles run parallel with the layout of the home, and it spans across all the way from living to dining to bedrooms; making the home look larger. Another decision is the type of stagger of the tiles. We selected "random staggering" as research had shown that it will result in an illusion that the floor is made of real natural wood rather than man-made. Followed by the skirting. At the same time, we also asked the tiler to make good the entrance and do up a kerb. The default given by HDB was a slope which we did not like as it would invite flooding into the home if there was heavy rain or if the town council worker washes the floor. We also hope that the kerb would also reduce pests and dust from seeping into the home. Final results of flooring. Making good the hacked kitchen wall, and tiling of cement sink support. Edited June 26, 2017 by Ecnalx Share this post Link to post Share on other sites
Ecnalx 4 Report post Posted June 4, 2017 (edited) Renovation Journey - Continued Step 4: Painting As mentioned above, we wanted our home to look bright, open and lively. With this in mind, we decided to paint the wall mainly in white, with dashes of colours. We went for colours which are contrasting with white to bring attention and life to the home. We used an app from Nippon Paint to visualise the colours before finalising them. We used a Nippon MediFresh paint which has anti-mould effect. Step 5: Carpentry From the above 2D drawings, we have built-in carpentry for the following. There are lots of laminate to choose from. We went with the woody laminates which is aligned to our theme. Step 5a: Shoe cabinet We integrated the DBbox together with the shoe cabinet. We added a few tips for better user experience. We requested the corner of the shoe cabinet to be rounded; so as to avoid unintended grazes. I asked to open a hole (for the wires) from the DBbox area (top section) to the shoe cabinet "counter top" so that I can place my router in the open. This is so to provide a better wifi coverage and also to ventilate the router. We also made the right section of the shoe cabinet suspended; so that I can slide in my daily shoes easily. Step 5b: Display cabinet Our display cabinet is pretty standard. An opening in the middle, with top and bottom storage split into 2 columns. Each column is further split up by placing planks horizontally. Each plank is also adjustable to our preferred height. I added power sockets at the side, so as to power up my Philips Hue lightstrip and also other electronic devices such as a printer. Step 5c: TV console Initially we wanted to buy a off the shelf TV console. However, we wanted to mount our TV and that would meant unsightly wires due to 1)Power adapter, 2)TV antenna, 3)Google Chromecast, 4)PS4, 5)Steam Link. So we decided to have a built-in TV console to hide the messy wires, and also acts as a support for the TV wall mount (the BTO interior walls are made of weak drywall partition). For the TV console, the design would be a simple top-bottom plank. I asked for a "cable management compartment" where I will hide all the wires/power extension strips. I will be placing most of my electronic devices on the TV console plank. On the left and right side of the TV console, there is an indent, where I will be installing Philips Hue lightstrips to provide ambiance. TV console pending installation of Philip Hue Lightstrips and opening of holes at cable management compartment. Step 5d: Kitchen cabinet Step 5e: MBR wardrobe As per the 2D design, we went with a L-shaped wardrobe in the MBR. 1 side would be fitted with sliding doors, whilst the other side would be the swinging door. We also installed metal baskets which can be pulled out. We hope that this can help us to take out clothes which are tucked at the back. We will also be installing interior lights with motion sensor; so that it can help us to see and search for clothes. MBR wardrobe still pending lights with motion sensor.. View from corner of living room. Edited July 8, 2017 by Ecnalx Share this post Link to post Share on other sites
Ecnalx 4 Report post Posted June 4, 2017 (edited) Renovation Journey - Continued Step 6: Aircon - Cont Step 7: Lights As part of the smart home project, we will be using a combination of traditional and smart lights for our home. For the traditional lights, we got most of them from Philips, and the kitchen tracklights from taobao. For the smart lights, we are using those from the Philips Hue series. 2 bright traditional ceiling lights from Philips installed in living room. All bedrooms are also fitted with these lights, but in warm colour. Kitchen are fitted with warm coloured track lights from taobao. The other ceiling lights are fitted with the smart e27 bulbs from the Philip Hue series. We bought a combination of the While Ambiance and the Coloured series to install around the house. We also bought a (nice looking) e27 holder to mount the smart bulbs. Our dining lights~ Took alot of effort to find a woody looking pendant lights with e27 bulbs. We fitted them with the Philips Hue smart bulbs. One of the Philips Hue Lightstrips installed on the Display cabinet. Colour can be changed. For the bathrooms lights, we bought a white coloured IP65 (which means "Totally protected against dust ingress" with "Protected against low pressure water jets from any direction. Limited ingress permitted") lights which is suitable for a wet environment. We also bought warm T5 lights to provide ambiance. Step 8: Kitchen & Bathroom accessories While we take a break from carpentry, the plumber came and install all the bathroom accessories. For bathroom accessories, we bought the "mirror/cabinet-related" ones from Lazada, and the Welmi stainless steel racks and storage from Song Cho. Step 9: Carpentry continued Edited July 8, 2017 by Ecnalx Share this post Link to post Share on other sites
Ecnalx 4 Report post Posted June 4, 2017 (edited) Moving In We have since moved in after renovation is completed. Past few weeks were really busy as we juggled between work, moving in, and cleaning. I am glad that we have fully utilised the carpentry/electrical works and that they suit our daily needs. This is also the time where I started to set up most of my smart home devices. Installation of Kitchen accessories. Delivery of Fridge. Delivery and installation of TV. Installation of Philip Hue Lightstrips at TV console. Delivery of Sofa. Testing of Philip Hue Lightstrips (change colour). Installation of my entertainment devices. From top left clockwise: PS4, Network switch (cause I have multiple devices that require lan cable), SteamLink, Google Wifi, digital TV antenna, Philip Hue Bridge, Samsung Smartthings Hub. And on the floor, our Xiaomi vacuum. On the right, you can see a standing KDK fan. Our dining area. We had a hard time looking for the right dining lights, dining table, and chairs. Edited July 24, 2017 by Ecnalx Share this post Link to post Share on other sites
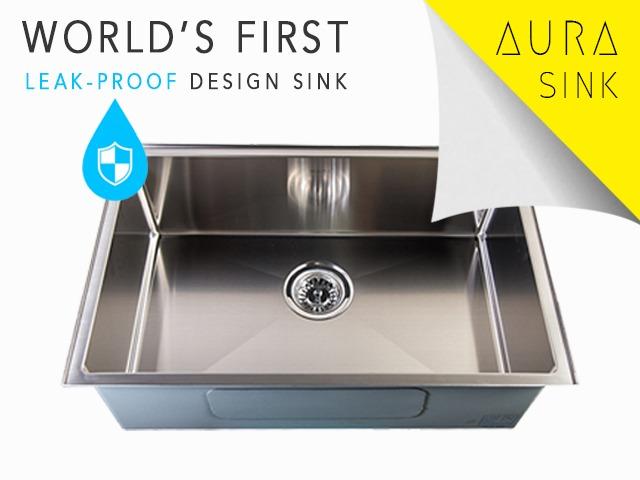
Ecnalx 4 Report post Posted June 4, 2017 (edited) Our Purchases 1. Bed - Four Stars Our first purchase was the bed; a king sized bed from Four Stars. I have been sleeping on a Four Stars bed for many years and we find that it is firm and comfortable enough for us. We bought it from Novena Furniture @ Big Box. 2. Living Room TV - LG 65UH615T We bought most of our electronics from Mega Discount Store. Their prices are really good and they have a price matching policy. You can even lock in a price during their promotion and reserve them for delivery later. We bought a LG 65UH615T during one of their promotions in March @ $1850, including a extendable wall mount bracket. I dare say that this is an extremely good price for a 65 inch 4K TV. 3. MBR TV - LG 49UH610T MBR TV is also from Mega Discount Store. Comparing my reserved price (Mar 2017) against the current price (Jun 2017), the current price was cheaper by $20. The staff assisted to adjust the price and gave me the current price. 4. Fridge - LG GTB-4381PZ We also bought a Fridge from Mega Discount Store in March 2017. When I went to arrange for a delivery in Jun 2017, I found out that they have a current promotion on the same fridge model that gives out $100 groceries vouchers at the same price. The staff assisted to cancel my reservation and create a new receipt with new purchase date, which meant that I would be eligible to get the groceries vouchers. This model is recommended by the Mega Discount staff as LG Fridges have a "air purifying" system. 5. Washing Machine - Samsung WA-11J5750SP Washing machine is also bought from Mega Discount Store in March 2017. No change in price or promotions in Jun 2017. While we are wary of Samsung products (especially after the recent incidents of Samsung's phone and washing machine explosions), we really liked the "hand wash basin" which was provided as part of the washing machine design. 6. Lights As mentioned in an earlier posts, most of our lights are from the Philips Hue series. We bought a combination of "normal" lights as well as "smart" lights. 1x Philip Hue Bridge 5x E27 Philip Hue Colour bulbs 8x E27 Philip Hue White/Warm bulbs 1x Philip Hue Go 4x Philip Hue Lightstrips 5x Ceiling lights for Living/Bedrooms 2x IP65 white lights for bathrooms 6x Philip T5 warm lights for bathrooms 6x E27 "Normal" Philips white bulbs 1x tracklights set from Taobao 7. 2-ticks Mitsubishi Electric System 4 Aircon In an above post, i also mentioned that we bought a 2-ticks Mitsubishi Electric system 4. Love how quiet and cooling it is. In fact, it is too quiet that I set to a "noisier" setting to match my previous bedroom sound level.8. Window Grills We installed window grills so as to future child-proof the house. 9. Blinds We purchased blinds for the whole house, but it has yet to be installed. Fellow home owners, remember to purchase blinds/curtains earlier as the lead time may take some time. 10. Fans We did not like the idea of ceiling fans on the already low ceiling. Therefore, we bought standing KDK fans @ $95 each.11. Sofa We bought a fabric L-shaped sofa from Sofaland. We liked the ability to wash the covers, and the price was really attractive at $1100 for a 3m L-shaped sofa inclusive of an ottoman. 5 small cushions were thrown in as complimentary gift.12. Dining table Our dining table is from Castlery. The model is Morten Dining Table 1.8m. It was not on display at their showroom, so we were afraid that we did not like it. Decided to take the plunge as it is the only table that meet our requirements; rounded edges, woody, non-obstructive leg space that allows me to cross my legs. 13. Uni-arm A must buy for all home owners. This is the first "furniture" that we bought and have brought about much convenience throughout the reno journey. 14. Hob & Hood Our hob and hood are bought at Mega Discount Store. We wanted an induction hob for easy maintenance; a good choice after using for a few months. Cleaning/Maintenance is really easy. Wifey is weary of Electrolux, so we went with Brant. Working well so far. We also selected the hood with chimney, so as to add a design to our empty kitchen. 15. Kitchen sink & tap Kitchen sink and tap are from Hoe Kee. We choose the one with 2 compartment, to segregate the washing. The tap has an extendable hose which is useful for washing purposes. 16. Bathroom cabinets We bought some wall cabinets which are of "plastic" material. This will ensure that they are free from rust. 17. Bathroom accessories We bought the Welmi series from Song Cho. Very expensive but has a lifetime warranty against rust. After using for a few months, can confirm that it is still free from rust. 18. Digital Water Heater - 40L from AOS Bath This is a digital water heater, where you can configure when to turn on at specific times of the day. Was deliberating between an instant heater vs storage heater. Went with the storage heater as it can also provide warm water to the bathroom taps. My only complaint is that it takes around 20 seconds for warm water to flow from the storage heater to the shower outlet, instead of just 5 seconds for an instant heater from my old home. 19. Xiaomi robot vacuum Our best purchase. Helps me to vacuum the house daily at 12nn while I am at work. Highly recommend home owners to get this. Edited November 20, 2017 by Ecnalx Share this post Link to post Share on other sites
Ecnalx 4 Report post Posted June 4, 2017 reserved10 Share this post Link to post Share on other sites
Ecnalx 4 Report post Posted June 4, 2017 reserved11 Share this post Link to post Share on other sites
Ecnalx 4 Report post Posted June 4, 2017 reserved12 Share this post Link to post Share on other sites
Ecnalx 4 Report post Posted June 4, 2017 reserved13 Share this post Link to post Share on other sites
Ecnalx 4 Report post Posted June 4, 2017 reserved14 Share this post Link to post Share on other sites