

RyanYTH
-
Content Count
378 -
Joined
-
Last visited
-
Days Won
31
Posts posted by RyanYTH
-
-
Blog Entry Date: 24th December 2017 Sunday
Click Here to go back to Page 1 - Table of Contents
Post Renovation - Furnitures and Appliances (Living Room)I'm back! Did anyone miss me?

I guess there are no excuses for this terrible long gap (1 month!) between my last post and this lol.
I'll admit i'm just plain lazy already now that my renovation is completed LOL.
How is everyone so far?
Just wanna take this opportunity to wish everyone a Happy Holidays!
Since today is Christmas Eve, I thought i'd show ya'll some pictures of my Living Room post renovations.
Nothing major happened, so this post will be just a photo collection of everything that was delivered
and the final pictures showing how everything looks 1 month later after I added a couple of soft furnishings.
================================================================================
(Star Living) Delivery of TV Console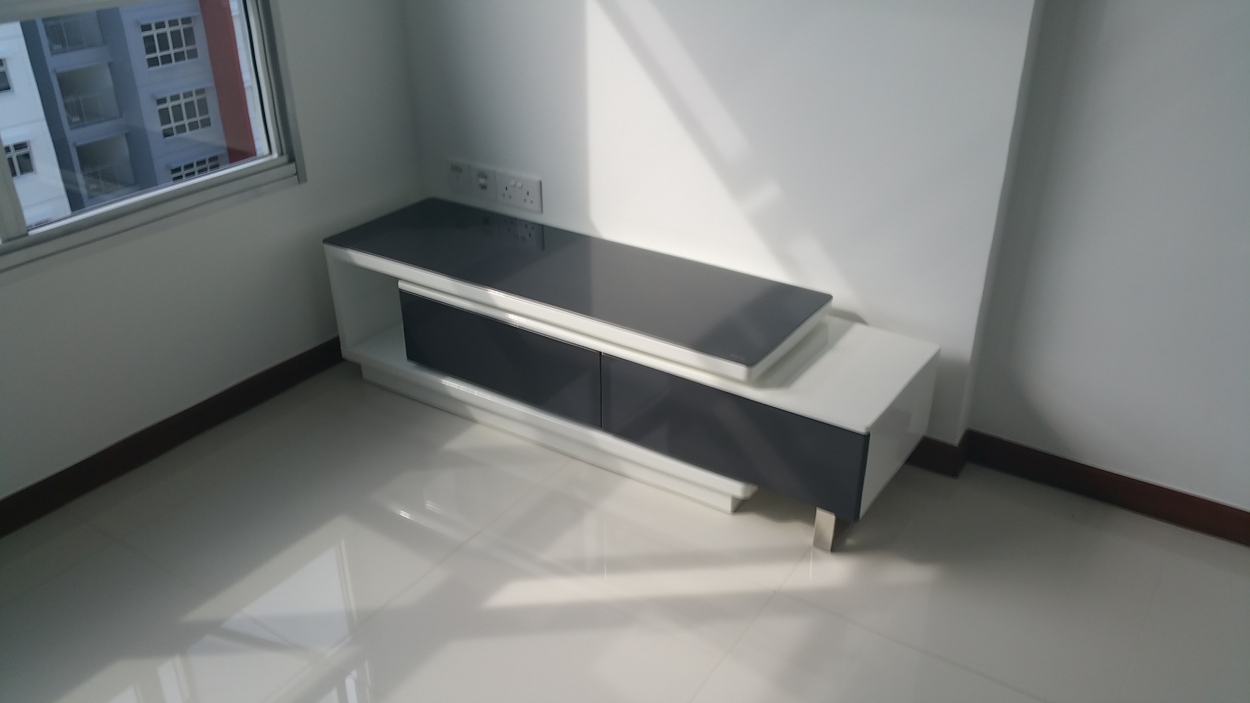
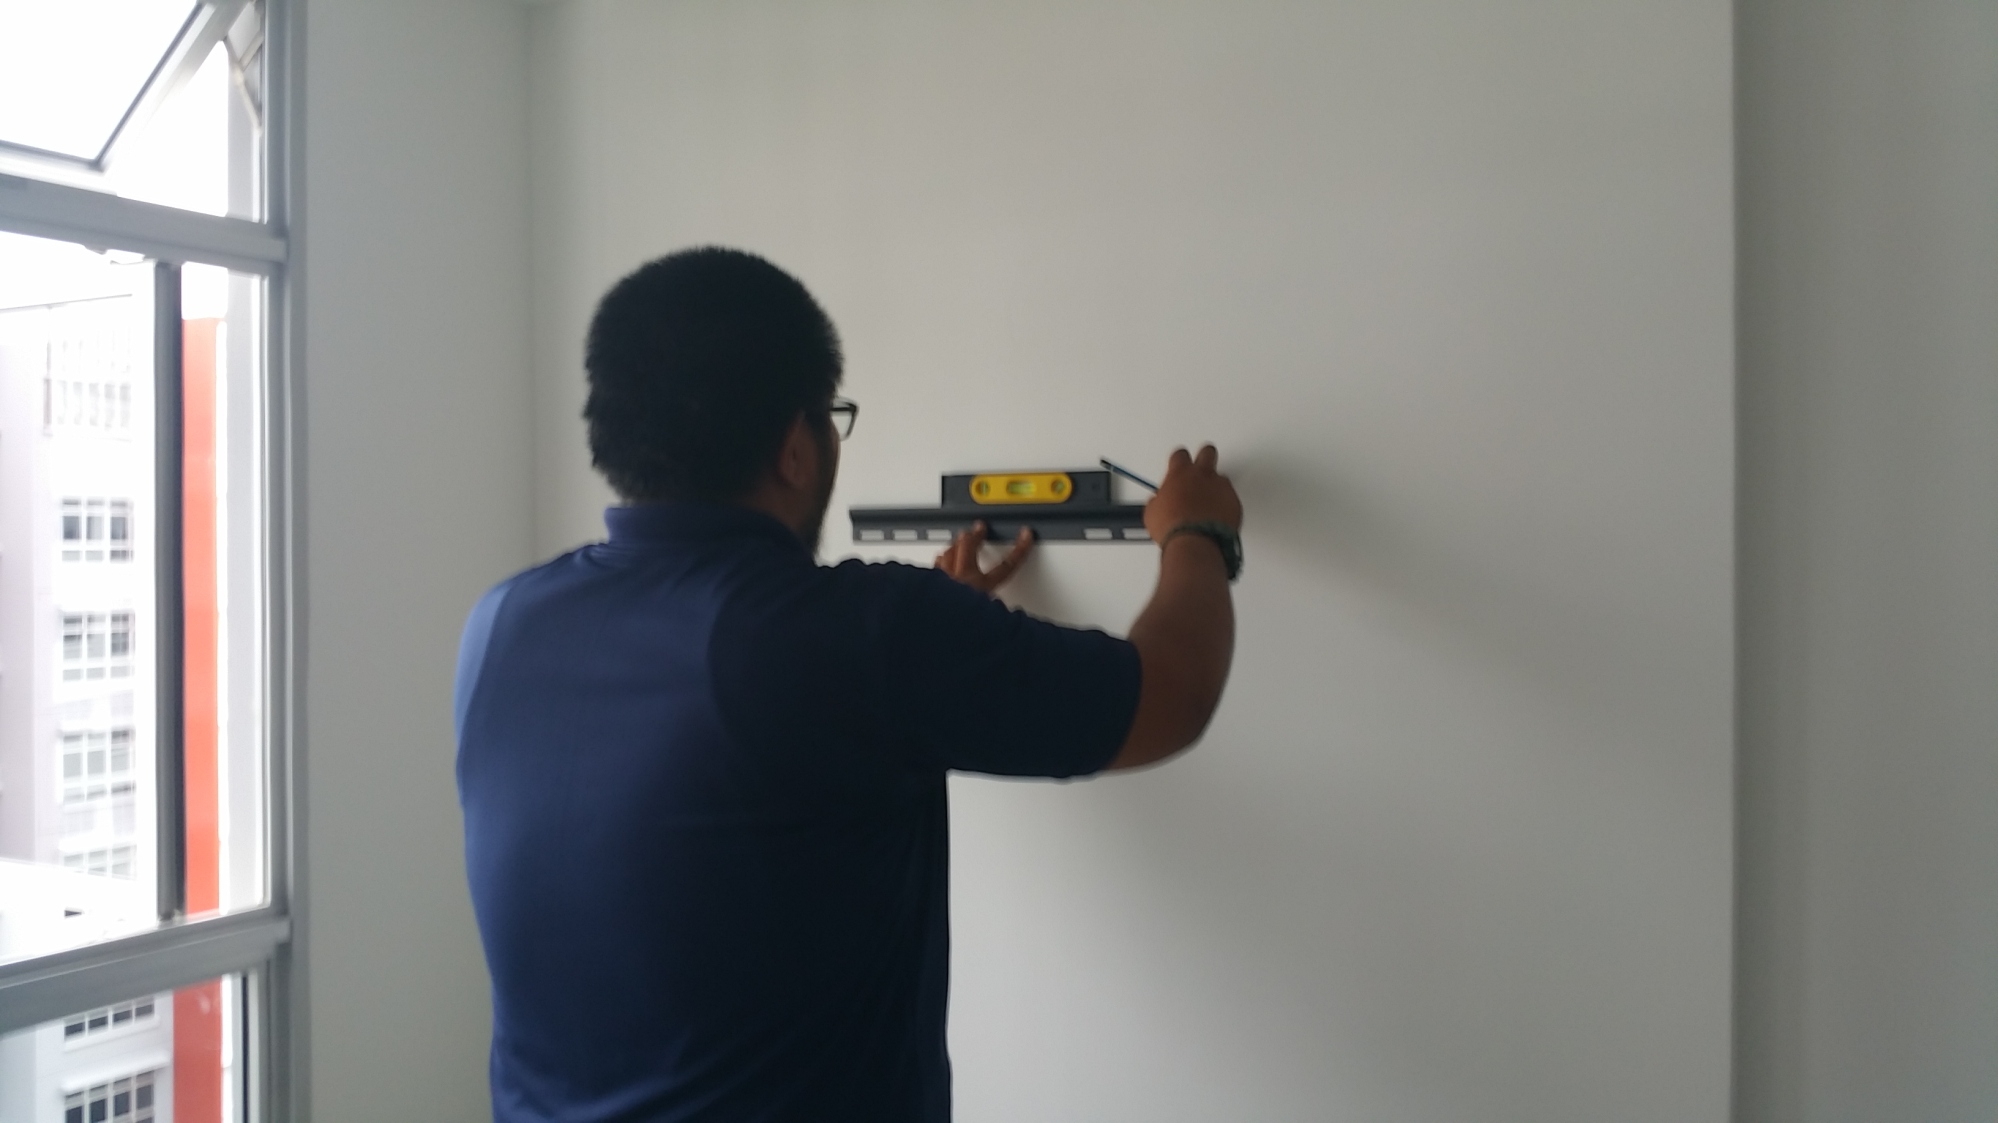
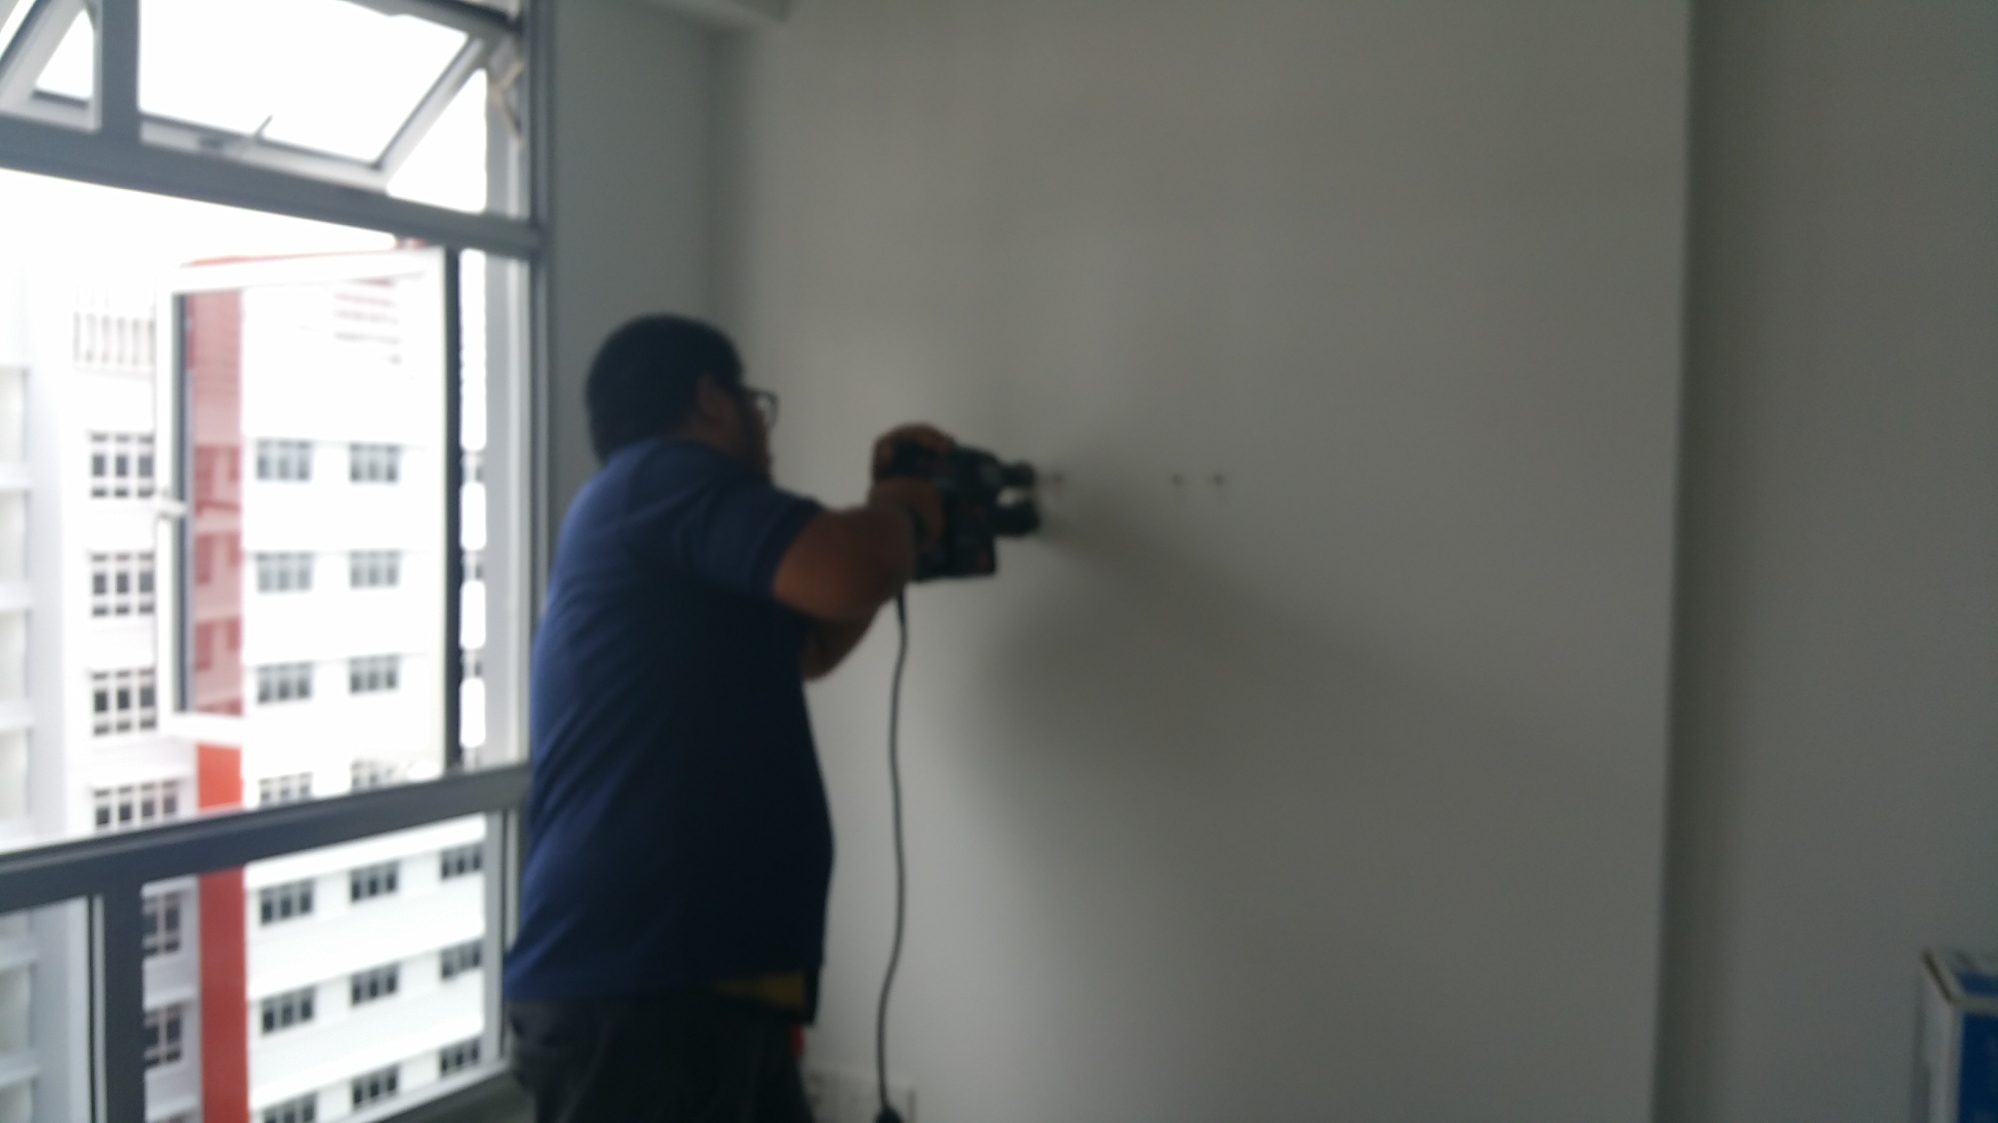
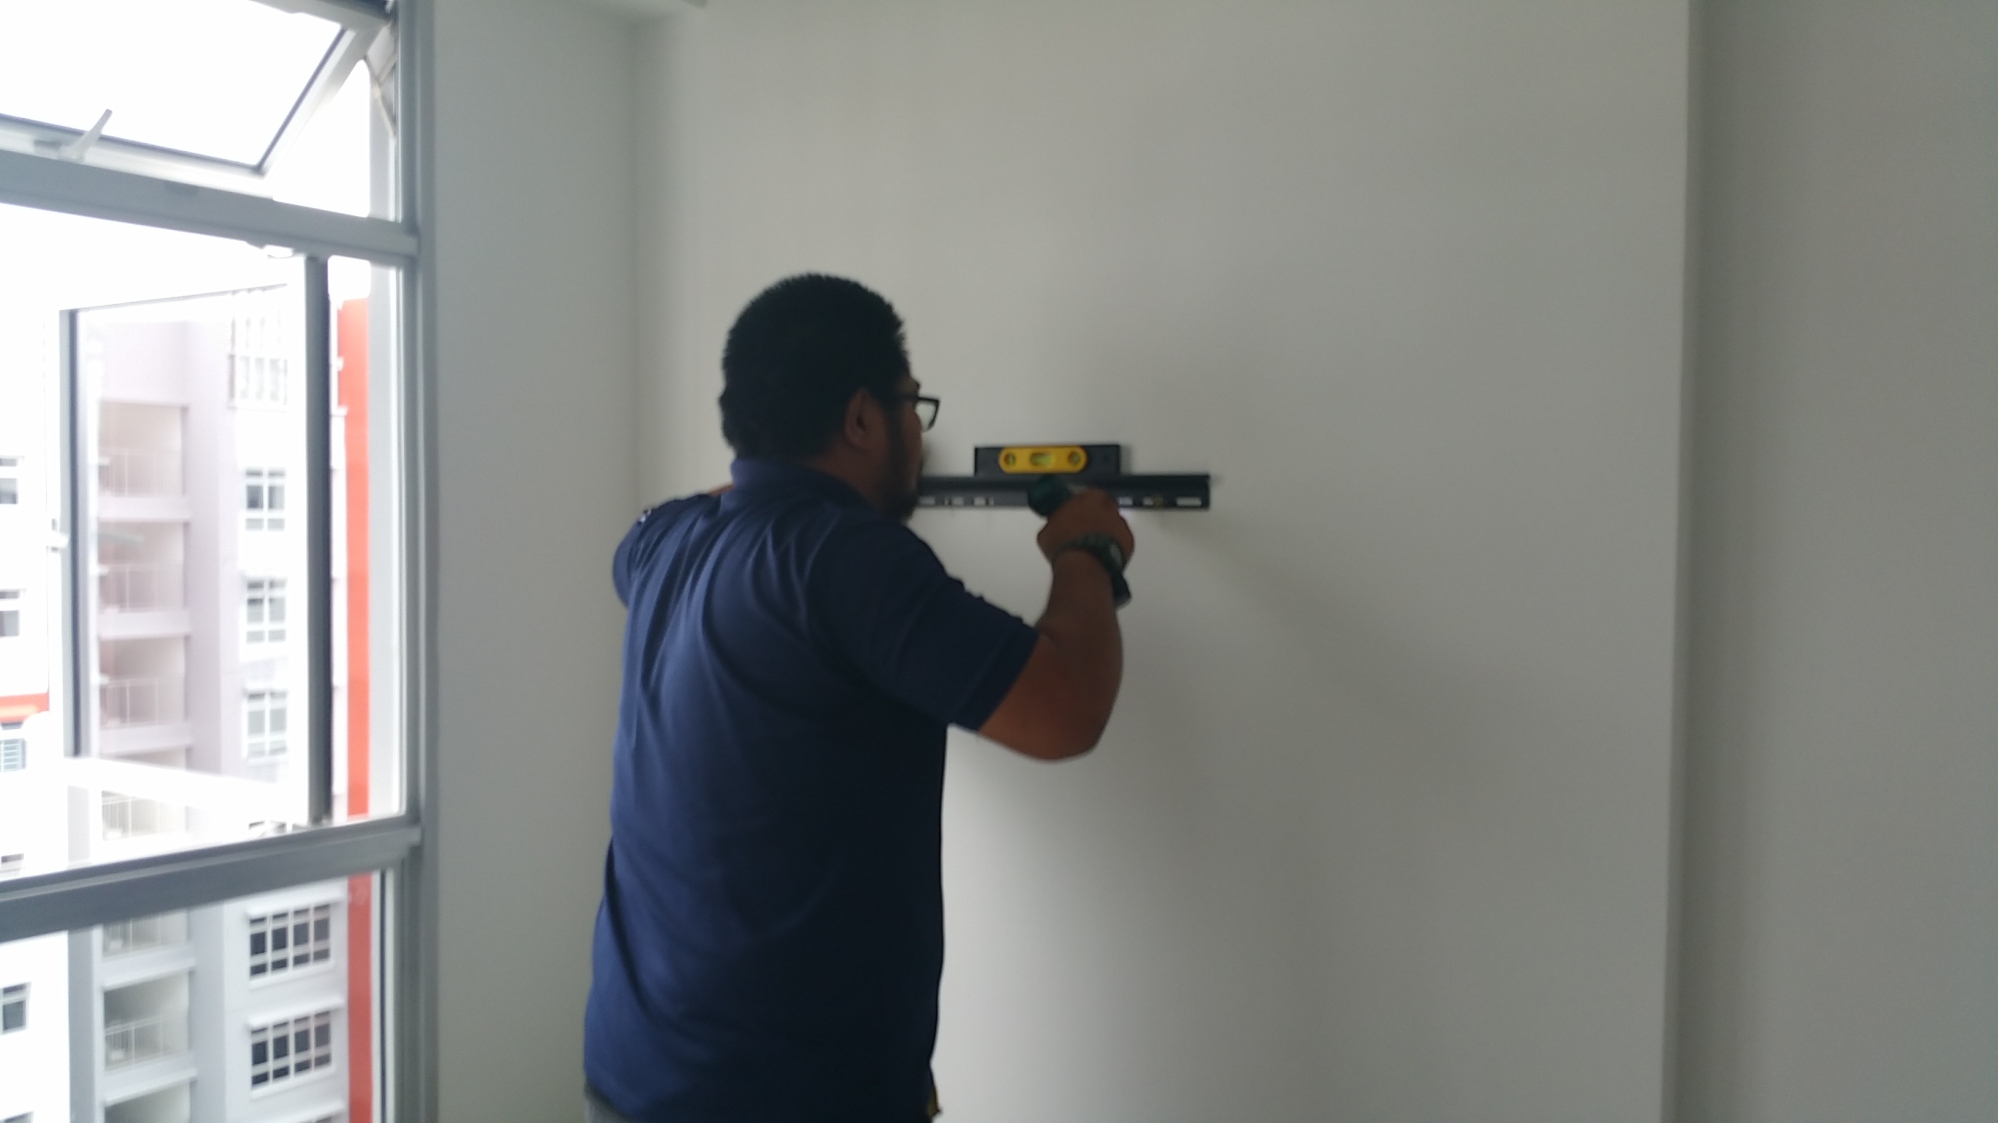
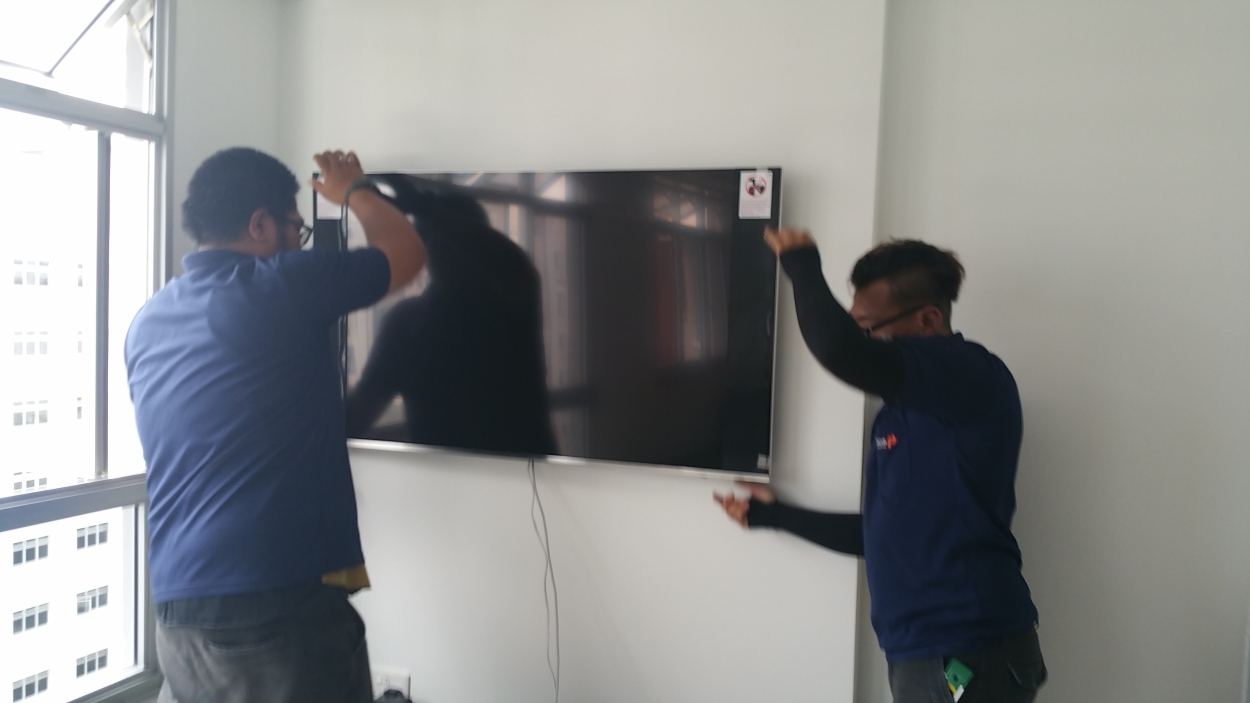
(Courts) Delivery and installation of my Samsung 55″ TV
I purposely request for them to mount the TV a little higher then normal,
because I want to be able to also lie on my bed in the bedroom and view the TV.
Luckily my Sofa Recliner has this lean back function so even though the TV is
positioned higher, I can still comfortably watch it when I lean back on my Sofa.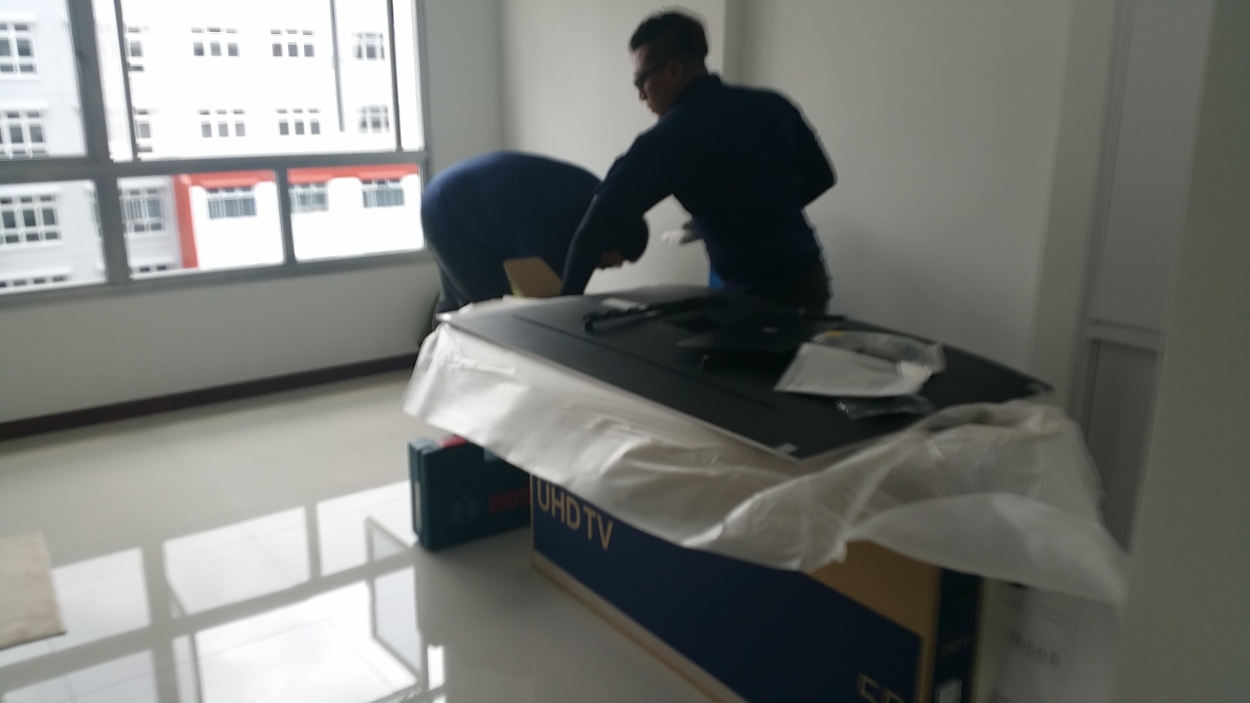
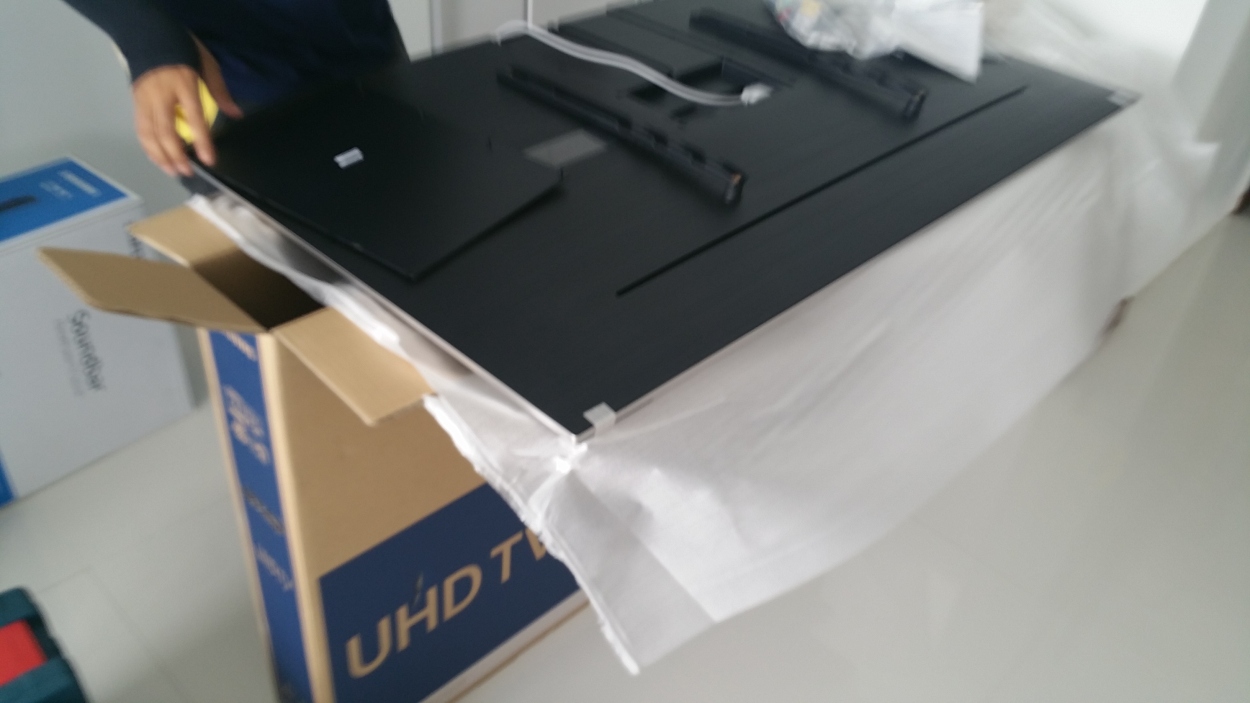
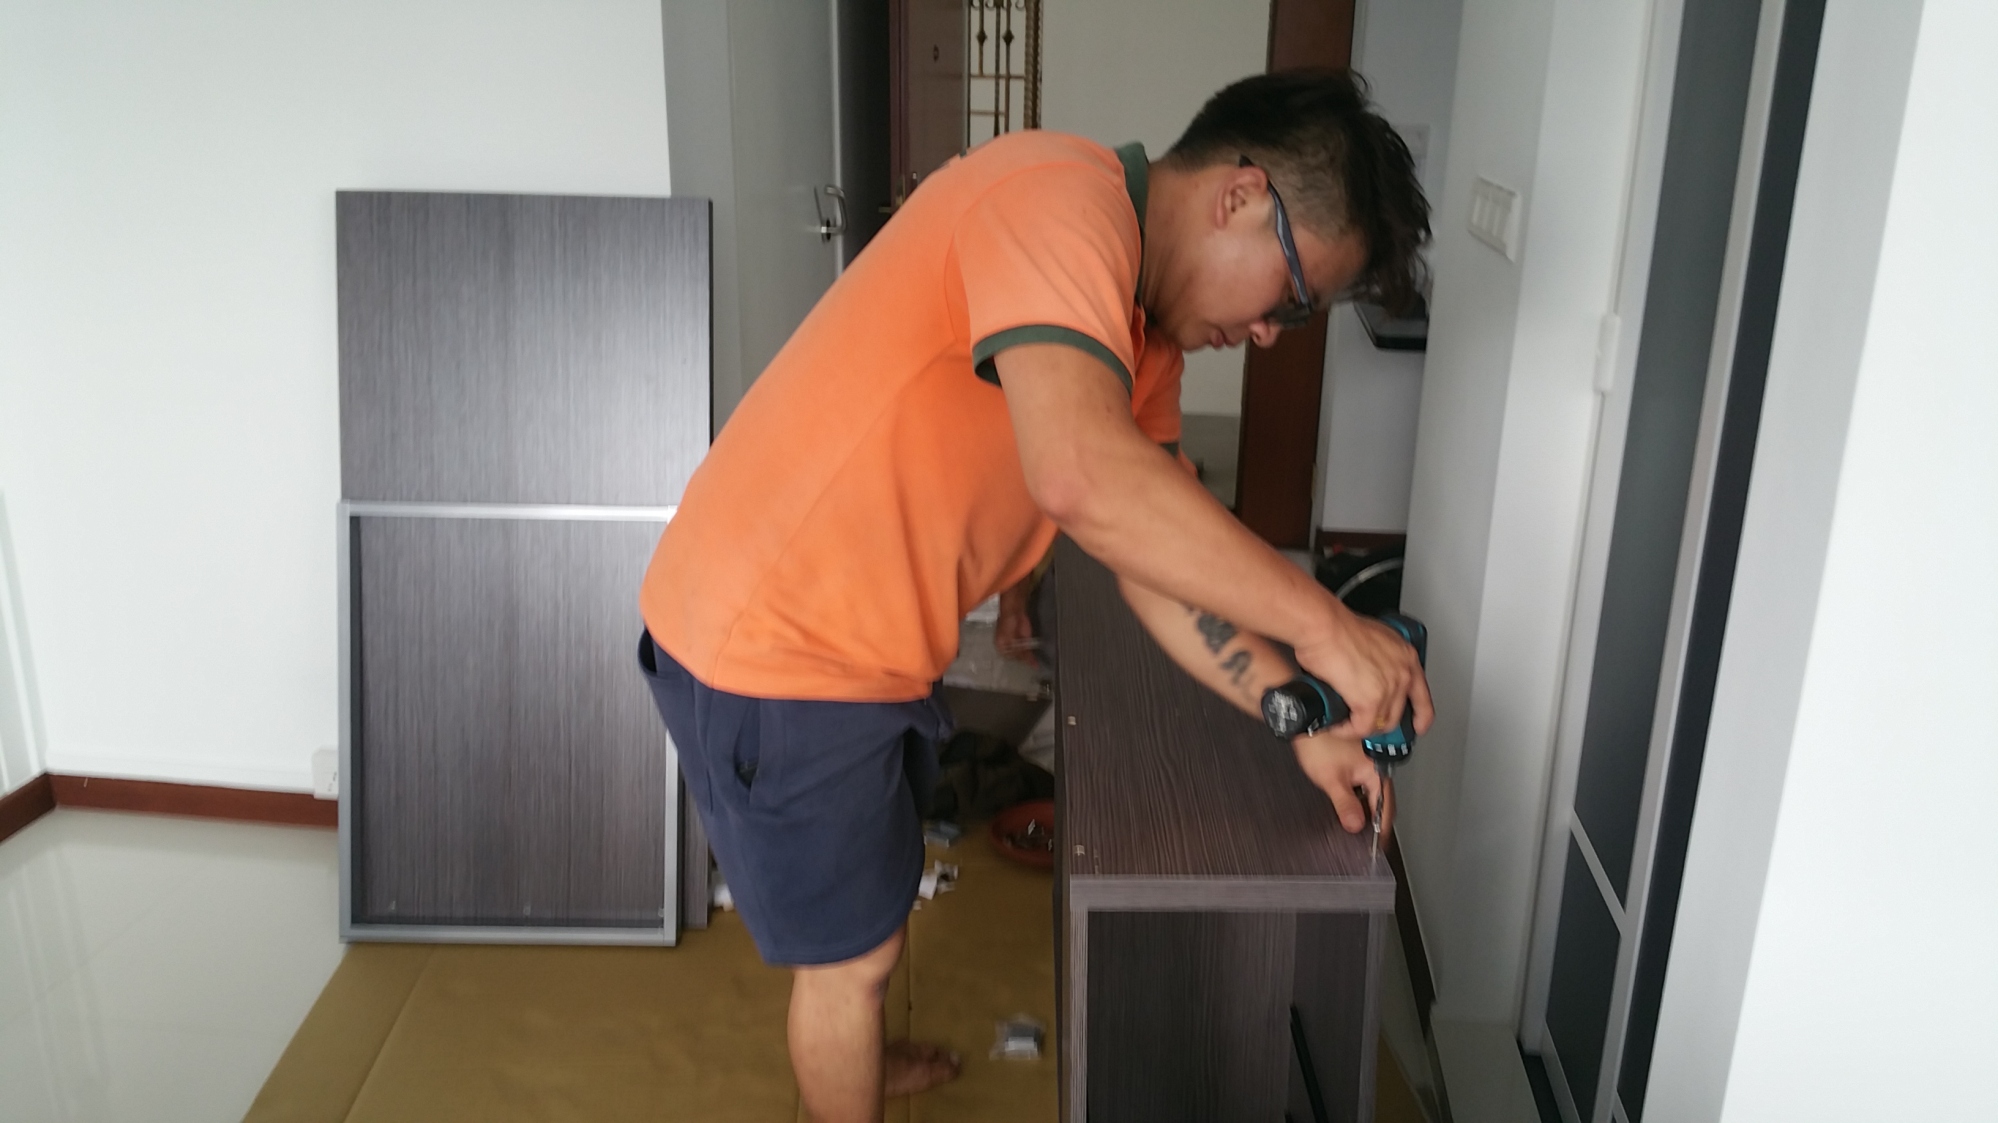
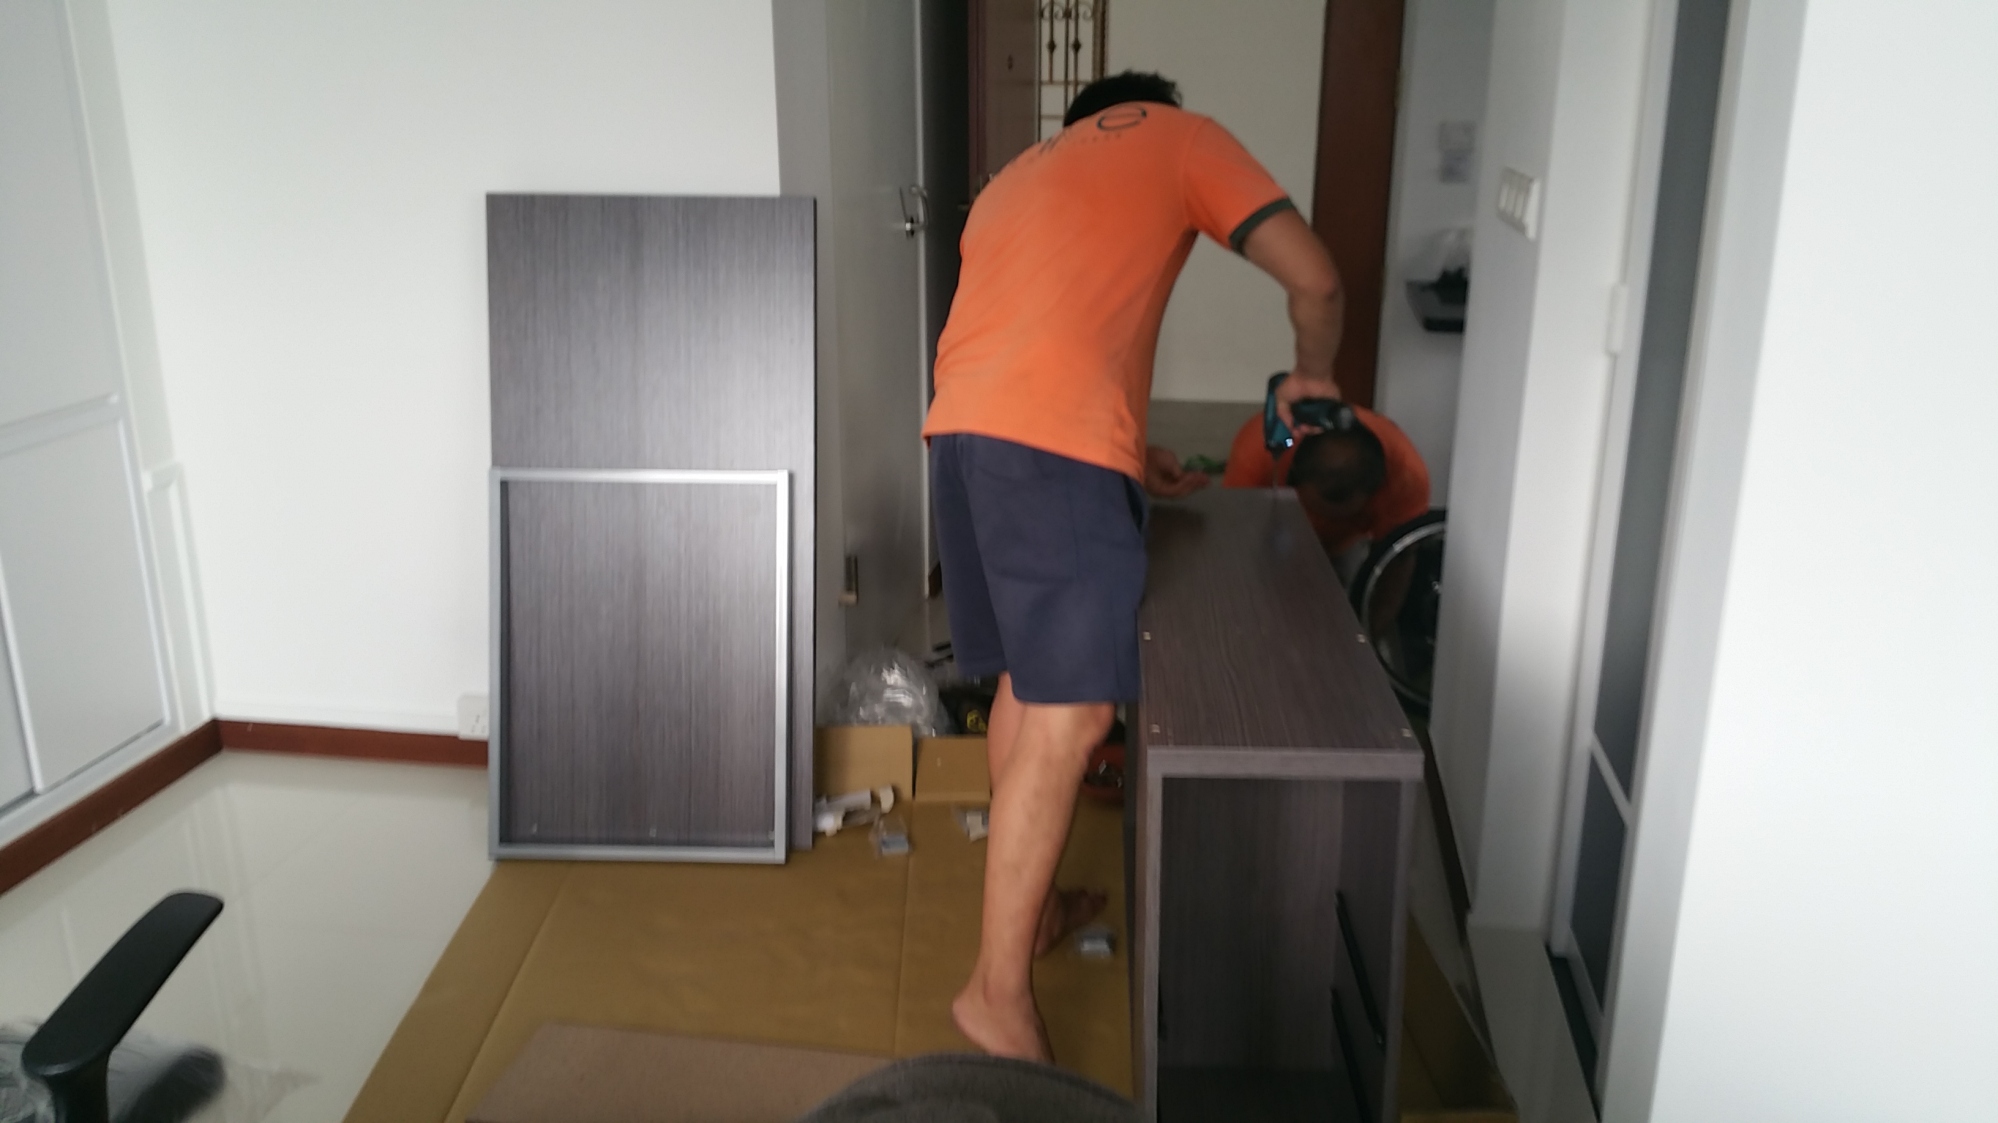
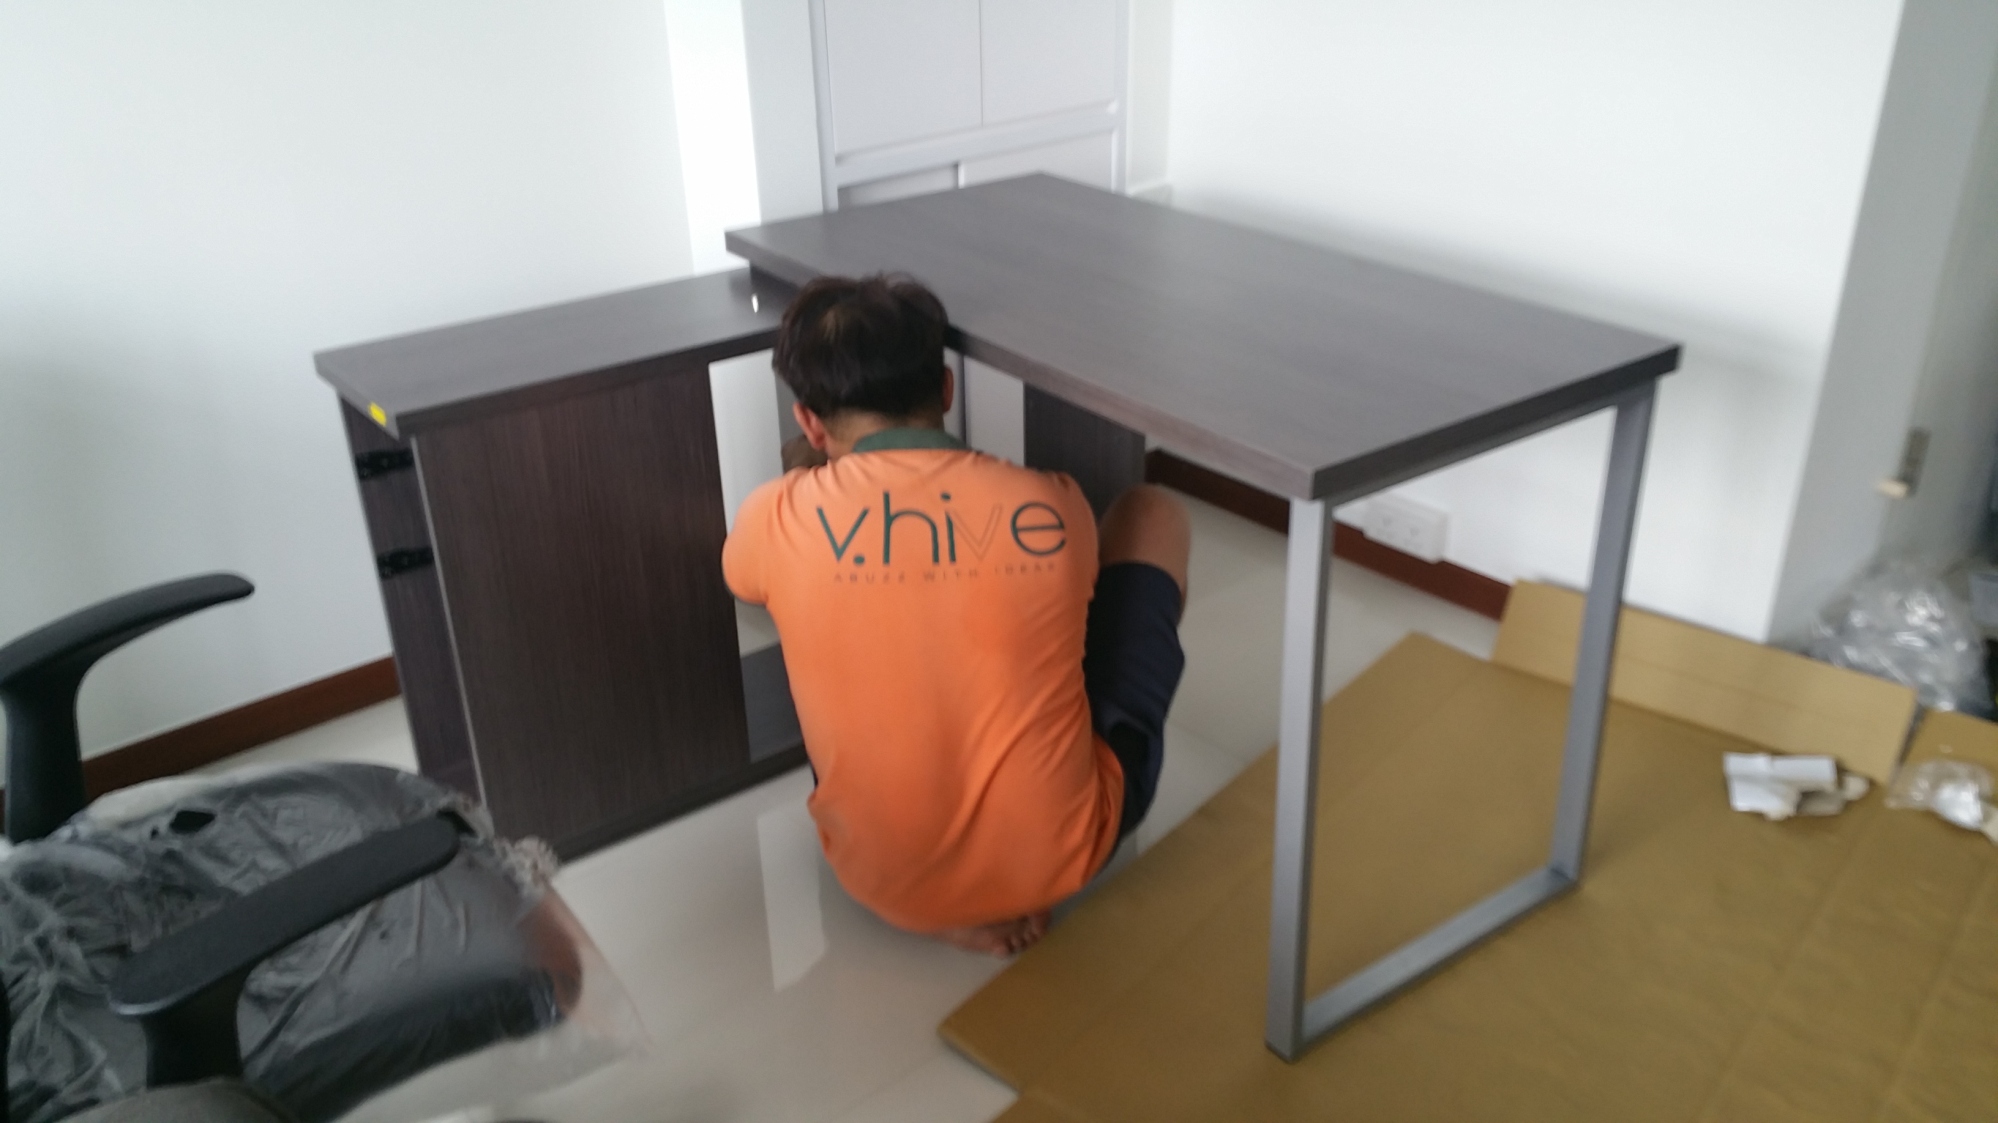
(VHive) Delivery and Installation of my Computer Study Table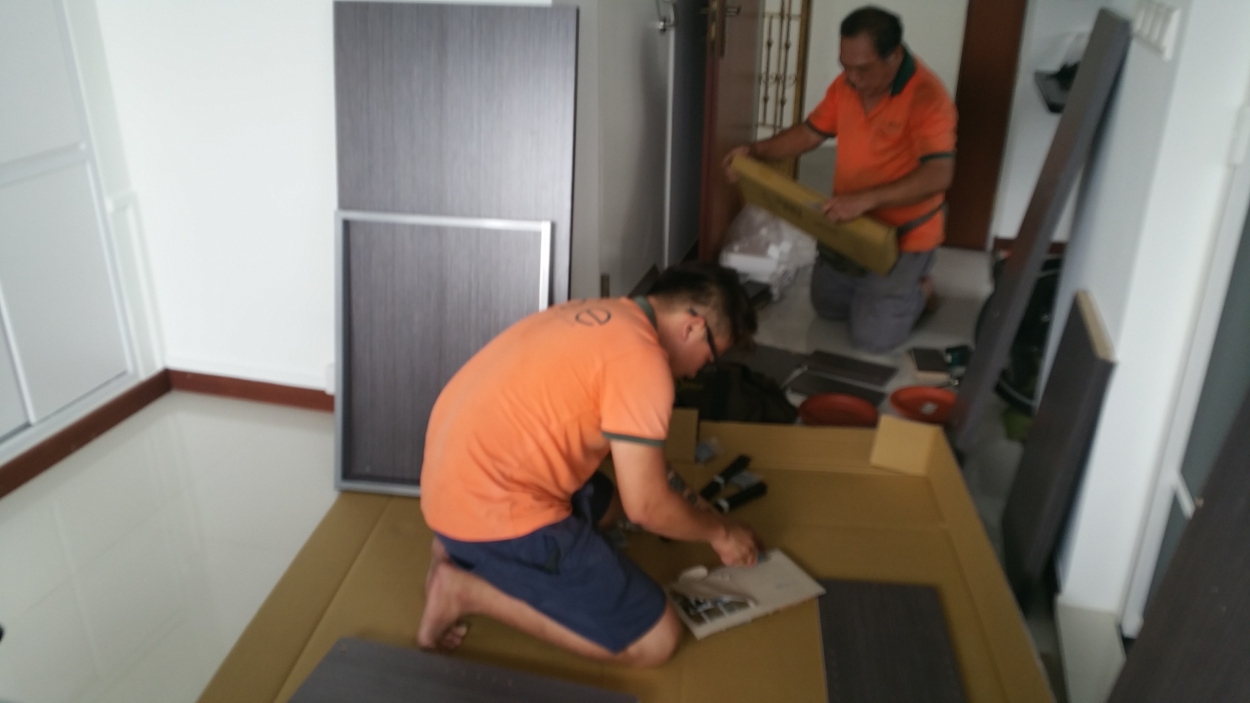
(Courts) Delivery of Sofa and small Living Room Table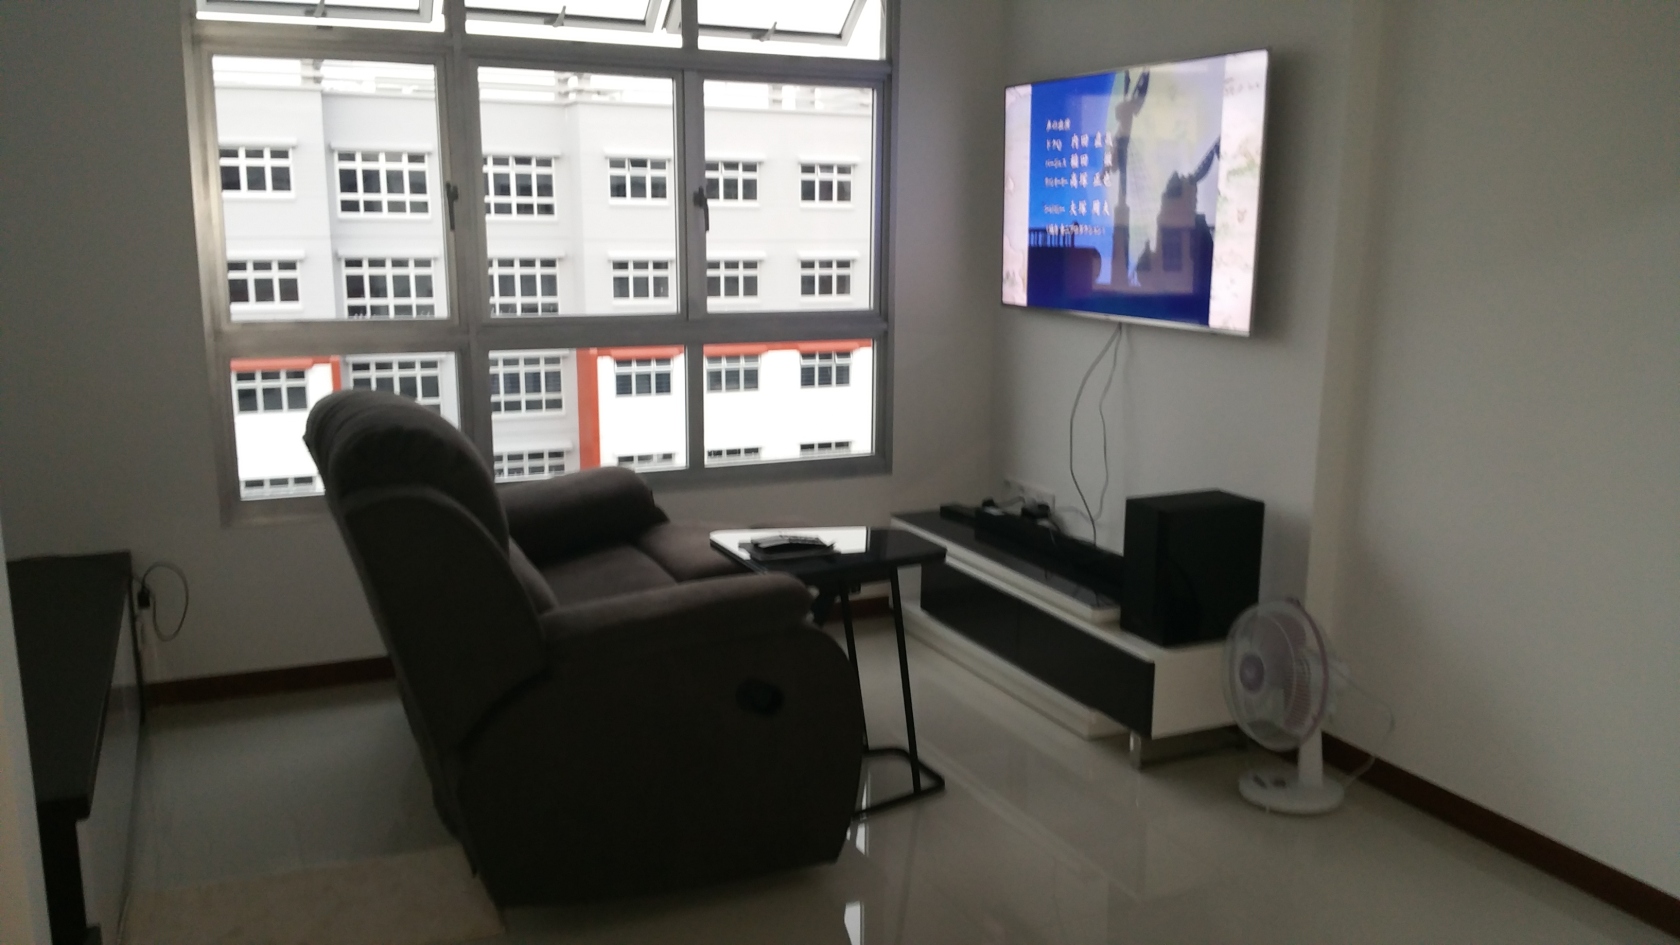
(VHive) Delivery and installation of Vertical Display Cabinet Case
================================================================================
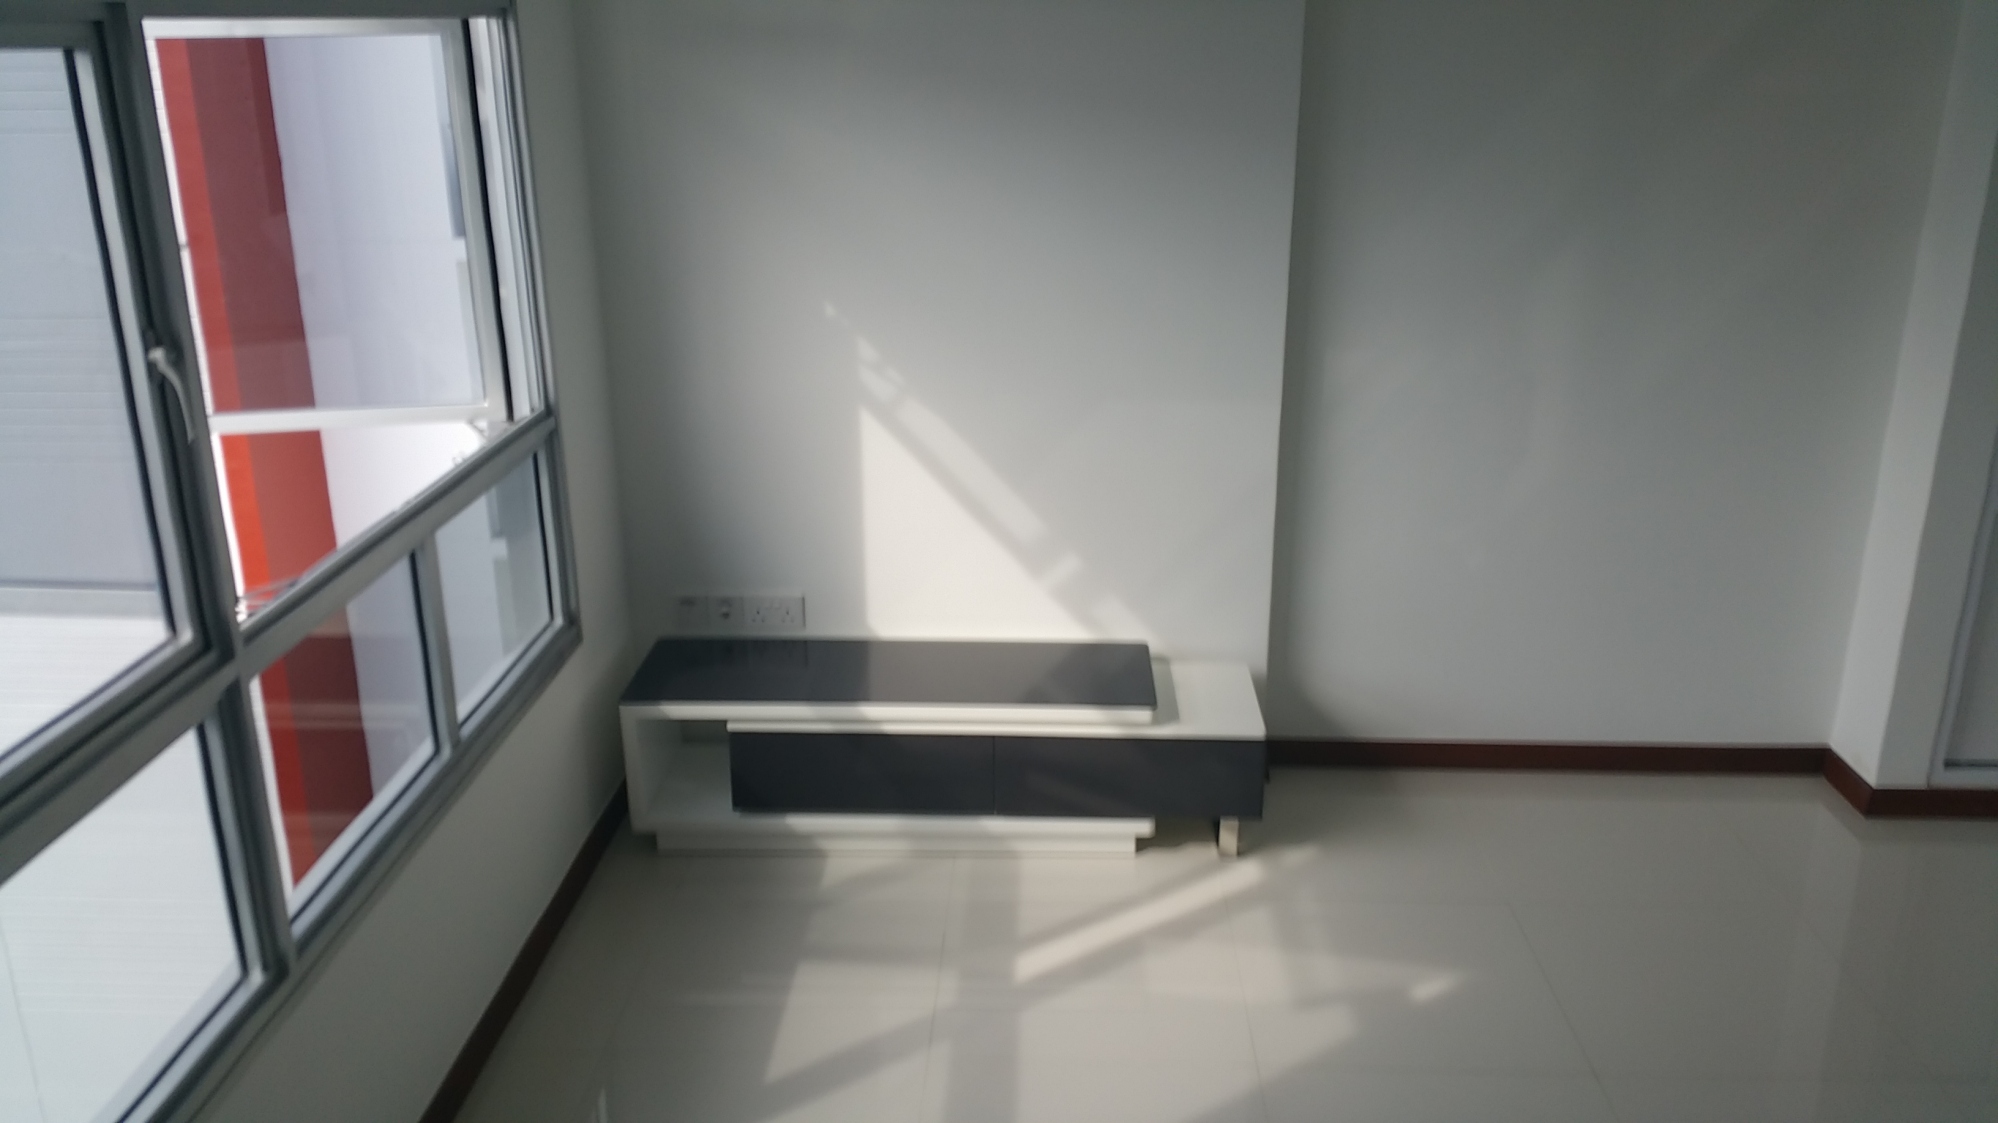
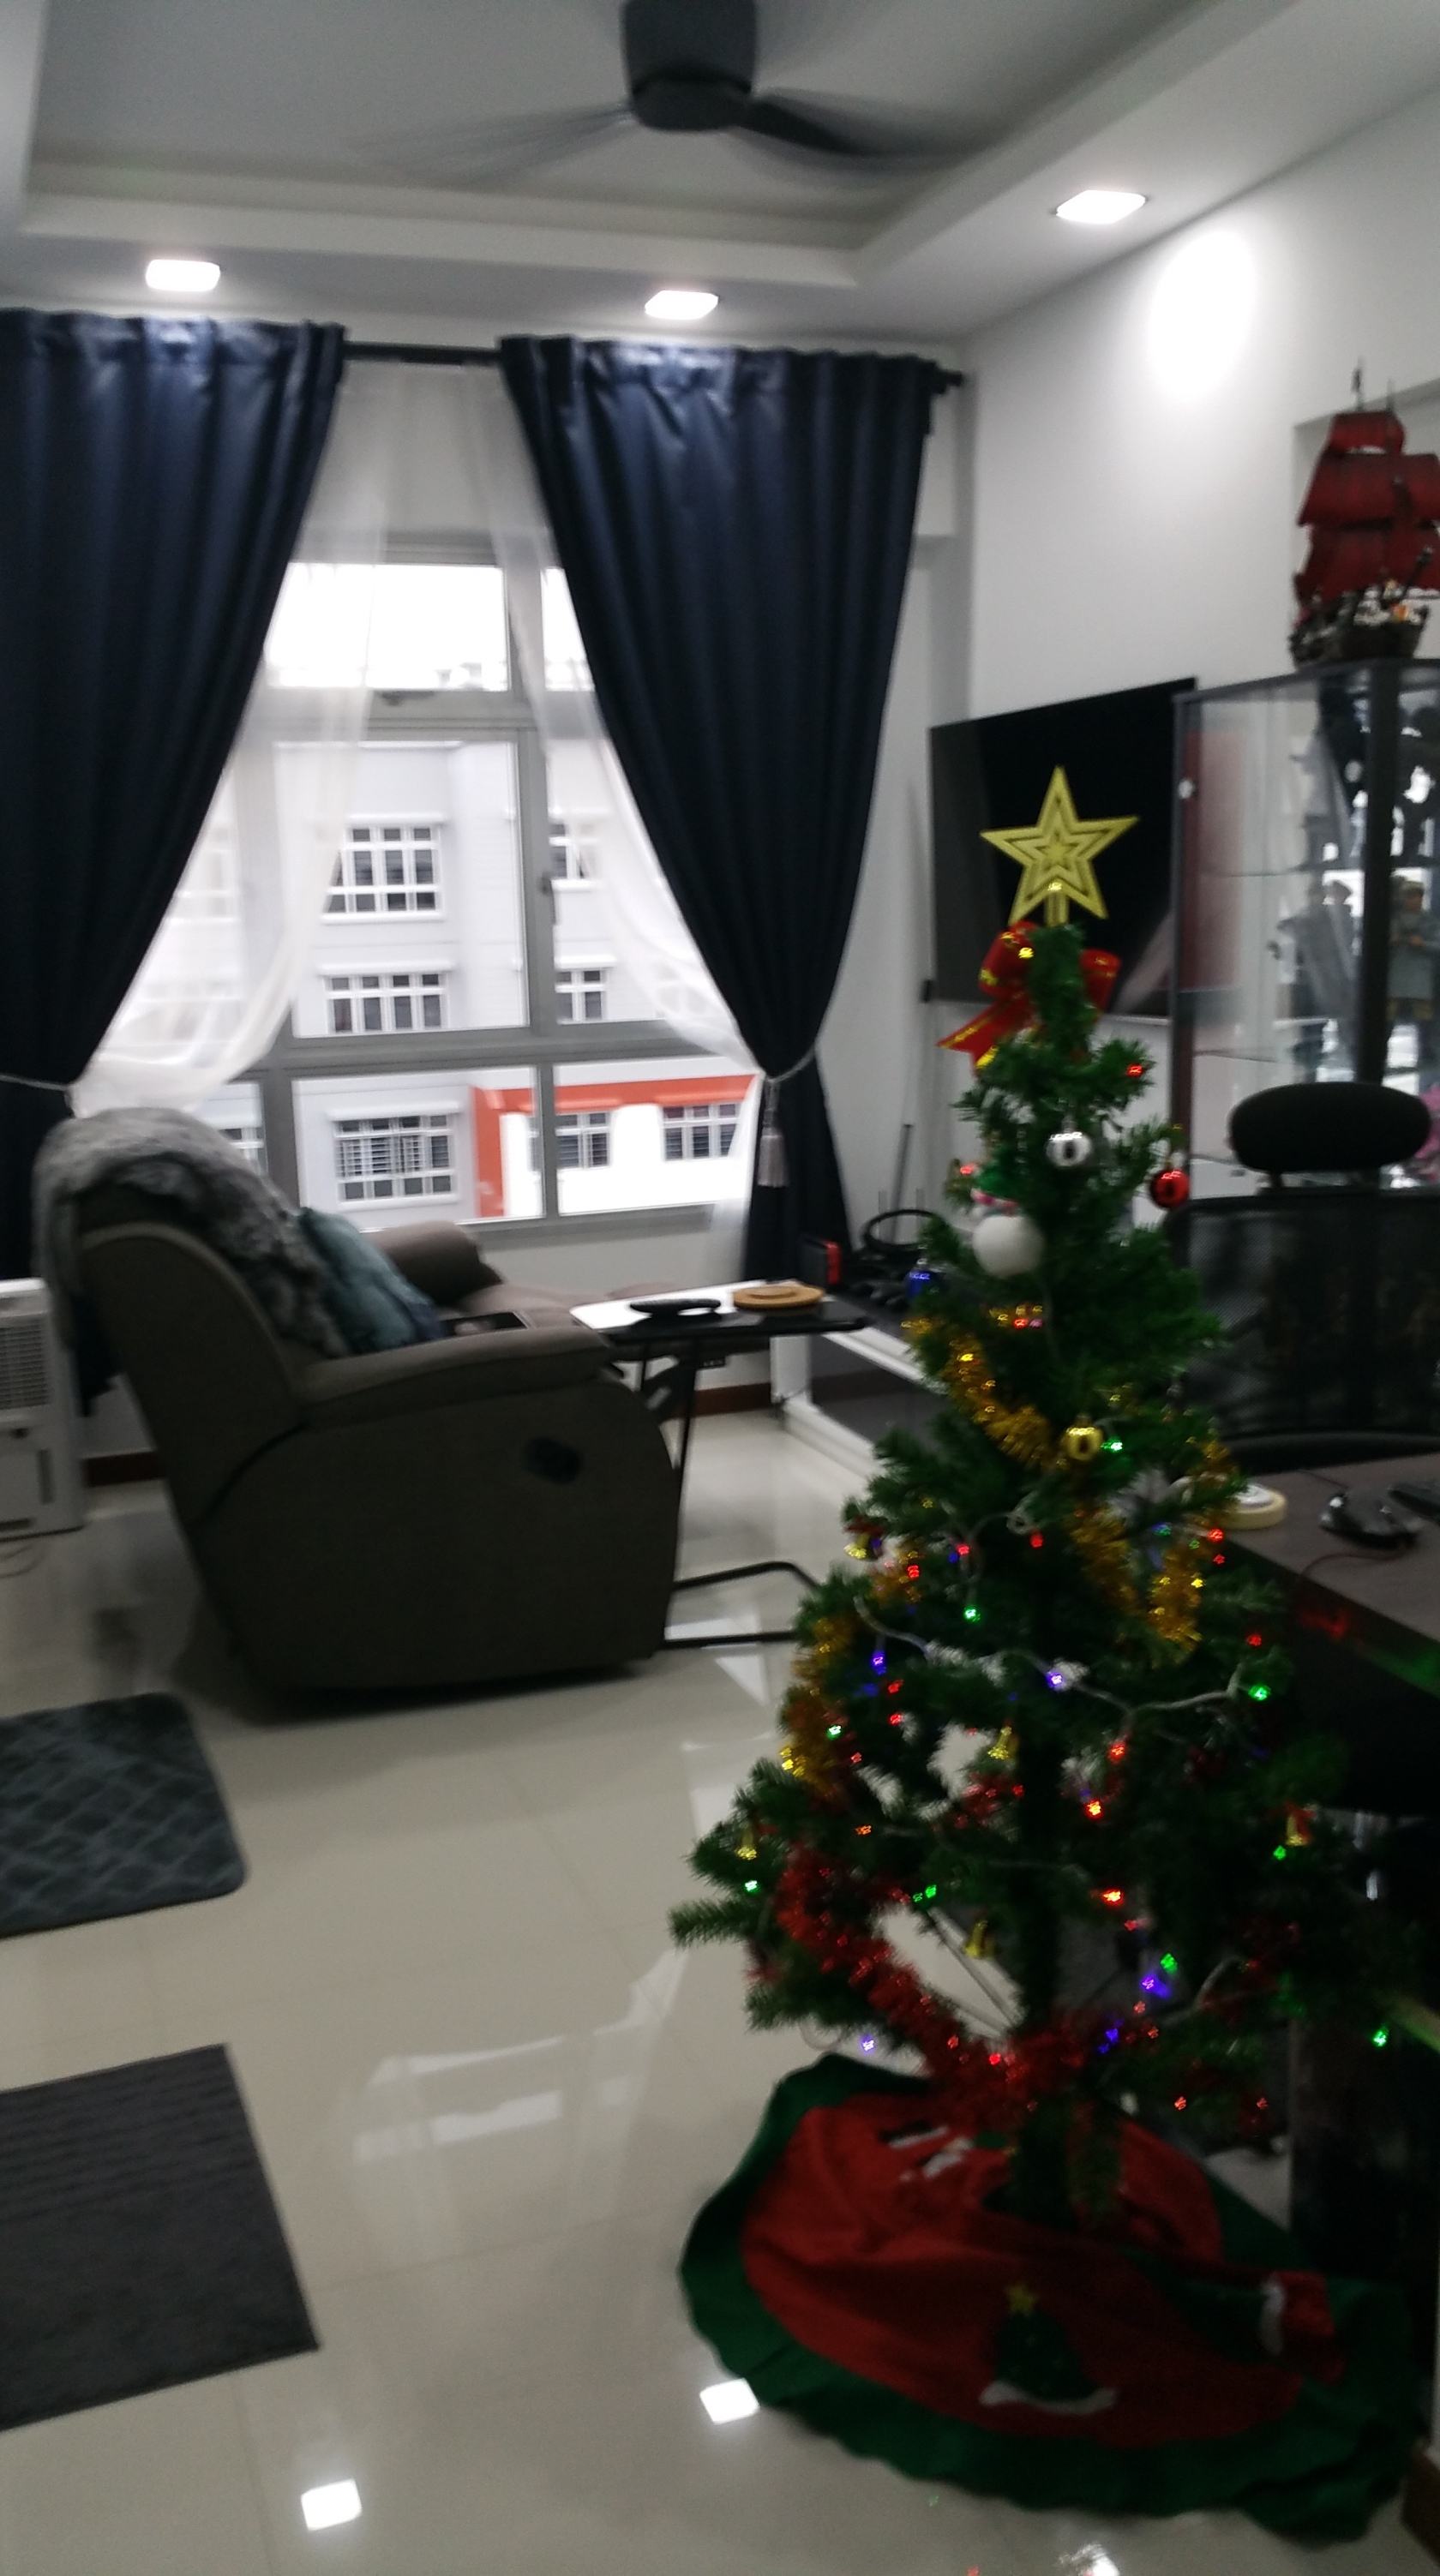
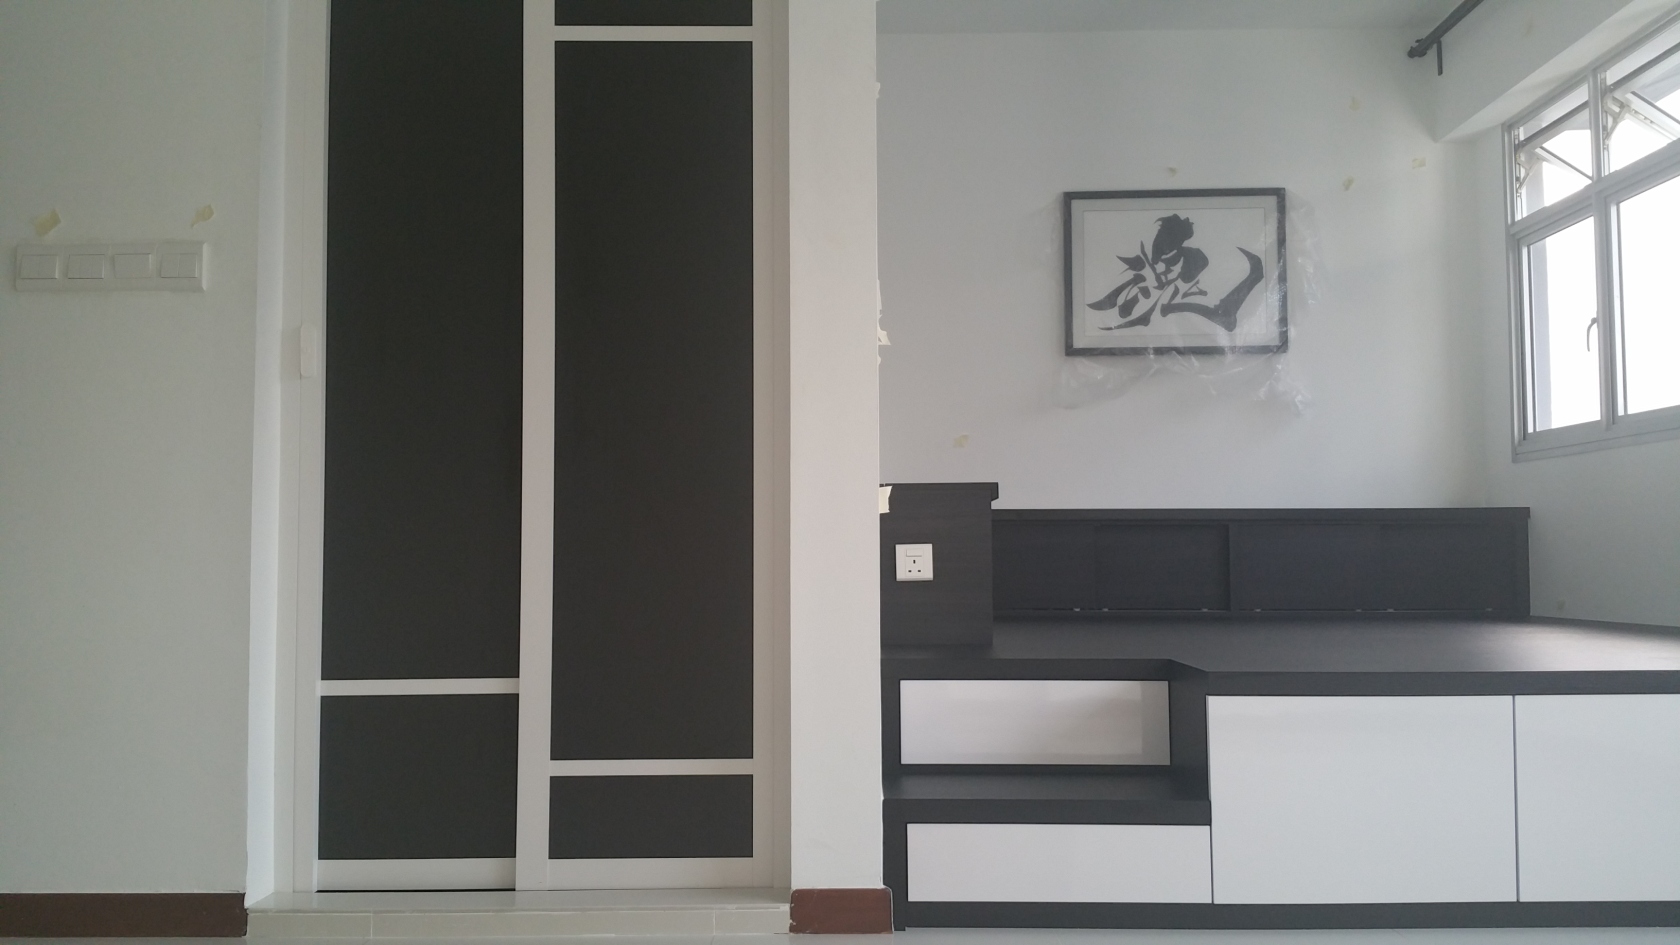
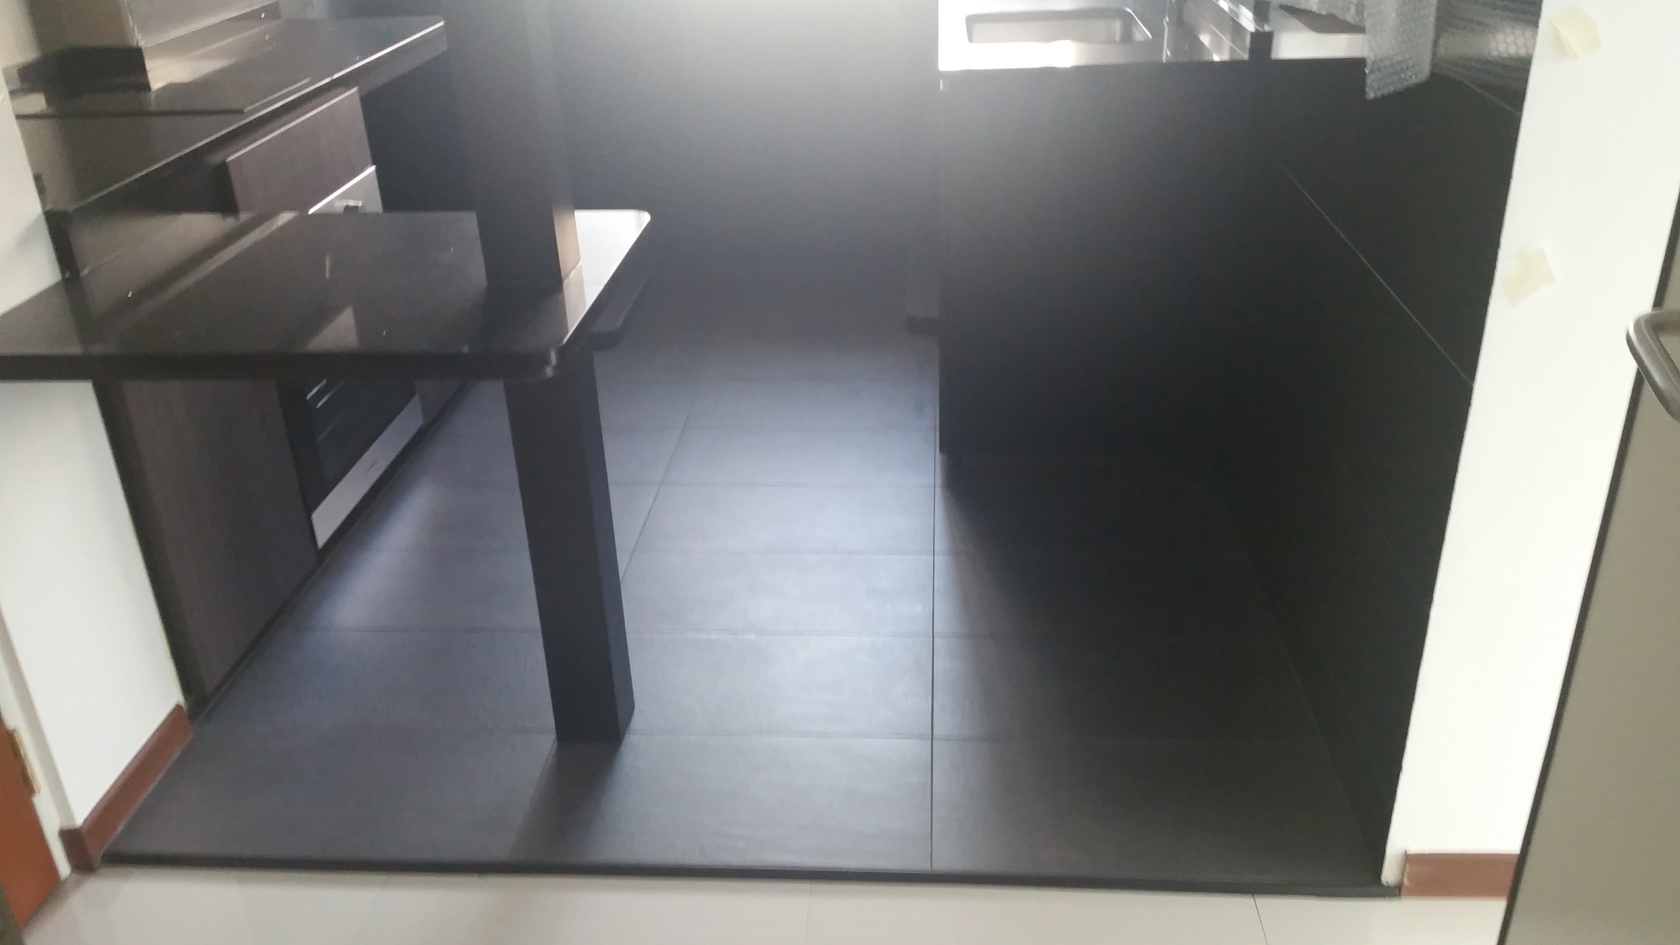
Here is how my Living Room looks currently, 1 month after all the deliveries:View from the Kitchen area
Another View from Kitchen Area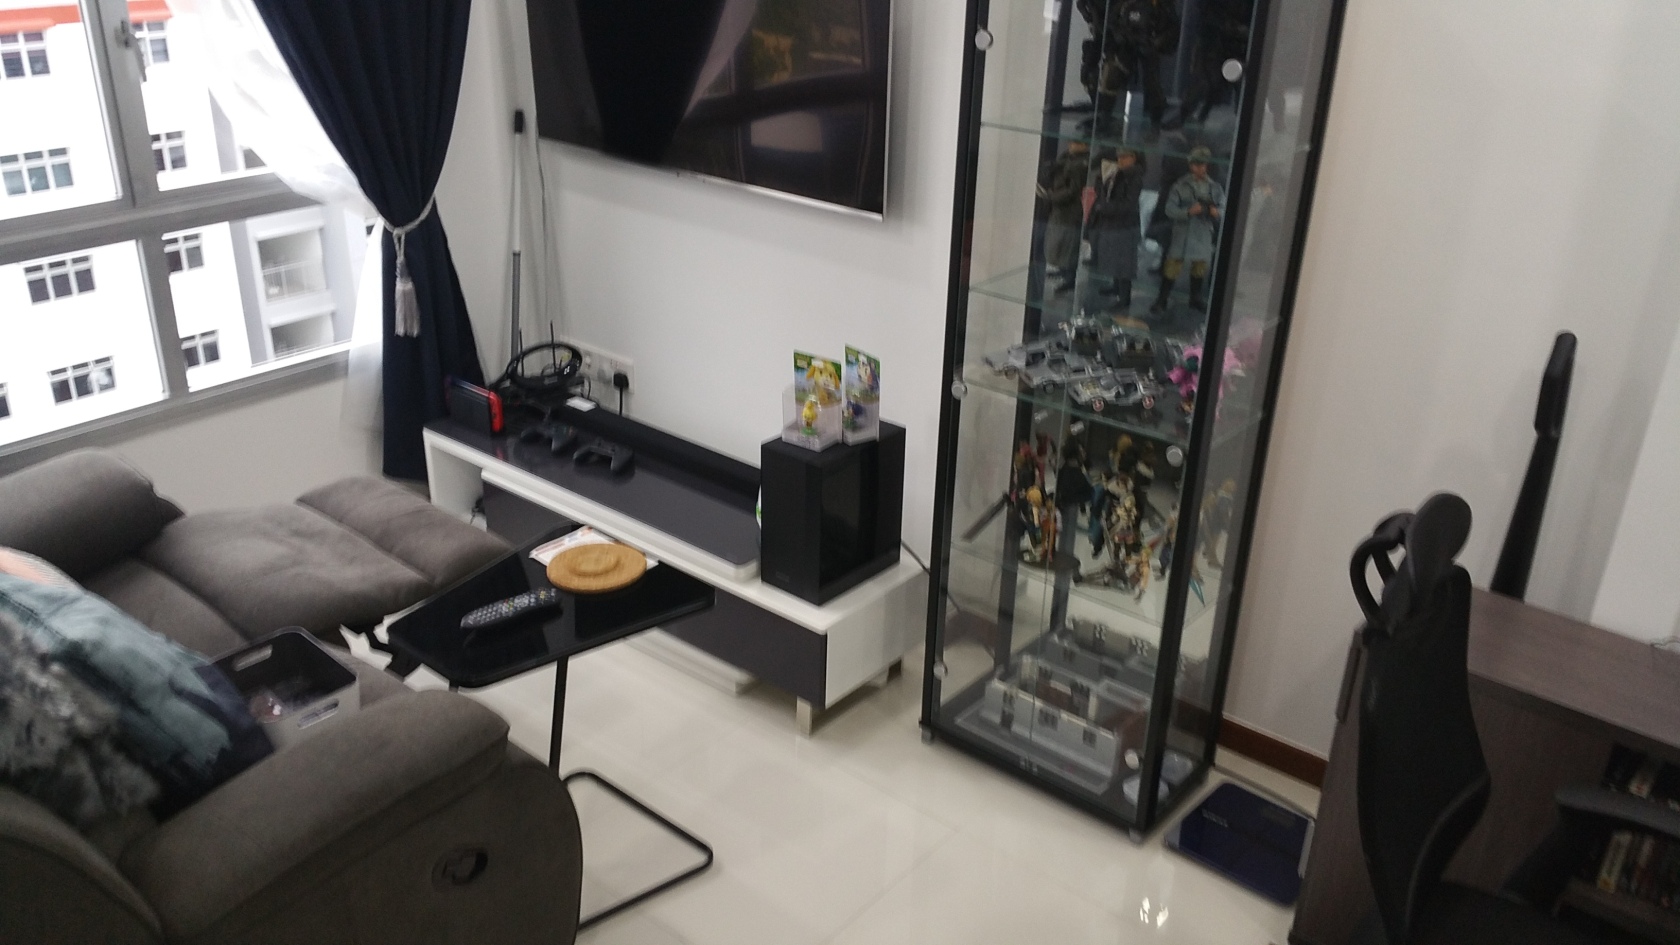
View from the Bedroom
View from TV side of the Living Room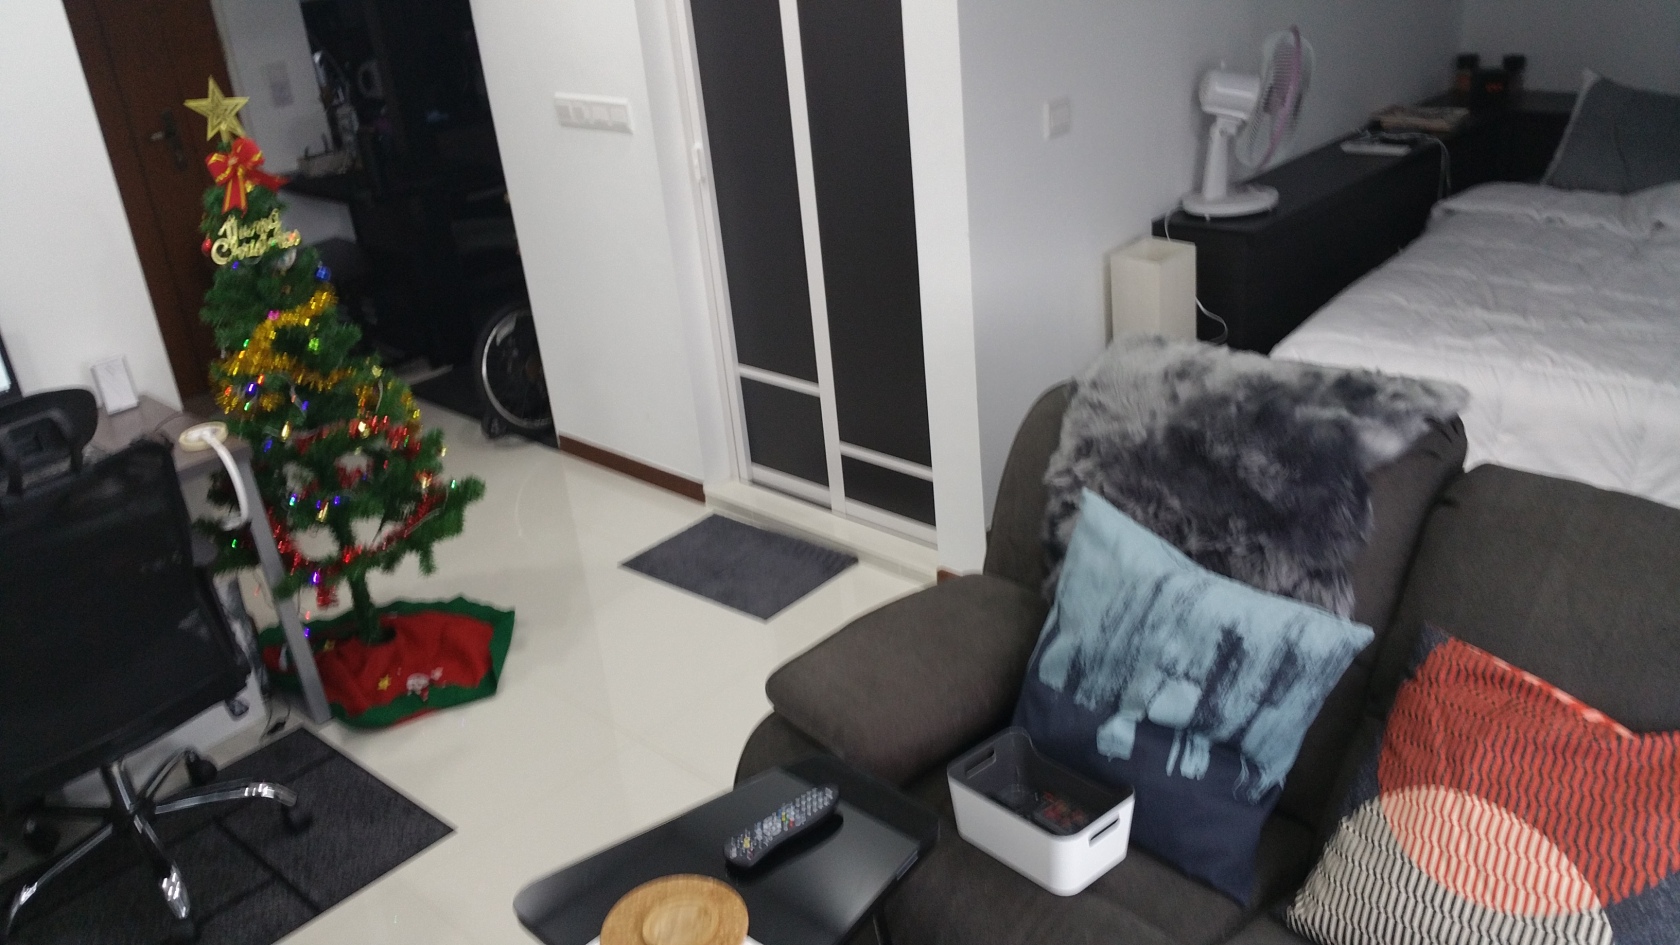
================================================================================And so that is my Living Room.
Sorry it was such a long wait, and I still got a couple more blog entries to cover before I officially retire.
(such as the conclusion of my IKEA curtain guide). Hopefully it won’t be another long month for the next Blog Entry!Merry Christmas Everyone and a Happy Holidays!!
Click Here for the Next Blog Entry:
Post Renovation – Slidearm and HDB Bomb Shelter Walk-In Wardrobe
Click Here to go back to Page 1 - Table of Contents-
 2
2
-
-
On 12/17/2017 at 12:02 PM, justmeonly said:Do you mind sharing with me your quotation?
Hi, Renovation quotation is about 25k.
Actual essential renovation costs during renovation adds up to about 31k. (not including Furnitures, Appliances and Air-Con) -
20 hours ago, huairen said:Maybe they saw your rant here! Haha! Congrats on your Reno! Now it's my turn for the headache and stress
hahaha ya lor maybe
hopefully everything turns out fine.
Yes renovation is challenging, but it can be very fulfilling.
I hope to see your blog too!!
-
Hmmm I might be choosing another vendor to do the pole wardrobe,
Smart Home doesn't seem very responsive with their replies, they don't seem very eager for my business lol.
Have PMed Rufus's friend see if she can do the pole wardrobe instead. Hope it works out.Edit: lol suddenly got a call from smart home.
maybe they're really busy. i got them to install slidearm and they did do a good job of it. ¯\_(ツ)_/¯ -
19 hours ago, Melvin Kin said:beautiful house still ryant.
Just curious , where do you place your utilitys things? Vacuum , ironing board / iron , majong table (if any ) boxes of stuffs, since store room is used for walk in closet.Thank you.
Pole wardrobe is still on its way and if everything goes nicely, I should still be able to store ironing board, a vertical vacuum cleaner and storage box.
-
5 hours ago, neutronstar said:Congrats, your house looks really nice =)
Thanks
")
-
1 hour ago, bykaraanne said:Like your blog + your bachelor pad (?) is looking good!!
")
cant wait to see the final post!
Thank you very much, i'm glad you like it
-
2 minutes ago, SuperZ said:No doubt this is one of the best renovation I have seen. In the beginning, you mentioned about $25K. But through the process, you encountered a lot of mishaps. Just a matter of curiosity, what is the final total renovation amount?
Thank you very much for your compliments!
Yes quotation is about 25k. Compared to other horror stories in the forum I would say mine aren't mishaps,
more like annoyances lol Actual renovation amount not including furnitures and appliances is 30k++
I will be posting my budgeting spreadsheet where I will put in every single item where possible of my entire renovation.
Taking abit of time though because i'm currently still working on my next Blog Entry about furniture and furnishings on my Living Room -
Blog Entry Date: 23rd November 2017 Thursday
Click Here to go back to Page 1 - Table of Contents
Post Renovation - Furnitures and Appliances (Kitchen)Sorry its taken me so long to post this, quite alot of action happened this week.
In fact, I think i’m gonna split them into separate blog posts.Monday 20 Nov 2017 was the official Handover day, when Jason officially handover the apartment
back to me and after my final inspections, I paid the last 10% of my renovation fee to him.It was also the day when my furnitures and electrical appliances start coming in, and there
was a slight hiccup with the washing machine piping, which I will discuss in detail below.
---------------------------------------------------------------------------------------------------------------------First up, the guys from Courts came and delivered my Refridgerator and Washing Machine.
No issues with the fridge, and I was advised I need to wait about 4-5 hours before turning it on.
I’ve read about this, because during delivery, some chemical in the refridgerator gets sloshed about,
and it needs some time for it to settle down after installing otherwise fridge will spoil if you turn power on too early.Installing the Refridgerator

Refridgerator Installed
I like it that there is a nice gap allowance at the side nearest to the wall
for me to be able to discreetly store brooms and cleaning equipment.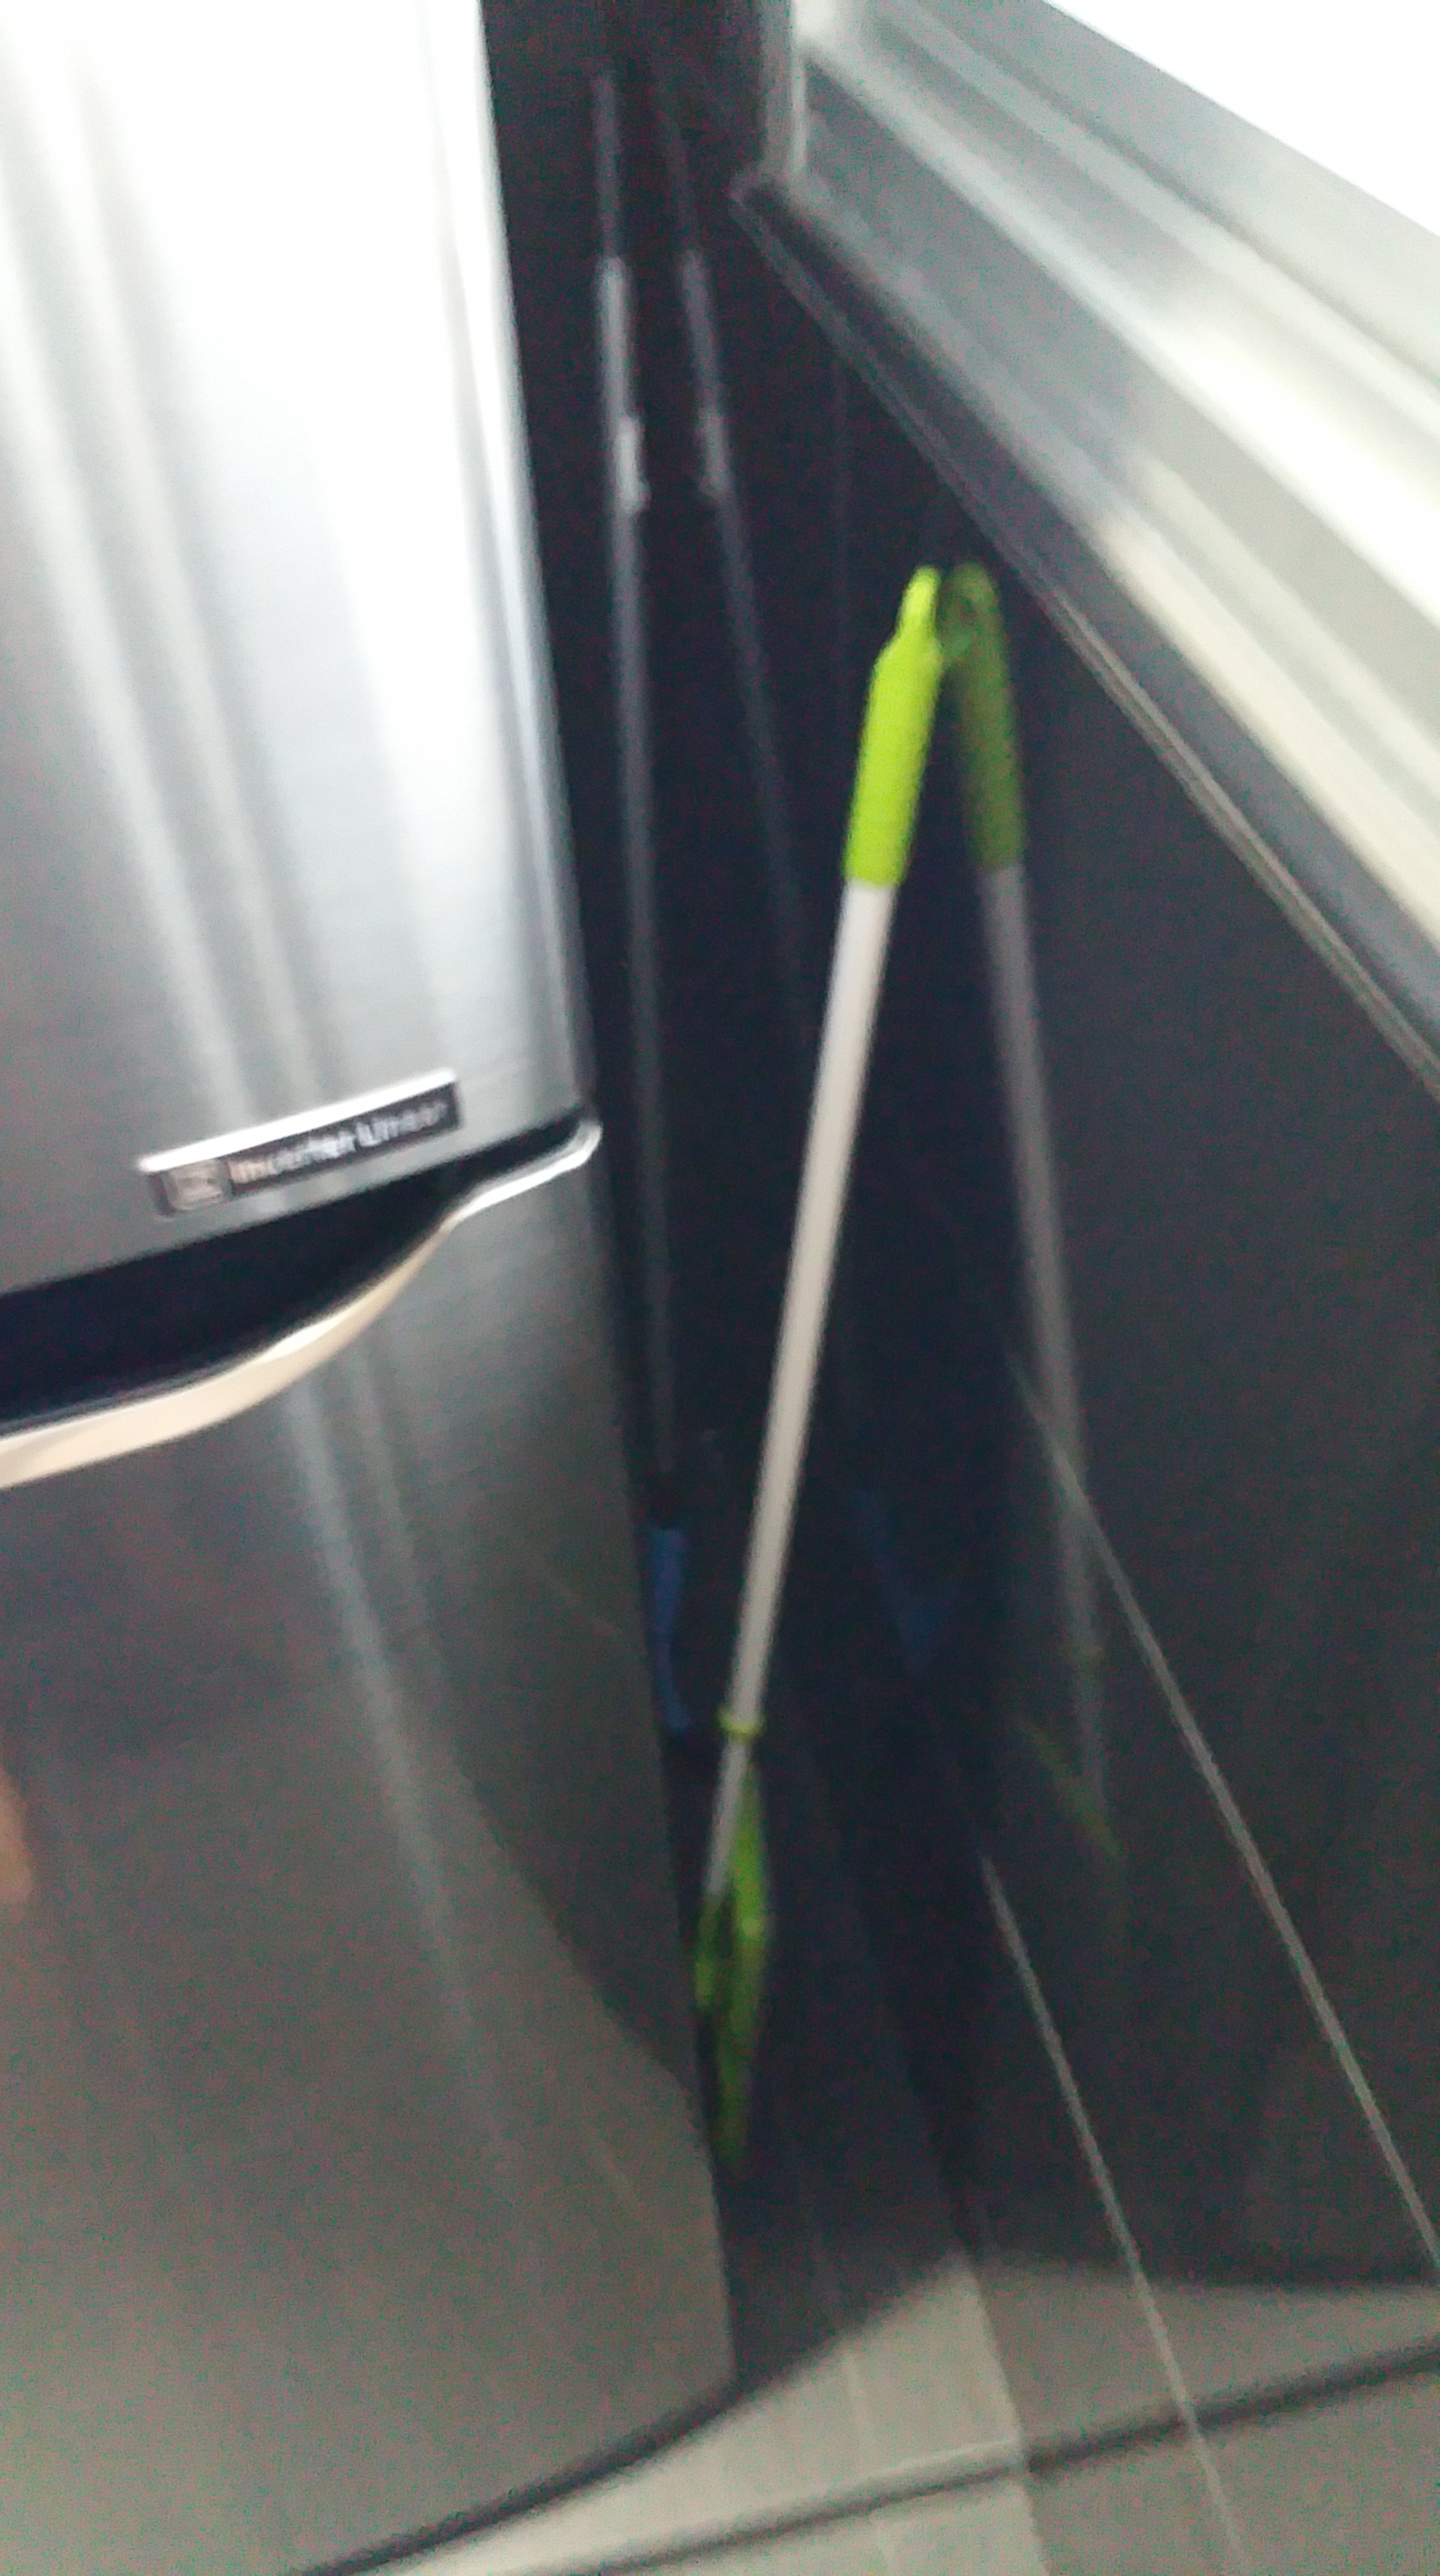
---------------------------------------------------------------------------------------------------------------------Next up, the Washing Machine had some problem with its pipe not being able to connect to my HDB tap in the Kitchen.
HDB’s tap is those “Push In to Lock” type but the Washing Machine head I got was the Screw In Type.
This was not an issue because Jason and I had already pre-empted this to happen.But what happened next was something that should have NEVER been done, according to Jason.

The installer guy from Courts actually rotated the HDB tap clockwise
in an attempt to show me
that I can simply take out the HDB tap and buy a different water tap from any Hardware Shop
that will then allow me to connect up to the Screw In Pipe that came with the Washing Machine.When Jason came later and inspected the tap, he found that it was actually LEAKING.

This is why you should NEVER EVER turn this tap because it actually connects to
the internal water piping in the walls which will leak if the tap is loose.This is the Default Tap installed by HDB
DO NOT ATTEMPT to twist or turn it in anyway!!
This is the incompatible water tube that came with the Washing Machine
To resolve this, Jason immediately called his Plumbers who arrived on-site.
He already had them on stand-by so they came quite fast.

What they did, was of course first repair the damage done by the Courts Installer guy so the HDB Tap no longer leaks.
Instead of using the HDB Tap to supply water, they used the water pipe meant for the Kitchen Sink
and installed a 2-way pipe to route water also to the washing machine below the cabinet.This is the Original Kitchen Sink water pipe before modification

This is the 2-way pipe that was installed.
Because they needed to route the hose discreetly out to the washing machine,
they cut a hole and put in a plastic cap to nicely hold the water pipe going to it.
This is how it all looks when photographed together.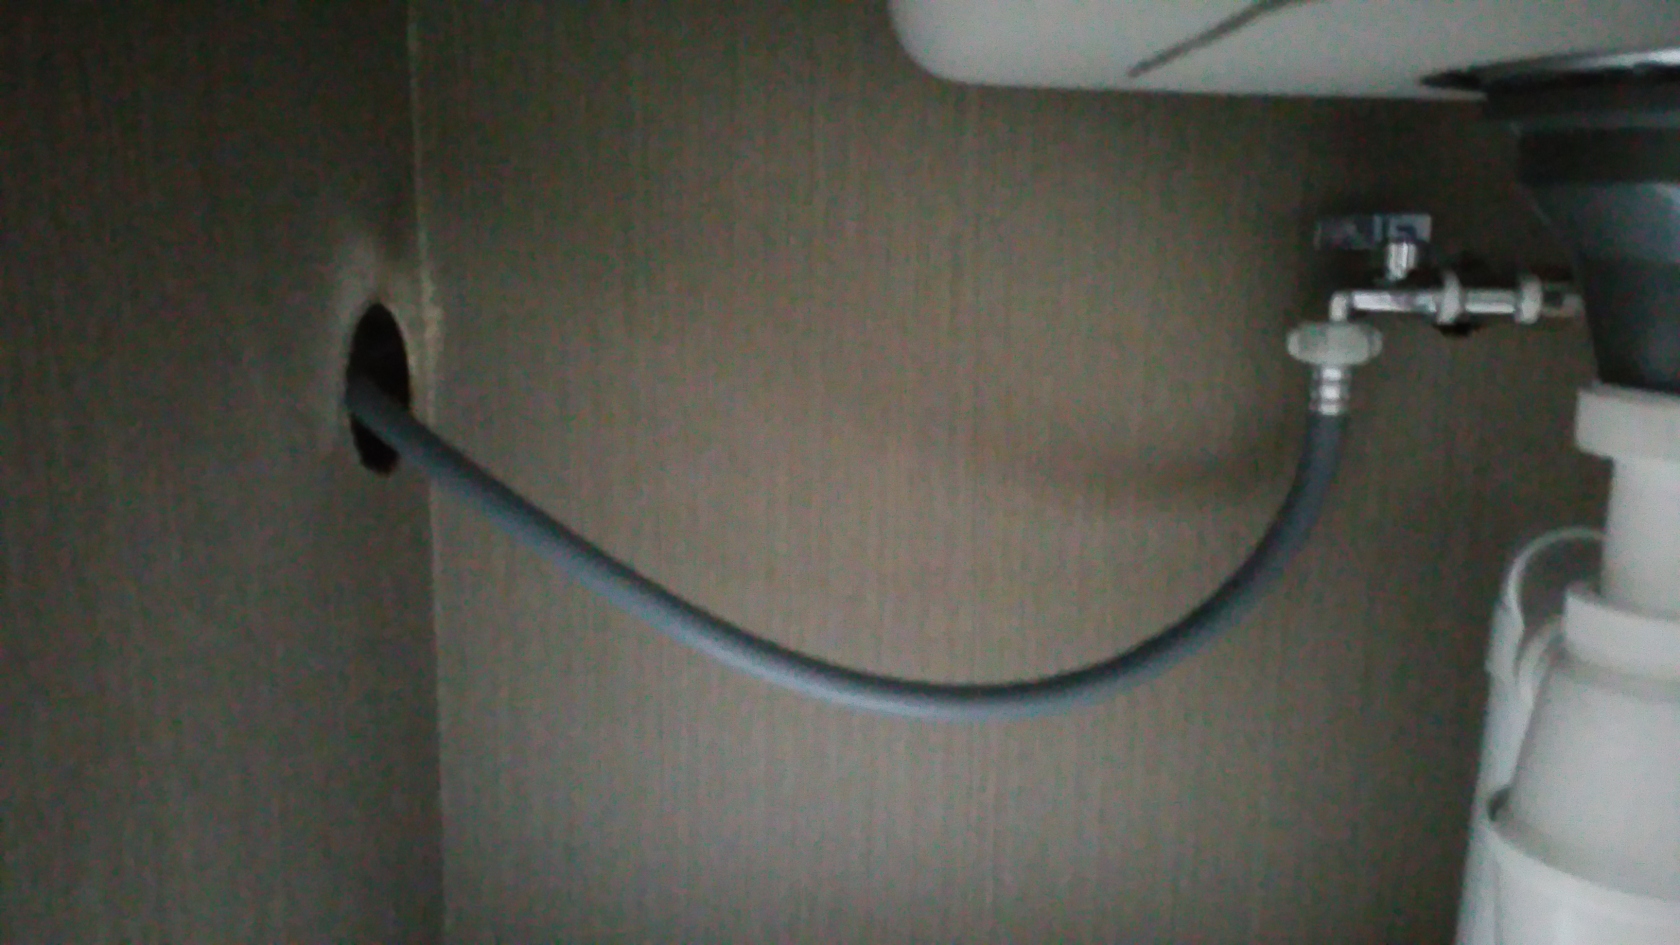
Washing Machine finally installed successfully.
Everything was installed nicely, and I was even able to do my first wash successfully.
Kitchen Sink’s water pressure was also not affected and the whole thing looked perfect.
Instead of just getting a compatible pipe to connect to the Kitchen Tap, this alternative way looked alot neater with
all the pipes hidden away beneath the Kitchen Sink, and best of all he didn't charge me anything for the parts and labour.Dear Readers, Lesson Learnt.
Luckily Jason was there with his Plumbers ready and standby to resolve the issue quickly.
I myself didn’t know that you couldn’t turn the default HDB Tap. So remember if you’re getting
Installers install your Washing Machine, DO NOT let them touch that HDB Tap if you have it in your Kitchen.Tsk tsk tsk. Looks like Courts haven’t been giving their installers proper plumbing training when installing
Washing Machines. I wonder how many homes were affected with water leaking because of what they did? For Shame.
---------------------------------------------------------------------------------------------------------------------
Next up was this nice Kitchen Trolley I got from VHive. I love how it looked with that marble top
and it also functioned very well as additional storage + portable Kitchen Counter-Top.
This is how it all looked standing together with my Refridgerator (Left) and Washing Machine (Right)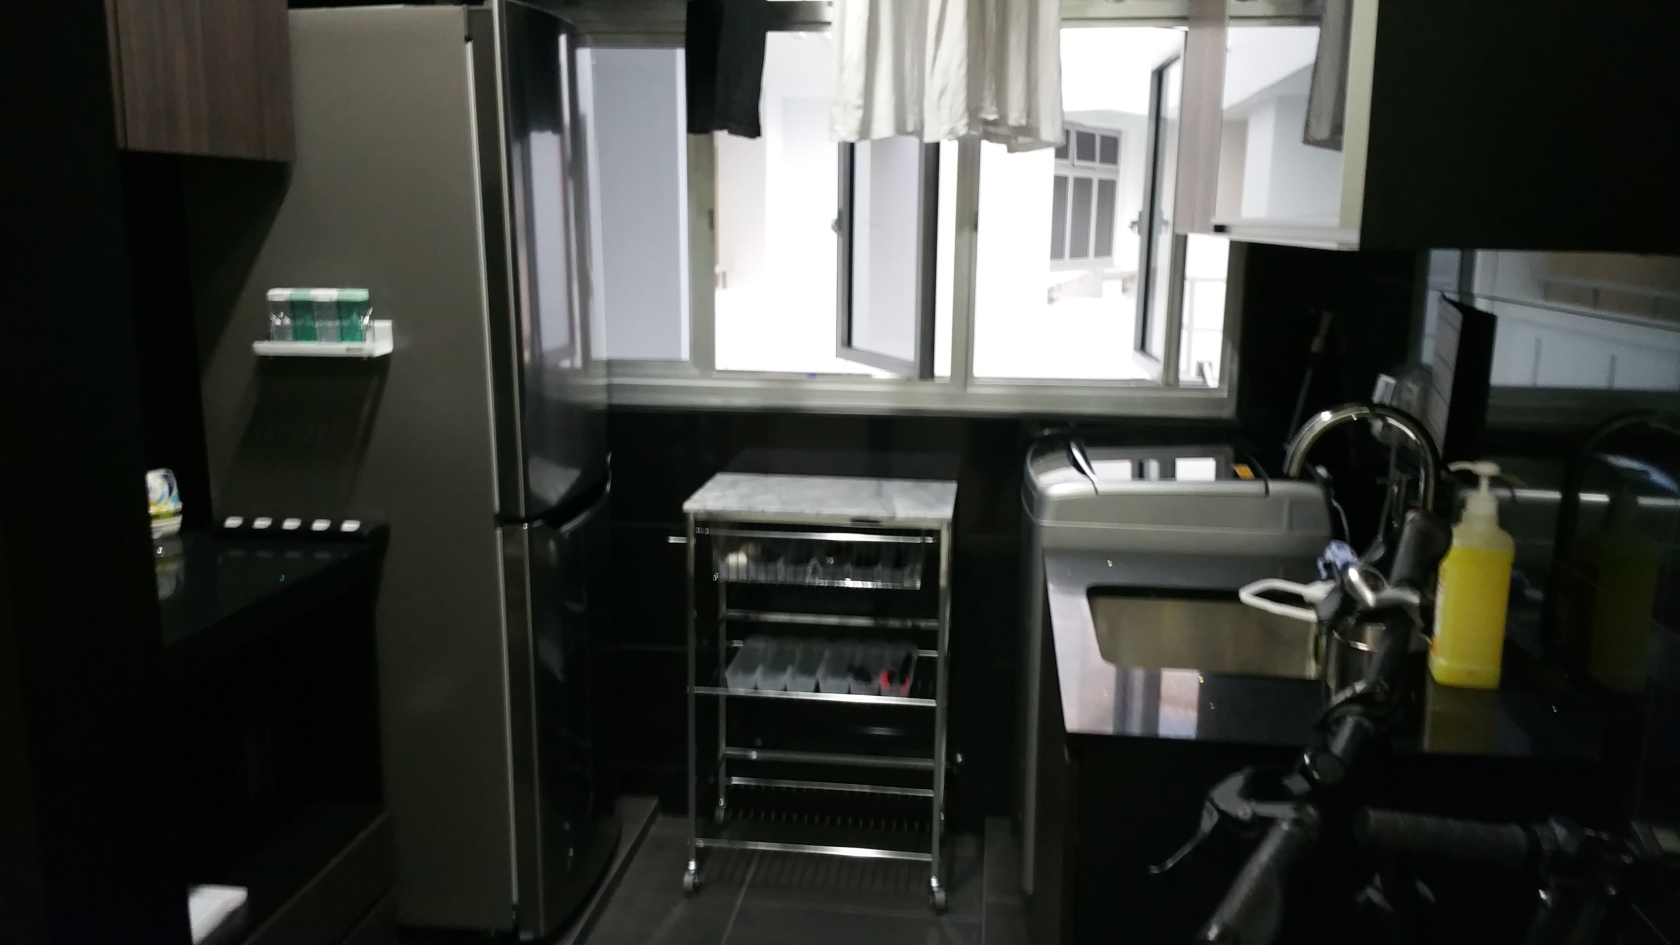
I’m especially happy that while the Lower Freezer door of the Refridgerator is blocked by the Kitchen Trolley,
I am still able to fully open the Top Part of the Refridgerator with the Trolley still there!!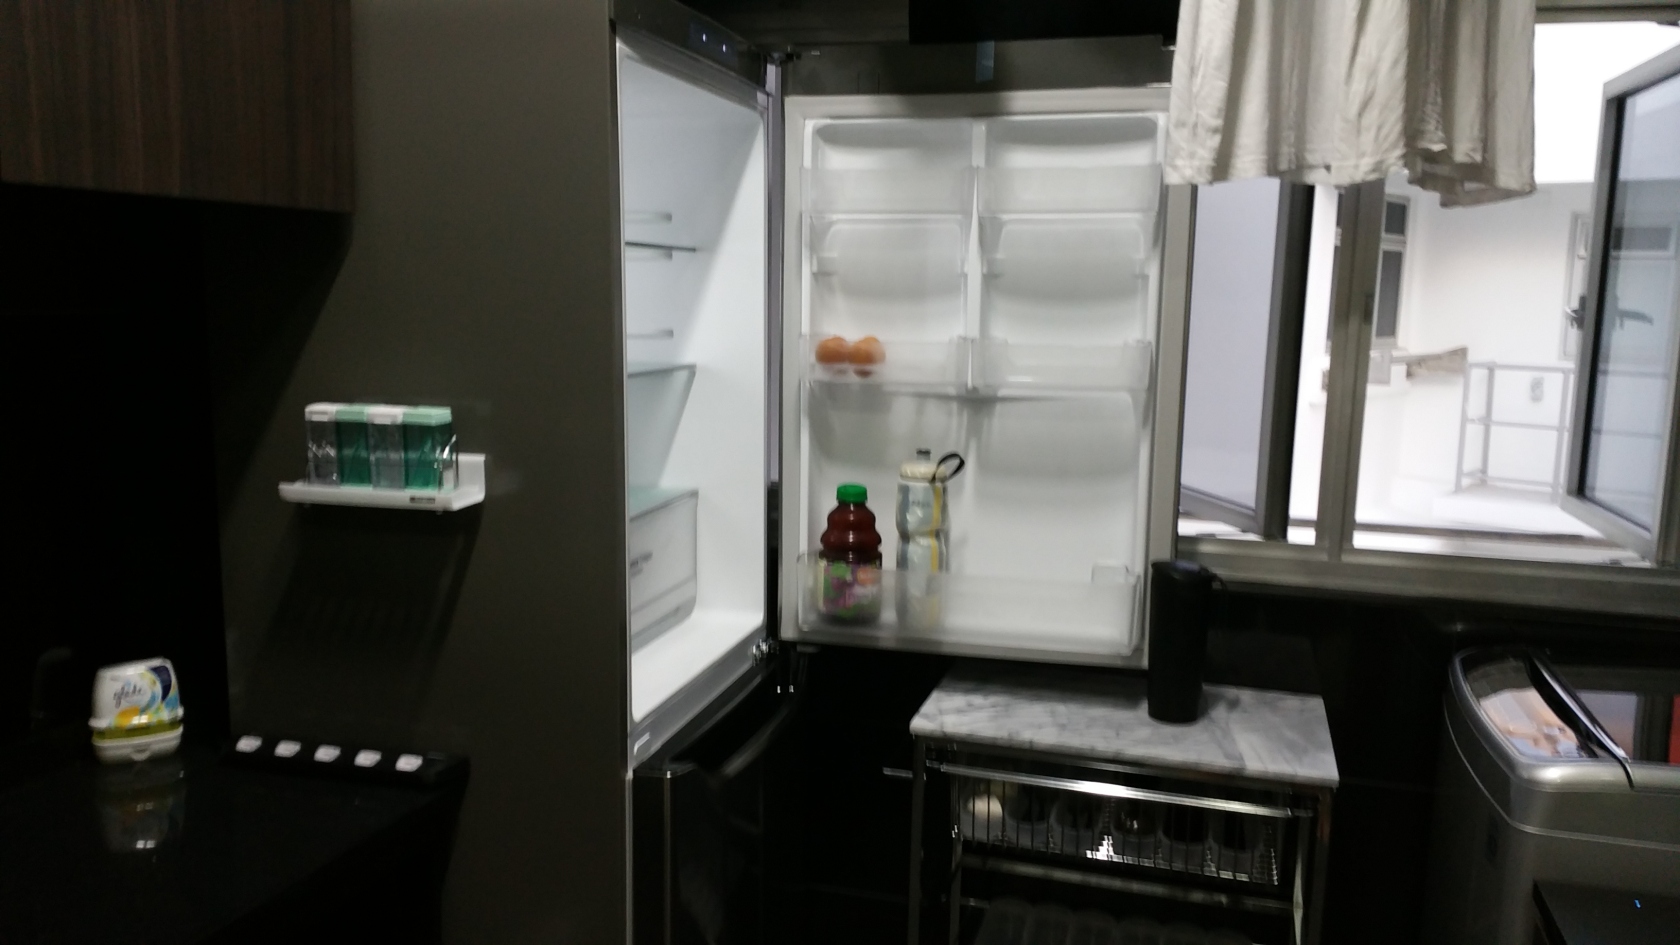
And here are some pictures on the Kitchen so far after some furnishingsRemember the default laundry rack from HDB that I did not want to remove?
At first I was thinking maybe I should’ve changed to a smaller version.
However, after doing my first laundry, I realized the extra space above my Refridgerator allows
me to be able to nicely accommodate and hang some of my short pants which is not too bad.
Another view of the Kitchen.
Remember this space I have in the Kitchen? Now I can use it to store my Foldable Bicycle and also E-Scooter.
The conveniently located electrical socket also allows me to access charging point for the E-Scooter easily.
Spacing between Dining Table isn’t very cramped and I can still walk in and out smoothly.
I’ll need to buy a long mat to protect the flooring against dirt where the bicycle is parked at though.
Addendum:
Added a bench and dining chair to the dining area to complete the look.
Waddya’ll think?
---------------------------------------------------------------------------------------------------------------------And so thats it for the furnishings so far for my Kitchen.
And you thought there are no more adventures AFTER Renovation huh?In the next Blog Entry, I’ll showcase furnitures and appliances delivered for my Living Room, so do look out for that!
As always, Thanks for your support and I’ll see you soon!!

Click Here for the Next Blog Entry:
Post Renovation – Furnitures and Appliances (Living Room)
Click Here to go back to Page 1 - Table of Contents-
2
-
-
1 hour ago, MiniBean said:I realized you don't have many things to store. Living room no cabinets

The Recliners sofa look comfortable!!
I assume everything stored under the bed since bomb shelter is occupied.
Actually i'm planning to get a display case like this to put right next to the TV.
I'm still deciding if it will make it look too cluttered.
Oh yes the sofa is very comfortable. I can't show it in the pictures, but they can recline close to 180 degrees.
I've napped there quite often at night while watching tv lol
Yea most will be stored at bed or the tv console drawers etc.
And if the pole wardrobe does it's job well, can put some barang barang also.
Trying to go minimalist too. Less Clutter = Less Stress -
On 20/11/2017 at 11:30 PM, CaseBlue said:Congrats!! So envy!! can I request a photo of your living room and bedroom together? Meaning looking into your bedroom from the living room diagonally also can and then from your bedroom out to your living room. I want to see how it look like for reference. Or did I miss any of such photos?
Thanks!
I prepped these photos to show in the next blog entry, but hey why not show a sneak peak
As usual, sorry for the bad image quality. my phone camera is potato lol
Here ya go!
Looking into Bedroom from Living Room diagonally.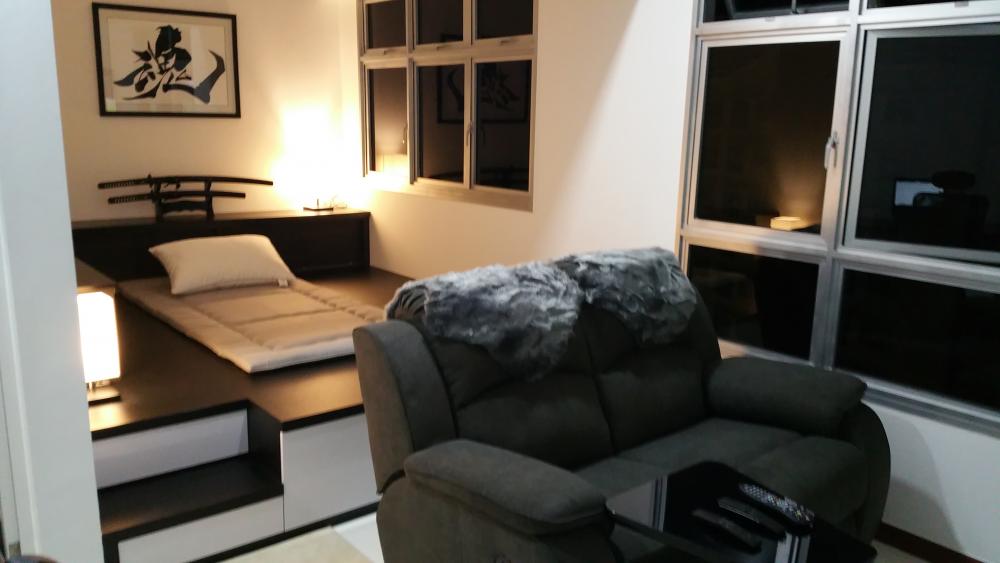
Looking from Bedroom out to Living Room diagonally.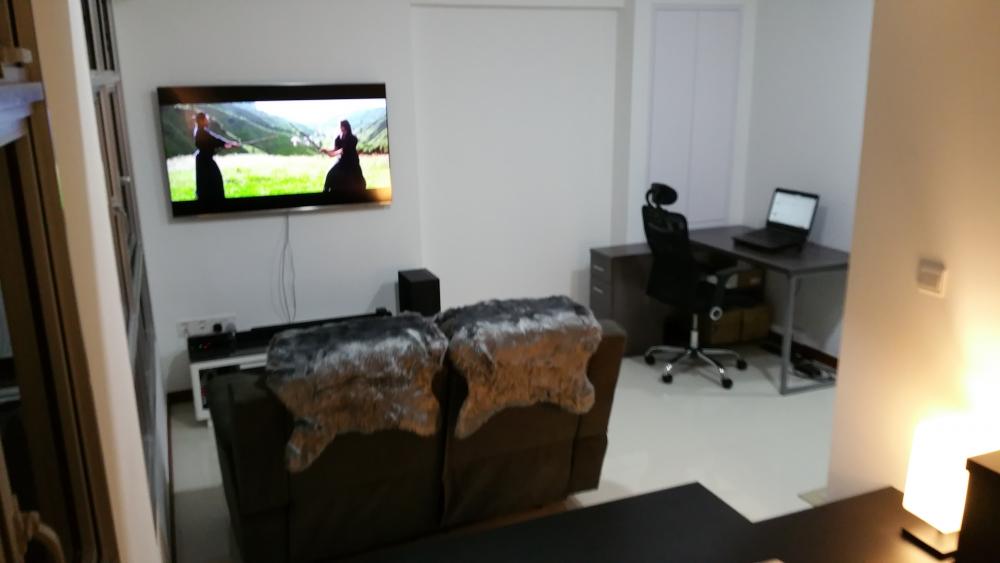 19 hours ago, Kelvin Cheng said:
Hi,
congrats on ur reno completion. May I know how is your built in wardrobe in your bomb shelter? I remember u were talking about engaging contractor from smarthome automation to customize it. Any picture of the completed wardrobe? I am thinking of doing the same thing btw.
Hi thanks
Yes built in wardrobe is still in progress. In fact I'm getting the team come do measurements and also install Slidearm tomorrow.
They couldn't do it earlier because I was still renovating and the place was very messy.
I will of course be doing a dedicated blog post about it.
For now, here is how it might look like. (Plan is still not confirmed)
Also, Quoted Price is $650, not $968 as shown in the picture..jpg.a352771f7df8f3f21c0441f8537f1969.jpg)
-
1
-
-
22 hours ago, 2Roomer said:I have been following your blog closely and am really impressed with how you realised your vision. Your actual unit matches your initial plans very closely.
Thanks for all the useful advice you've dispersed throughout the blog. Looking forward to see how your unit looks with furniture and soft furnishings.Thank you very much and it is my pleasure.
I'm glad that the advices and tips I put in the blog is useful
That said, i'm thinking of doing a Blog Entry with a summarized list of advice and tips for renovation.
Would be helpful as a Quick Reference Guide. Thanks again!!10 hours ago, pandacel said:Whee black glass backsplash! And single glass panel to protect vanity cabinet! High 5 high 5!
Hahaha i'm glad you liked it!
Glass was one of those things that once installed, immediately can see how nice it looked.
For the longest time the ugly kitchen wall was exposed. So happy that its covered up now lol7 hours ago, MiniBean said:Congrats!! Well done and really hope you will be settled down soon!
Looking forward to your posts and of course the curtains
, it will make better effects!
Oh yes! I've been waiting to do the conclusion of the curtain guide, but
the main issue I face is.....I don't have a ladder!! hahahaha!!
And no, i don't want Jason's contractors to help, because I wanna test if hanging the curtains can be done safely by only 1 person.
Thats because down the road, curtain dirty already may need to wash, and during that time Jason's contractors won't be around.
I've ordered a Ladder from Lazada tho, it should be arriving soon i hope lol.
--------------------------------------------------------------------------------------
Once again thanks everyone for your kind words
Today was handover day, furnitures also started coming in, but I wanna compile one shot make a solid
long post to showcase all the furnitures and stuff I got, so the next blog entry might take awhile! -
1 hour ago, mmoh said:clap clap clap.
 Thanks for the taking of photos and arranging and uploading and typing down the whole process. Very detail and useful information.
 Have you tried shower and see if the water will splash onto the wooden door?
And I want to see pics with furniture!
Thanks mmoh!
And thanks for your guidance every step of the way!!
And yes i have been showering a couple of times already the vanity storage area is completely dry never kena any wooden door. One of the first things i was afraid of.
Furnitures will come in progressively next week.
Meanwhile....my Big Shopping Trip at Daiso!! #ContributingToSingaporeEconomy Lololol

-
Blog Entry Date: 19th November 2017 Sunday
Click Here to go back to Page 1 - Table of Contents
Renovations Completed! - A Final Look just before HandoverThis Blog Entry is going to be a photo collection of the Final Look of the Renovations done
before Jason officially handover the Apartment back to me on Monday 20 November 2017.9 weeks of Renovation. *Drum Rolls*
This is how it all finally looks like…
--------------------------------------------------------------------------------------------------------------------------------------------
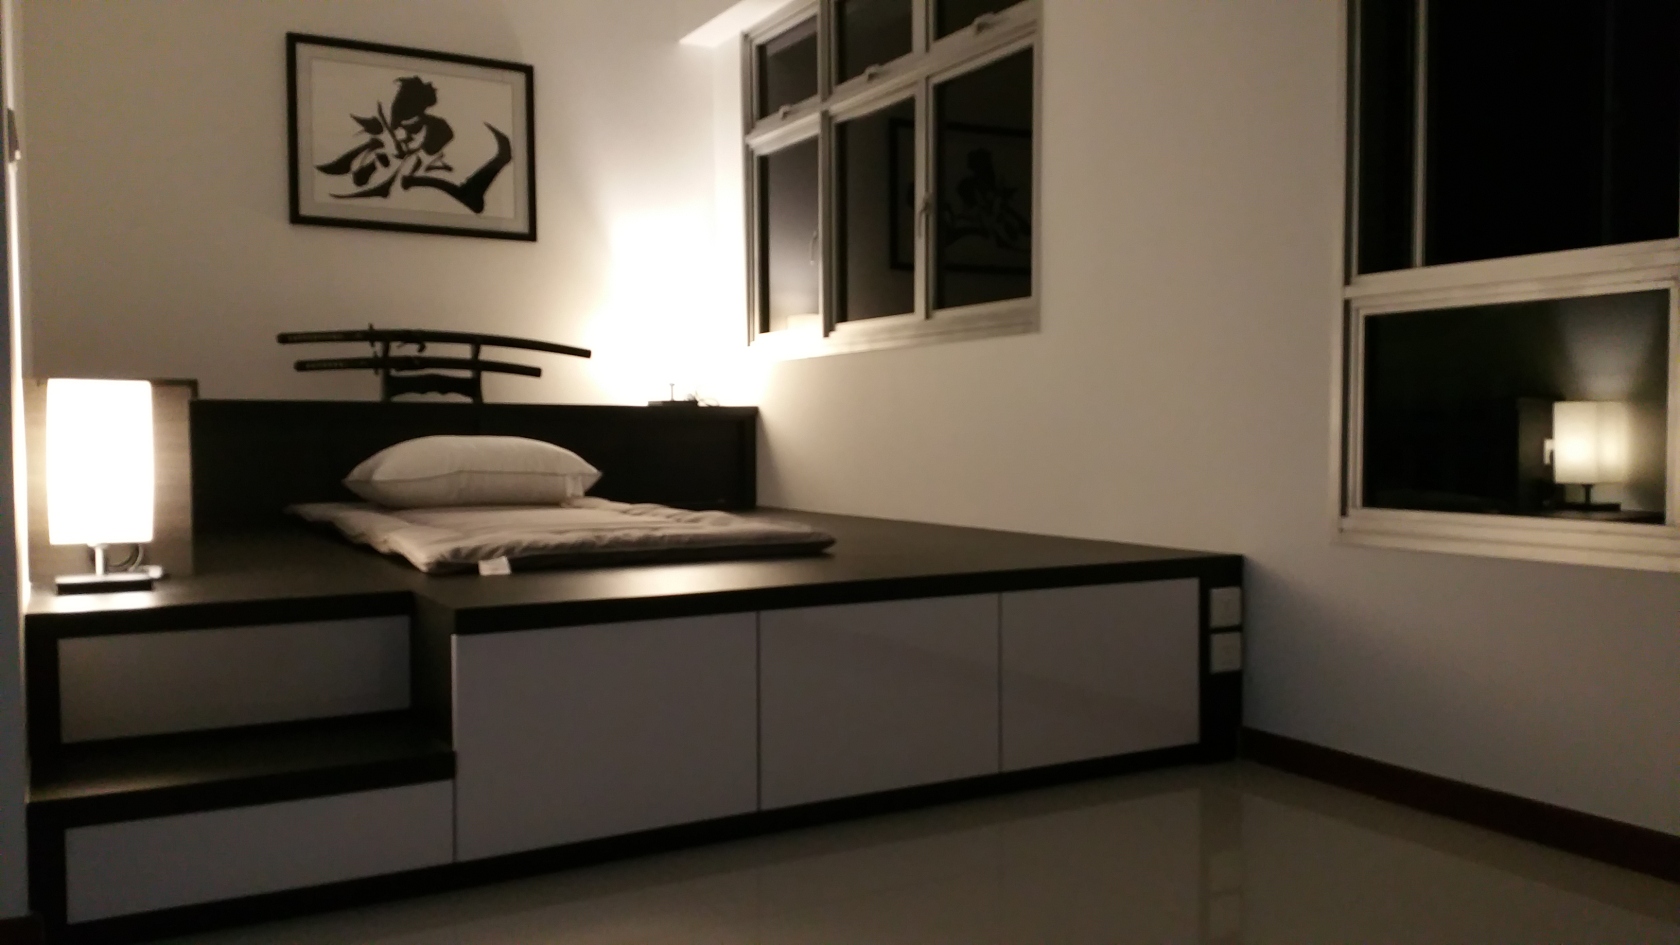
Bedroom (Day Time)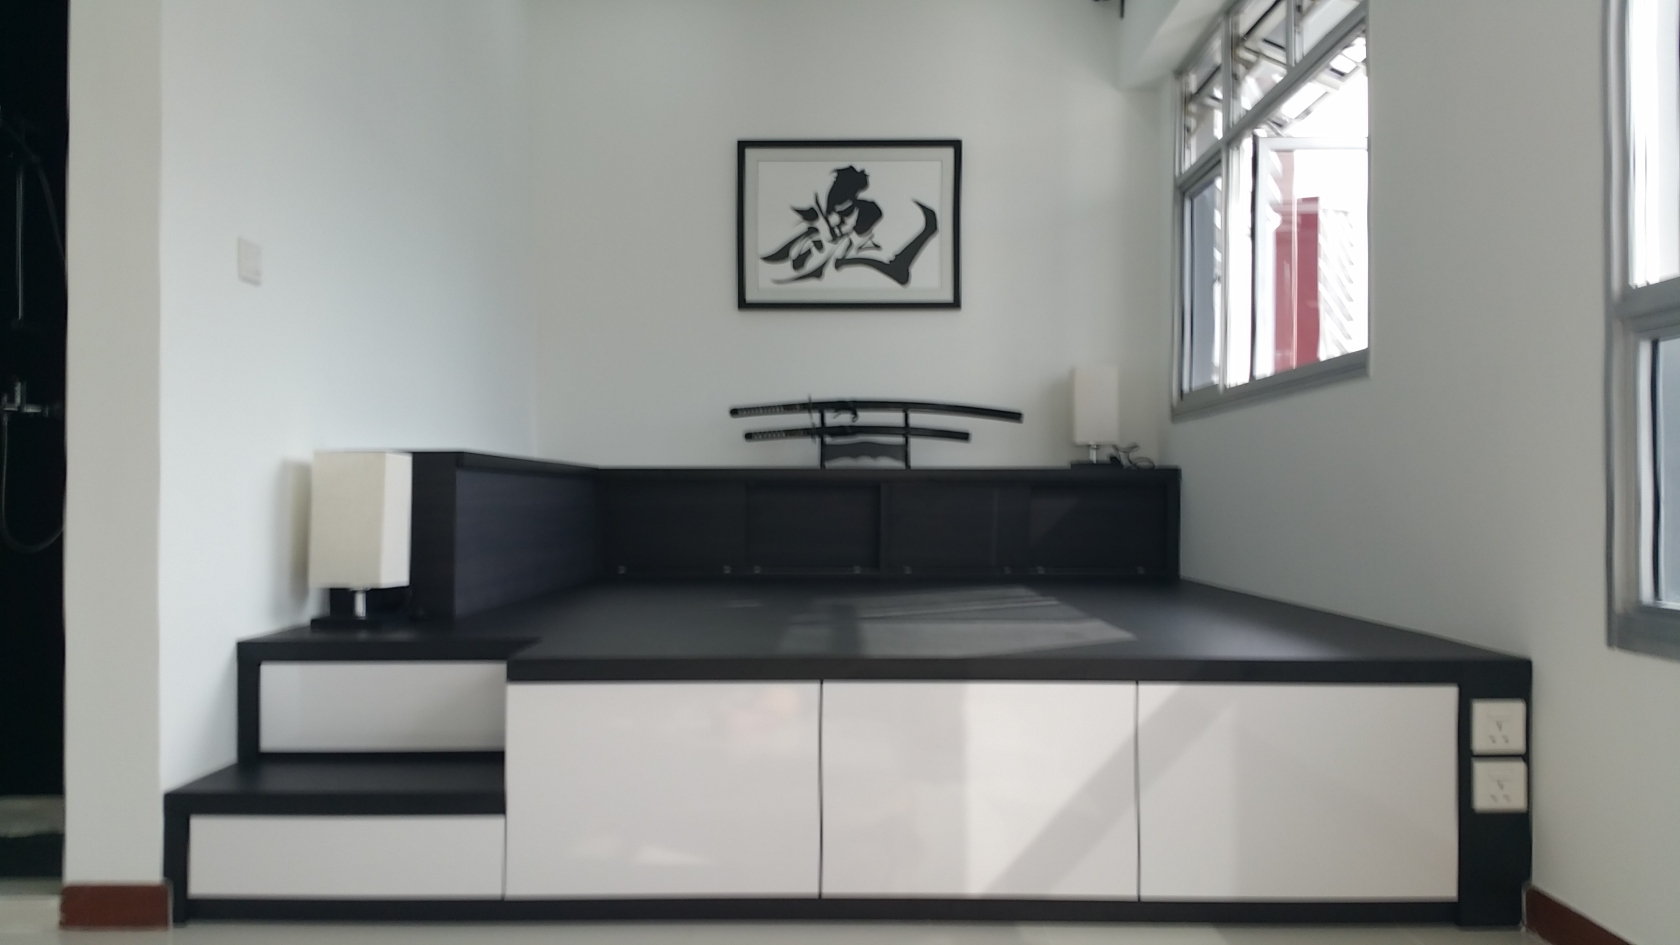
Bedroom (Night Time)
The futon here is just a temporary thing I bought to sleep until my real mattress arrives.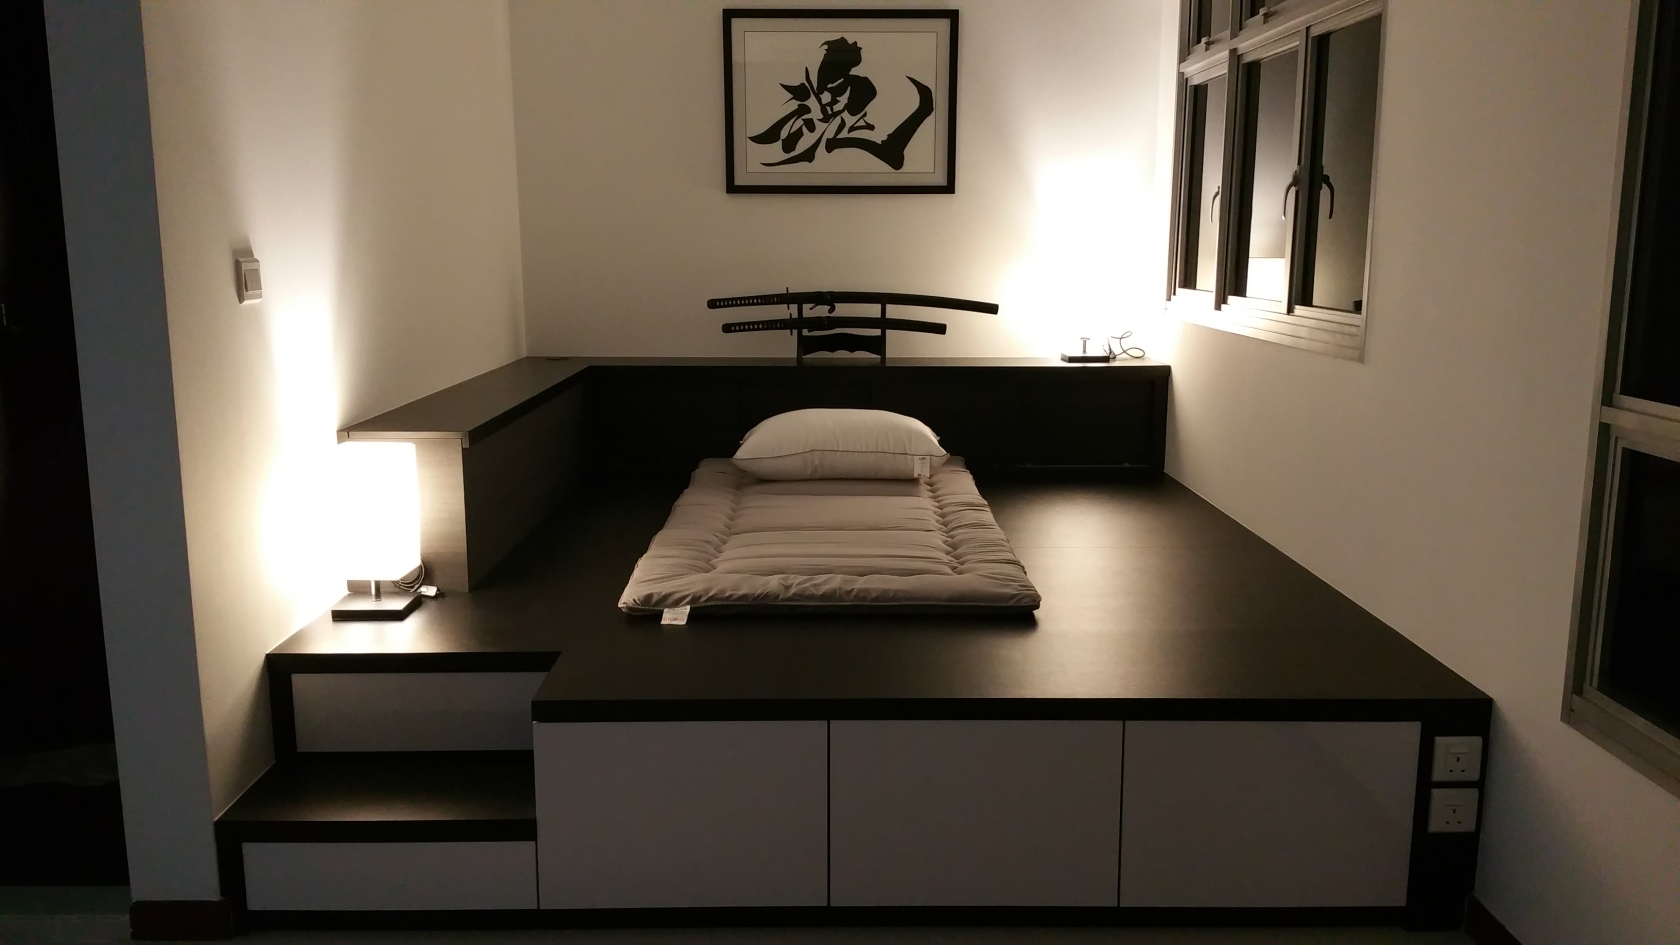
--------------------------------------------------------------------------------------------------------------------------------------------
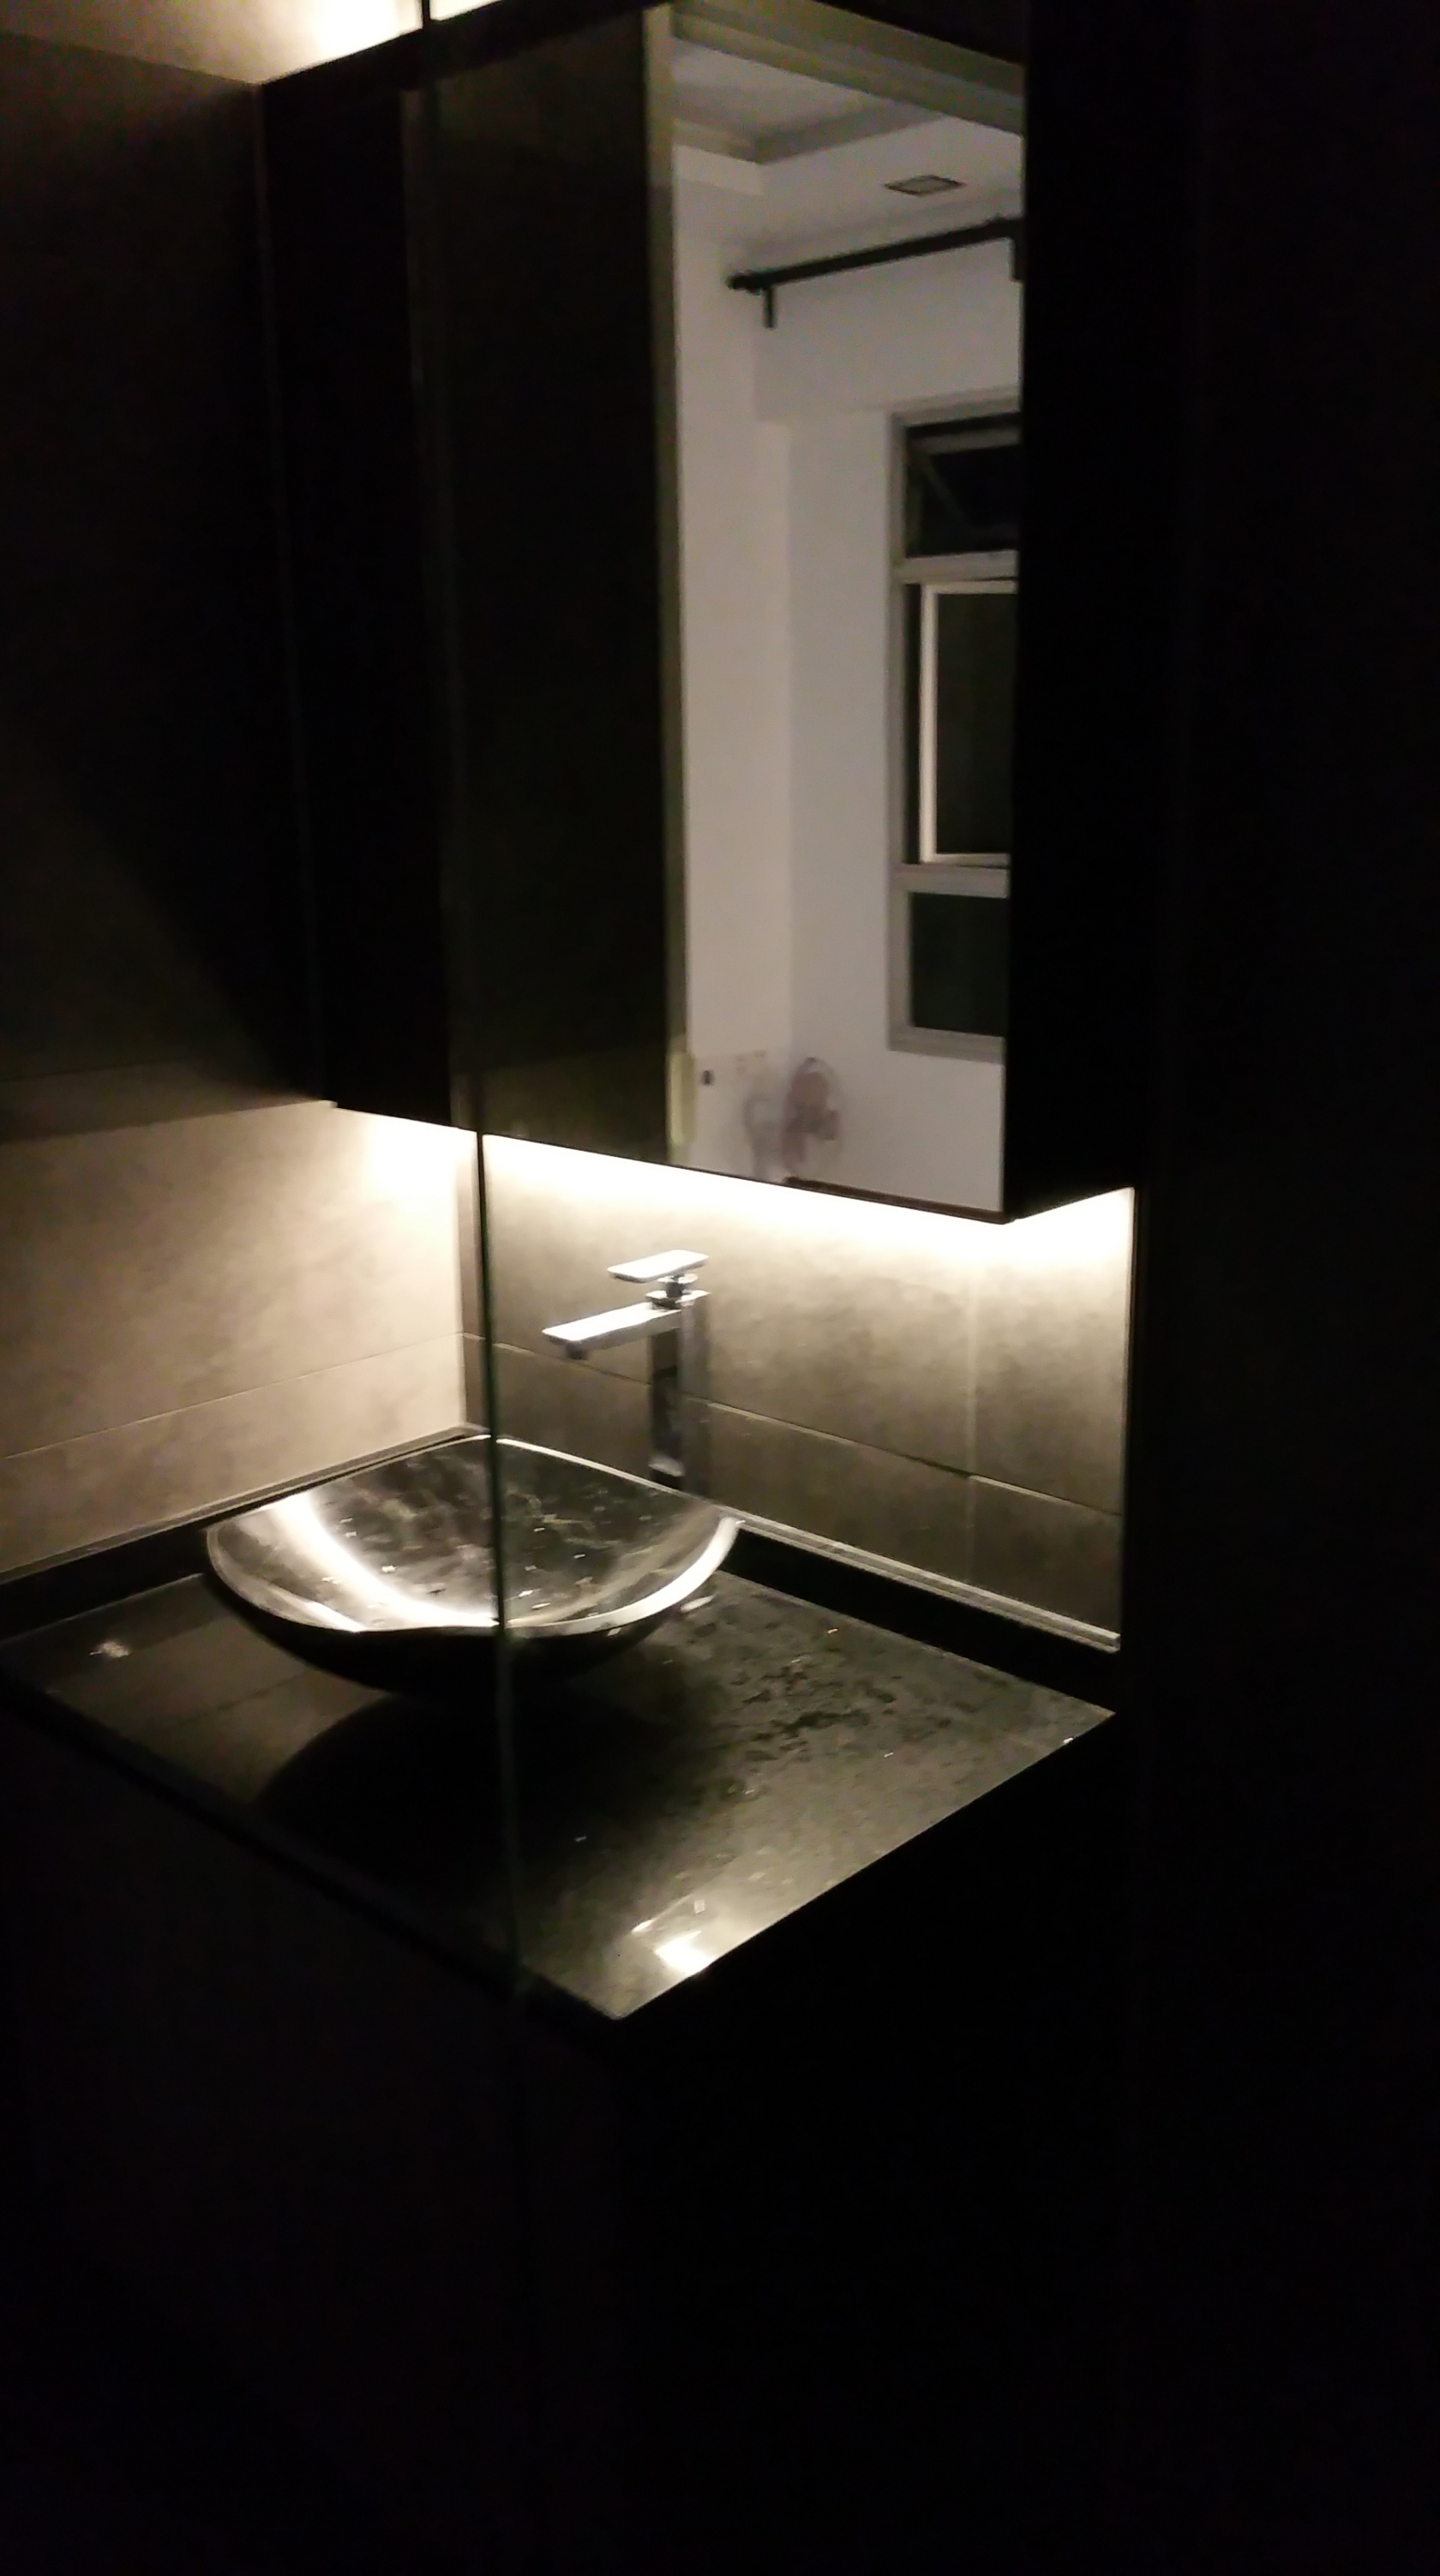
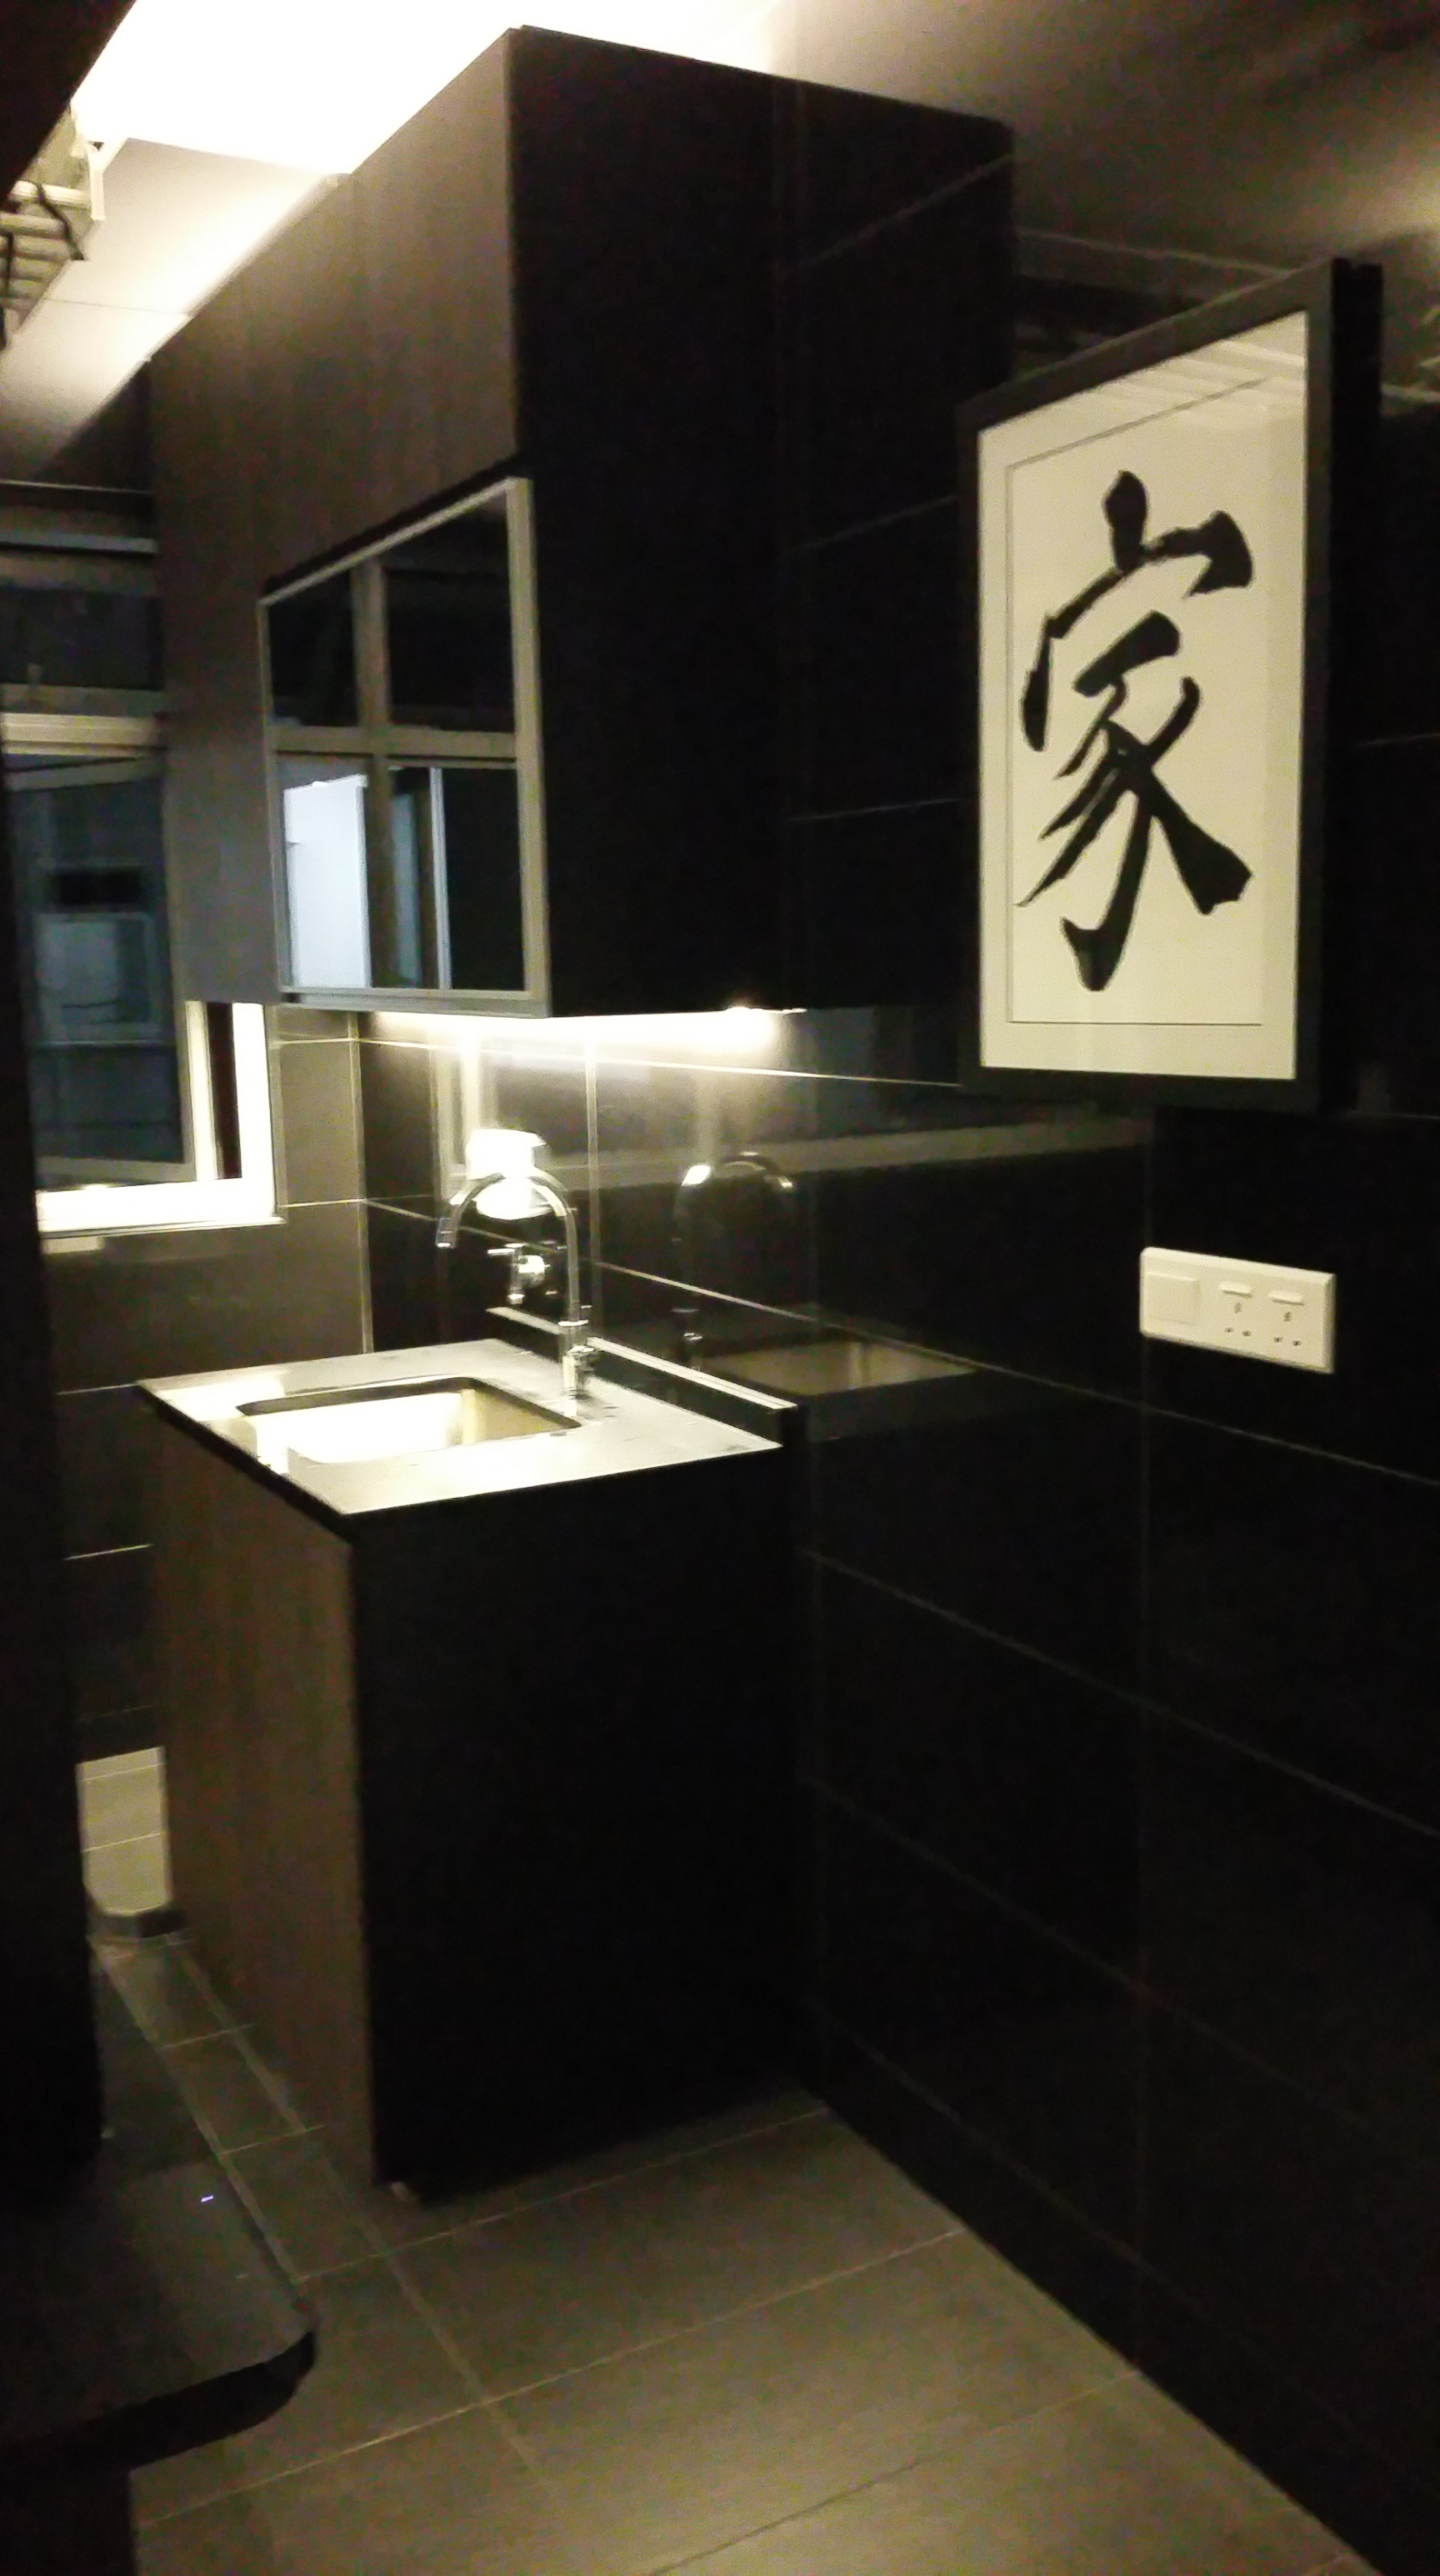
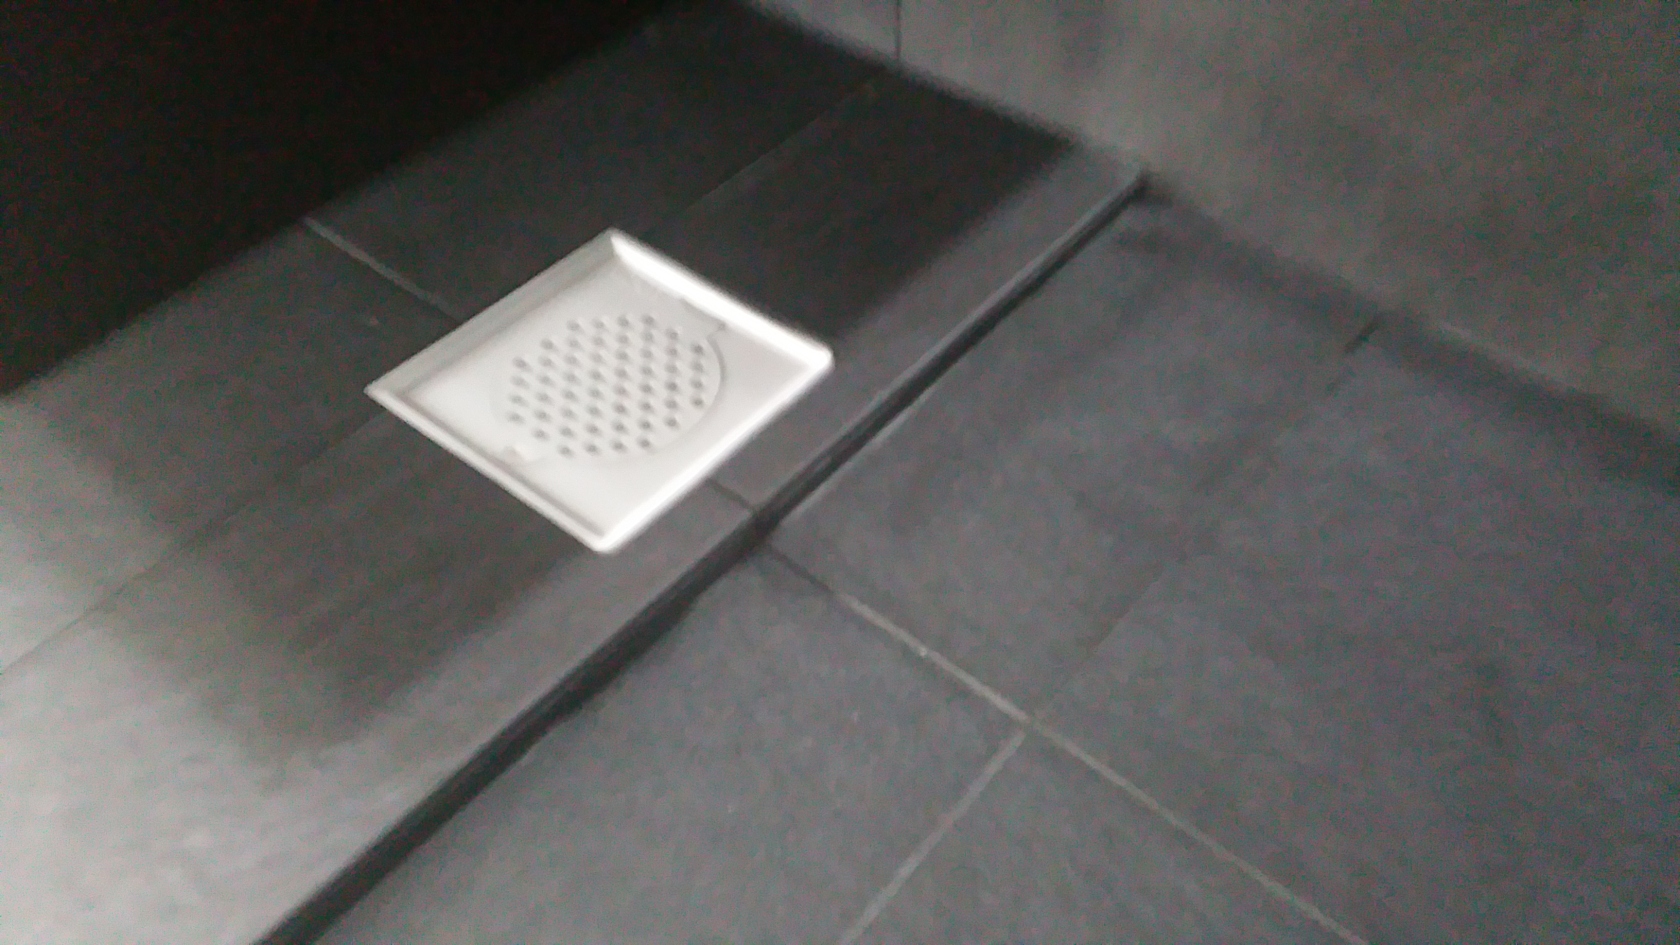
Bathroom (Day Time)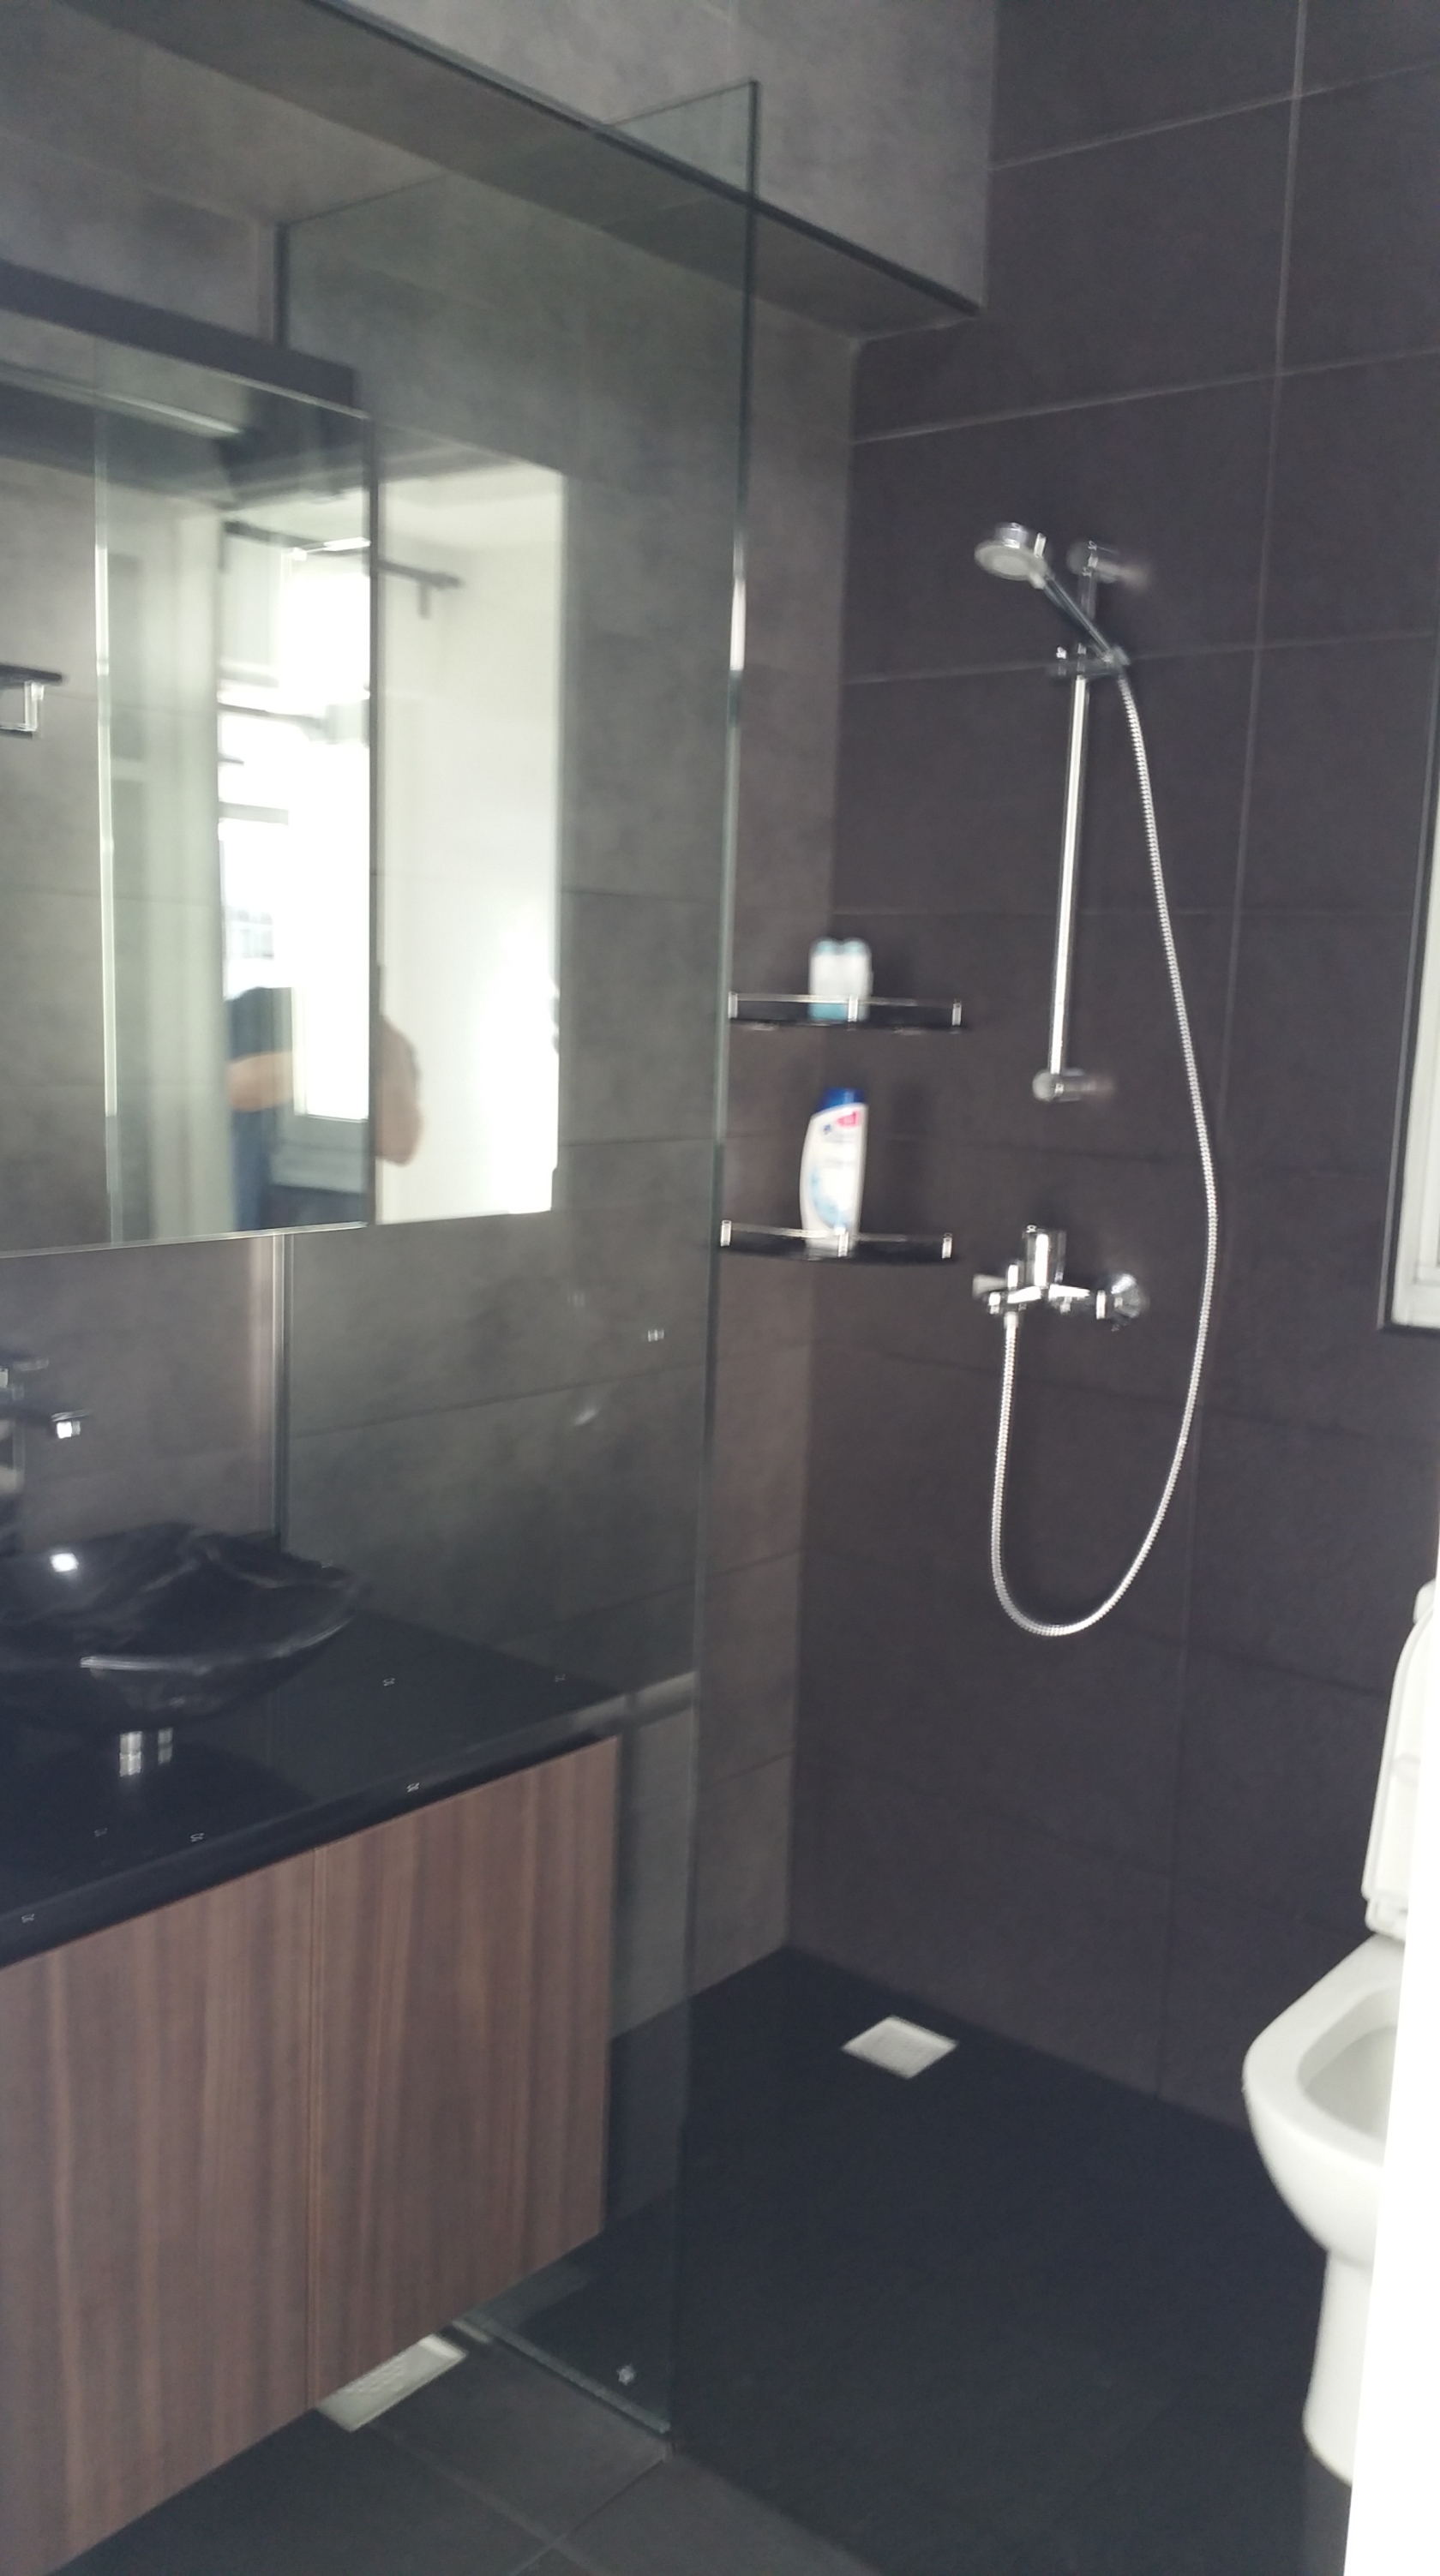
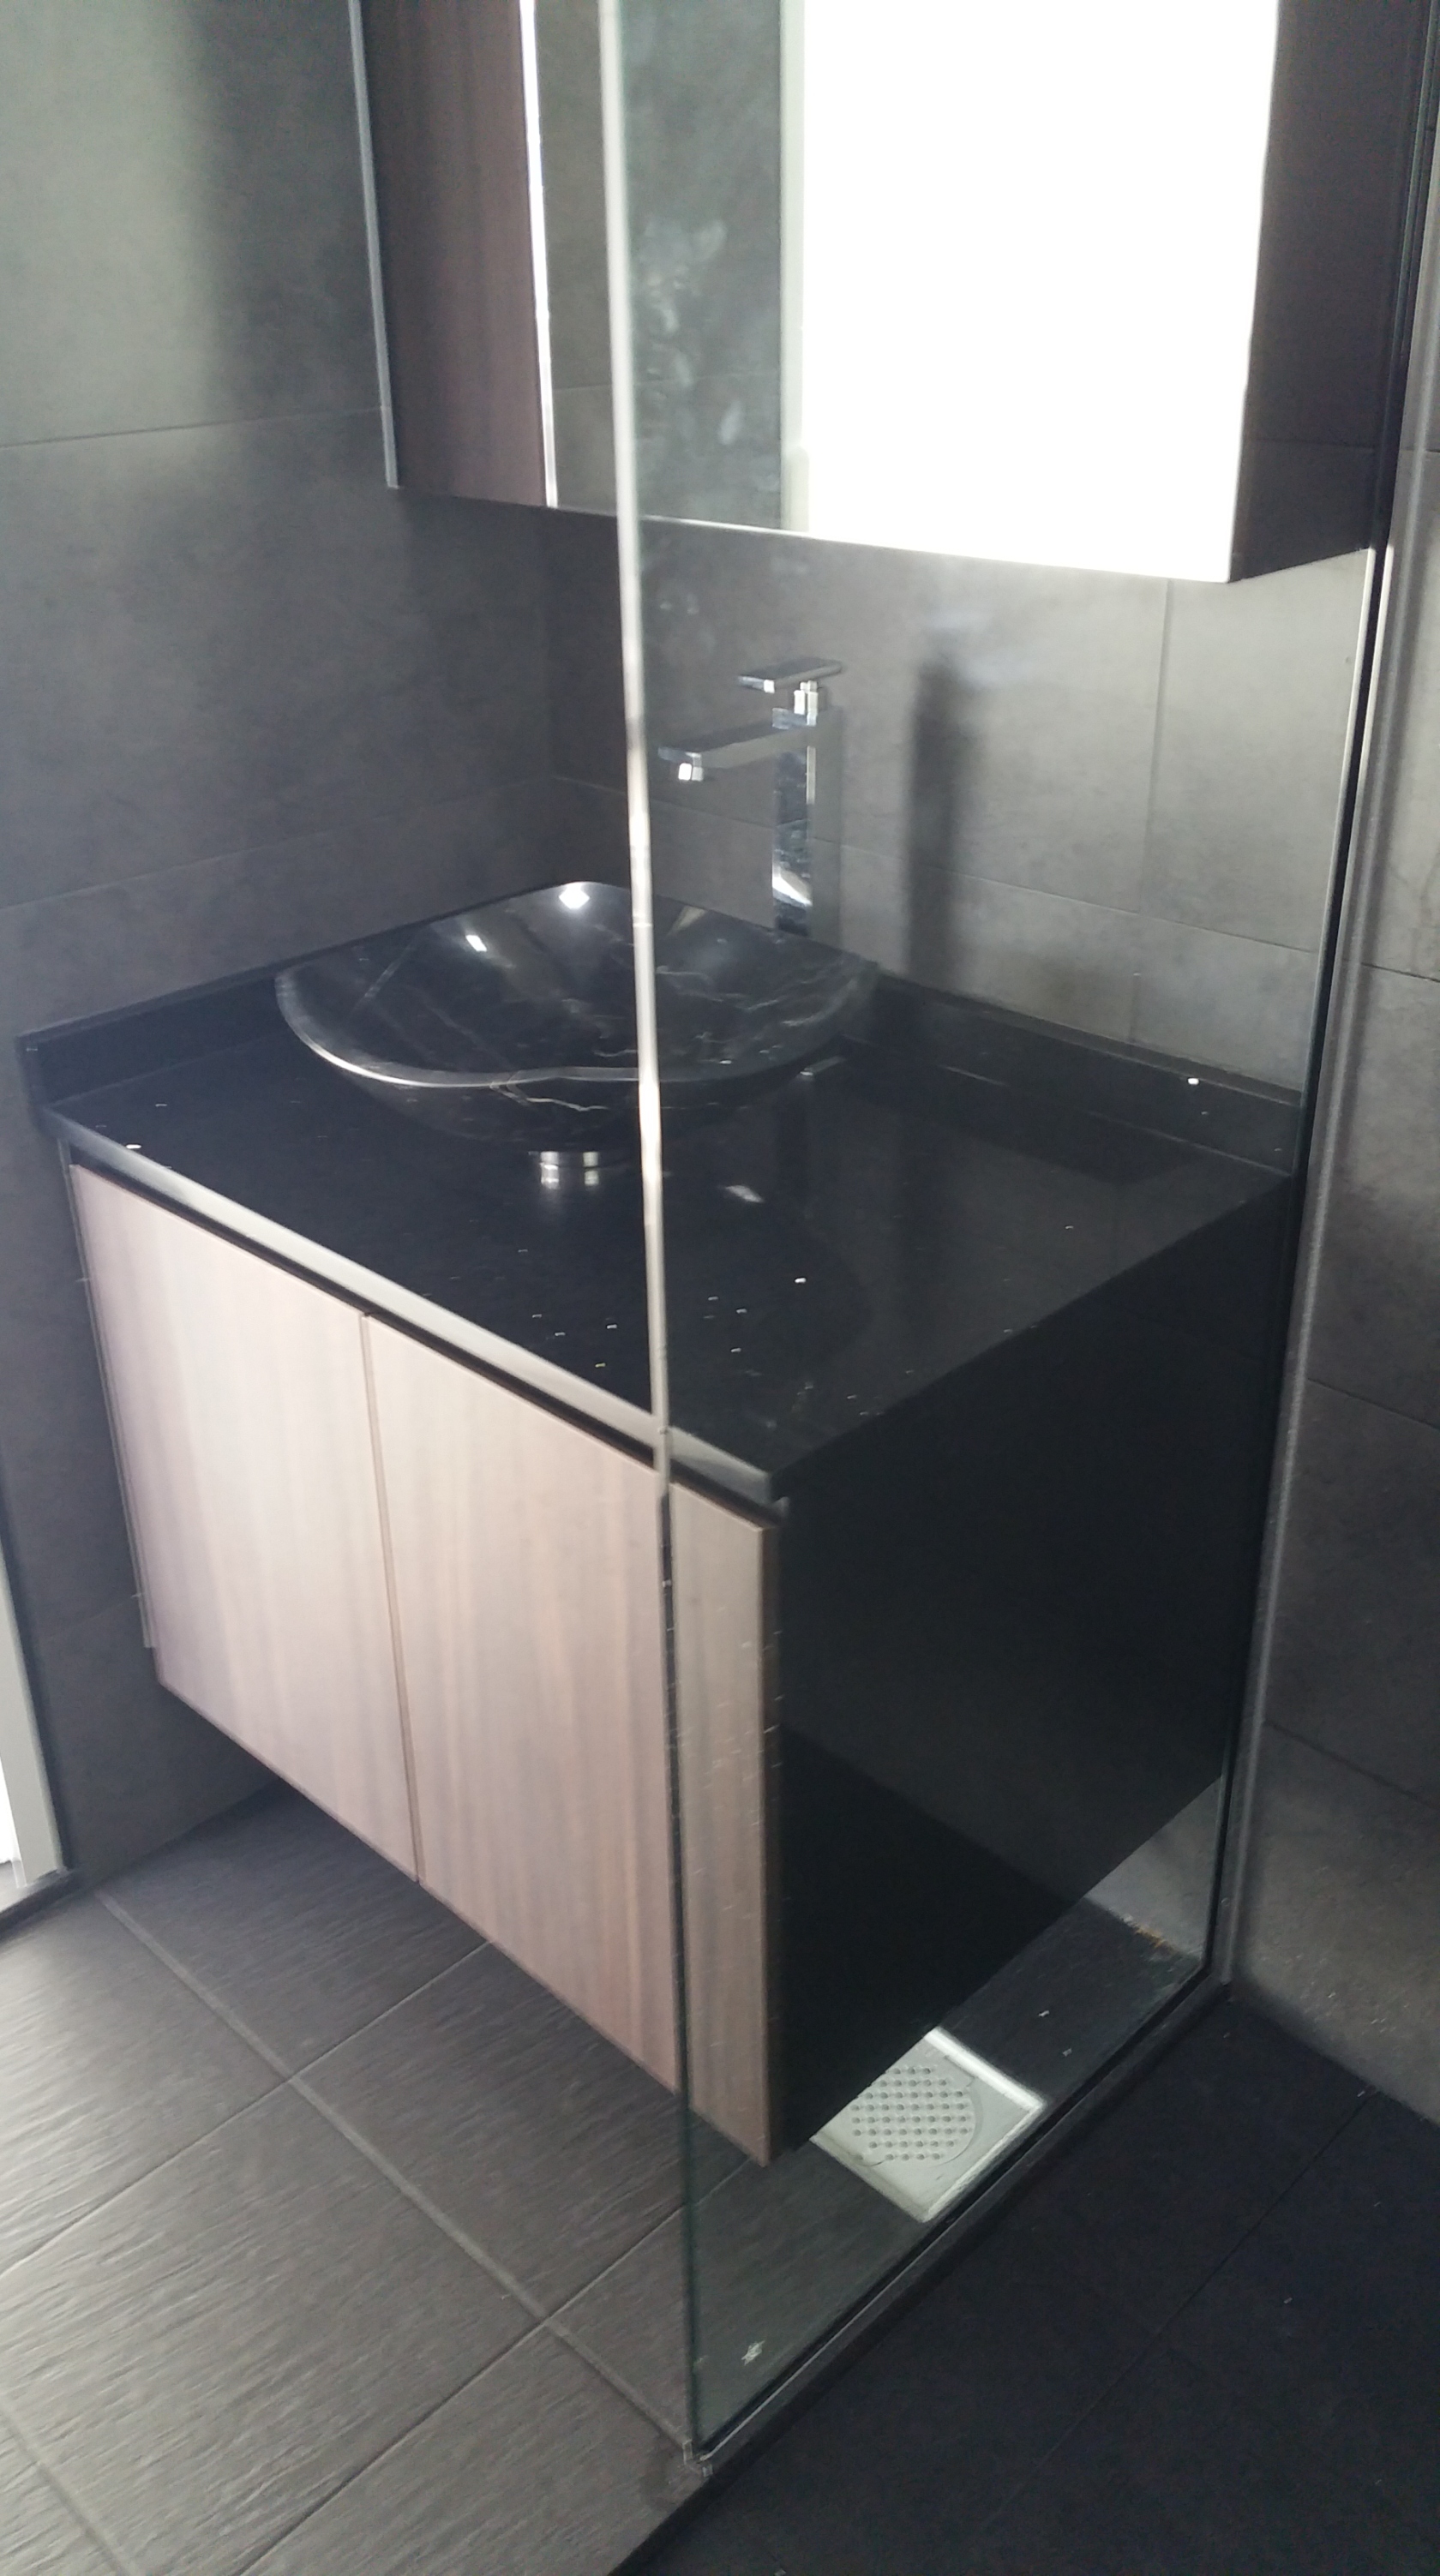
Bathroom (Night Time)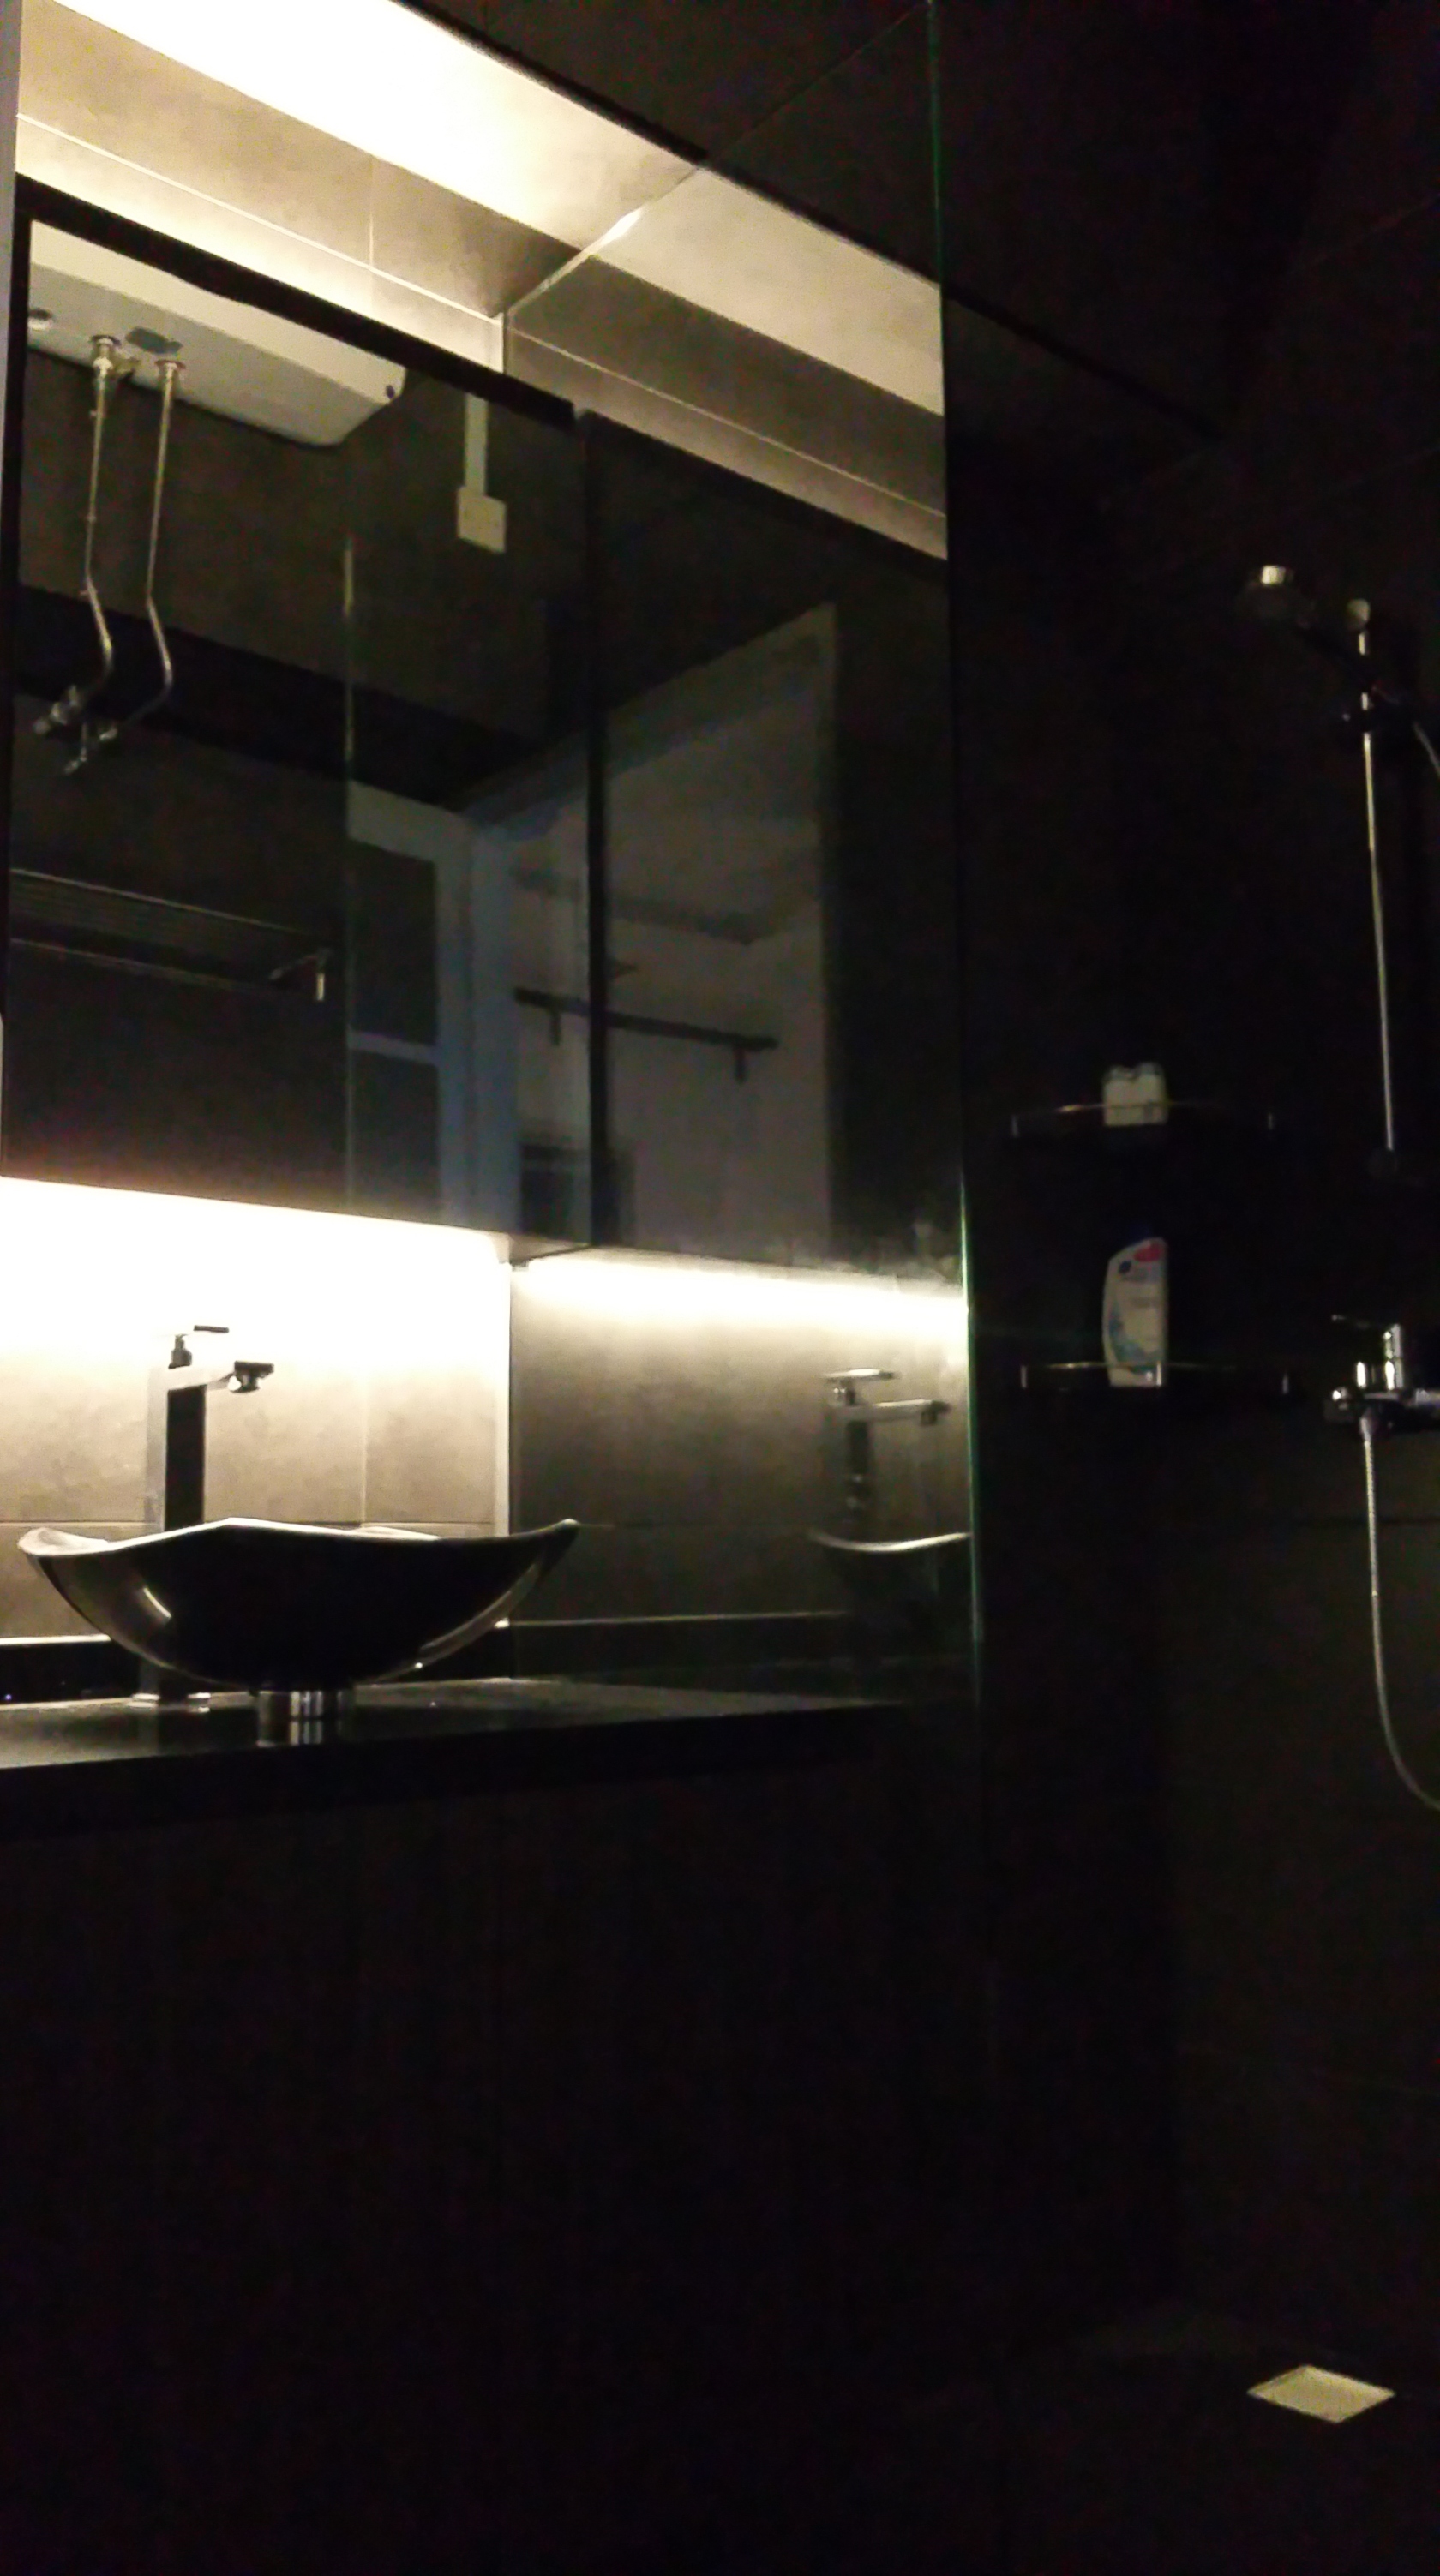
--------------------------------------------------------------------------------------------------------------------------------------------
Kitchen (Day Time)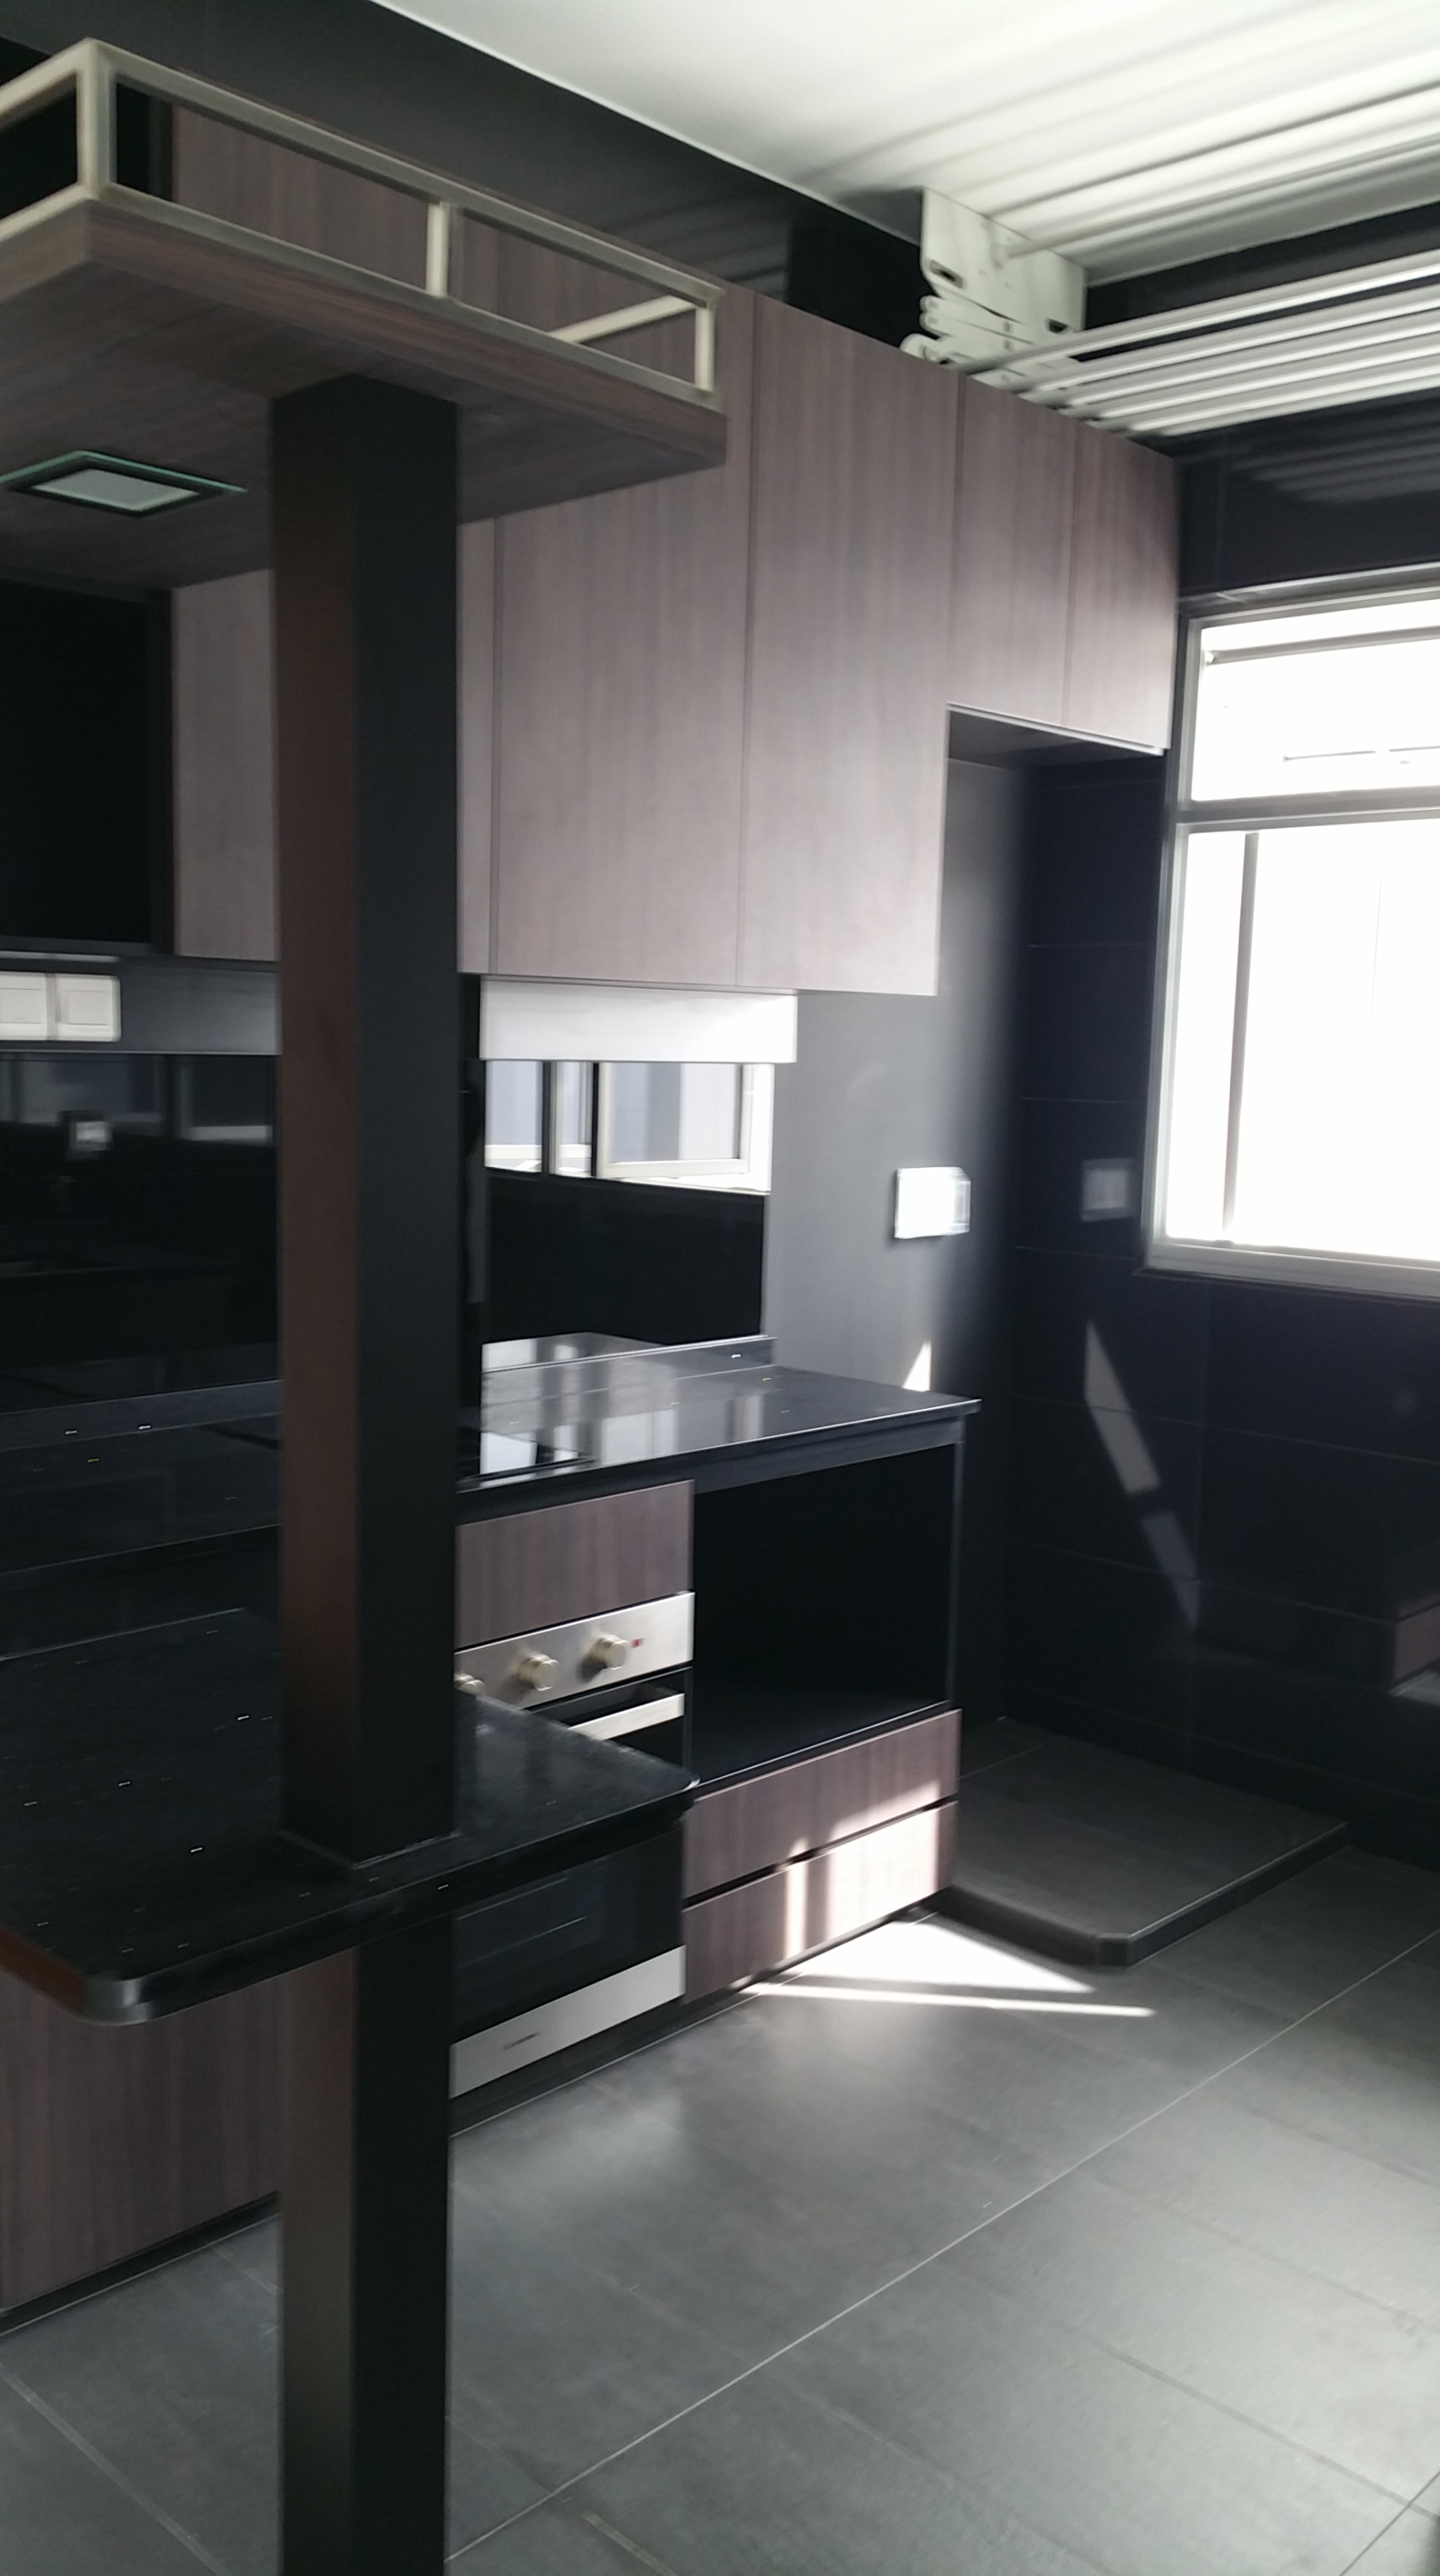
Kitchen (Night Time)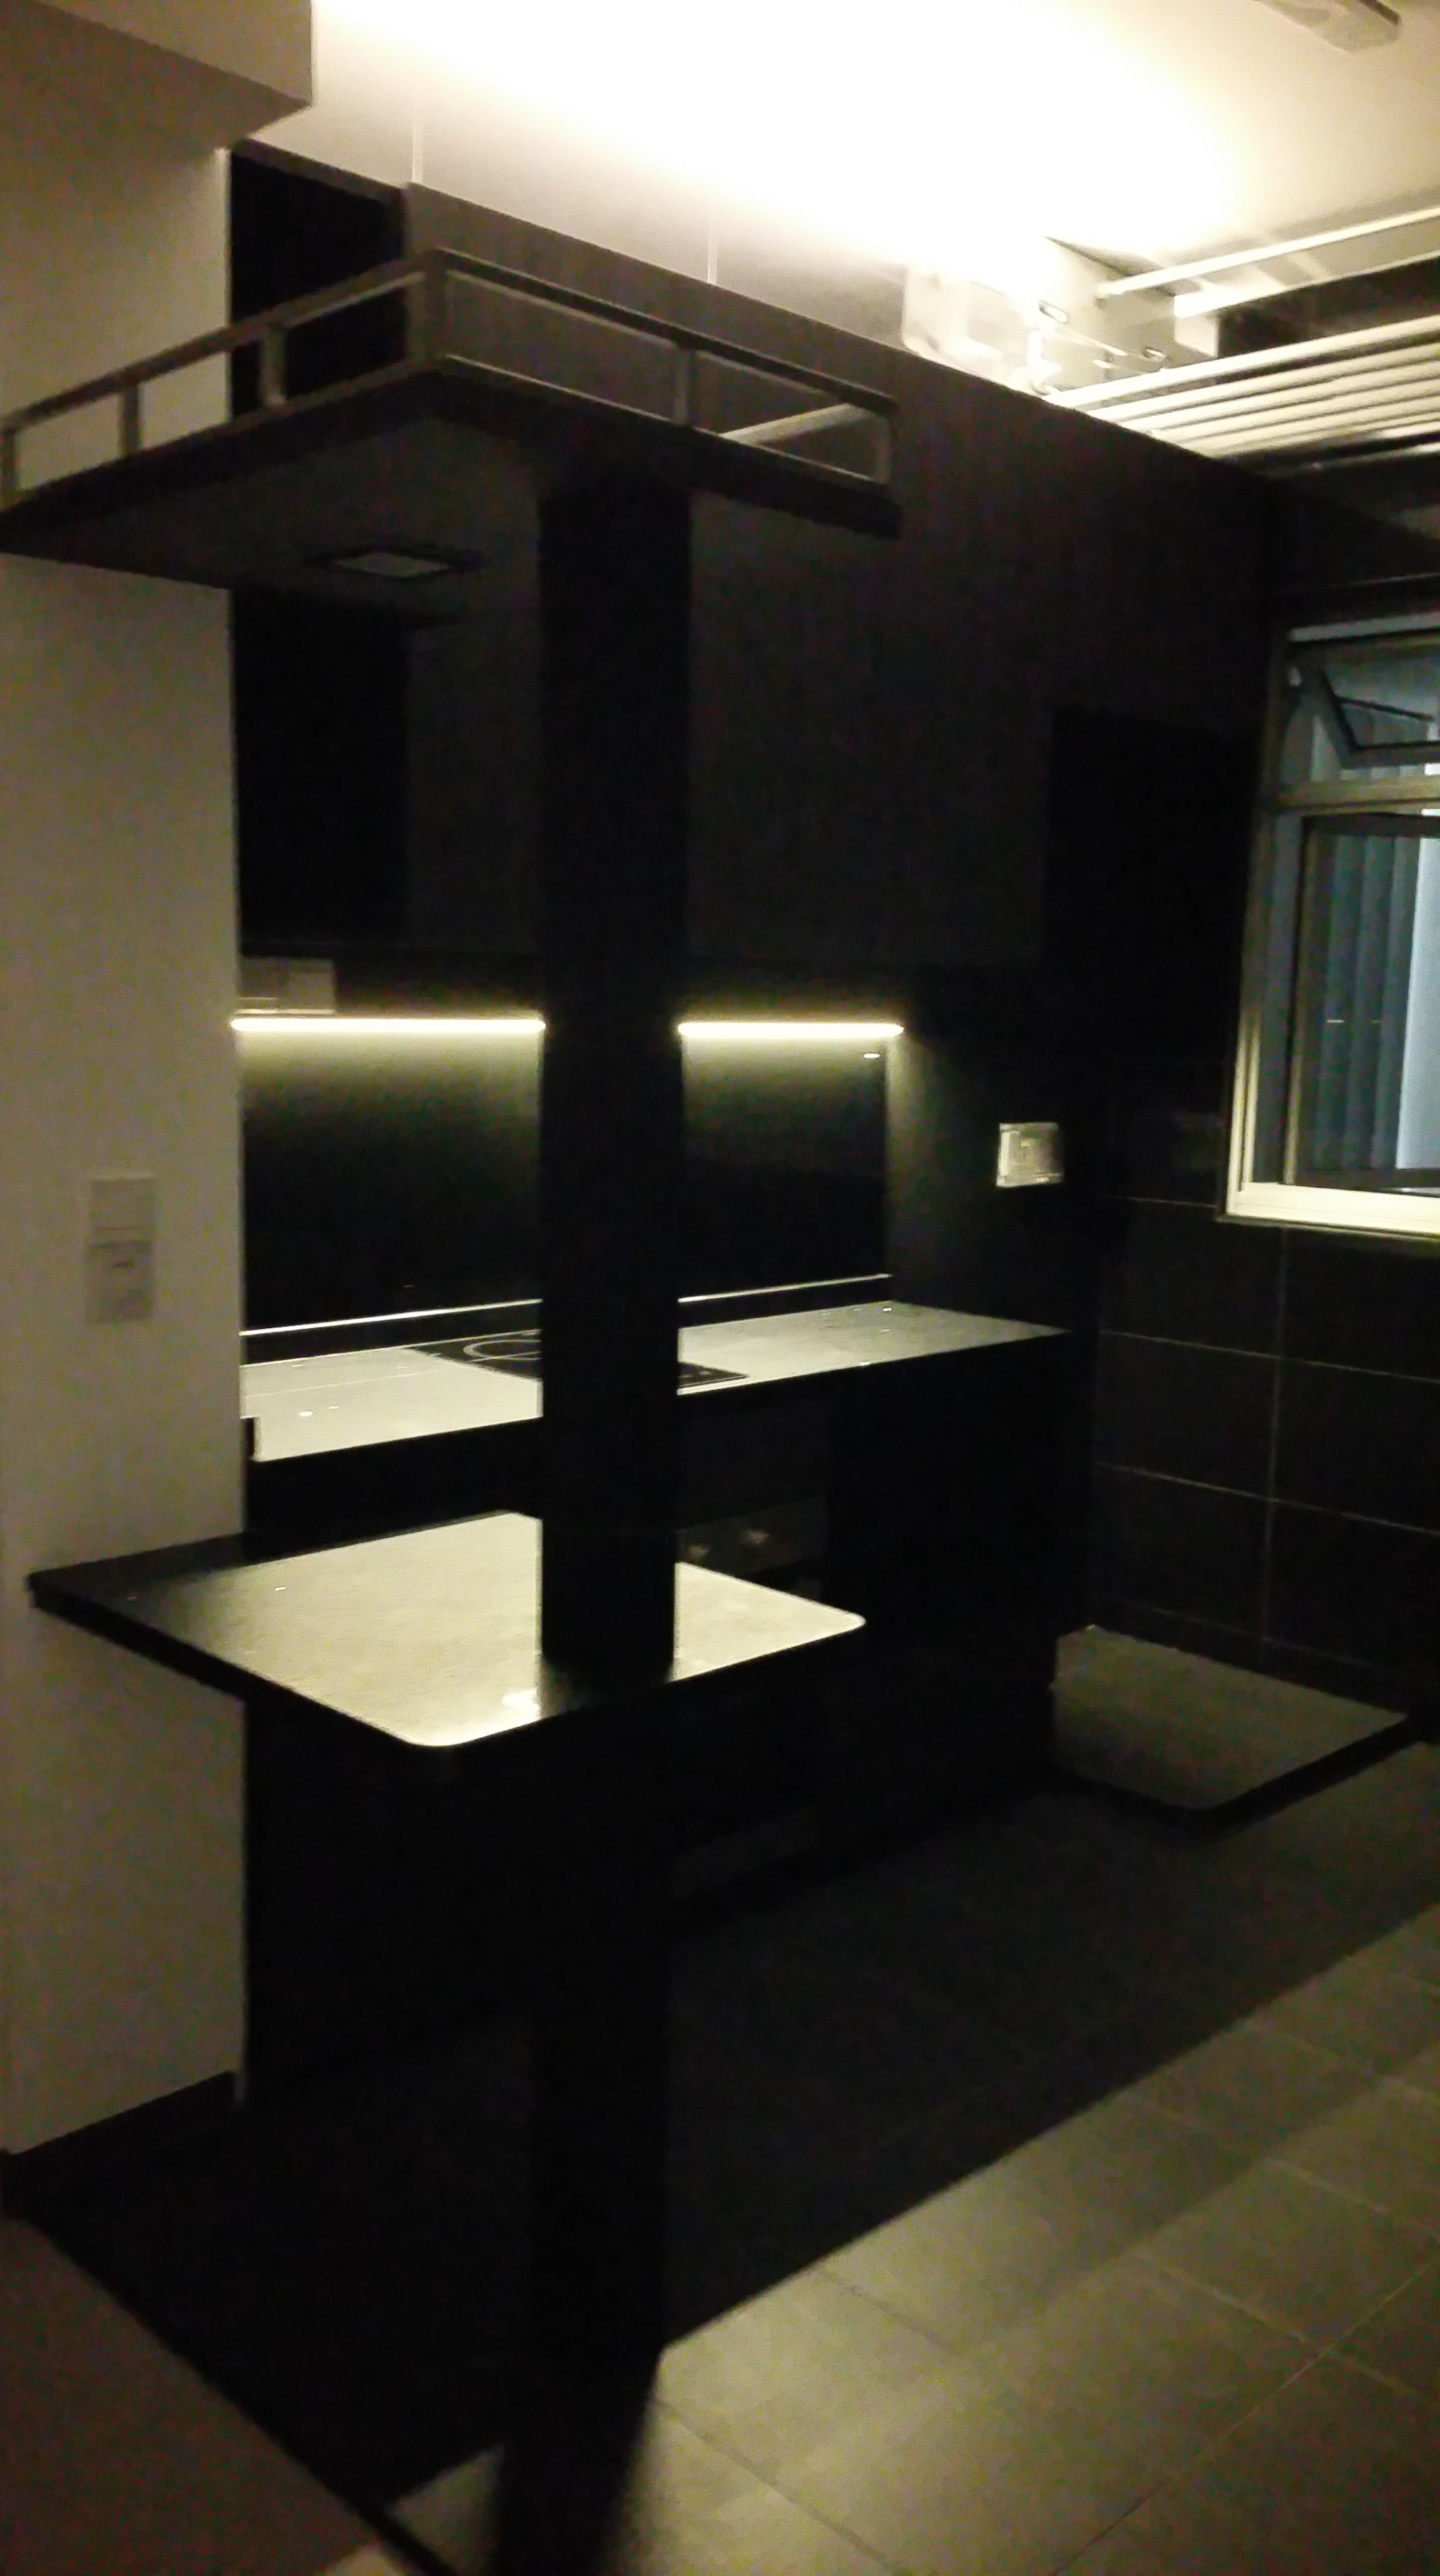
--------------------------------------------------------------------------------------------------------------------------------------------
And so this is it. The final look of my Apartment after 9 long weeks of Renovation.
I'm so sorry my camera is so potato and couldn't produce better quality images lol.I’m really happy to see how my Apartment turned out.
It was a really fascinating and fulfilling journey to personally design my initial 3D Sketch
via Planner 5D and see it from the initial 3D Concept Designs till finally appear in real-life.
A Journey that as you all can see, is filled with Ups and Downs.And so, we have officially come to the End of my Renovations.
I really must thank each and everyone of you for being so supportive and following my blog.
I hope it was entertaining (and educational) enough and I hope that by chronicling my journey and thoughts, will hopefully make it a less scary and confusing process for fellow 2 Roomers who is starting out with their Renovations.This will certainly not be the last Blog Entry, as I intend to continue to add more entries such as my Furnitures and Electrical Appliances as they start delivering, and the little knick knacks and things to make it more like a HOME. (And of course I still need to provide the conclusion of my IKEA Curtain guide!! LOL!!
)
A Special Thanks to Yvonne who is Rufus58's friend who offered her help with my DB-Box issue.
While I eventually did not engage her services, I am still truly appreciative of her willingness to help! Thank you!!Last but definitely not least, my Sincere Thanks to Mr Jason Tan from 96 Degree Designers
and his many skillful and professional contractors who all worked very hard in making this dream home of mine. Well done Chaps!!Once again, as I always say when signing off:
Thank you for reading, and I’ll see you soon in my next Blog Entry!!
Click Here for the Next Blog Entry:
Post Renovation – Furnitures and Appliances (Kitchen)
Click Here to go back to Page 1 - Table of Contents-
1
-
-
Blog Entry Date: 19th November 2017 Sunday
Click Here to go back to Page 1 - Table of Contents
End of 9th Week after Key Collection - Final Tasks: Aircon, Glass and Painting
Should have posted this on Friday, but I was enjoying my new home turn on aircon relax too much
and didn’t go back to type out this Blog Entry!! Sorry~ To make up for it, i’m gonna do a double post okay?So on Friday (17th November 2017), I had a couple of teams come over for the very final installations
to be done before Handover by Jason tomorrow on Monday (20th November 2017).
Nothing major happened, everything went smoothly, but still quite alot of action as you are about to see.
--------------------------------------------------------------------------------------------------------------------------------------------
First up, the Aircon guys from StarCool showed up.
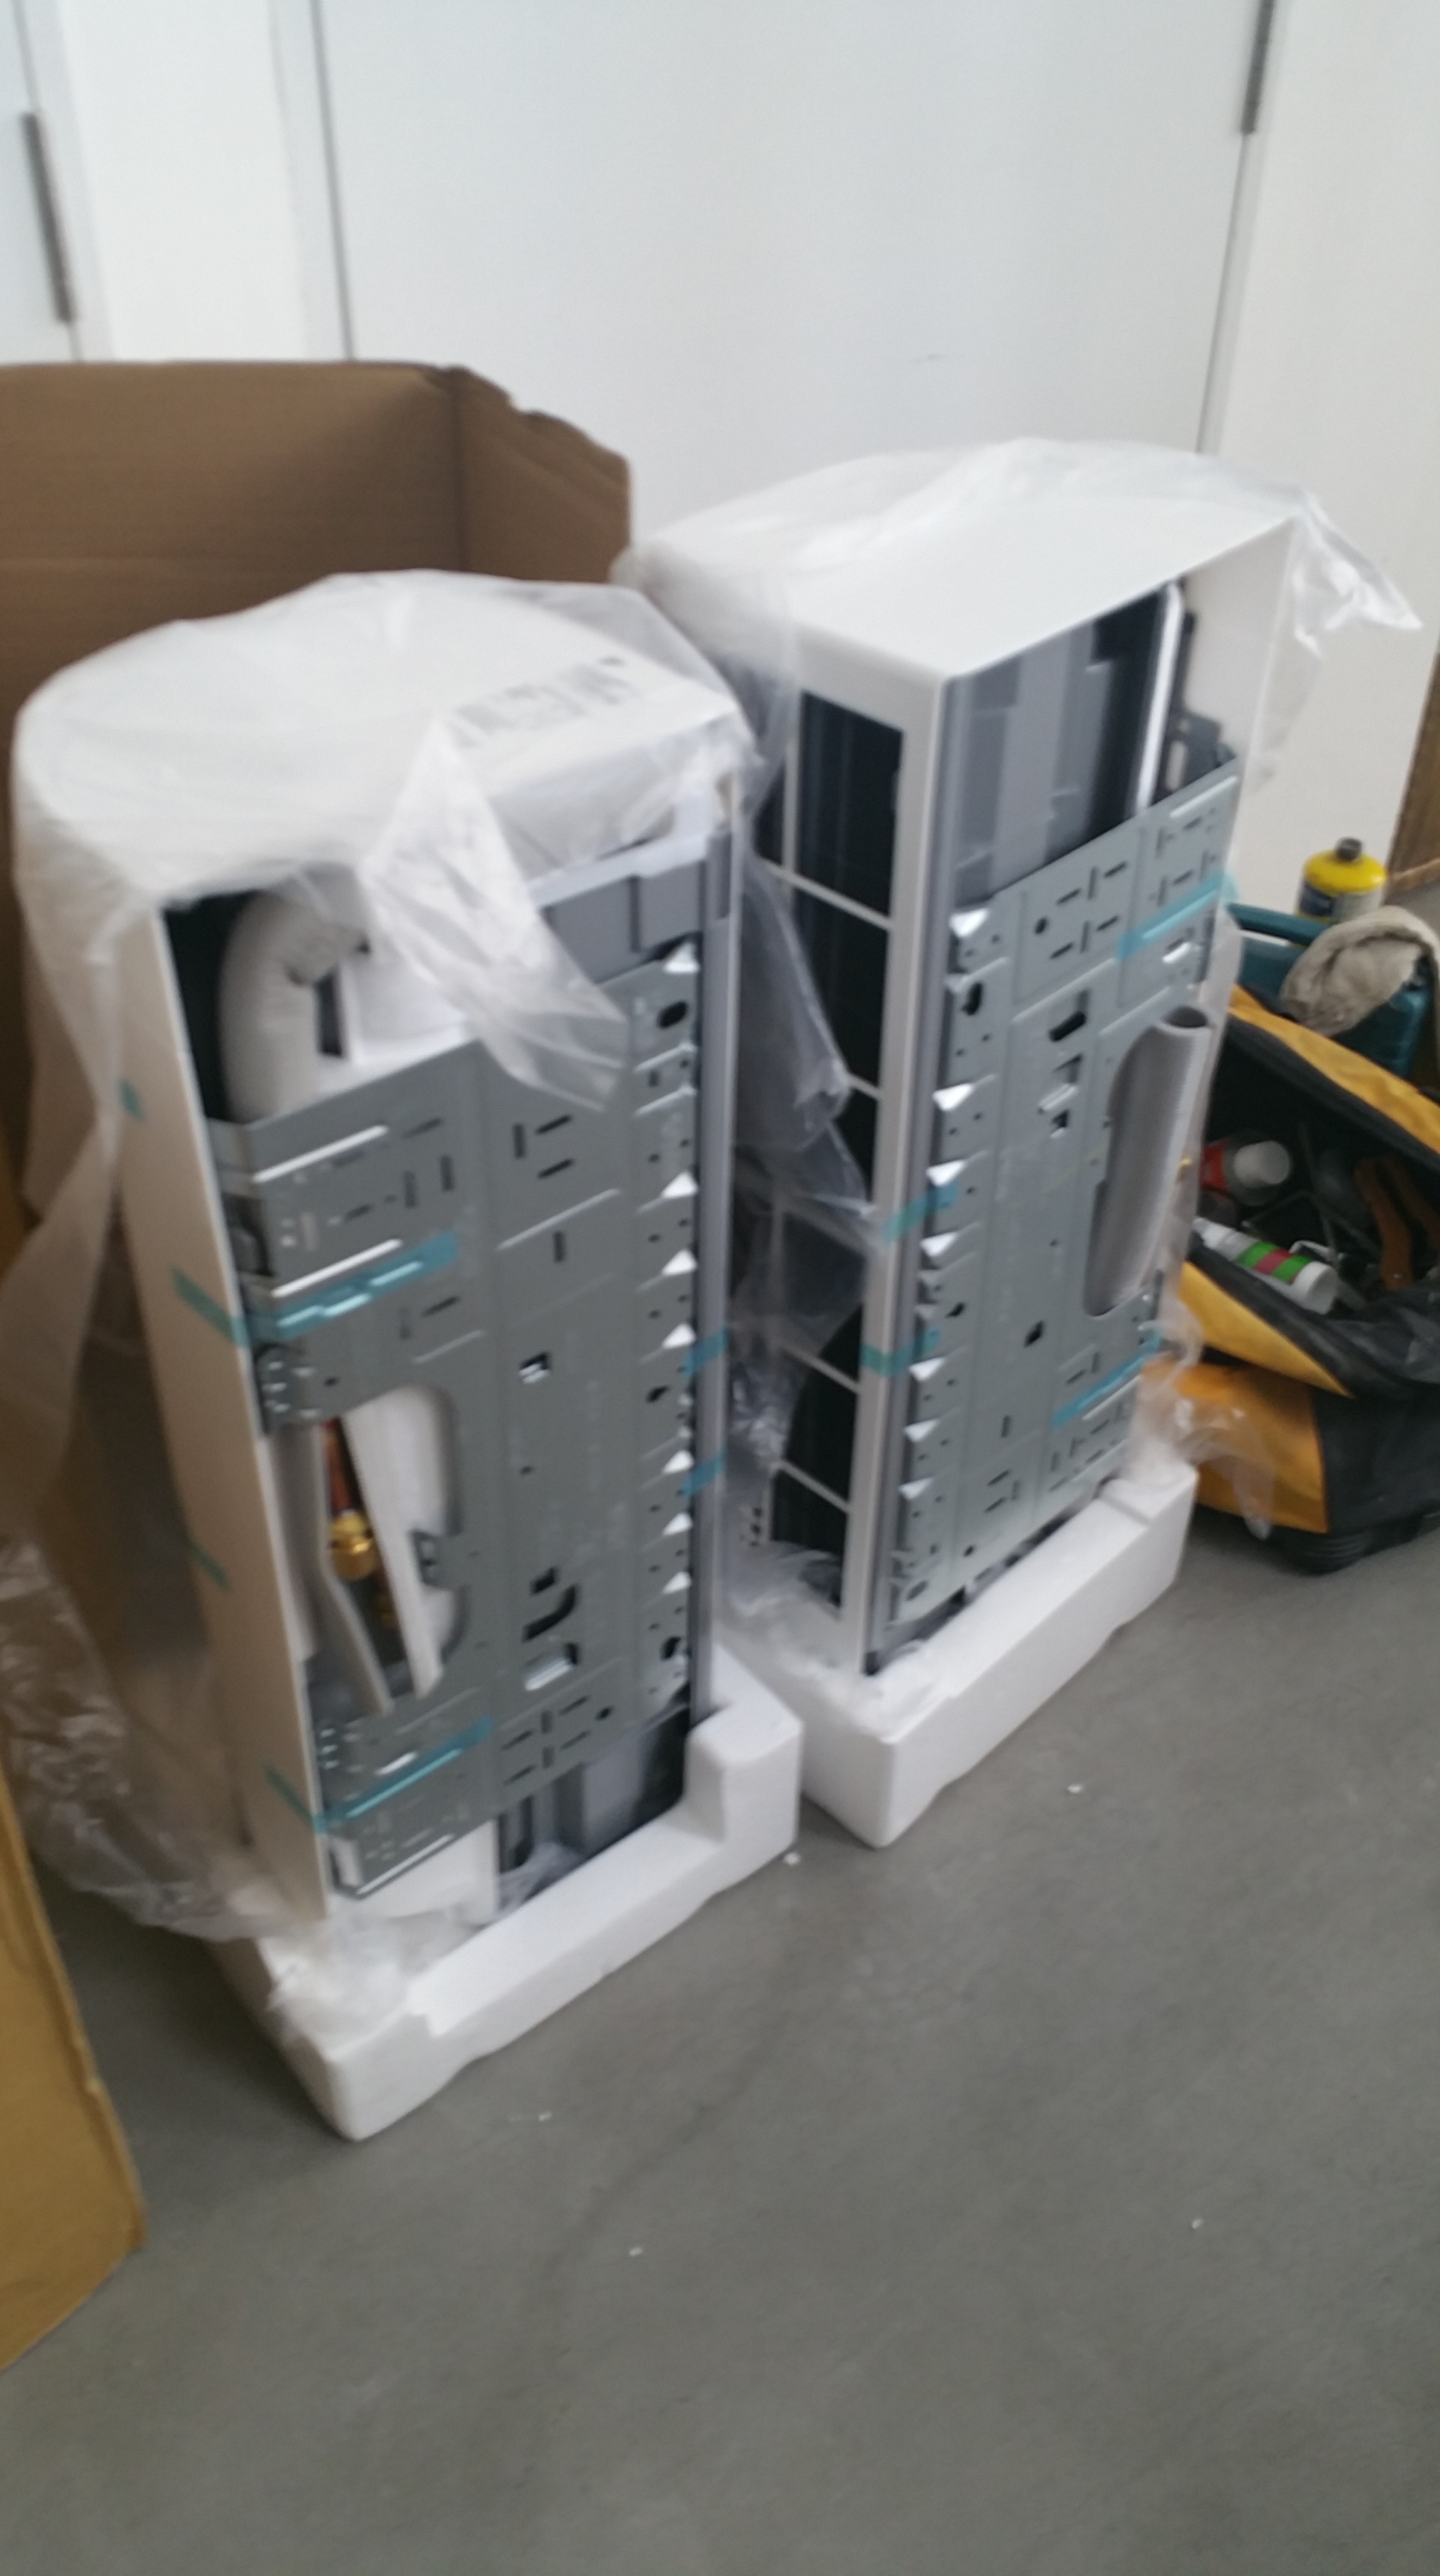
Daikin 5 Ticks Smile Series System 2
2 Air-Cons (1 is 9000BTU, the other one is 18000BTU)
1 Giant Inverter / Compressor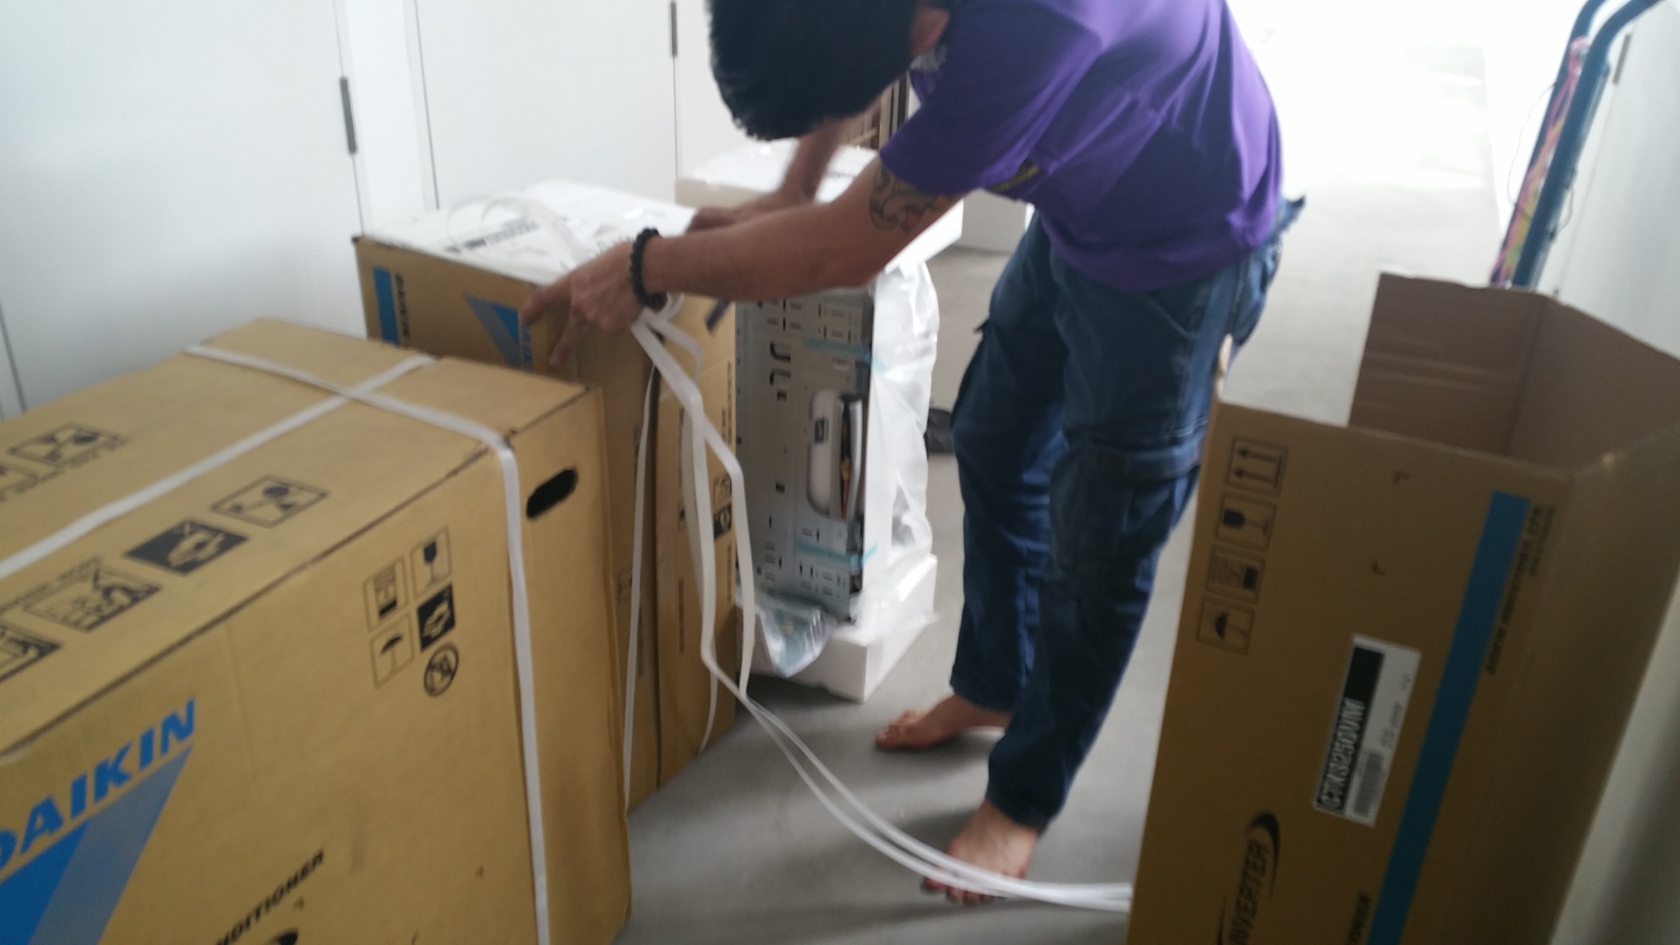

Installing the Air-Con Base Plate first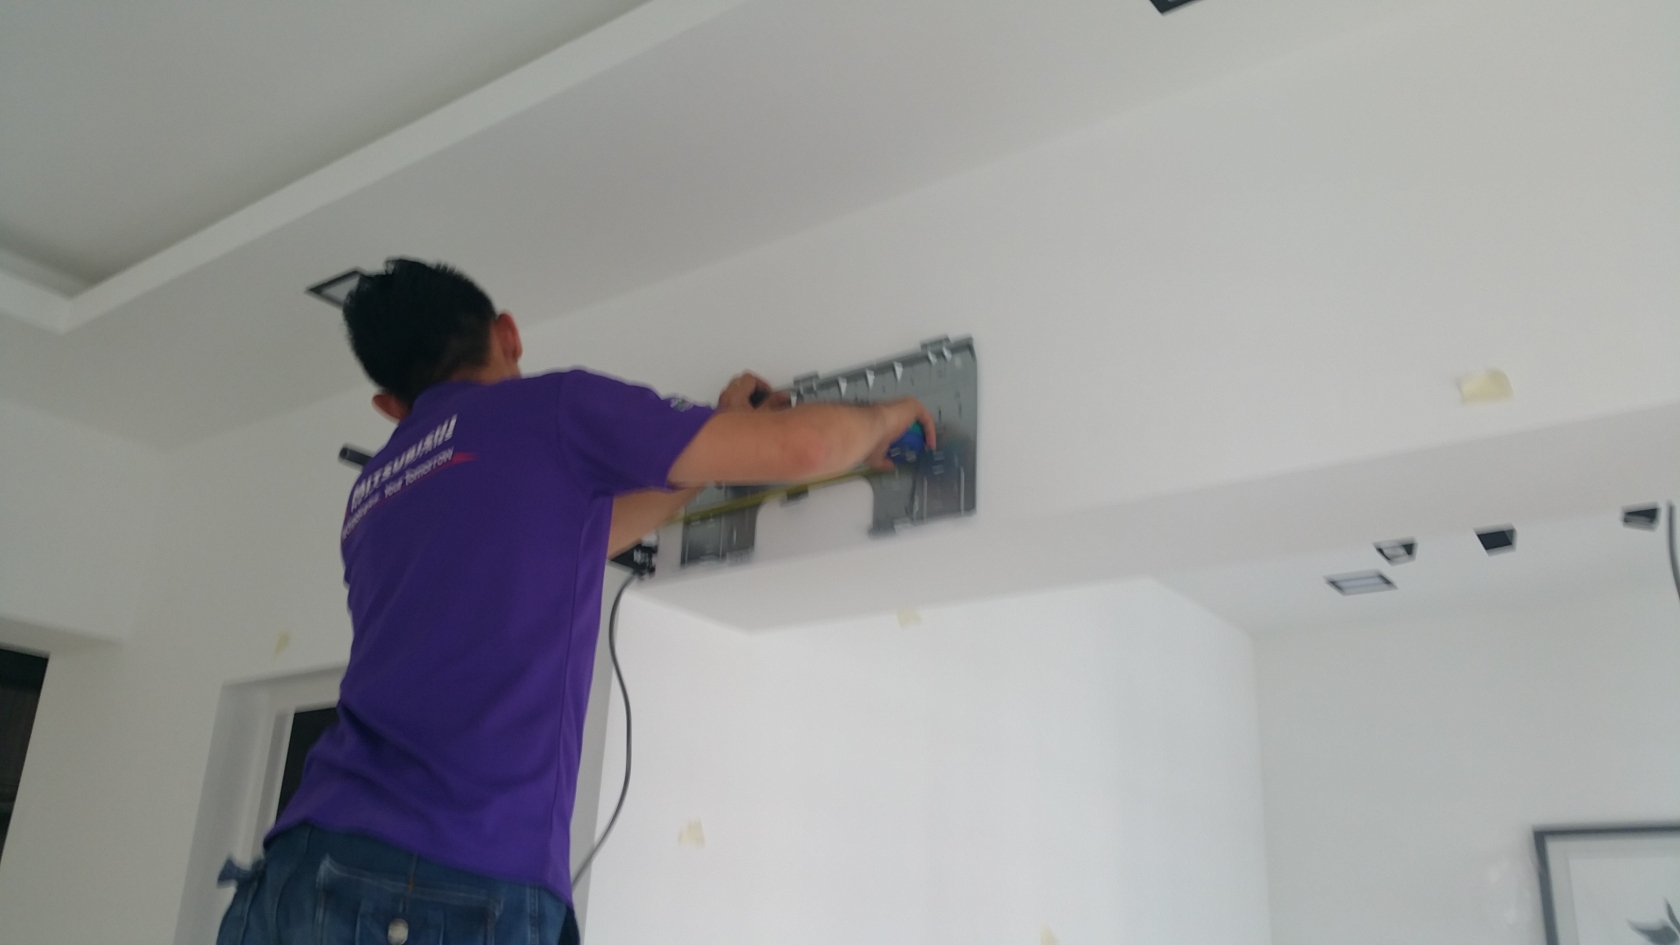
Air-Con Base Plate installated, Piping routed and fitted.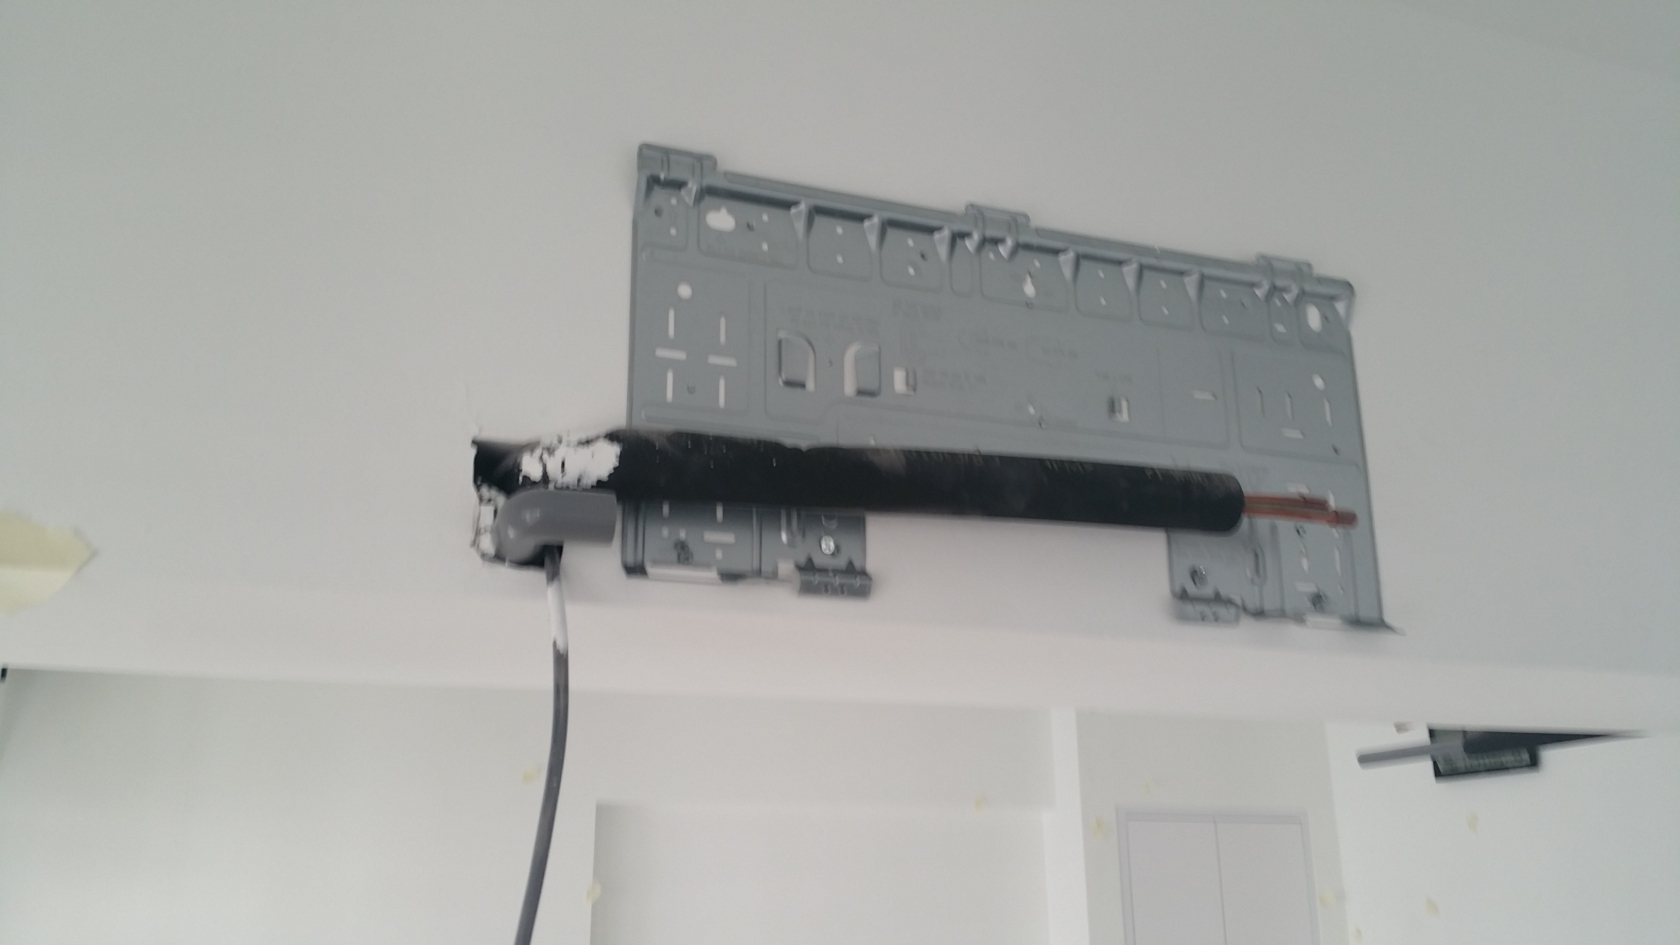
Installing the Air-Con Main Unit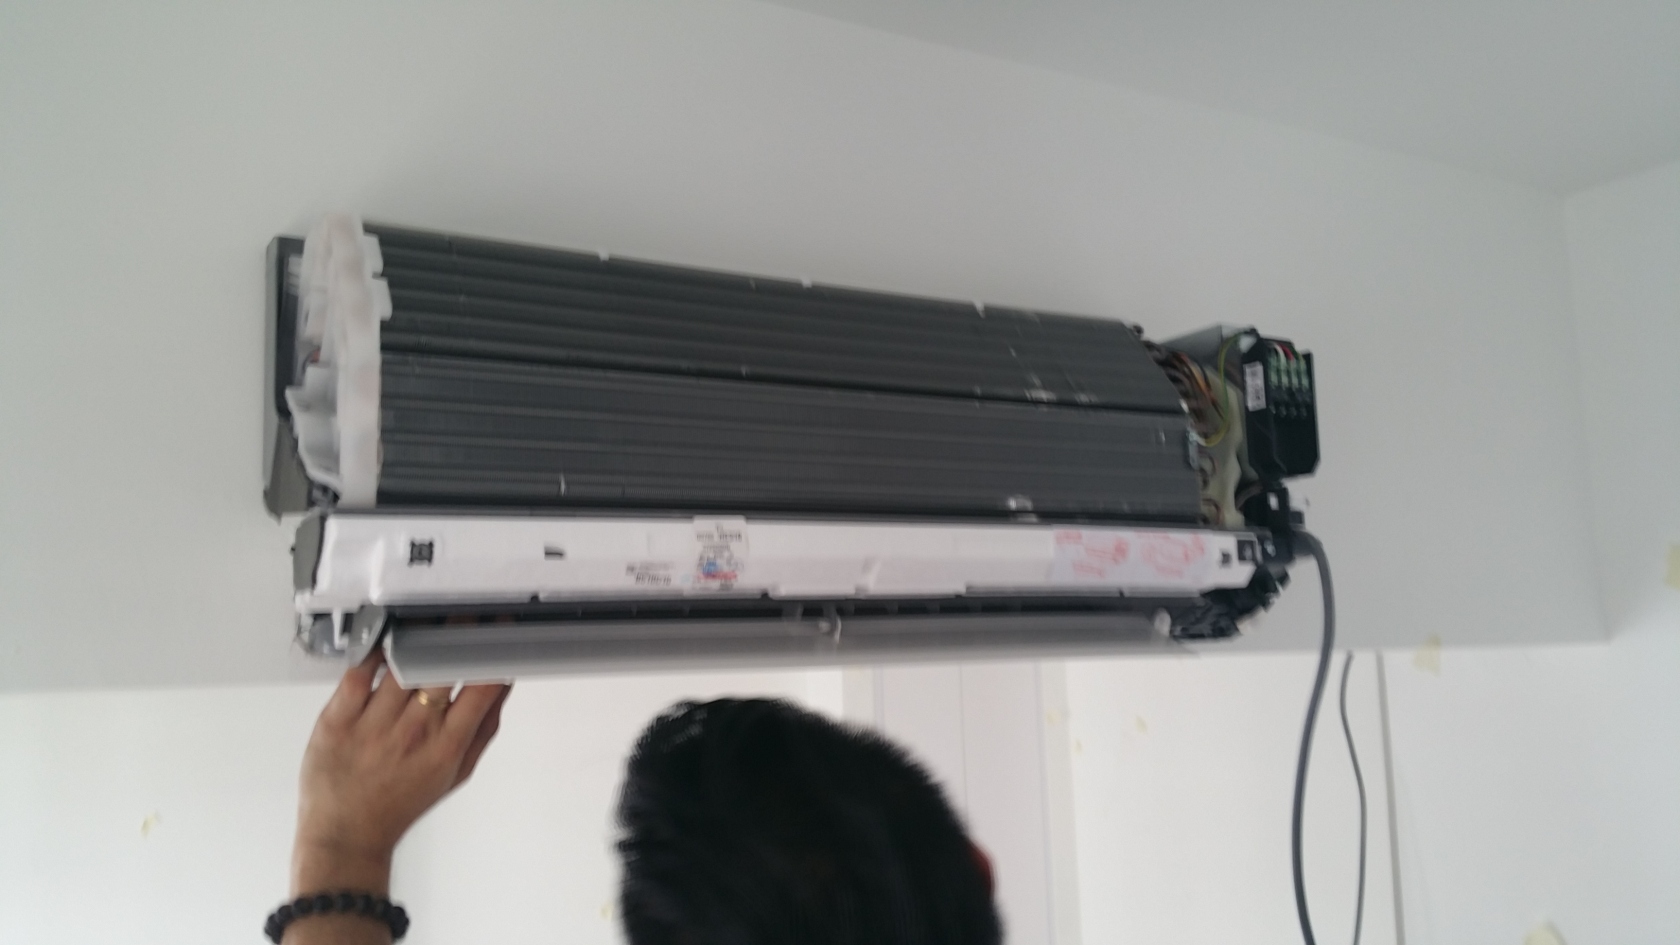
Close-up look at how complicated looking the Air-Con is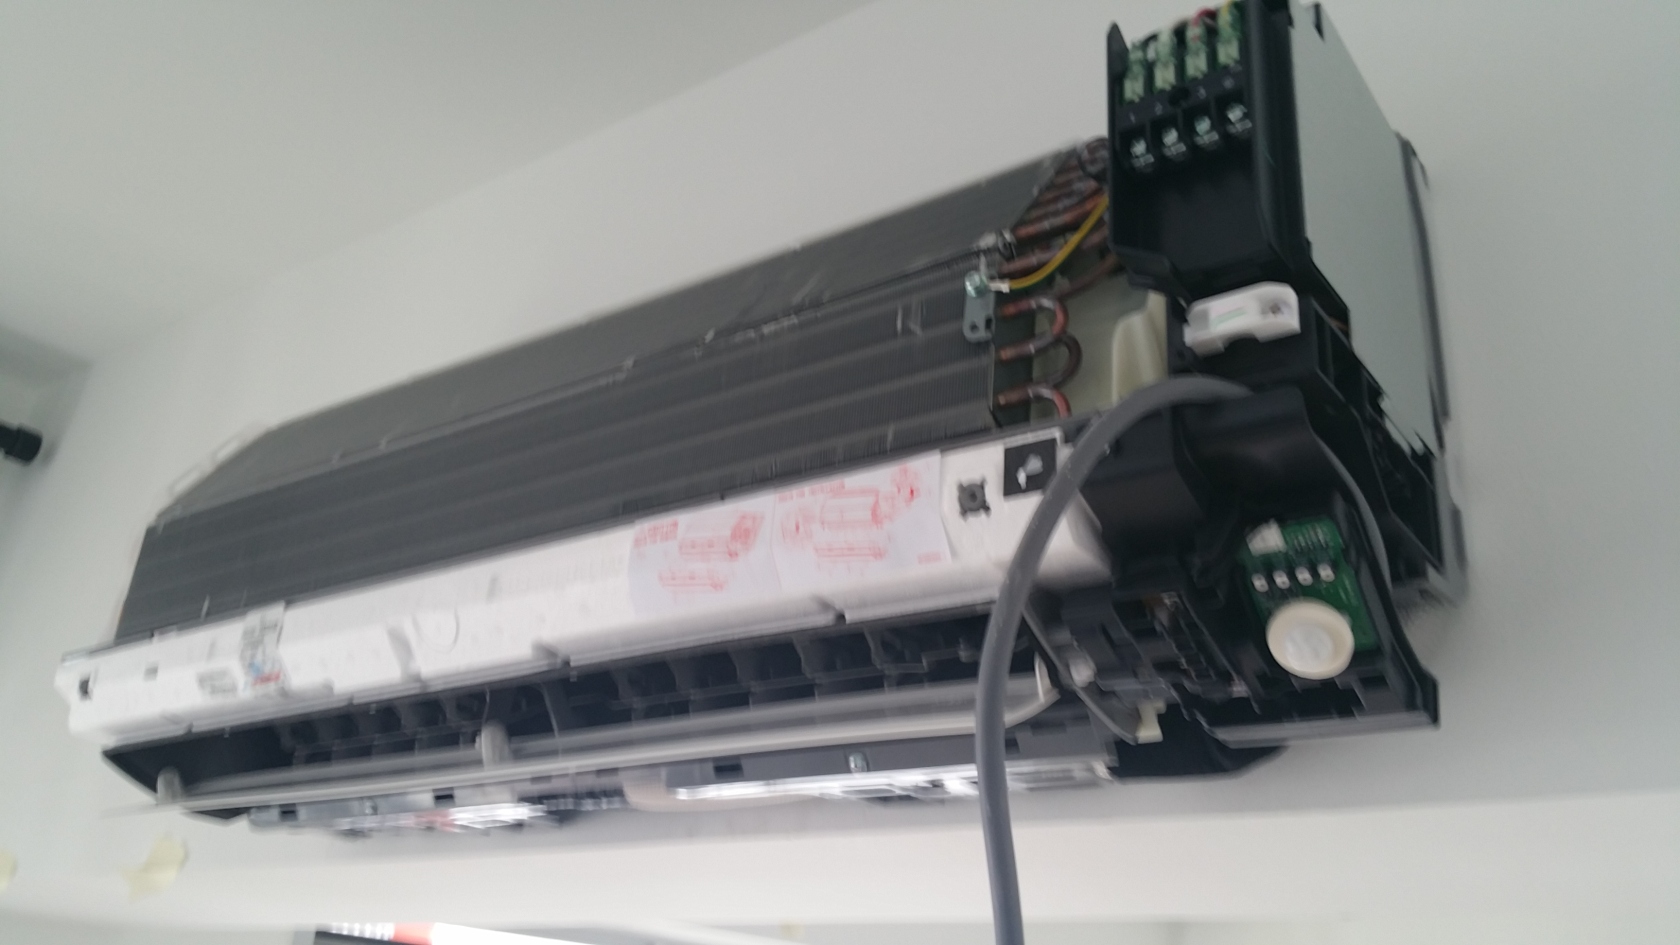
Covering up the Air-Con Main Unit with the Casing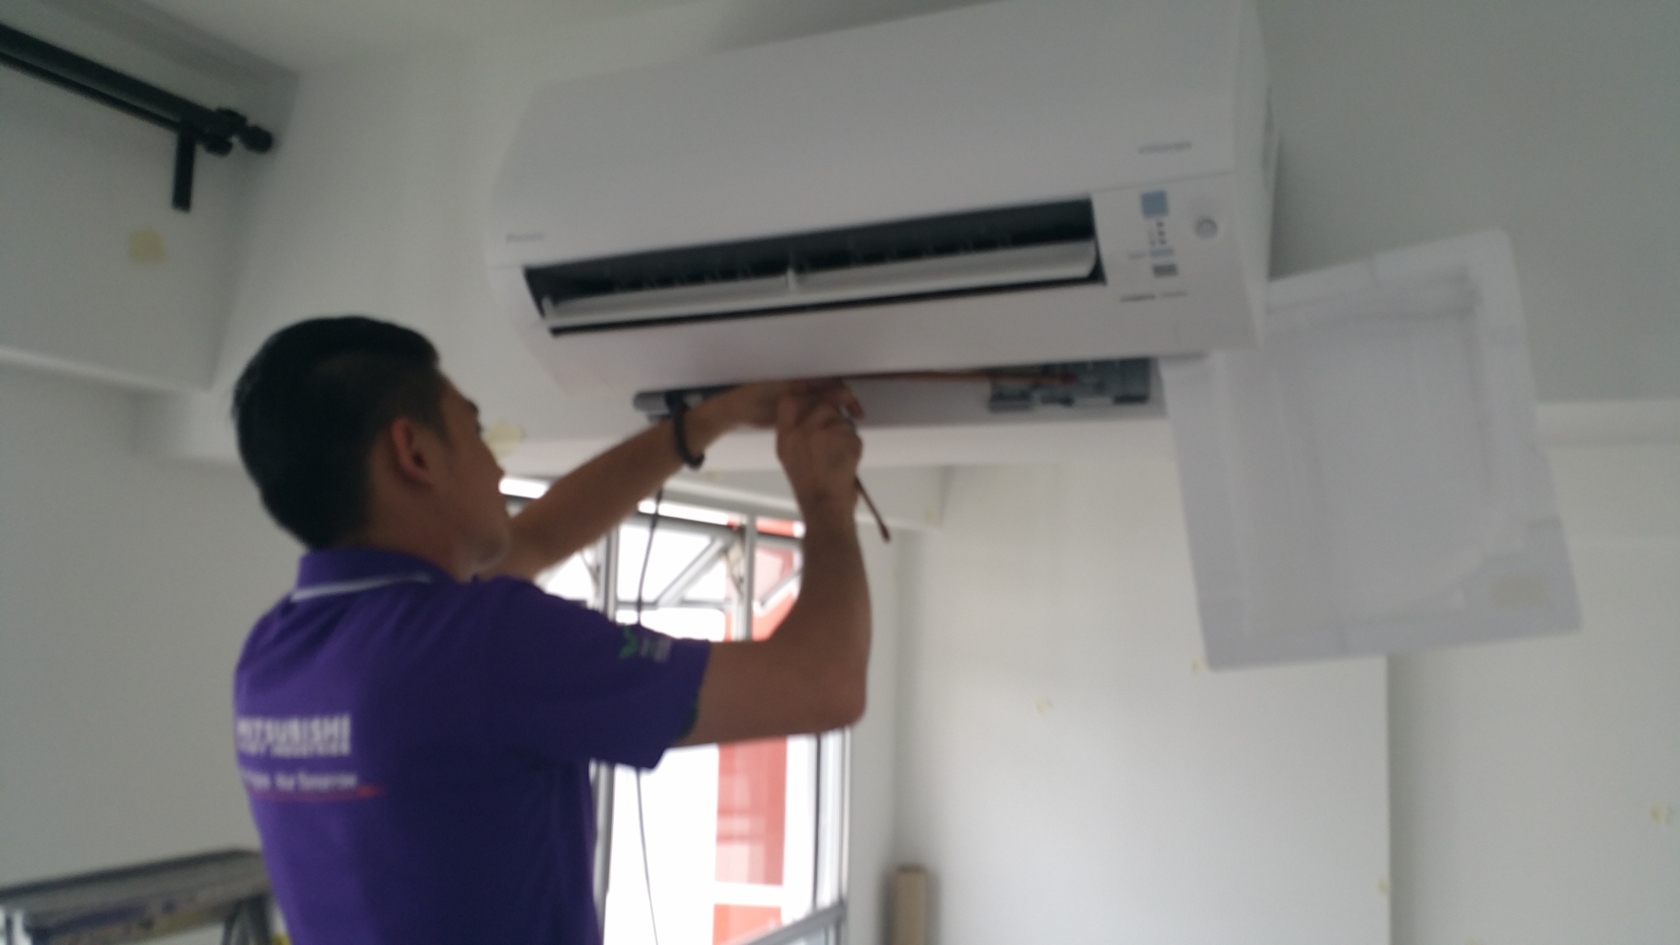
Bedroom 9000BTU Air-Con Installed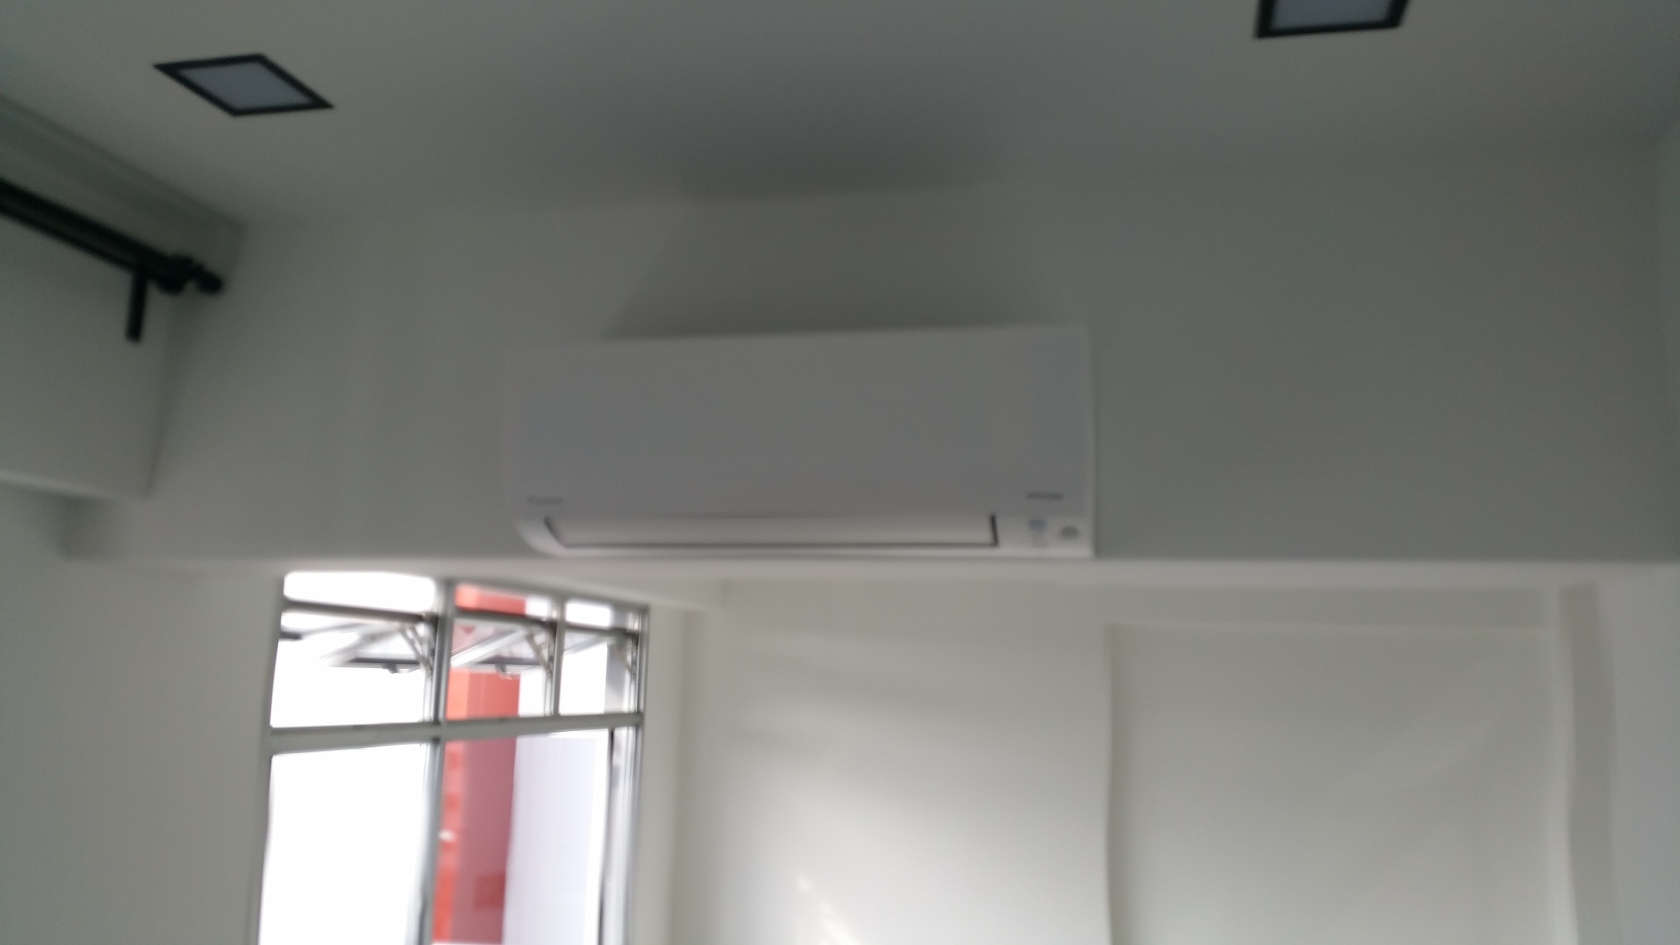
Living Room 18000BTU Air-Con Installed
(Honestly not much difference in size comparing a 9000BTU unit and a 18000BTU unit,
I don’t know about Air-Cons, no idea what special component is inside to make it a Bigger BTU.
Any Tech Saavy readers knows? The cooling power of the 18000BTU definitely is much much stronger)
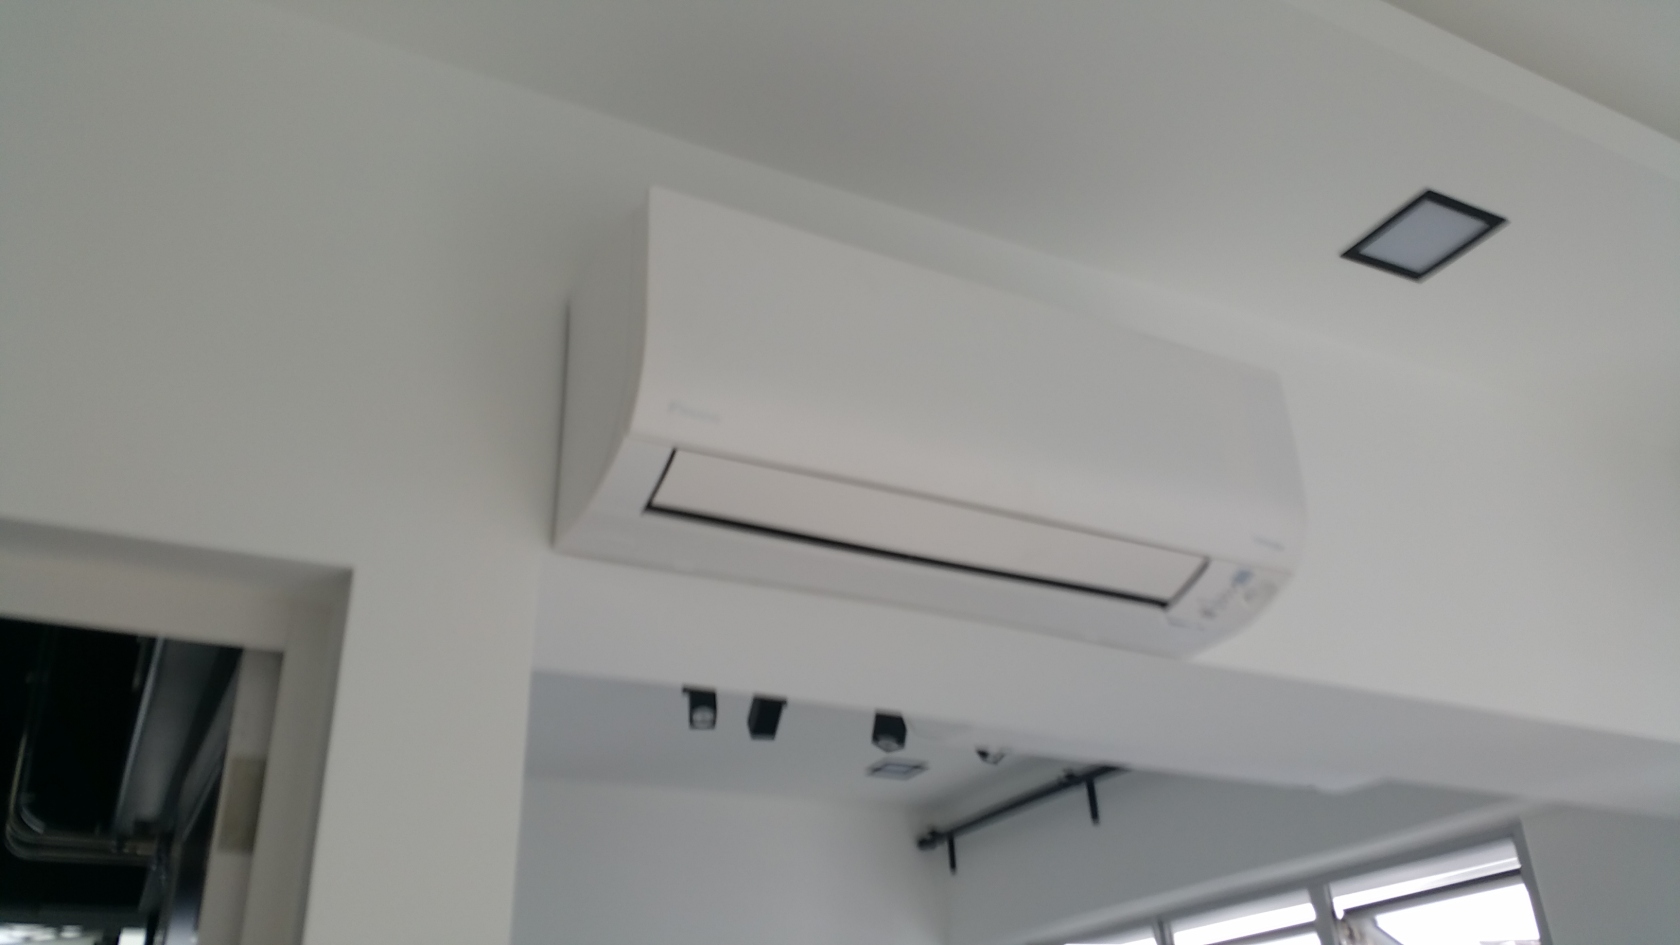
Here’s another look showing them installed asymetrically side by side.
(One thing to note if you are installing Air-Cons so closely, is that the Remote Control
may sometimes activate both Air-Cons at the same time with one button press.
A mild inconvenience, all you need to do is just shield the remote control with your
hand when pressing it, or just simply turn off the Air-Con that you accidentally turned on.)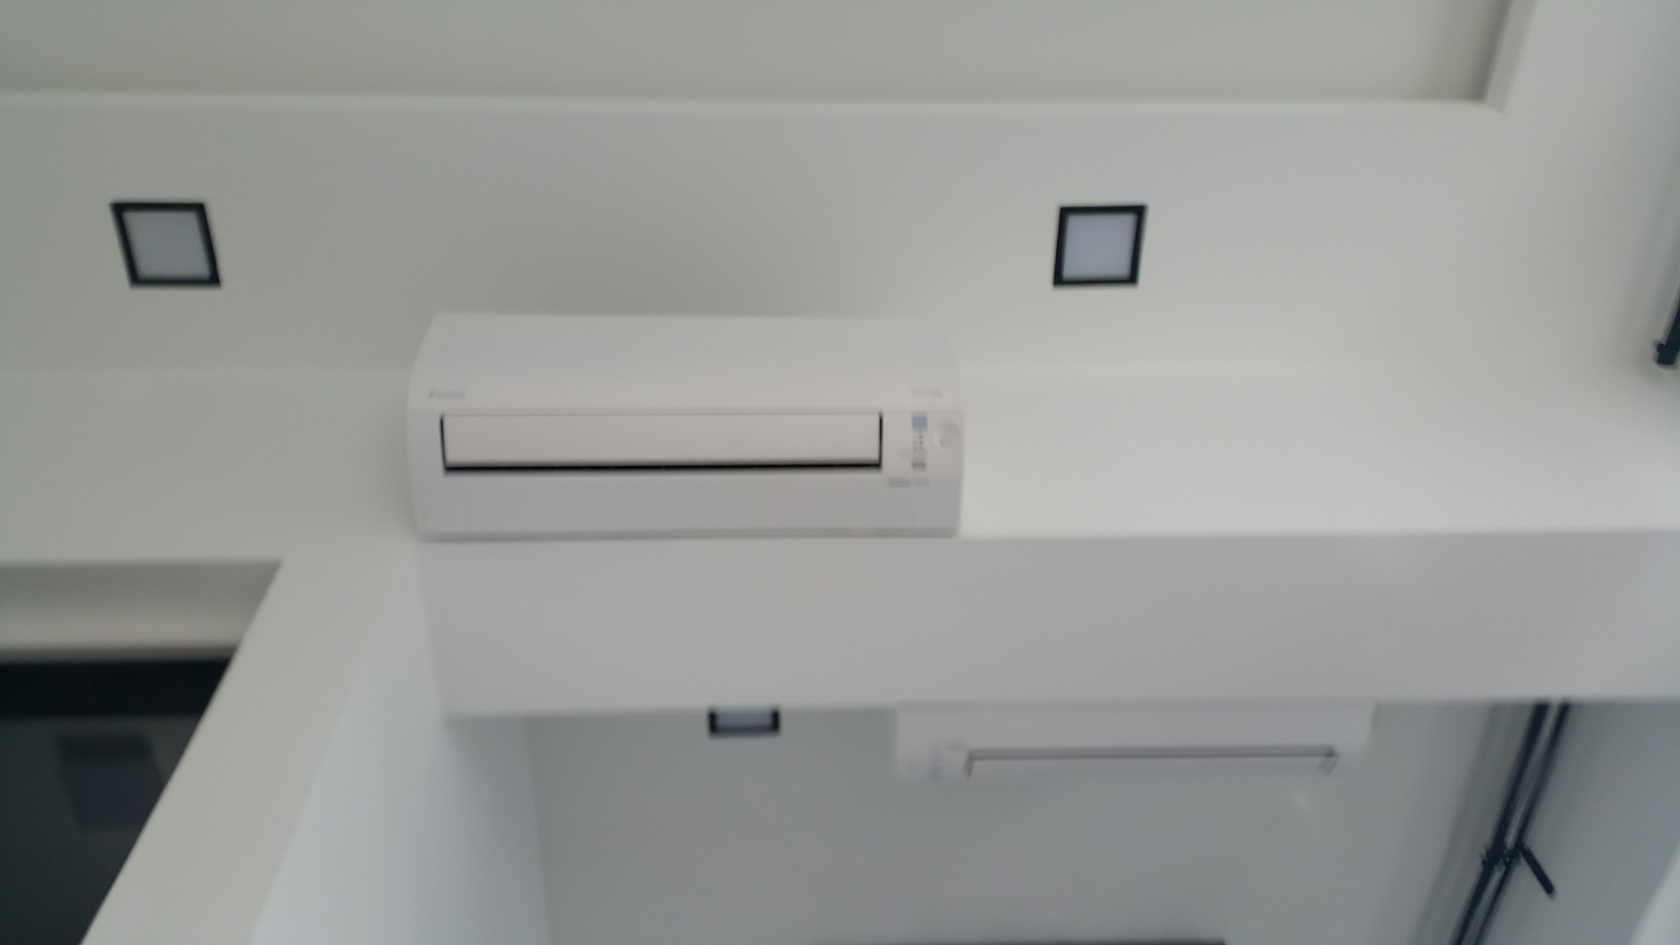
Oh but we are not quite done! Not yet!
Still remember we have this Giant Inverter / Compressor to install?
This one was so heavy, 3 people were needed to carry and install it.
So one guy climbed out to the Air-Con ledge to prep the Air-Con piping that was also laid way back in Week 1 of the Renovation.
Nowadays it is mandatory for new HDB BTO flats to have a dedicated concrete ledge and metal barriers to prevent Inverter/Compressor from falling off, and also ensure the safety of the Air-Con installers.Older HDBs built in the 1980s don’t have such features, and I really have
no idea how the Air-Con guys can install that safely. Really dangerous job.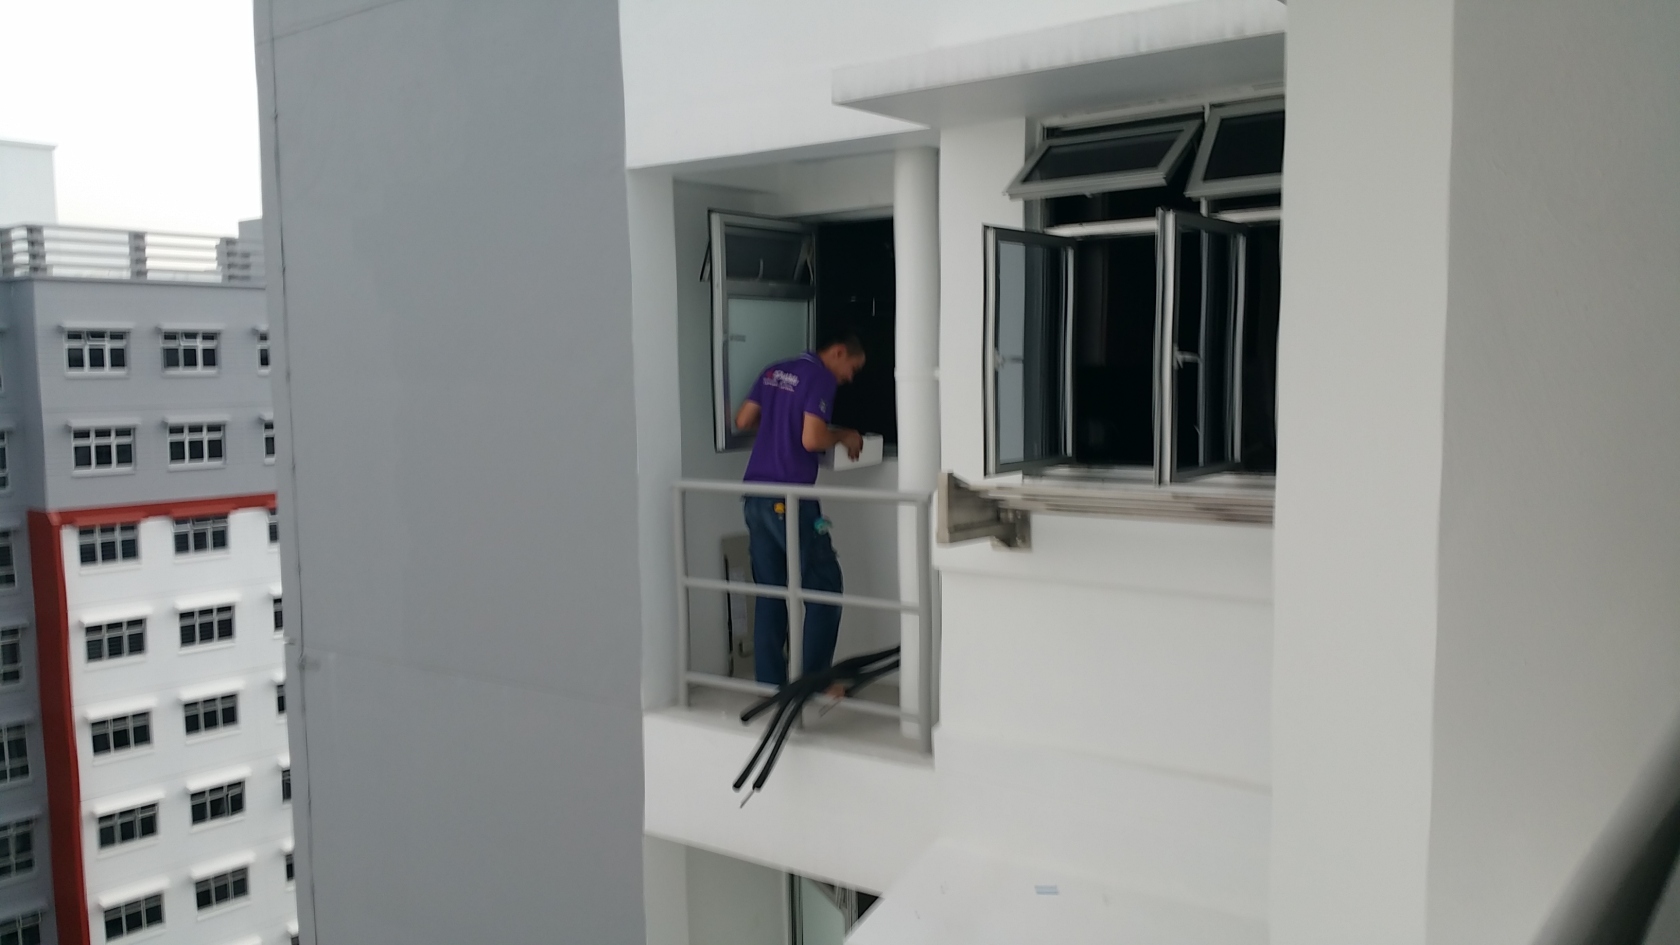
So anyway, after prepping the piping outside, the guy will remain outside
while his 2 colleagues bring in the Inverter Compressor.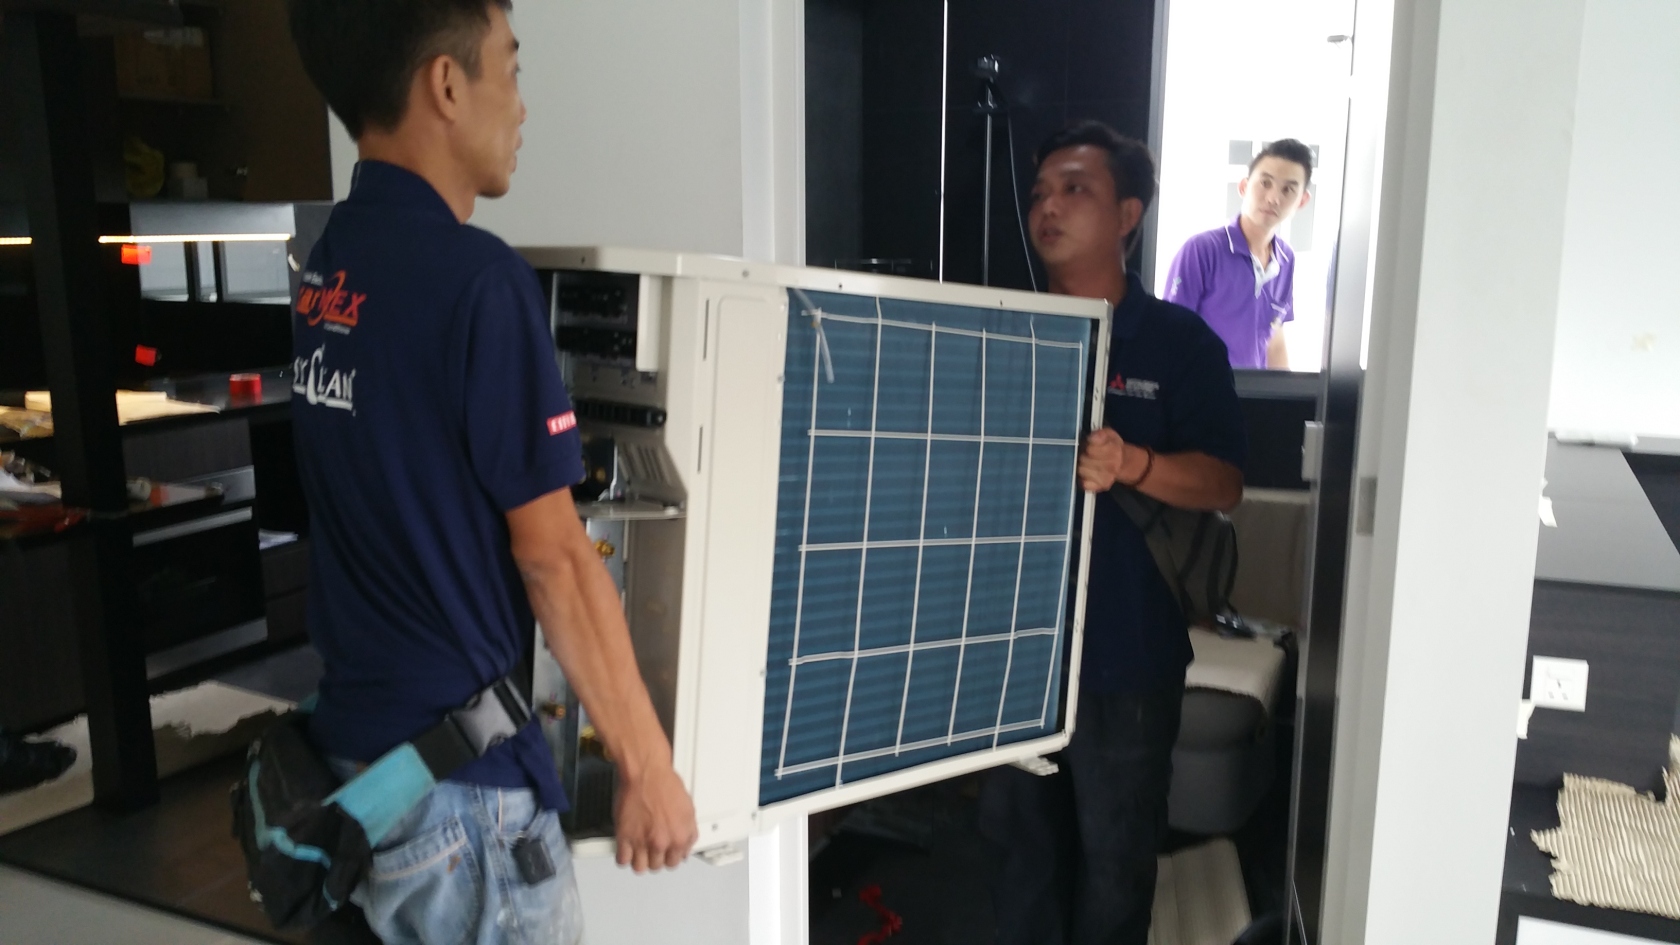
This part really made my heart skip a few beats because they had to then carefully fit the Giant Inverter/Compressor nicely through my Bathroom Window without causing any scratches to my Tiles or Window.
Luckily they were very professional about it, and it was all done nicely and safely. Phew!!!!
(Quite amusing to see them wear Mitsubishi Air-Con Shirt but installing Daikin Air-Con btw LOL!!)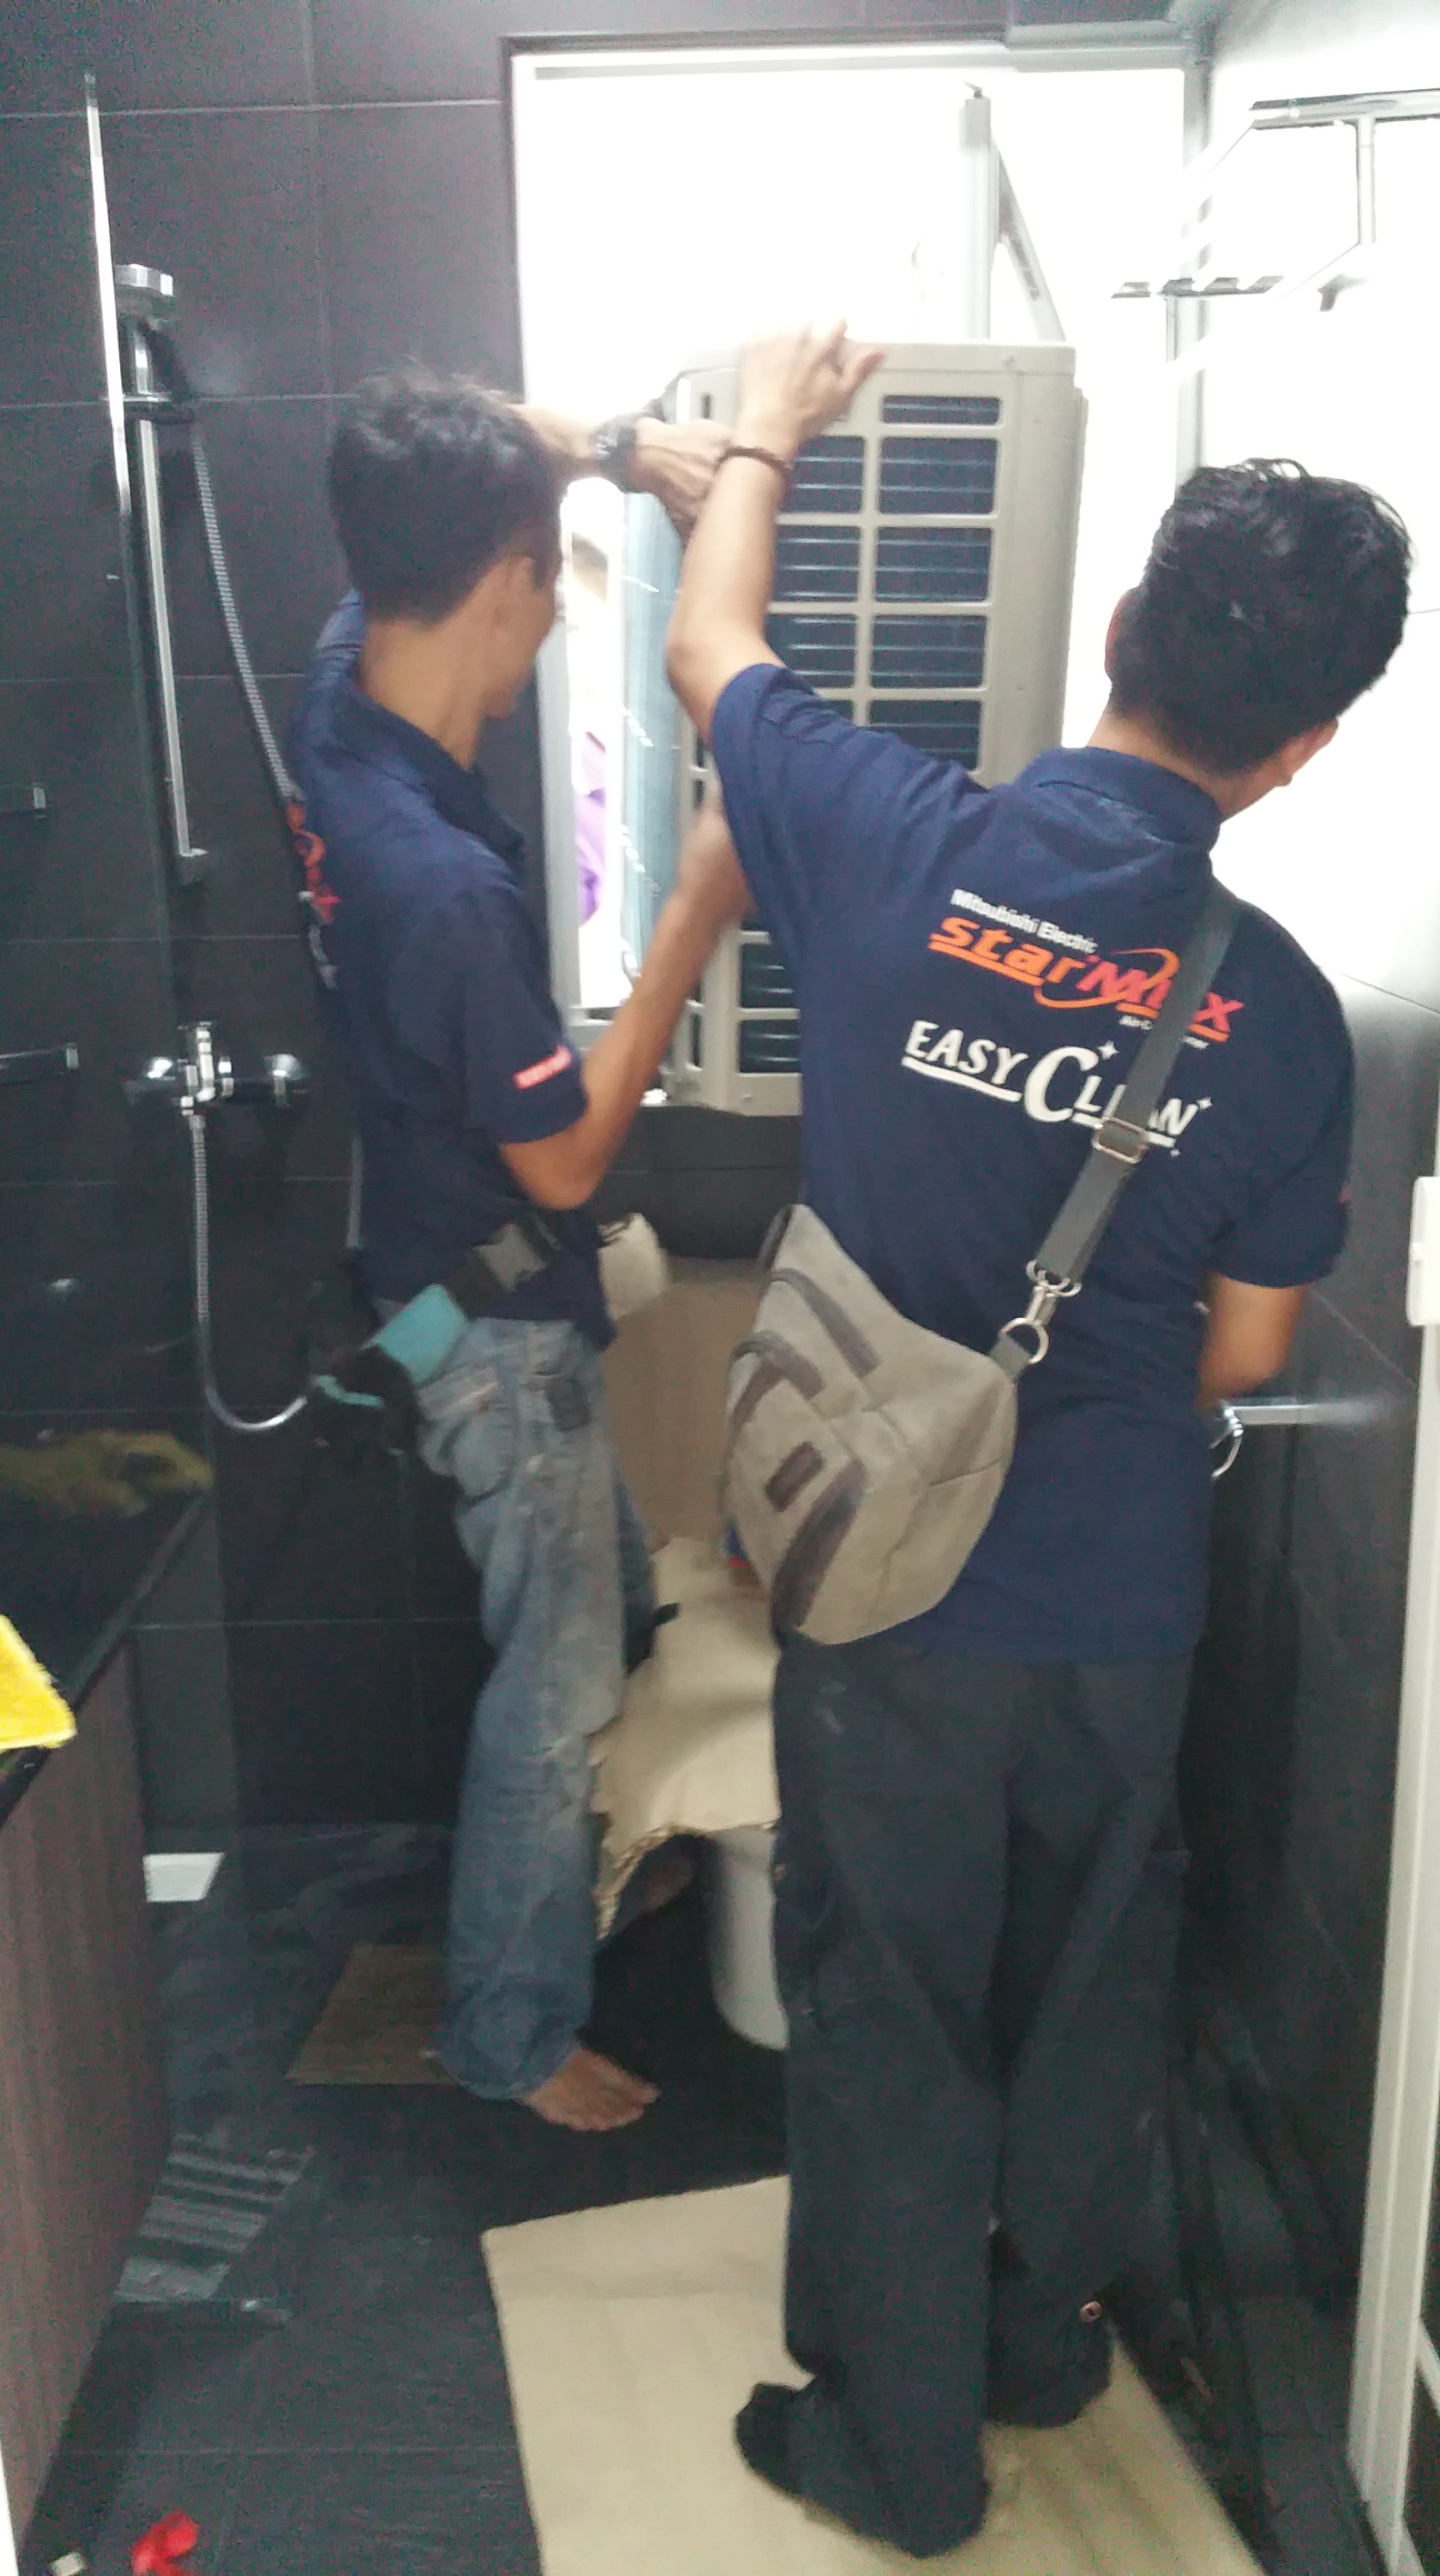
Once safely outside, its just a matter of hooking up and installing the piping accordingly.
Luckily it was a bright sunny day. I wonder if the Air-Con guys will still install this Inverter/Compressor
if it was raining? Really dangerous job. Thank you so much!!!
(Treating them to some drinks at this point would be a nice way to thank them)And of course, the end result of all that hard work is to enjoy the cool cool air!
Both Air-Cons worked and tested very well.I timed the 18000BTU one, and within 5-10mins can immediately feel the cool crisp air.
Maximum Coolness was achieved in about 1.5 hour++ and this was tested on a hot sunny afternoon.
Coolness was felt in the entire Living Room which was what I wanted. Its not the freezing cold type, but you can definitely feel the coldness.
The whole place felt so fresh and clean! (Protip: Turning on the Ceiling Fan helps alot in decreasing the time it takes to cool the place)As for the 9000BTU one, even when I did not have any barrier between my bedroom to the rest of my apartment, IT WAS STILL FREAKING COLD!!! Wooo!!!
--------------------------------------------------------------------------------------------------------------------------------------------
In fact, when I was sleeping and set it to 23°C, I still woke up half-way freezing and shivering like mad LOL!! Guess I need to buy thicker blankets and maybe even a sweater!! LOL!!!
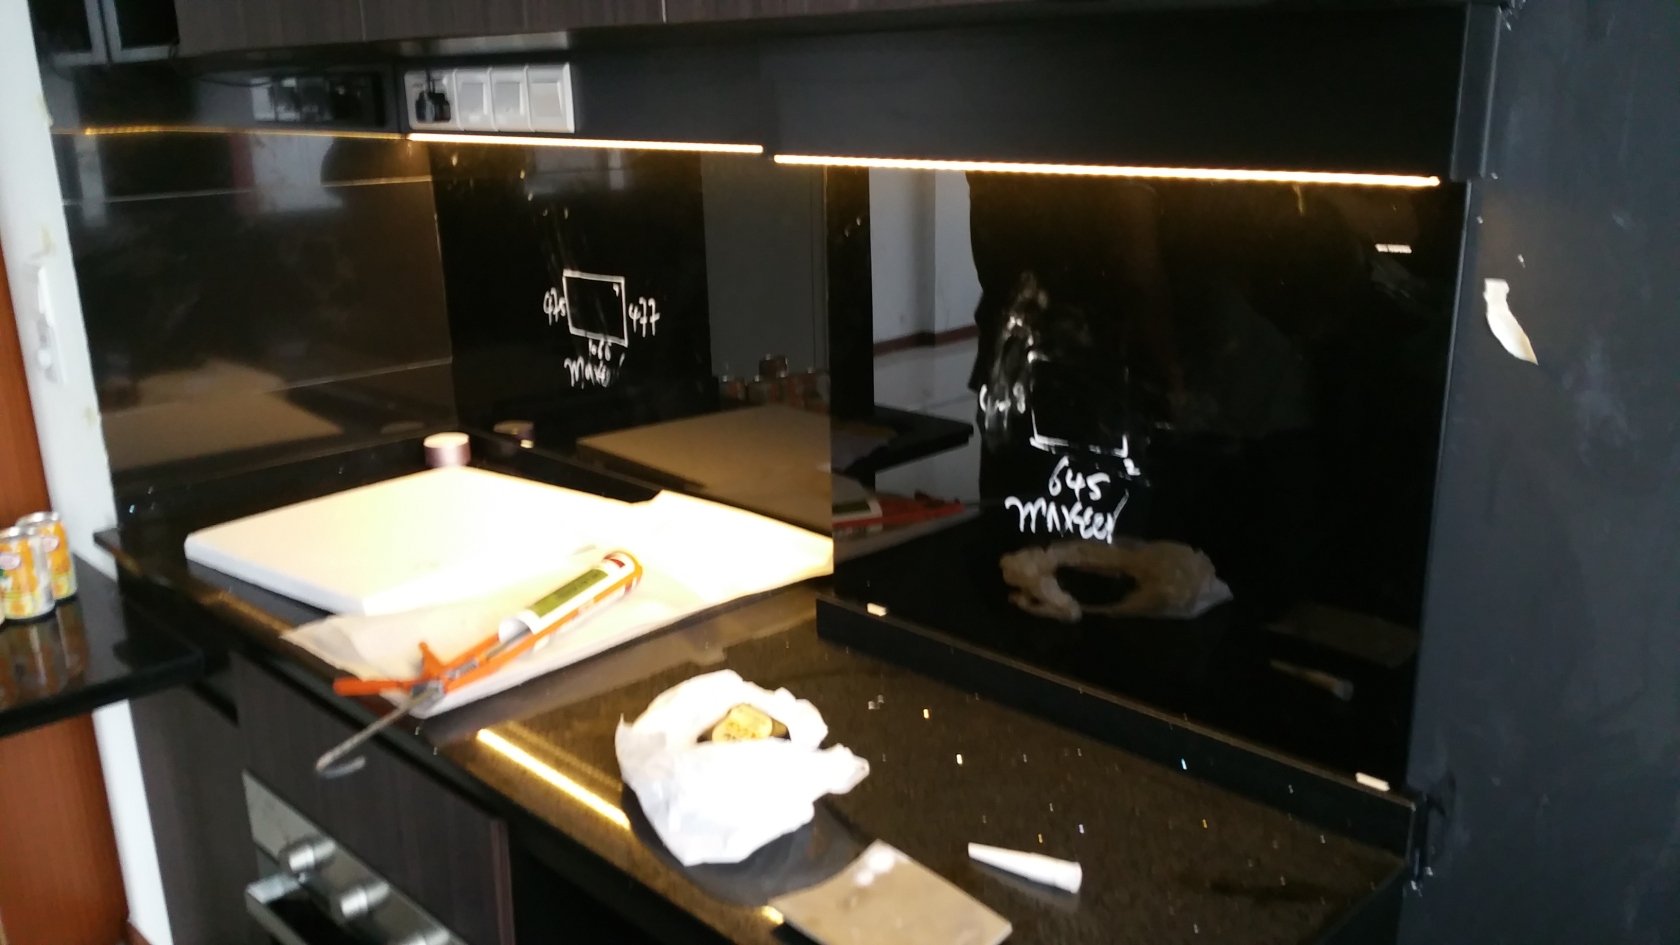
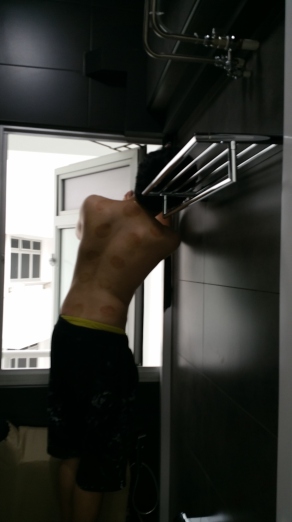
Ok moving on, the Glass guys also came to do their installations.
Tempered glass is used for my Kitchen, and also a big panel to shield my Bathroom Vanity Storage against random water splashes while bathing.Installing the Glass Backing at Kitchen
Cleaning the Bathroom Tempered Glass panel and installation.
This one also made my heart skip a beat when they were carrying it in,
but again, it was professionally installed with no hiccups!!! Double Phew!!


Applying special waterproof silicone to the glass panel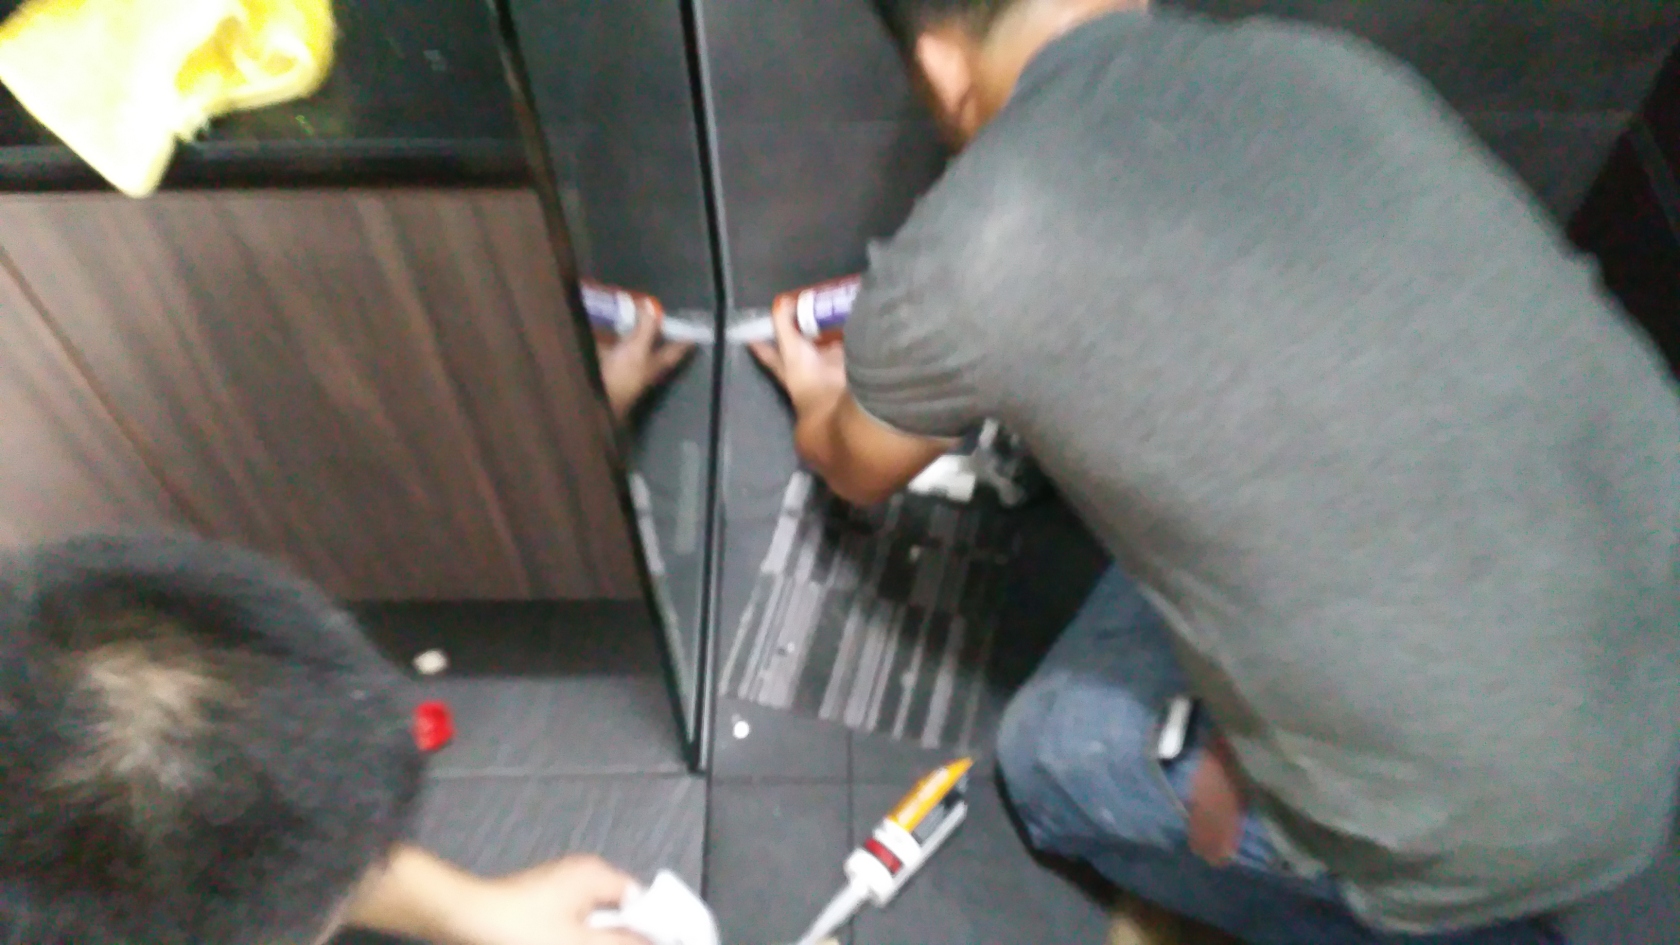
Closer Look at the Glass Corners
(A little bit dirty. No issues, it will be washed away during final cleaning)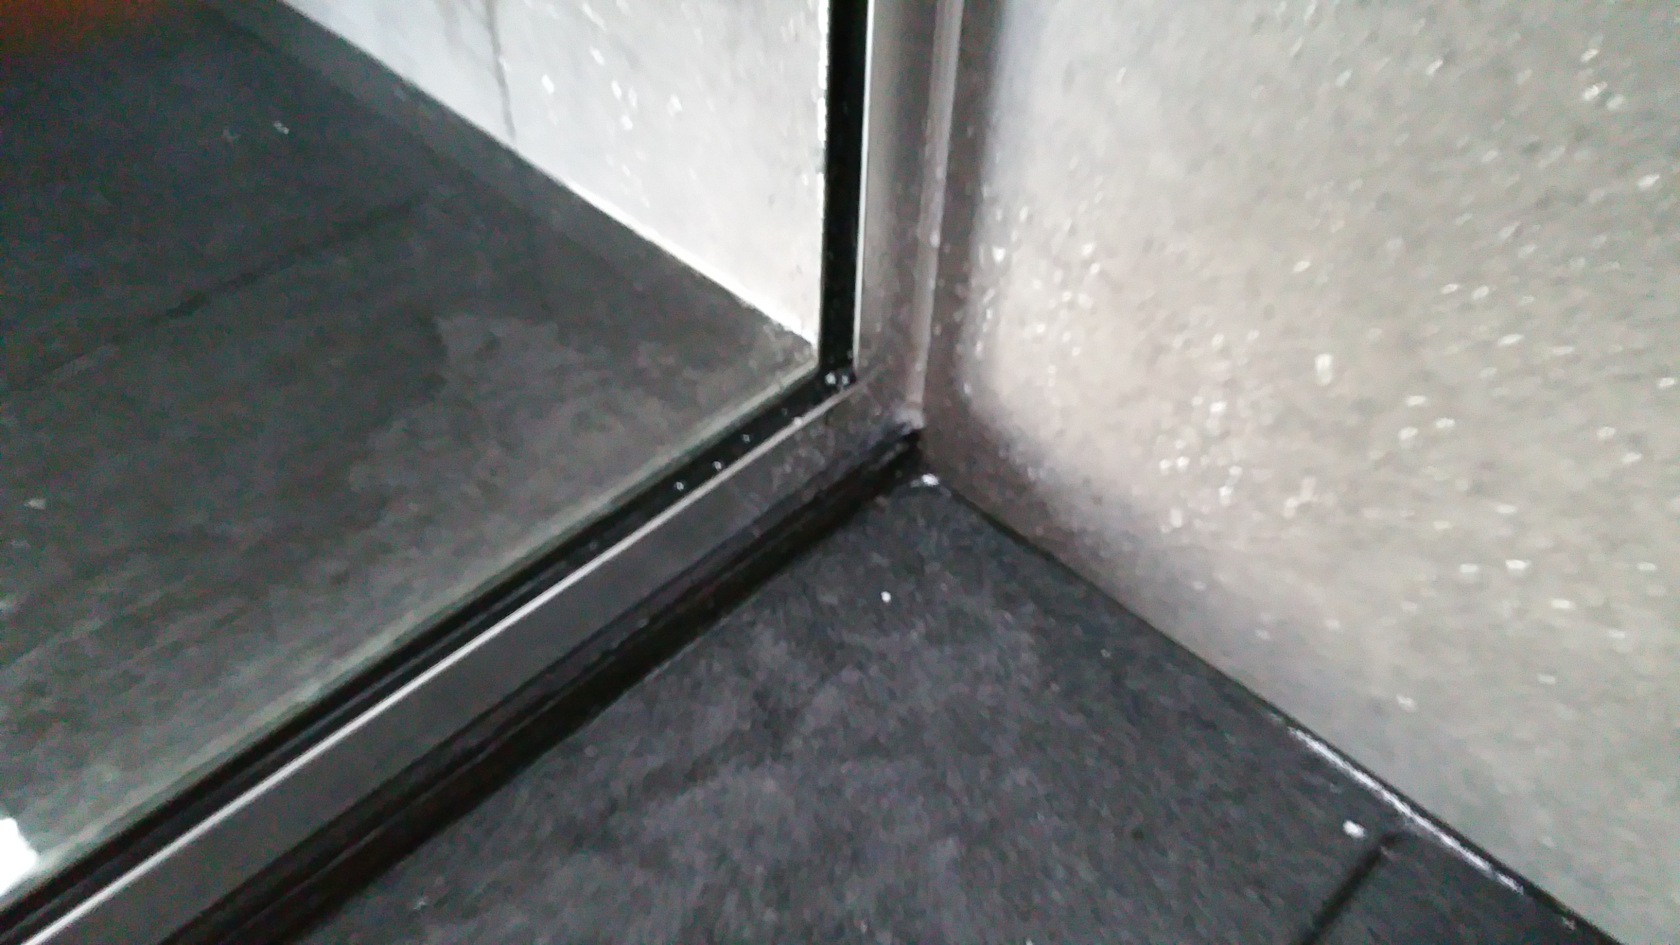
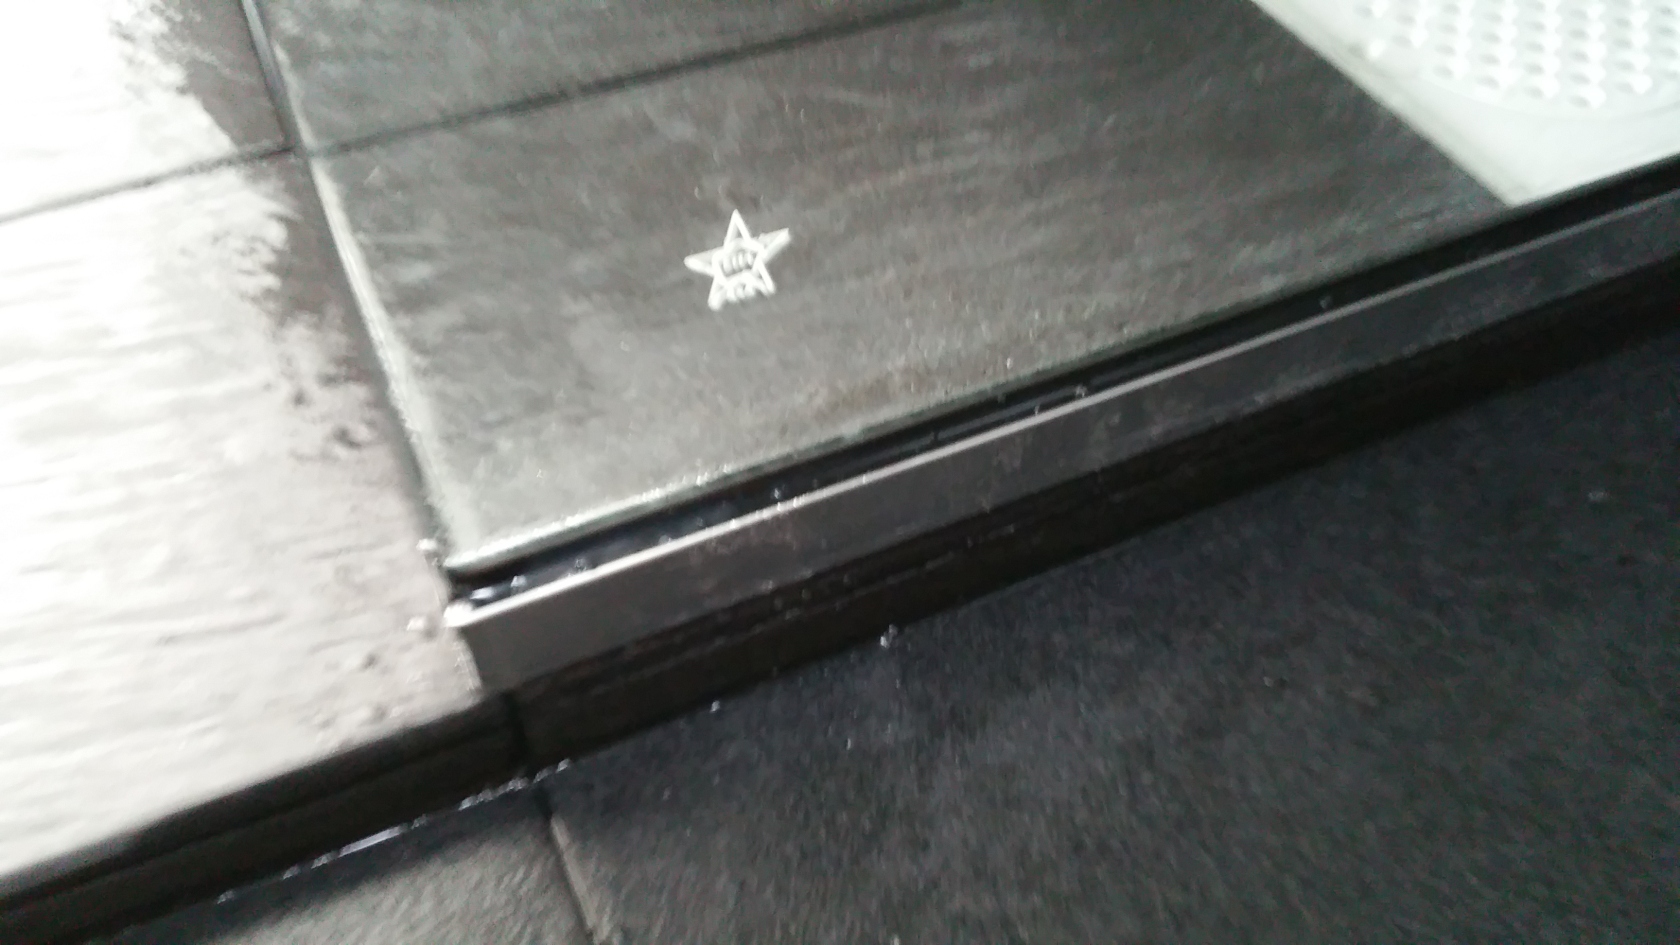
Because of the way how I installed my Glass, there is this little narrow space that may be a little hard to clean. Its still doable though with a long thin stick with a nice pad of microfiber cloth. 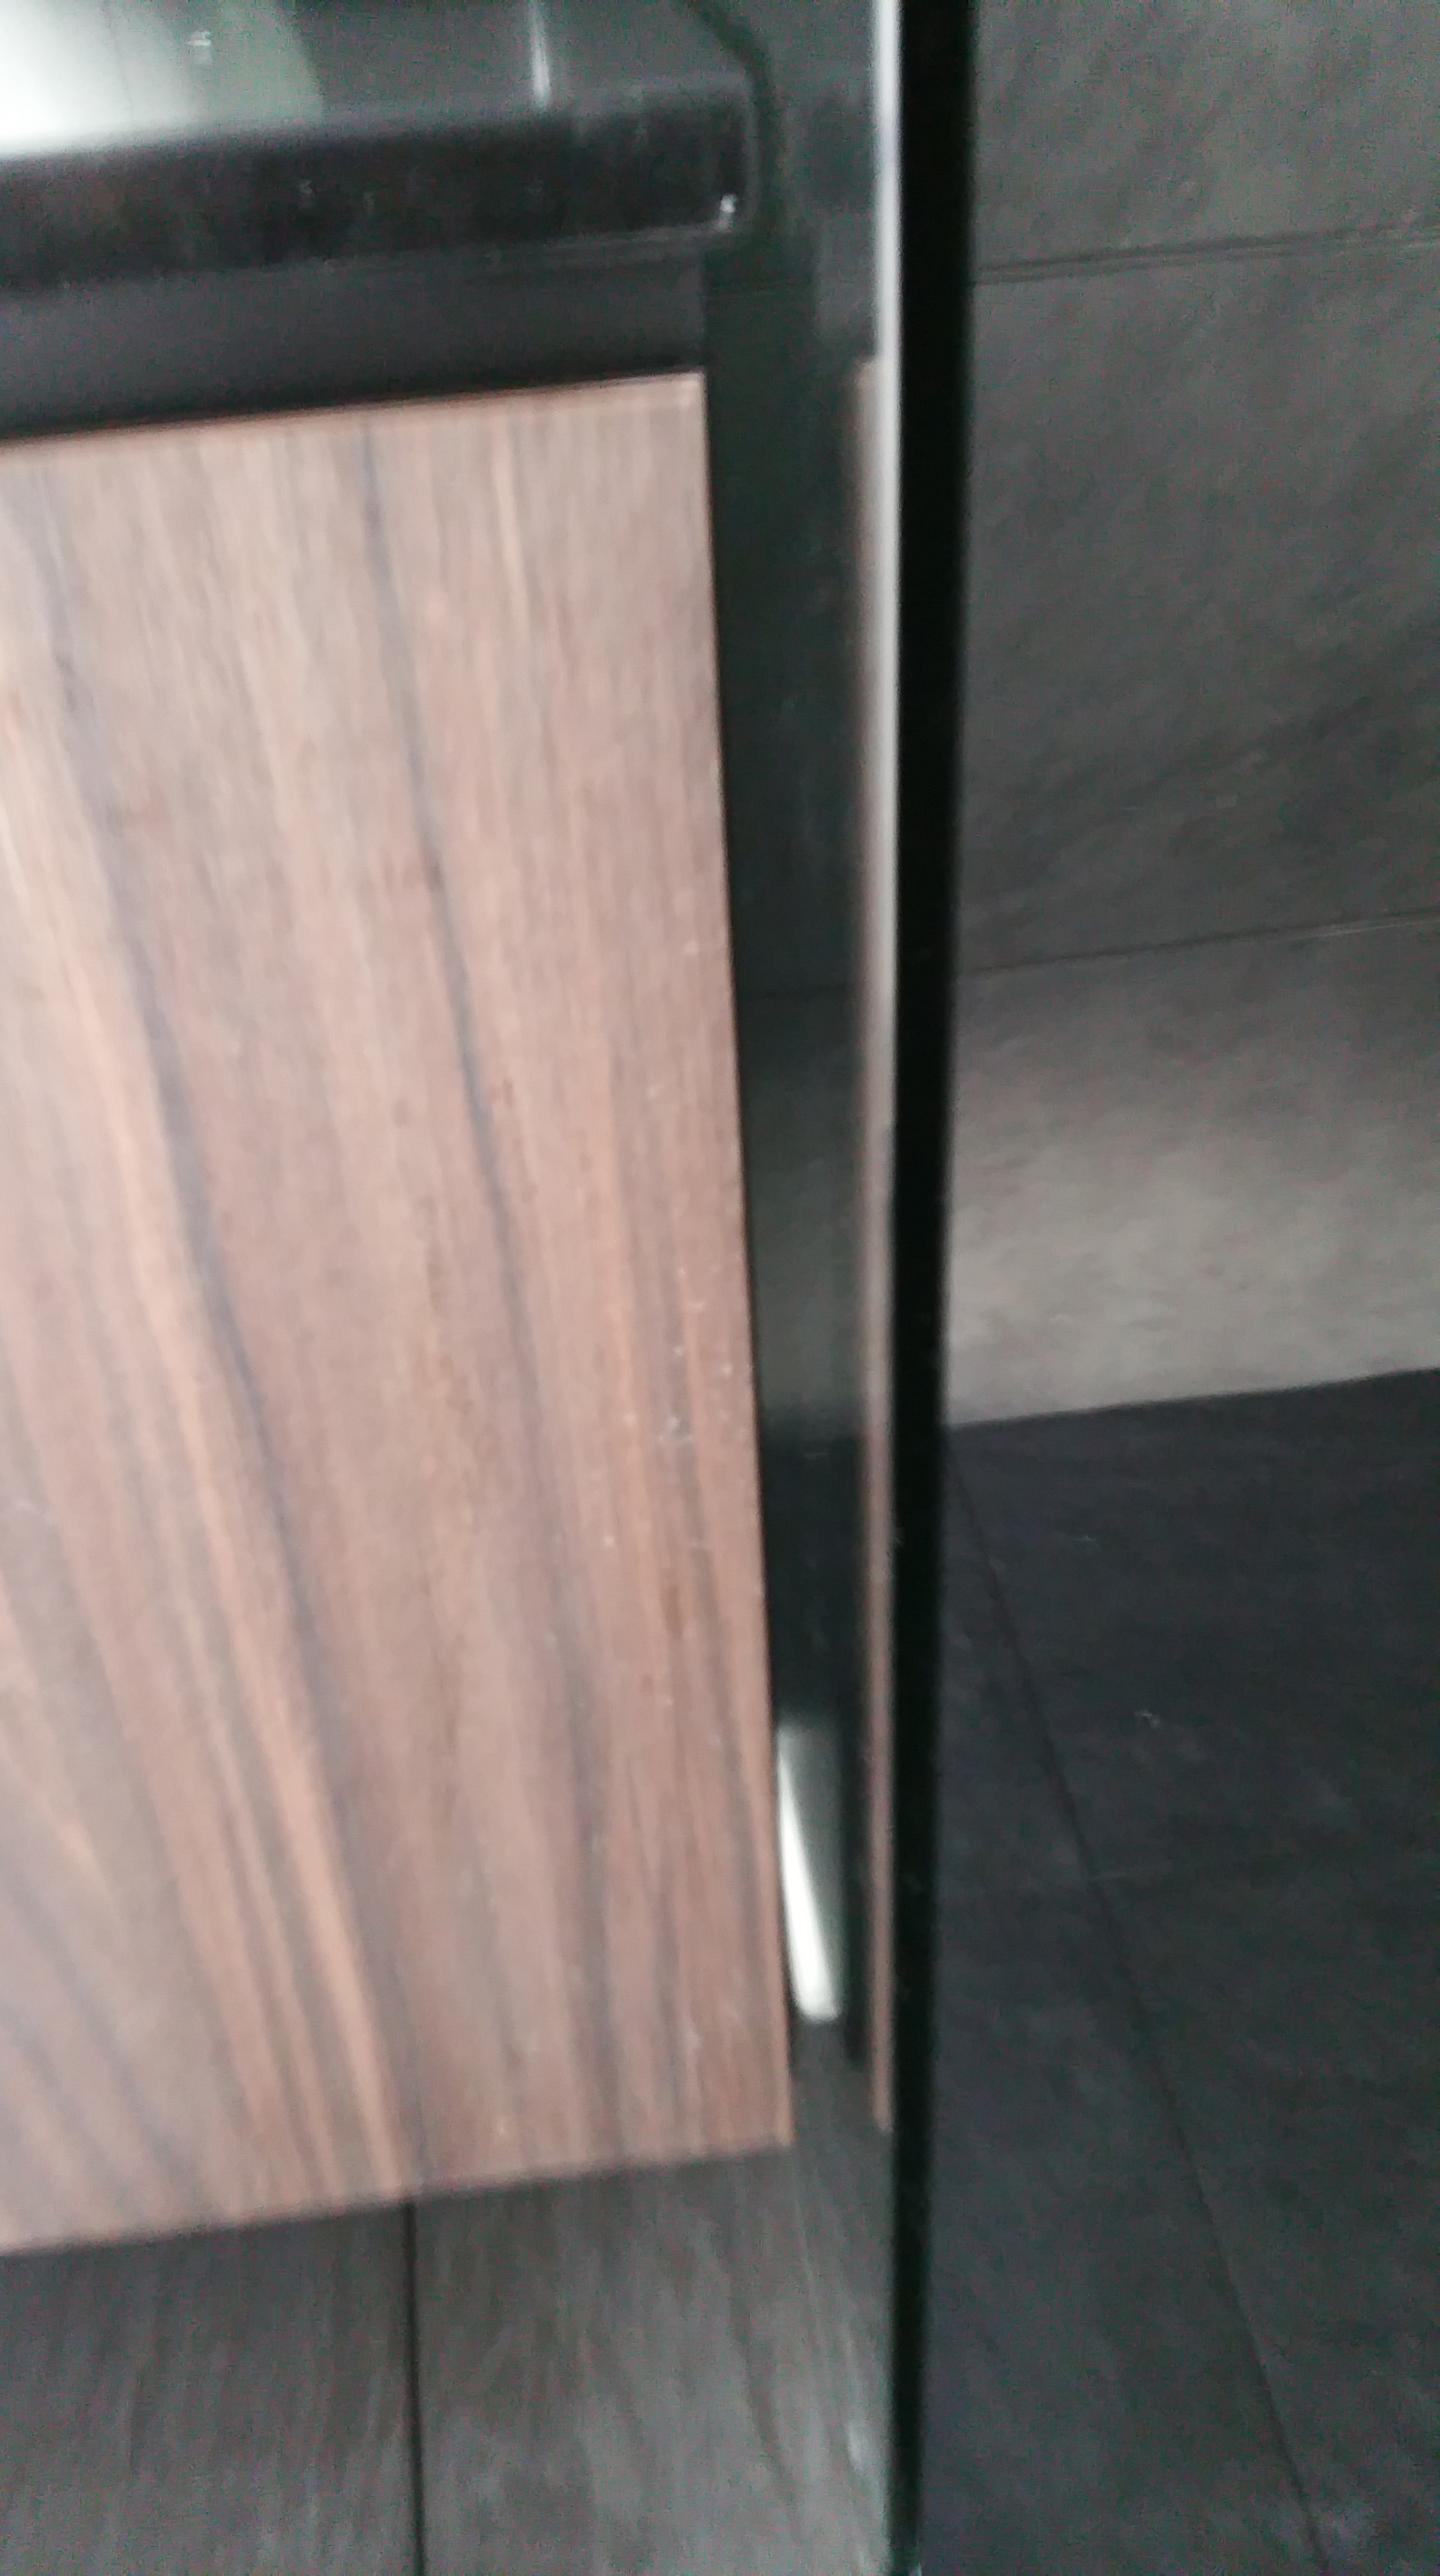
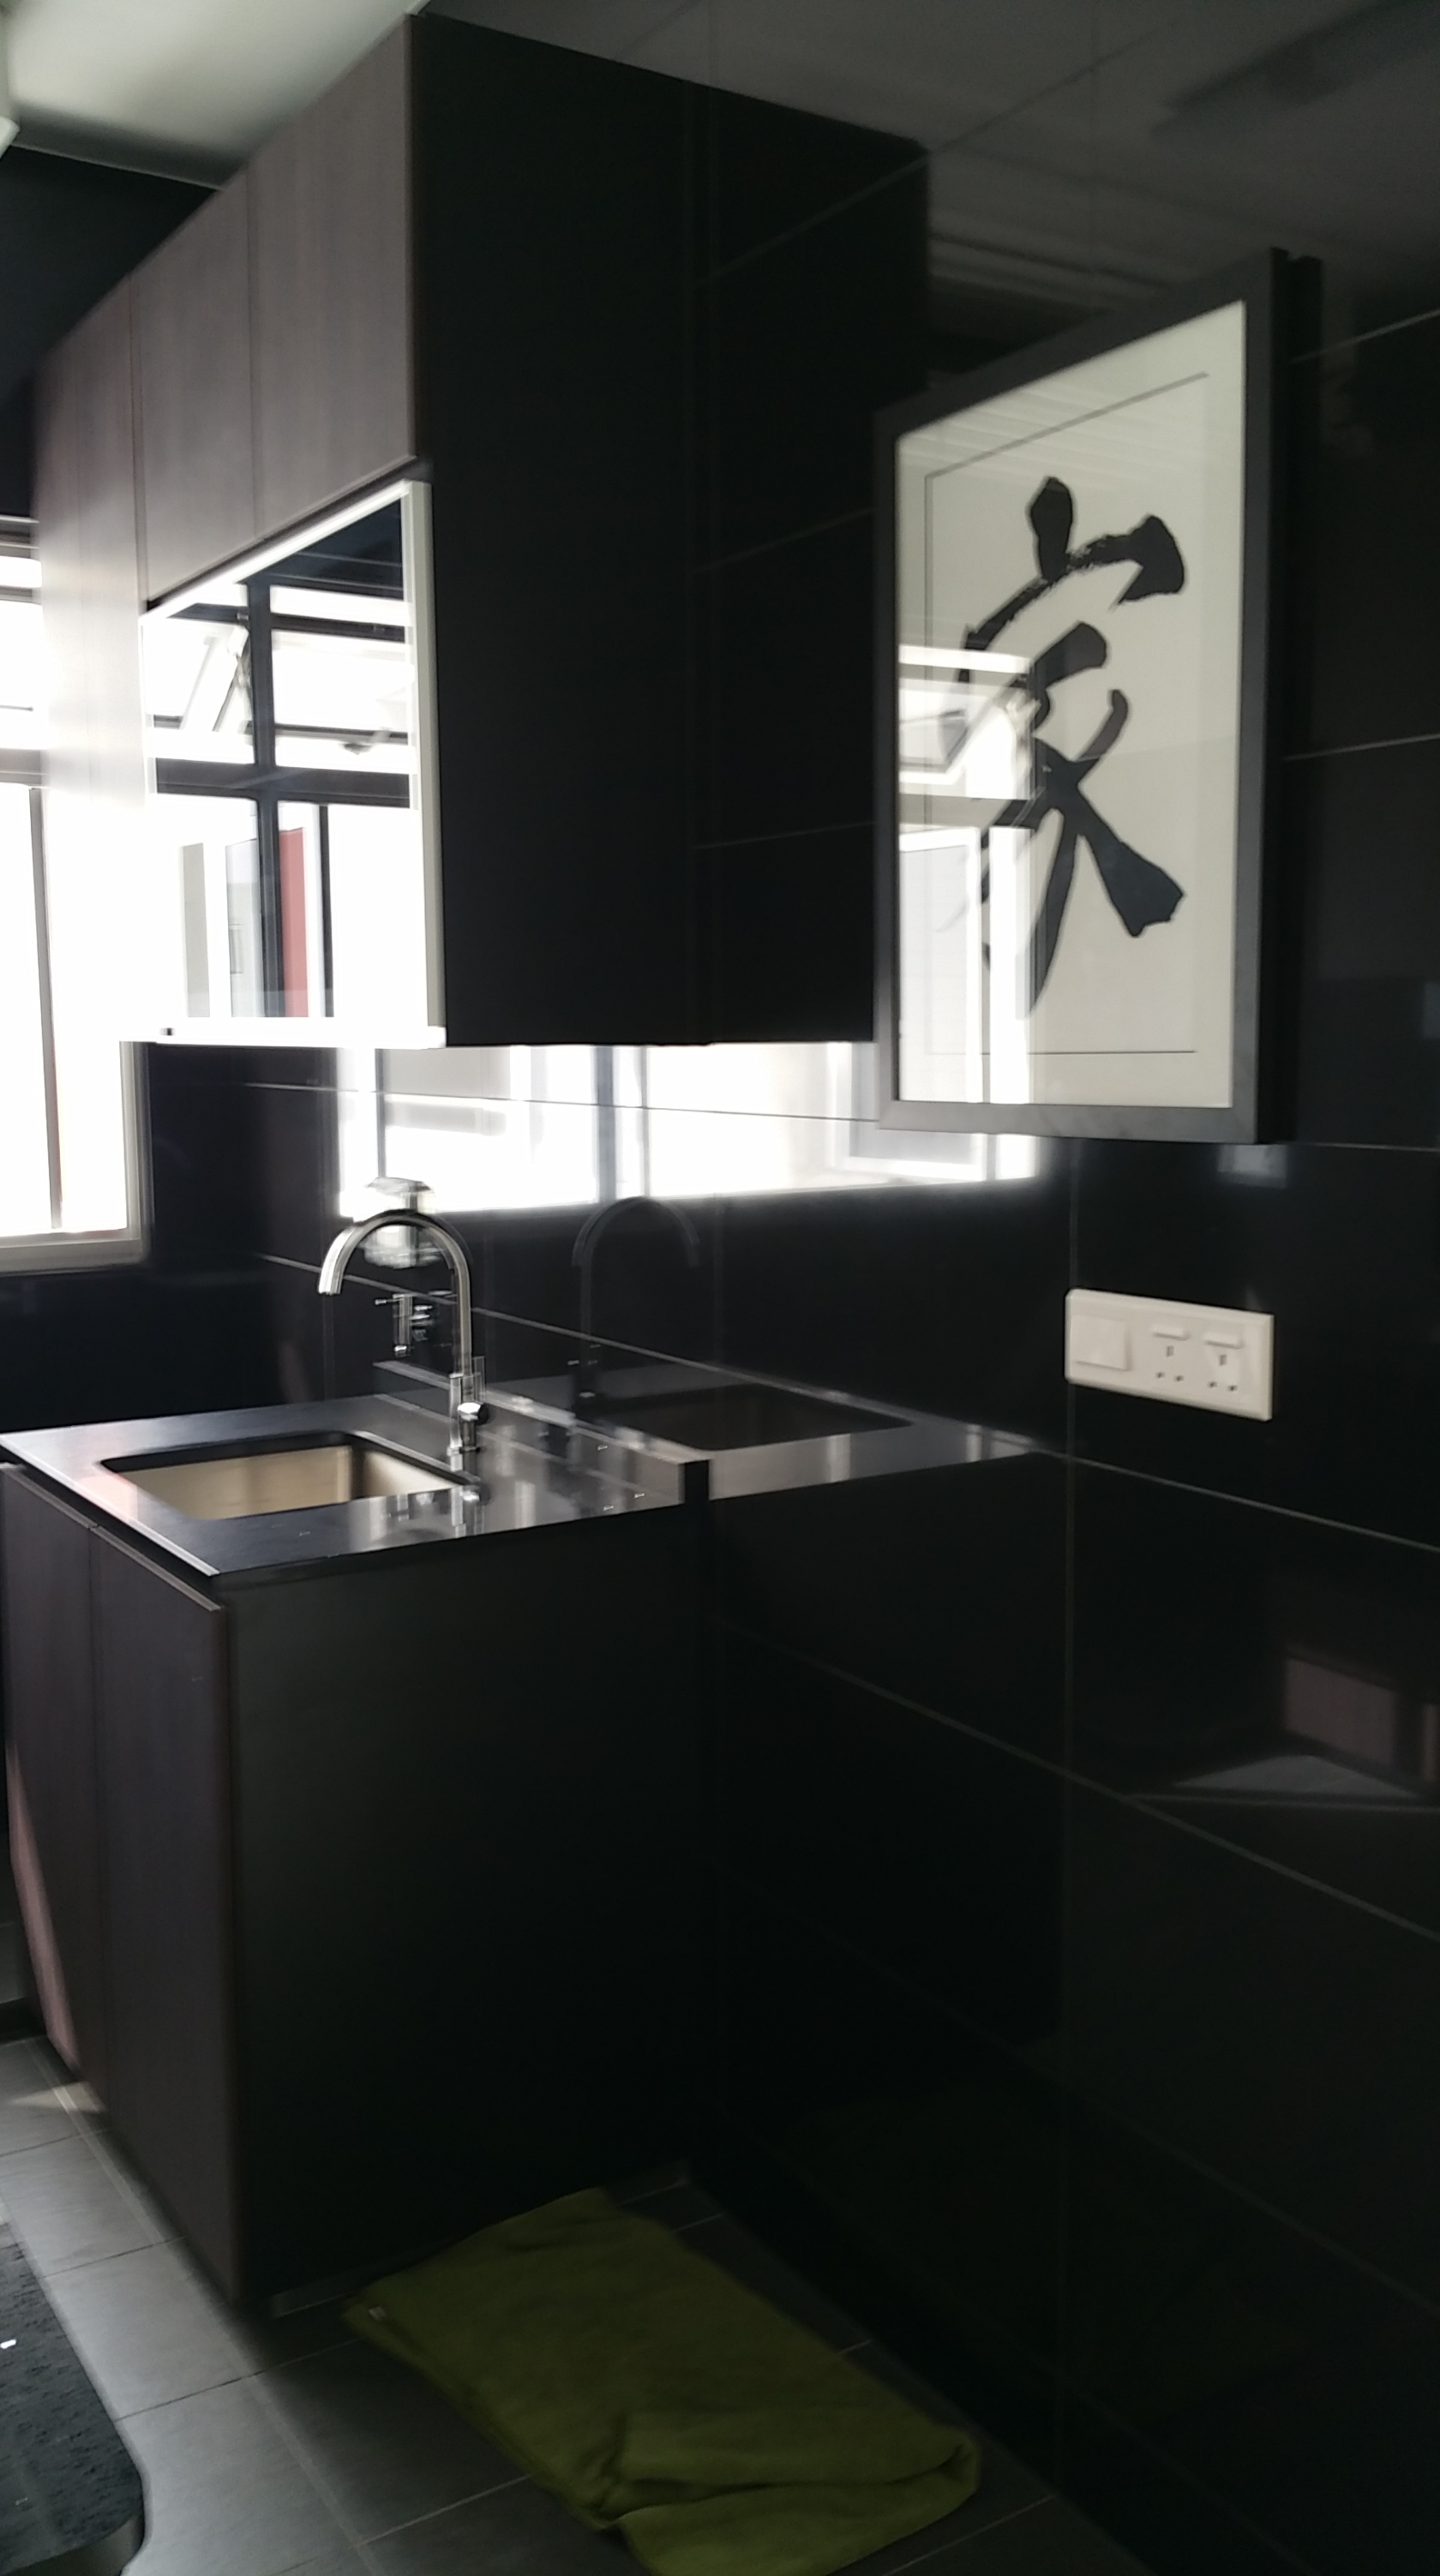
Kitchen Glass Backing Completed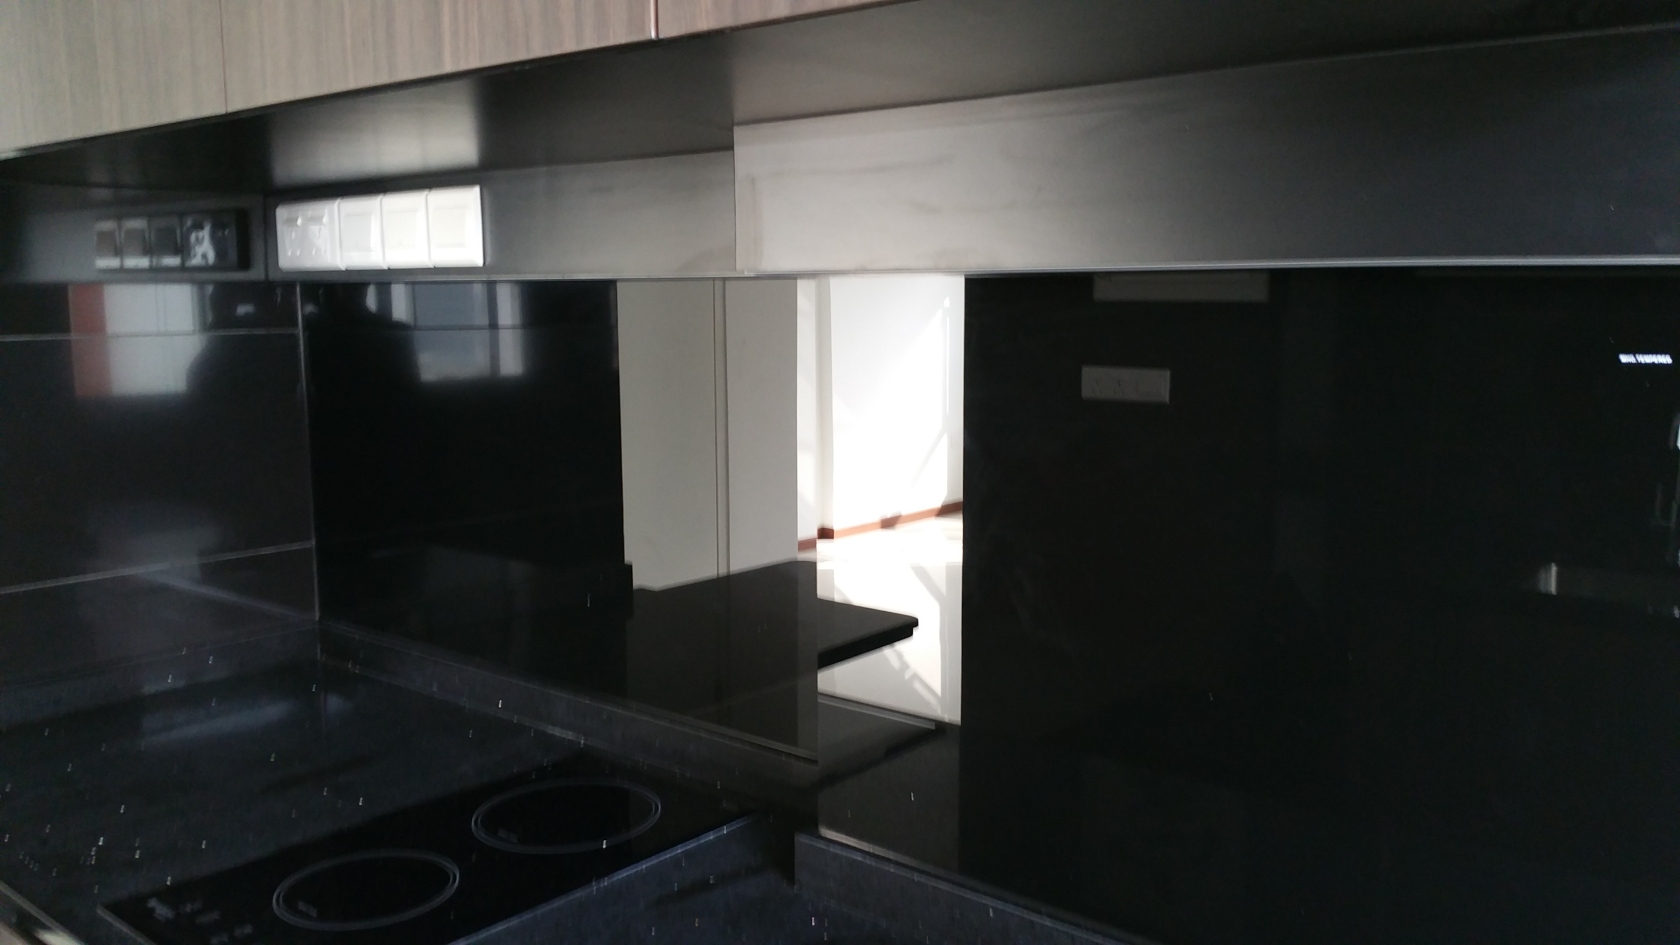
Kitchen Glass Backing with LED strips lighted
Glass Panel at the Bathroom
Another look at the Glass Panel at Bathroom
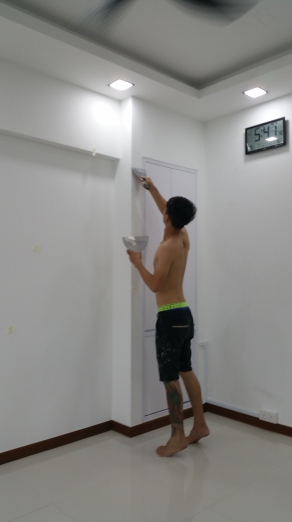
And finally, these 2 young chaps came over and touch up and basically apply 2nd coat of paint
Glass works are really beautifully done!!
Love the beautiful black glass backing for my Kitchen!!
Love the glass panel at the bathroom where the water no longer splashes onto the Bathroom Vanity Storage. Really exudes a next level of classiness!!
--------------------------------------------------------------------------------------------------------------------------------------------
to cover up any additional scuffles and dirt marks left by the earlier contractors.
They did a beautiful job of this and the whole place looks even nicer!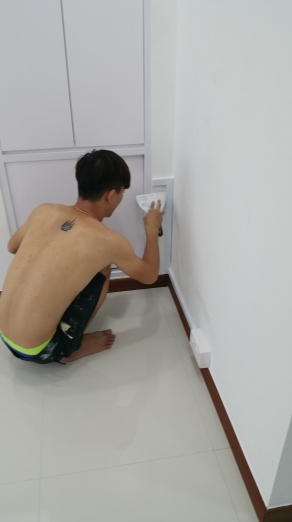
--------------------------------------------------------------------------------------------------------------------------------------------
And so with the conclusion of the final installations of all major works that were still
needed for my Renovation, this is officially the end of the Renovations for my Apartment.Of course there is still one more cleaning scheduled by Jason, and he scheduled it after the moving in
of my furnitures. Just minor cleaning really, because the place is completely in a very good move in condition already.What a long and fascinating journey it has been!!
Thank you so much for supporting my Blog!!
Stay tuned for the next Blog Entry where I will post the FINAL LOOK
of my Renovations done just before Handover!! *Excited*
Click Here for the Next Blog Entry:
Renovations Completed! – A Final Look just before Handover
Click Here to go back to Page 1 - Table of Contents-
2
-
-
11 hours ago, RuFus58 said:yup, i echo mmoh's concern as well.
see your tiles now super shiny and gleaming.
later the aircon and glass suppliers sure to put down/drag stuff and tiles will have some scratches etc
Thats why chemical wash must the last job.The ID did a bad planning.. no matter how careful they say they will be.
if possible, get them to use carton box to cover the tiles again.. trolly wheels or boxes dragged sure to leave some unslightly damage.that said, i must say a big WOAH!!!!!!! look at your home... it looks awsome and ready!!!
just need a bed and can sleep there already.. lol, u already took a nap.. comparing your pg 1 to pg 17, can see how far the journey you have travelled.. the highs and lows.. Congrats Ryan!
Hahaha aizai dun worry!
It's already the end of the renovation why sweat the little things right? Anyway Jason say his guy will come clean clean again after furniture move in which is true also because I wall mount my tv also got drilling later.
For now...let me enjoy my cool cool Daikin Smile series aircon full blast!!
Especially after a hot shower!! Woooo shiok shiok!!! *shivers*
P.S. Nice or not my Aircon?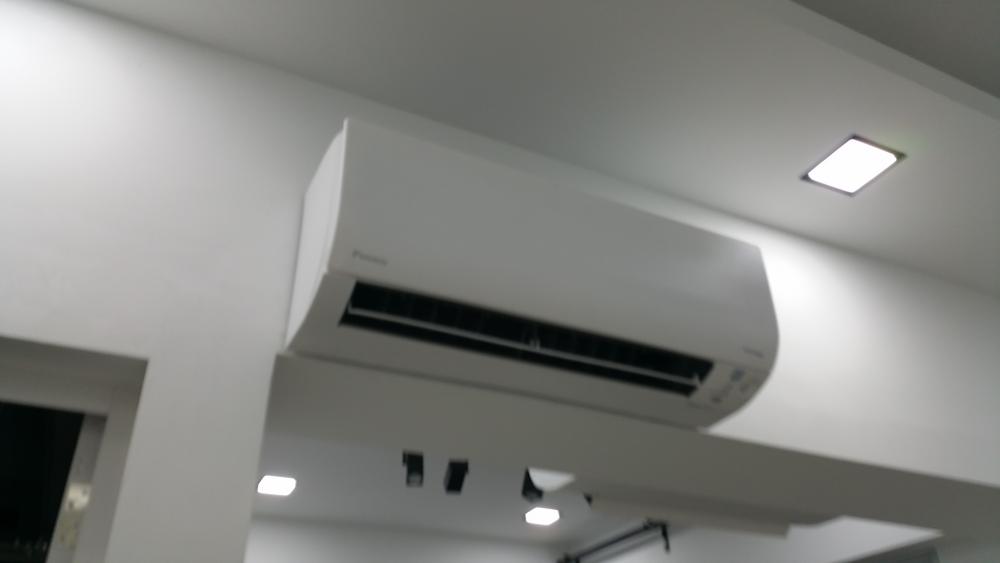
-
1
-
-
31 minutes ago, mmoh said:Then you better get your contractor to clean it up cos they are going to dirty your house. Or if Jason is the one who schedule such, you get him to arrange another cleaning (need not chemical cleaning) if the contractor did not clean it up enough.
Yes Mom. lol
-
45 minutes ago, mmoh said:congrats! but why do chemical washing b4 glass and aircon? why not do it after instead?
Thanks!! I also dunno. Probably some Scheduling issues lol
-
18 hours ago, fantastic4 said:Just to share some of the progress of my renovation
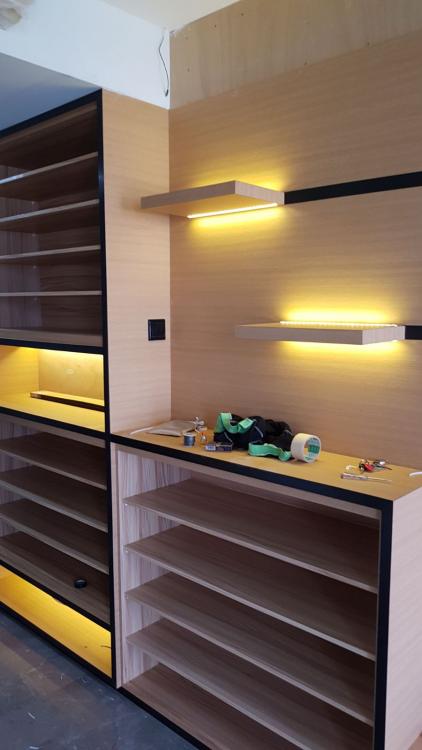
Never seen anyone do LED strips for small shelves like this. Clever.
Really looks very nice!
And so much shelves!! lol -
Blog Entry Date: 16th November 2017 Thursday
Click Here to go back to Page 1 - Table of Contents
9th Week after Key Collection - Chemical Washing Done. Everything is SO CLEAN!!Today marks the Unofficial End of the Renovation.
Why Unofficial? Because for most people, Chemical Washing is usually the very last event at the end of their renovation. For me however, there is abit more to go because I still got Glass Works and Air-Con Installation, so its still not quite the end of Renovation for me yet.Thinking back, how far I have come since January 2017 when I first started, asking many questions and blur blur without a clue on where and how to start, and now, its already considered almost the end already. Really emotional seeing the end result today.
But hey, don’t worry. Even if my Renovation has officially ended, I will still be posting more blog entries where possible, and try my best to answer any questions you have ok? I’m thinking of even doing an overall review maybe 6 months or even 1 year down the road when i’m well and truly settled down in my new home!
---------------------------------------------------------------------------------------So anyway, enough of my ramblings LOL!
Today is the day my apartment gets a complete Chemical Washing
which makes it actually in a condition that is suitable to start moving in.Can you imagine I received this Whatsapp message from Jason this morning at 6.18AM!!??!!

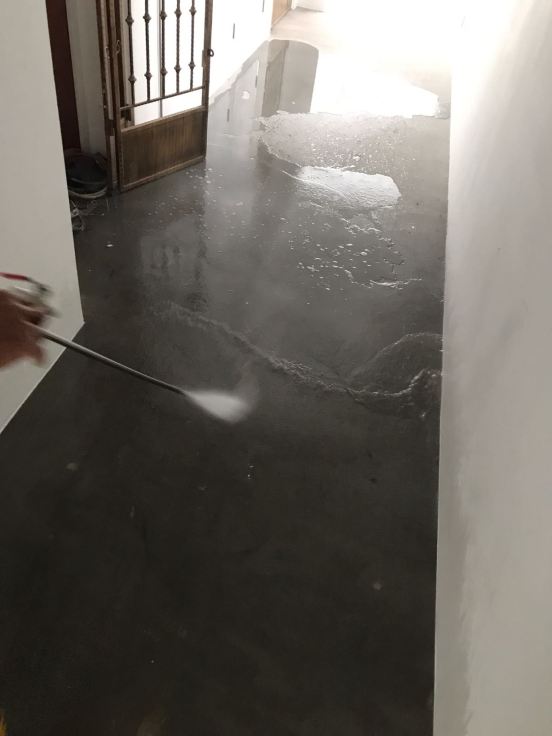
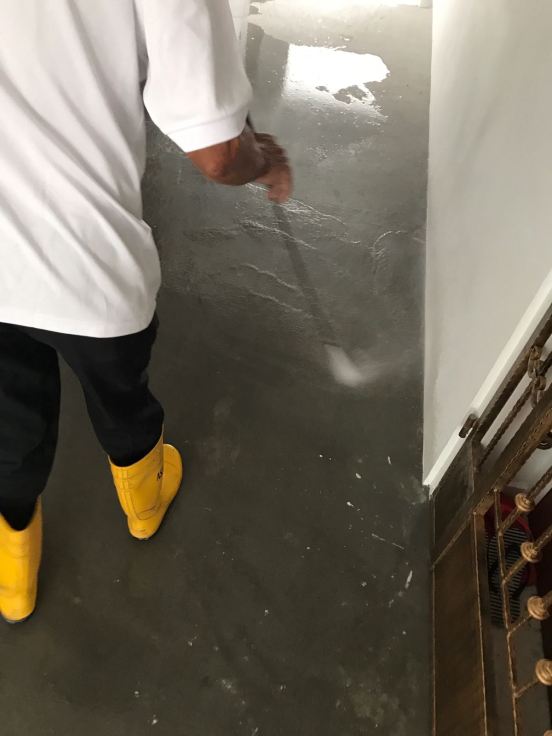
Apparently he and his team were already at my place BEFORE 6AM!
At a time where most of us are probably still sleeping, he and his guys were at my place even earlier clearing rubbish and doing chemical washing! If that’s not dedication, I don’t know what is! LOL!!As I wasn’t there, I can’t tell you exactly what goes on during Chemical Washing.
All I know is that it is basically a complete overhaul and cleaning of EVERYTHING and ensuring that the entire apartment is sparkling new before doing final handover. What I always hear is some special acid will be used to do cleaning which will enable hardened cement pieces to easily come off.
---------------------------------------------------------------------------------------Before this Chemical Washing, what always greeted me whenever I entered the house, was always
a big pile of rubbish like this. Urgghhh! every time see so messy also psychologically very sian.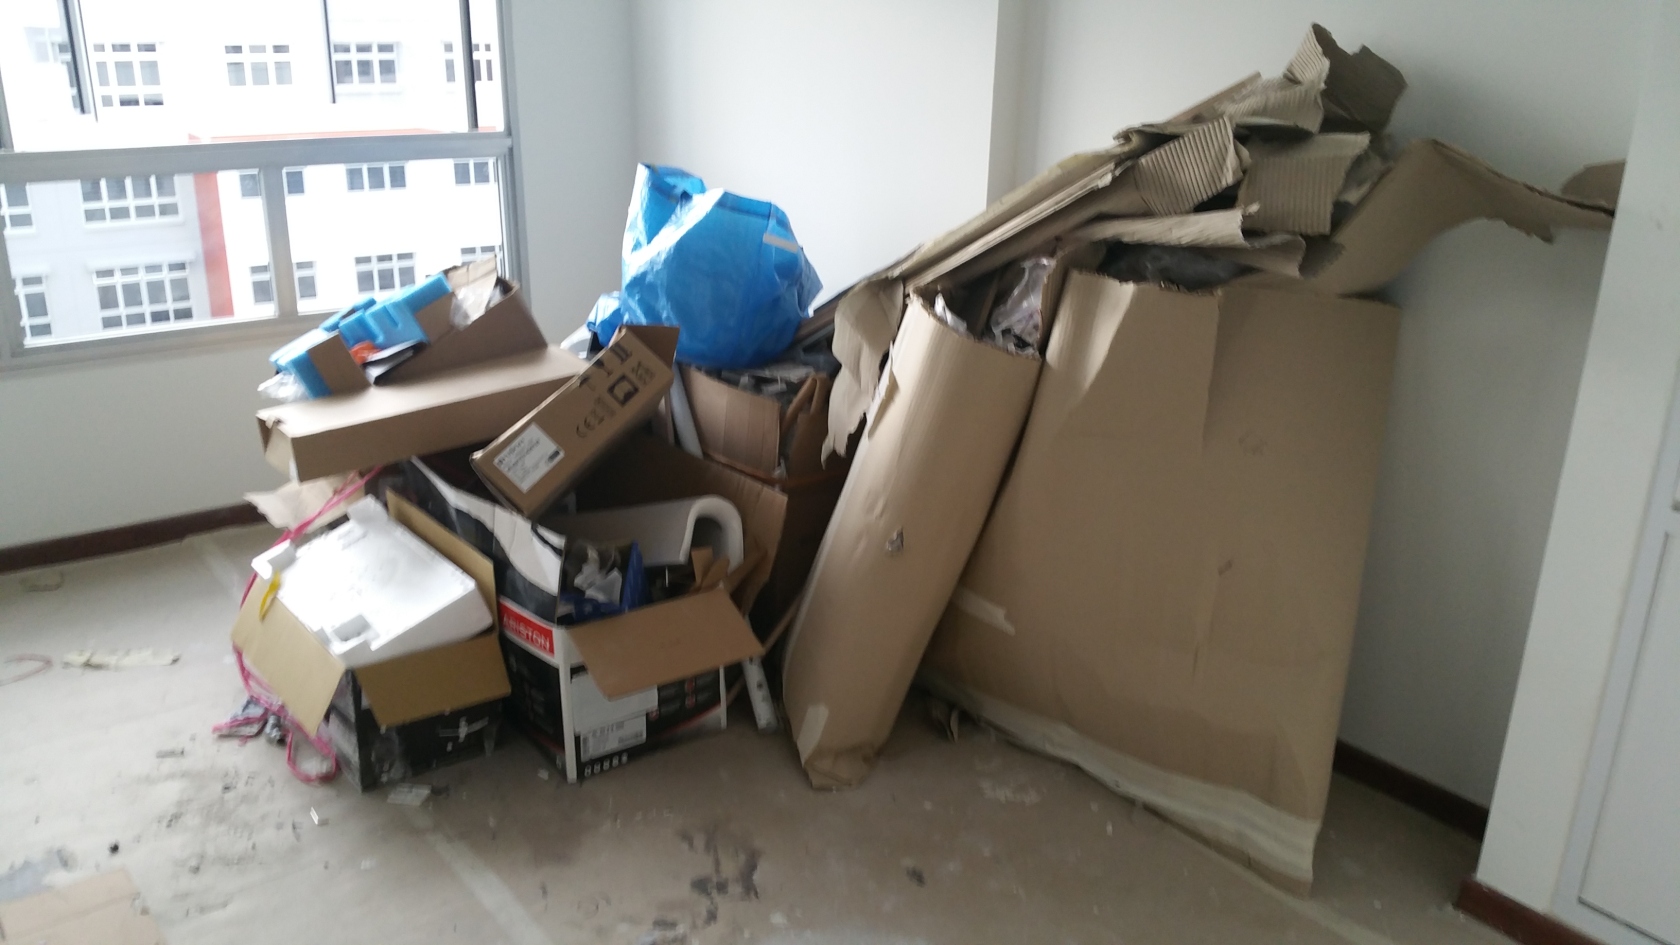
Also, this absolutely horrid looking caked with cement Bathroom Floor
which can never seem to be clean no matter how much I wash and scrub it.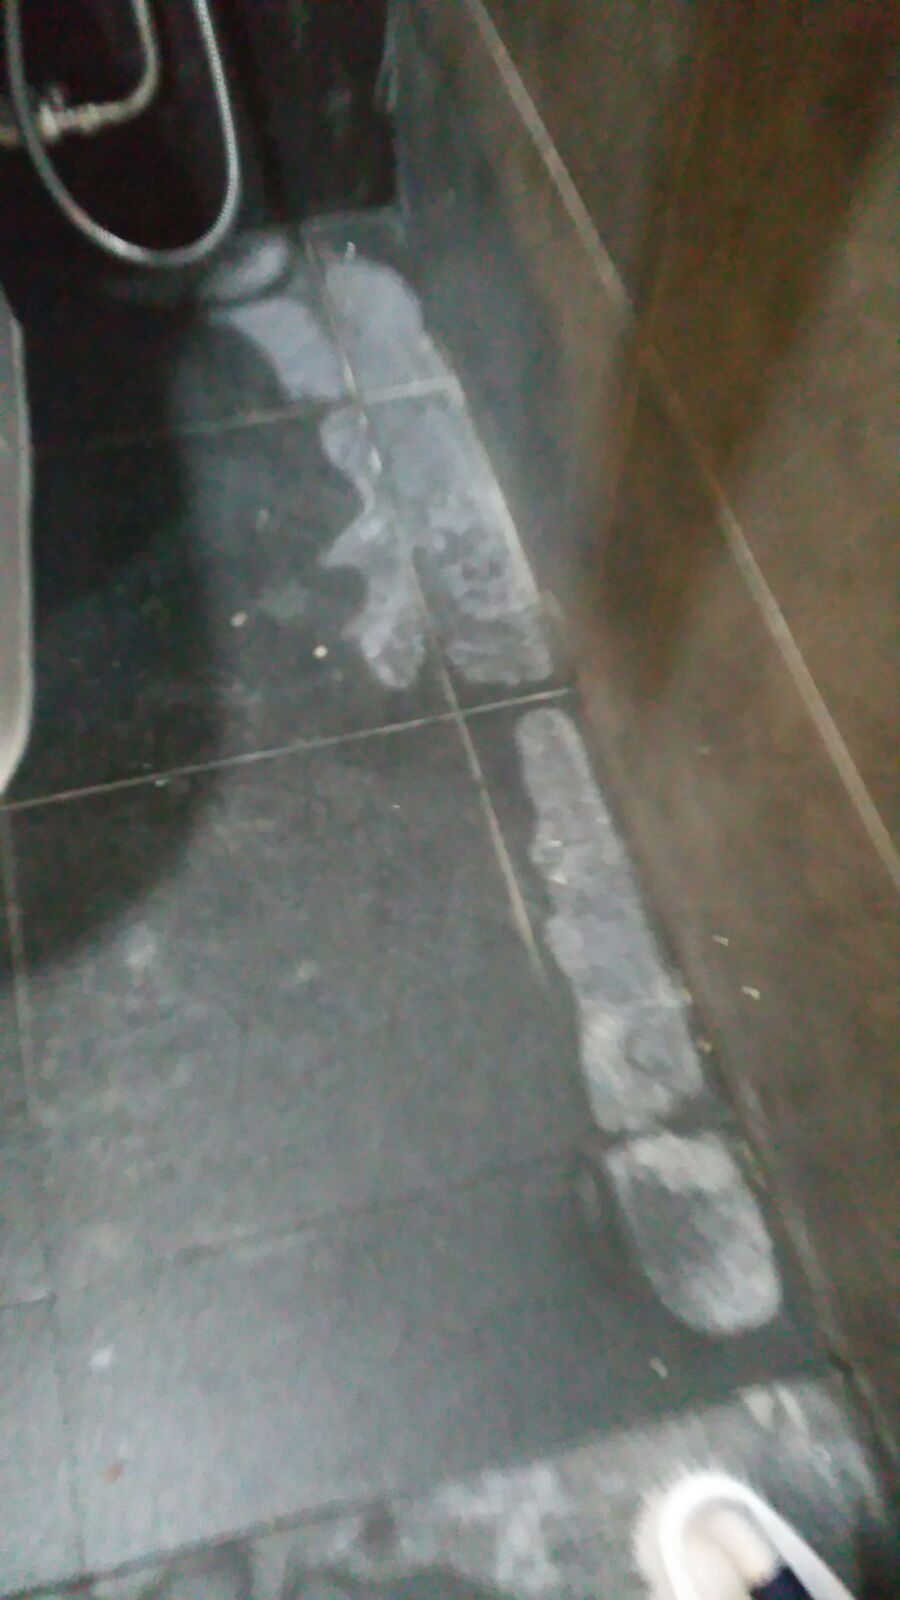
Or these little annoying pieces of loose cement that I just can’t
seem to be able to pry out of the equally dusty and absolutely filthy floor.
---------------------------------------------------------------------------------------
It turns out, I needn't have bothered to clean at all!!
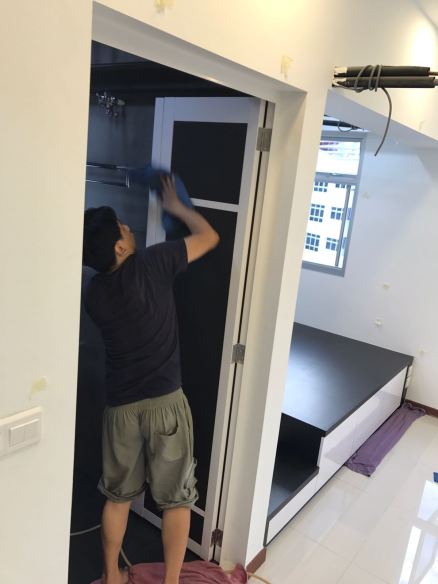
Below are some pictures Jason took and showed me of the Cleaning guy in action.
I still can’t imagine having to do House Cleaning before 6AM in the morning LOL!!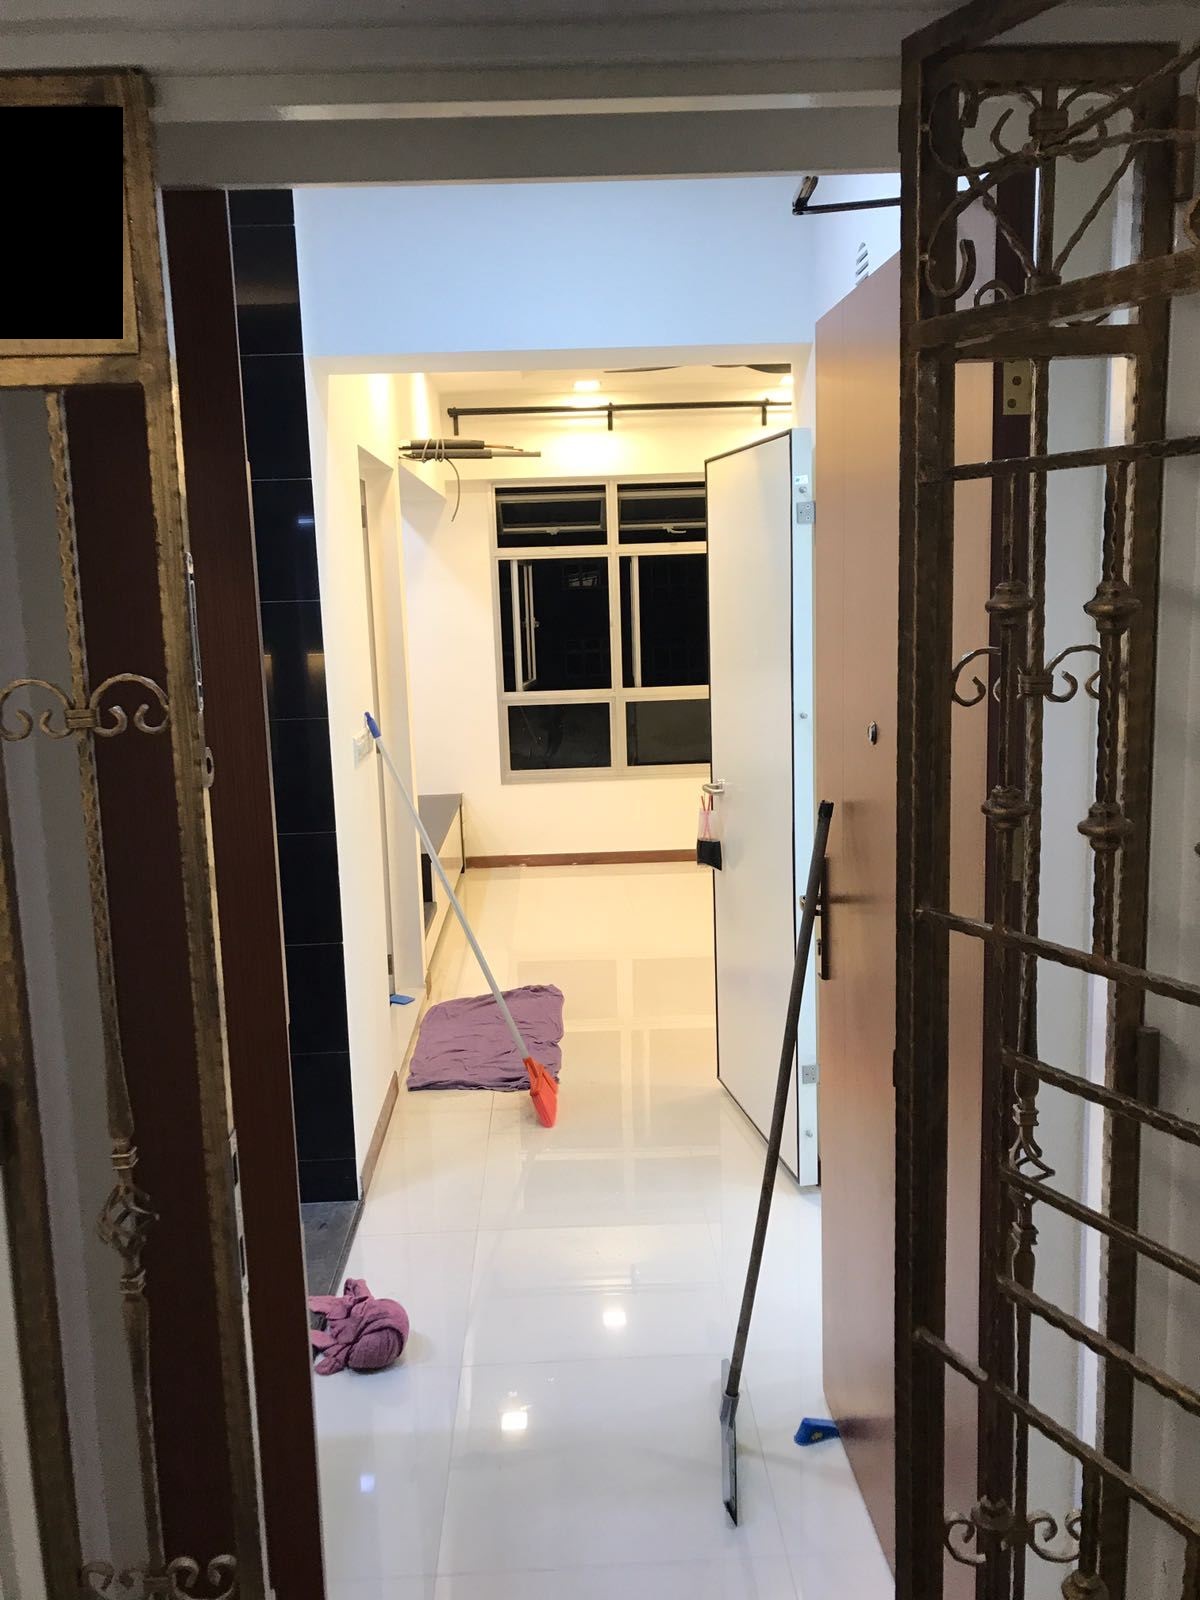

I was really skeptical whether he can clean my Bathroom Floor well even with Chemical Washing
considering I used a very rough sandpaper feel floor at my Wet Area, and is naturally very hard to clean.The results speak for themselves.
Check out how CLEAN the Bathroom Floor now looks!
I really cannot believe my eyes!! No more of that ugly patchy dusty and cement caked filthy floor! Woohoo!!
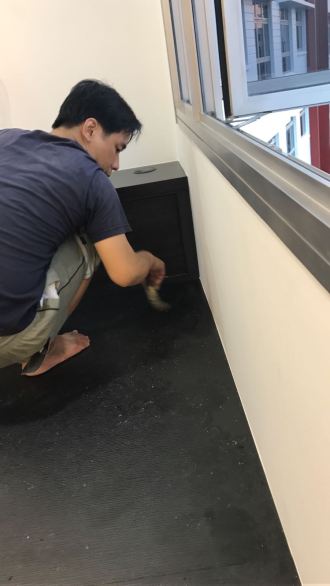
The cleaning guy was so good, he even helped scrapped off any cement stains and clean the OUTSIDE CORRIDOR of not only My Apartment but also my Next Door Neighbour’s Apartment to make sure everything swee swee so my next-door neighbour also feel happy. So nice of him to do that right??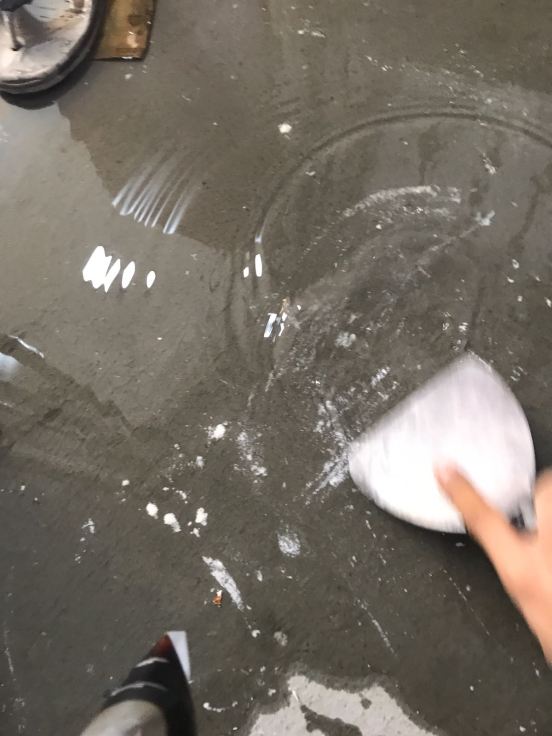
---------------------------------------------------------------------------------------
And the below pictures are how nice everything else looks now!
I literally lay down on the floor and had a little nap earlier! LOL!!
Living Room
There are some masking tape all around, and that is to mark out areas for the Painters to do more touching up later.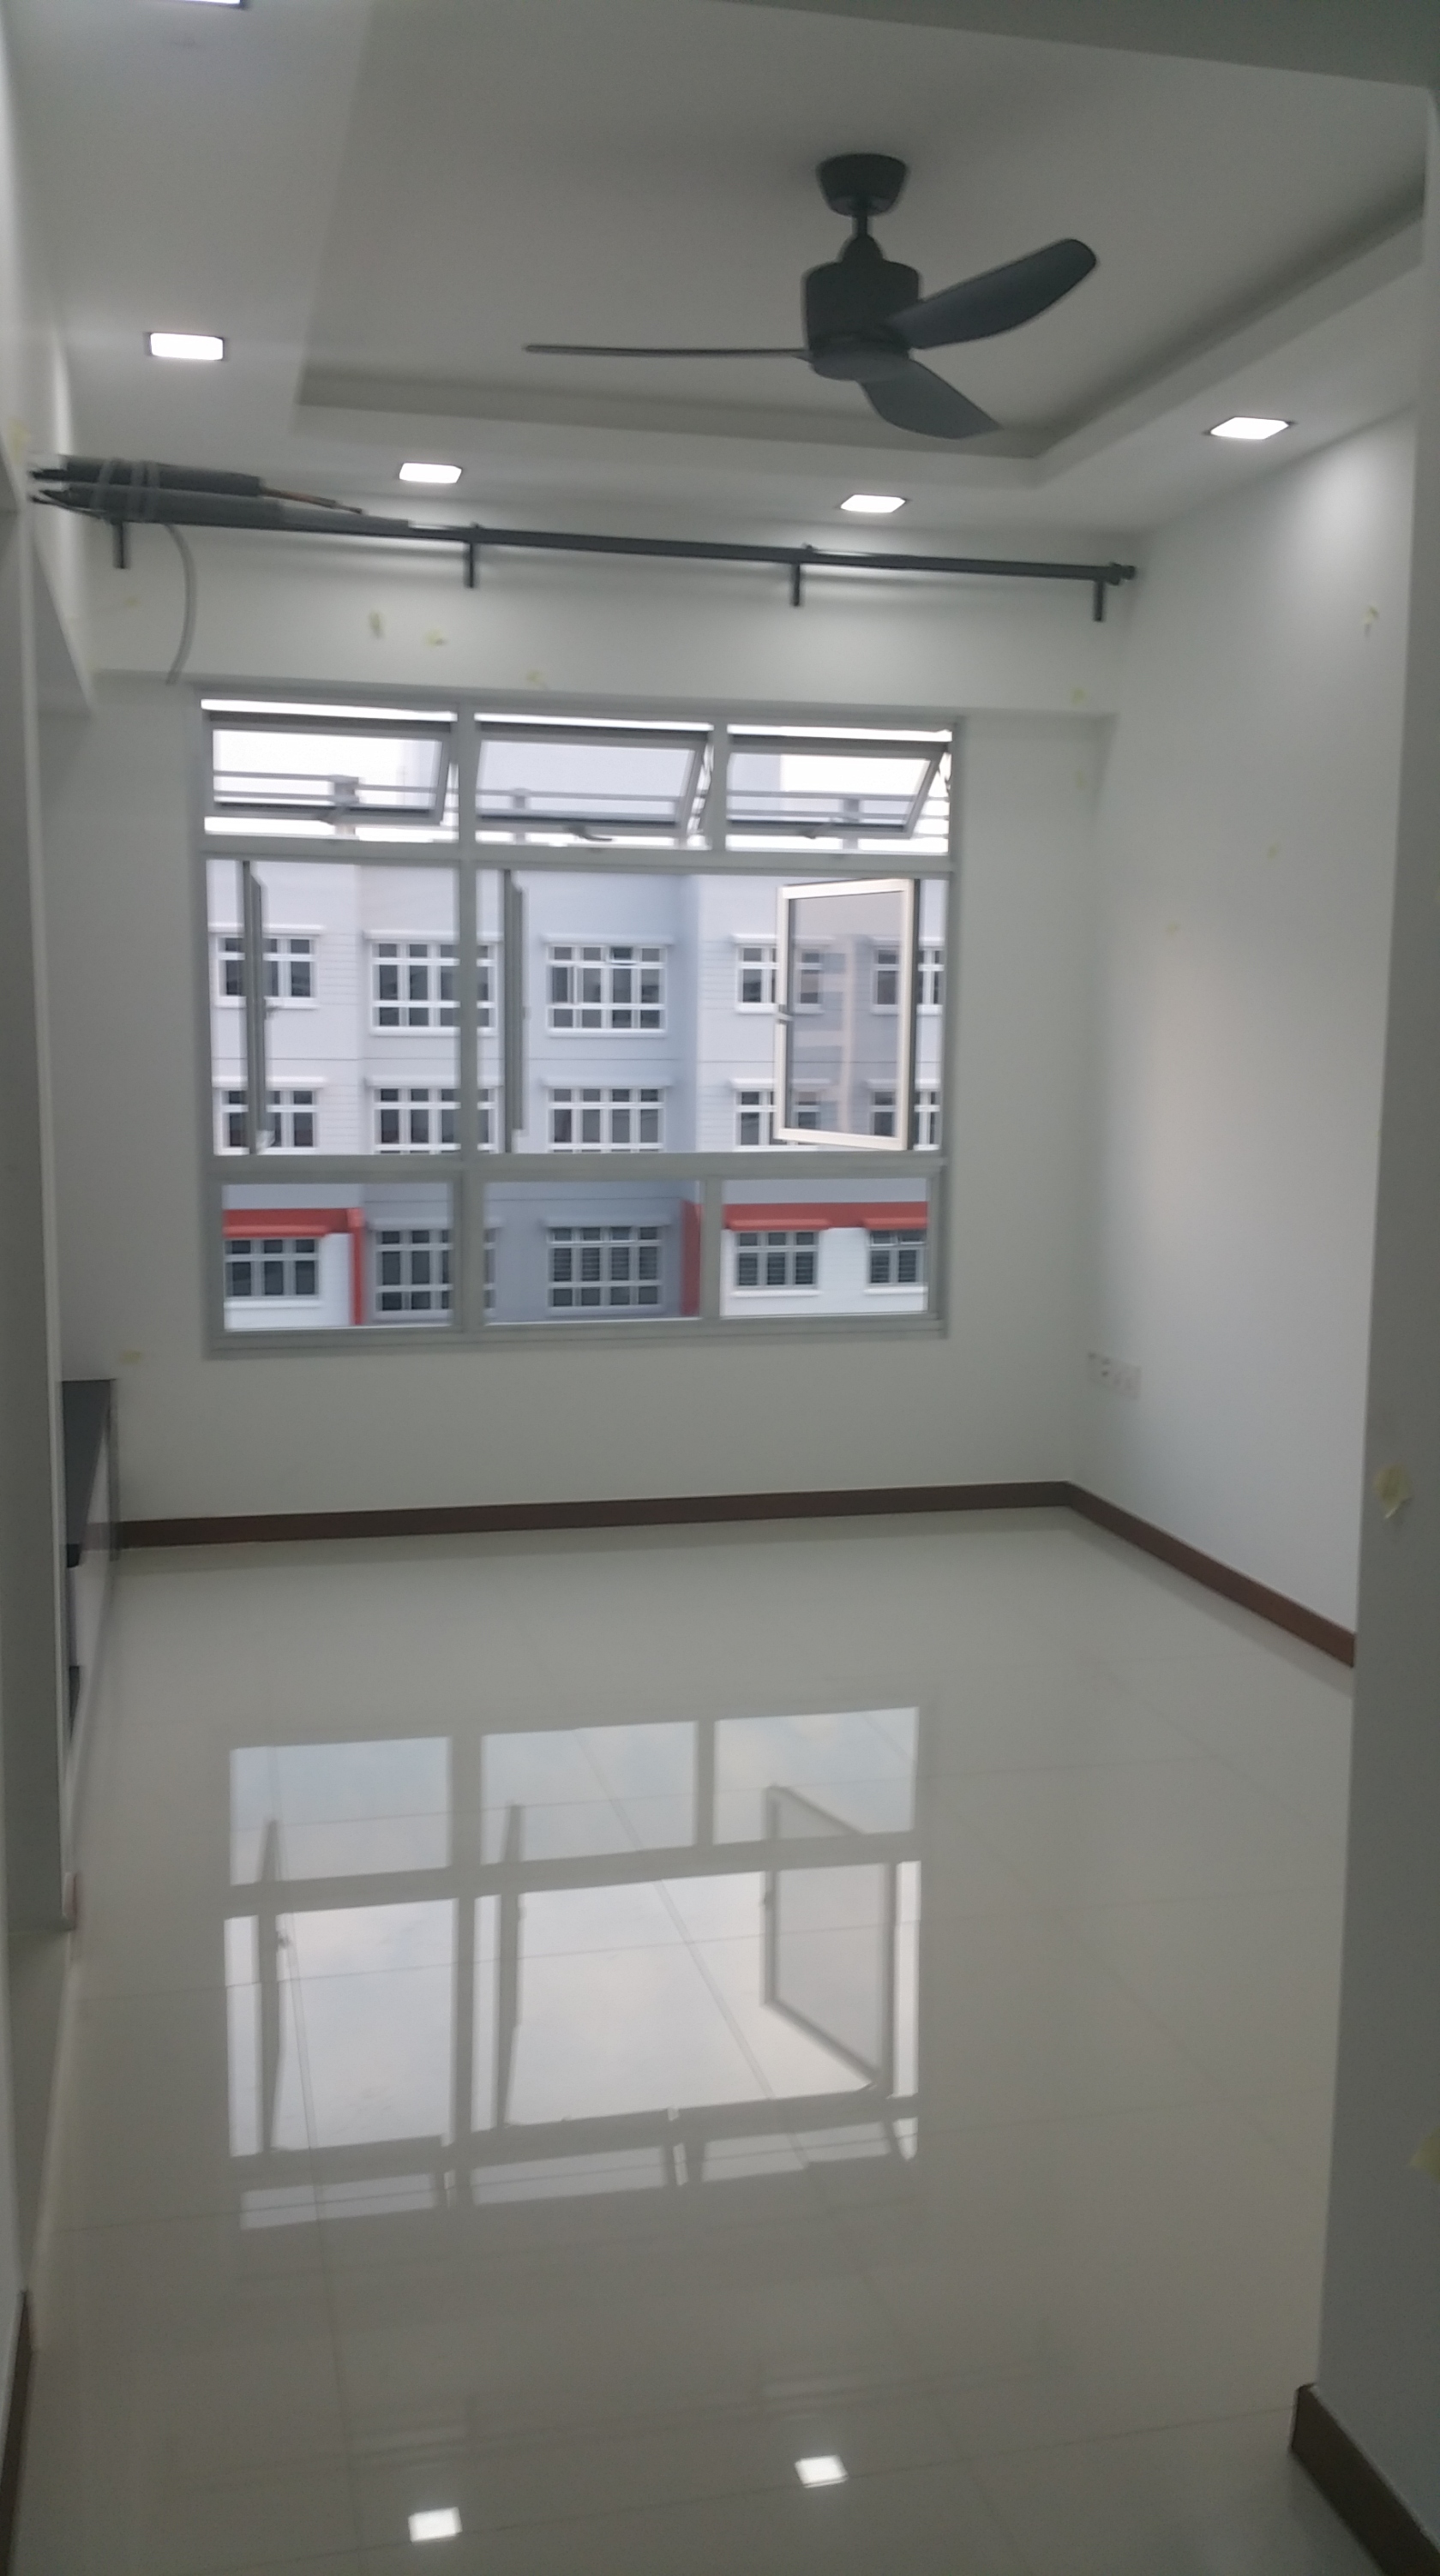
Really like the Bathroom PD-Door I selected how the door gels so well with the steps
of my Bedroom Platform bed unintentionally forming a nice abstract geometric pattern.
Here’s another look, showing my Bedroom, Bathroom and Kitchen all in one shot.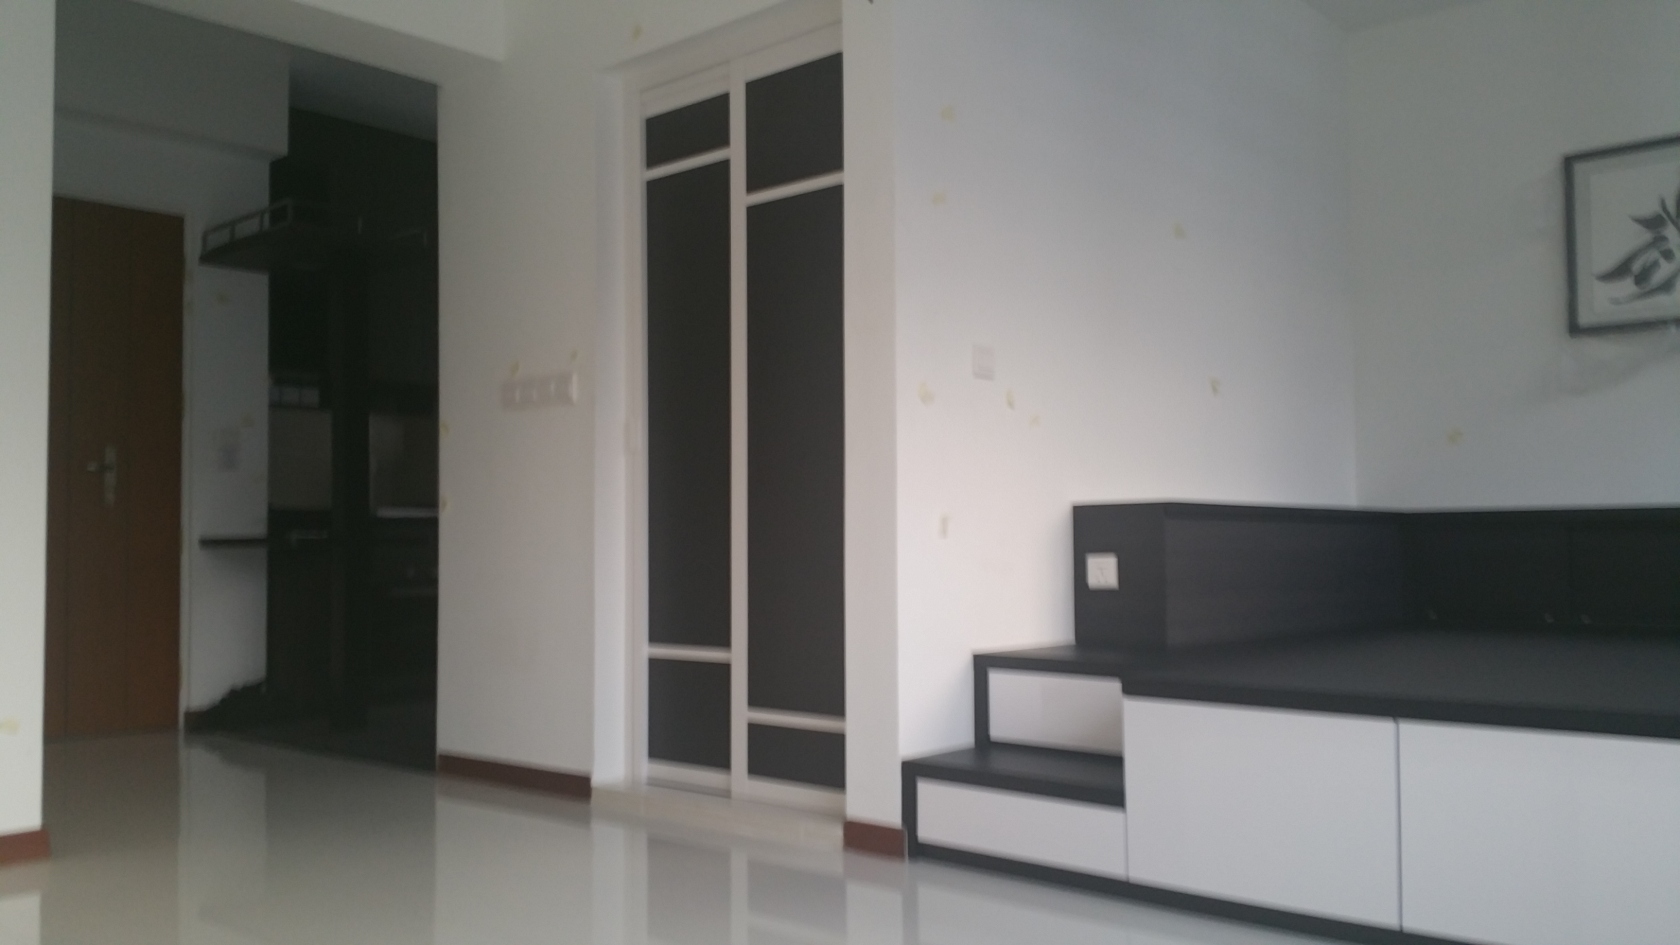
Kitchen Area
Never have I ever seen my Kitchen Floor so clean before during Renovation LOL!!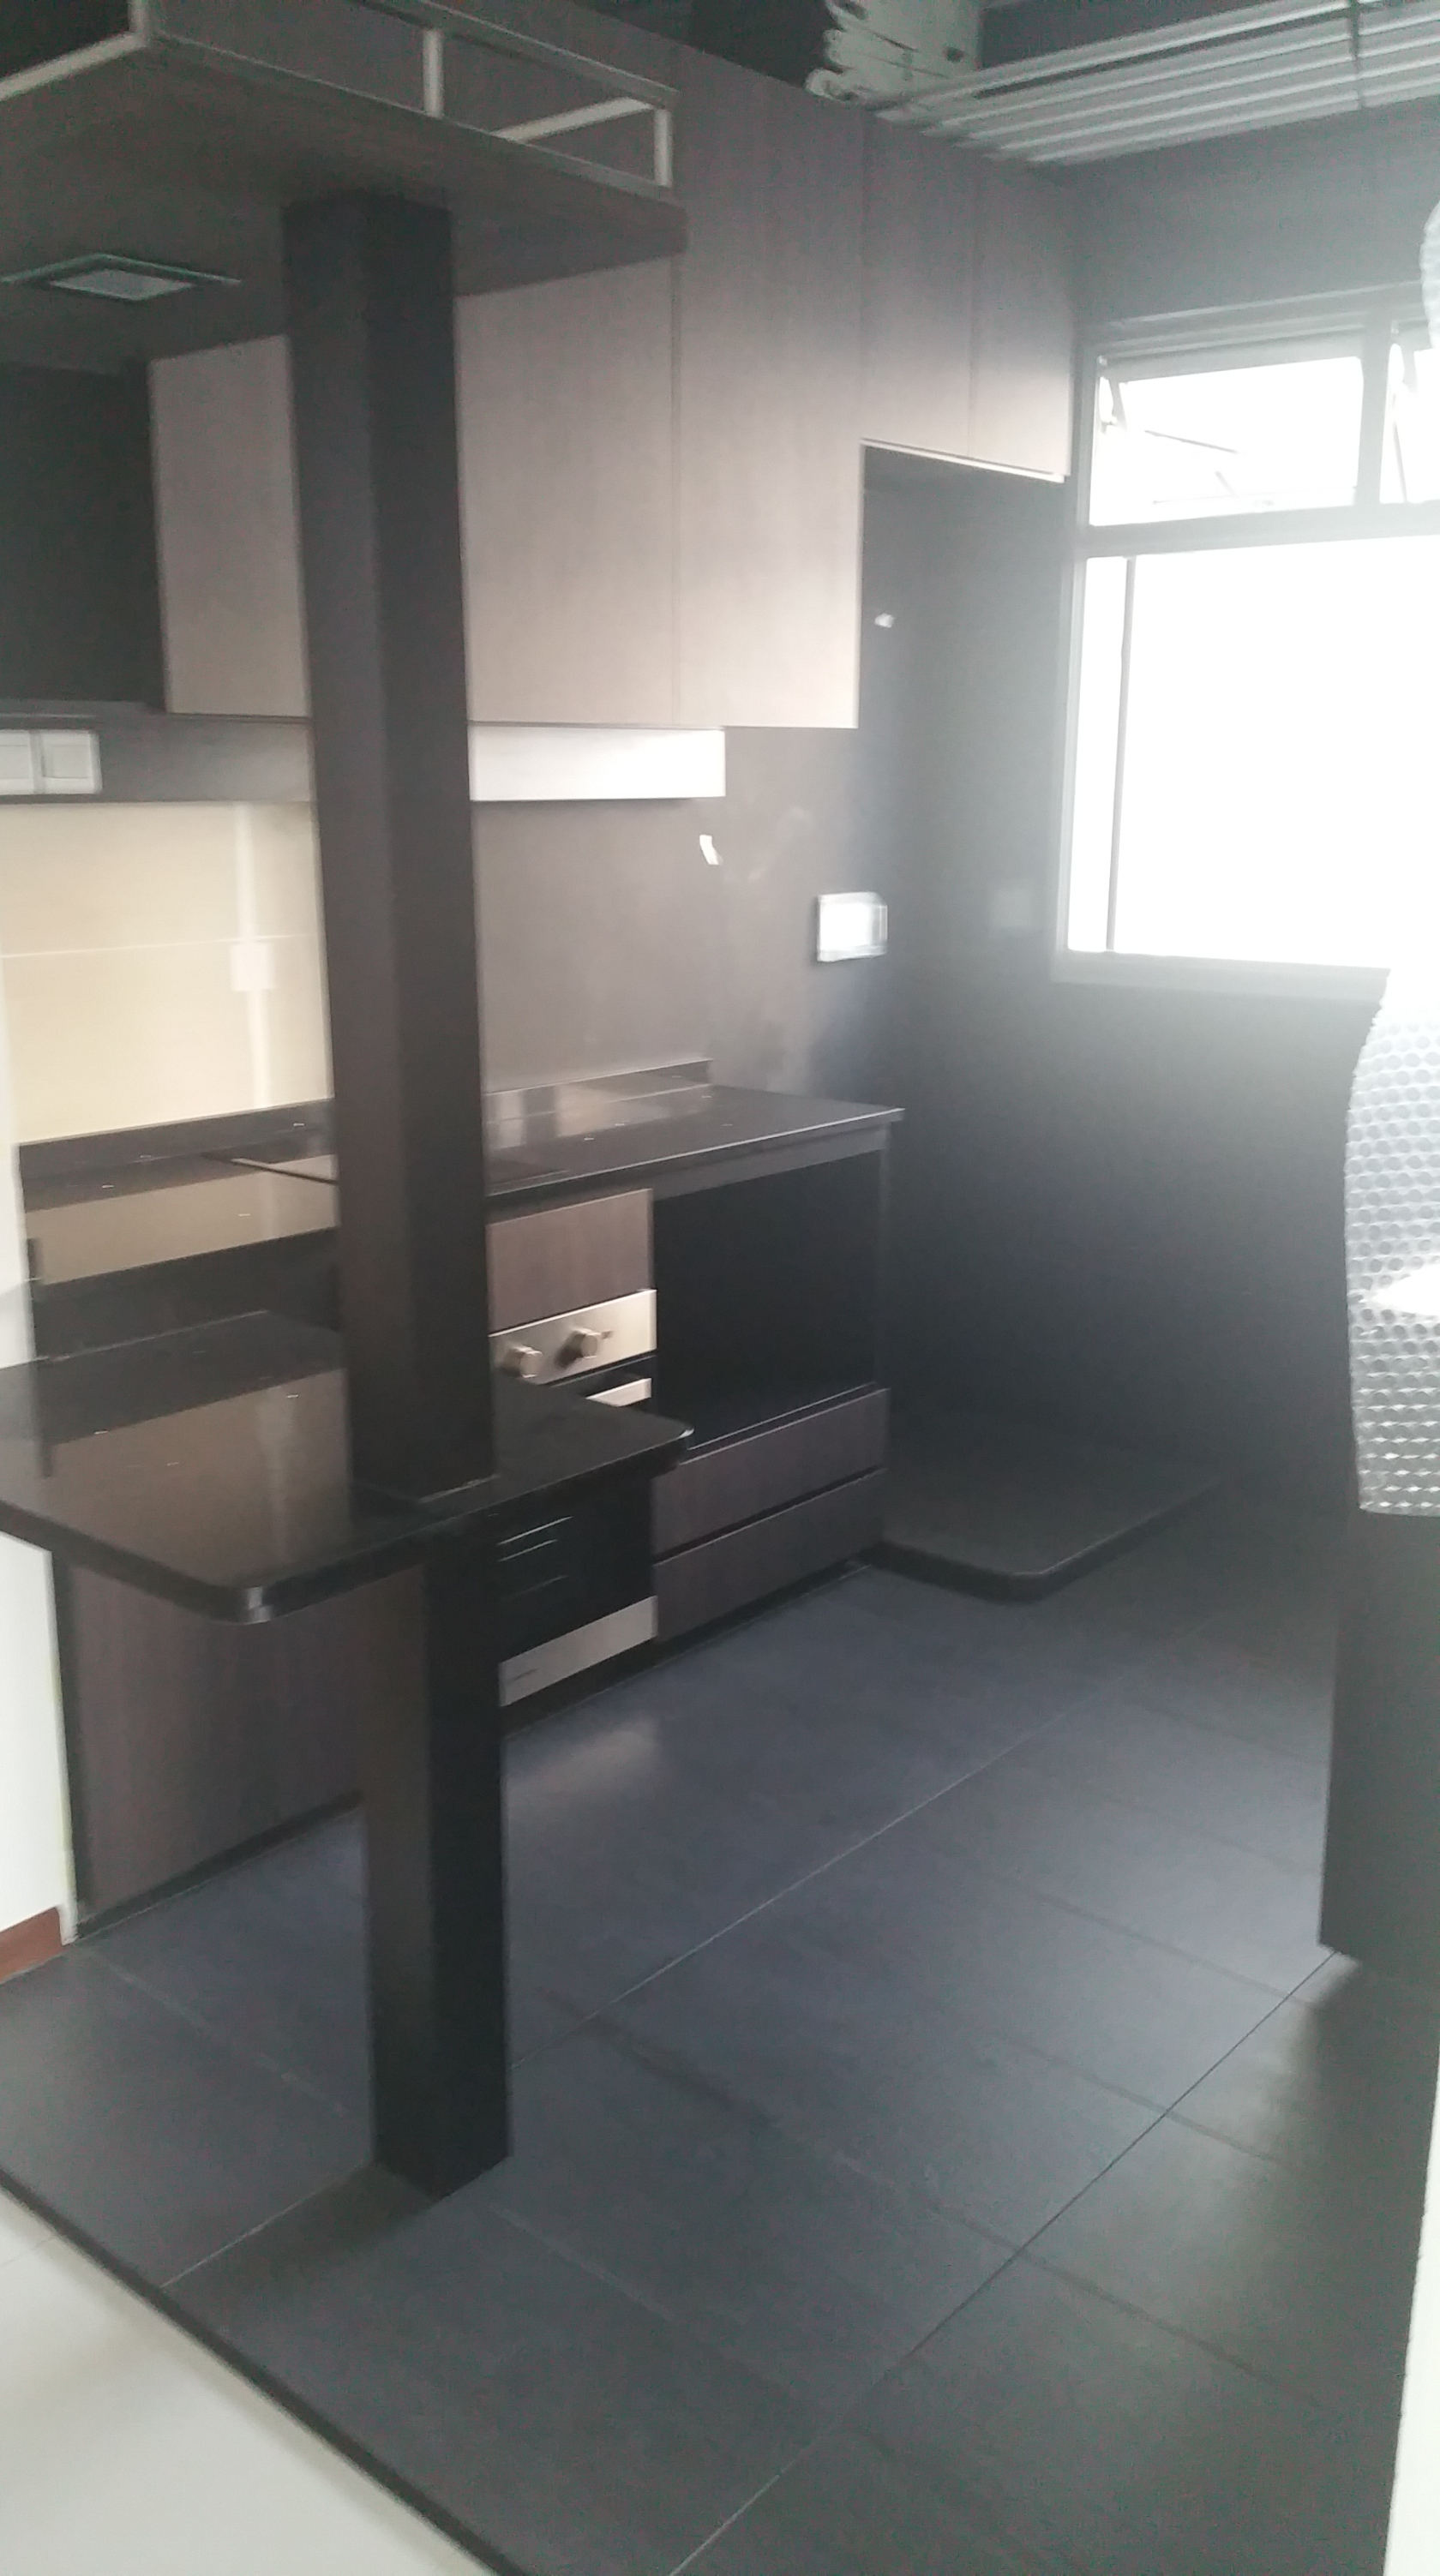
Bedroom
Spick and Span dontcha think so? Again, more masking tapes were used to indicate areas to touch up.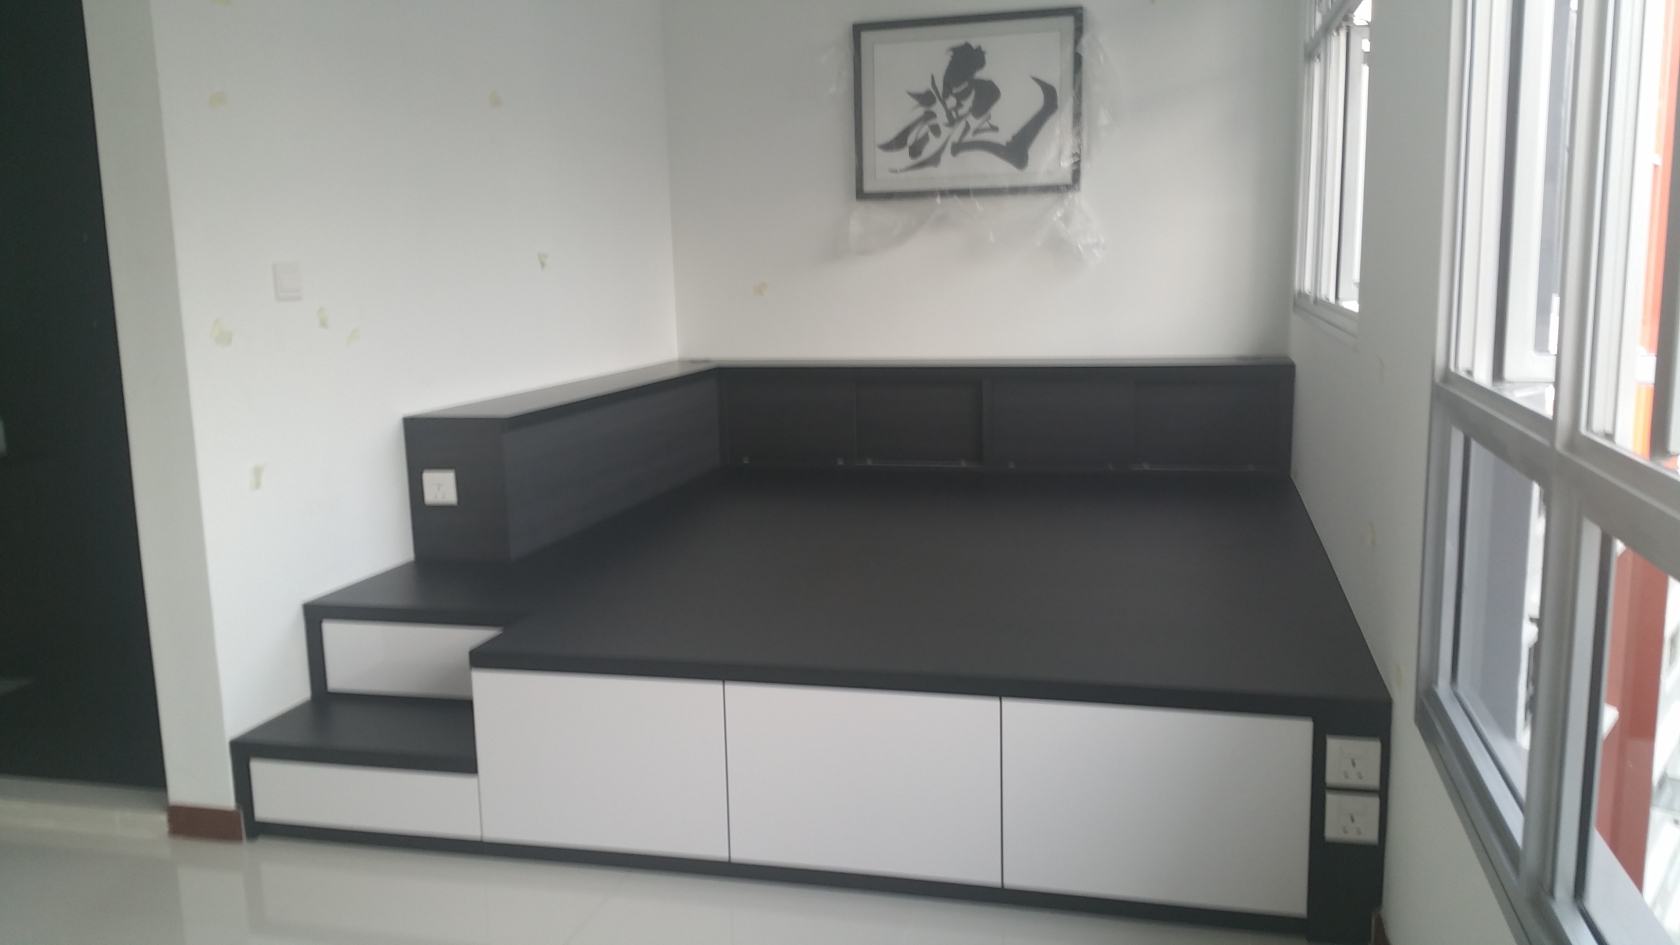
---------------------------------------------------------------------------------------
Oh ya! Something I realized about my Bomb Shelter Door.
When the bomb shelter door is closed, this is what people can see when they walk past.
Abit lack of privacy like that lah. Imagine me watching TV and people can look right in.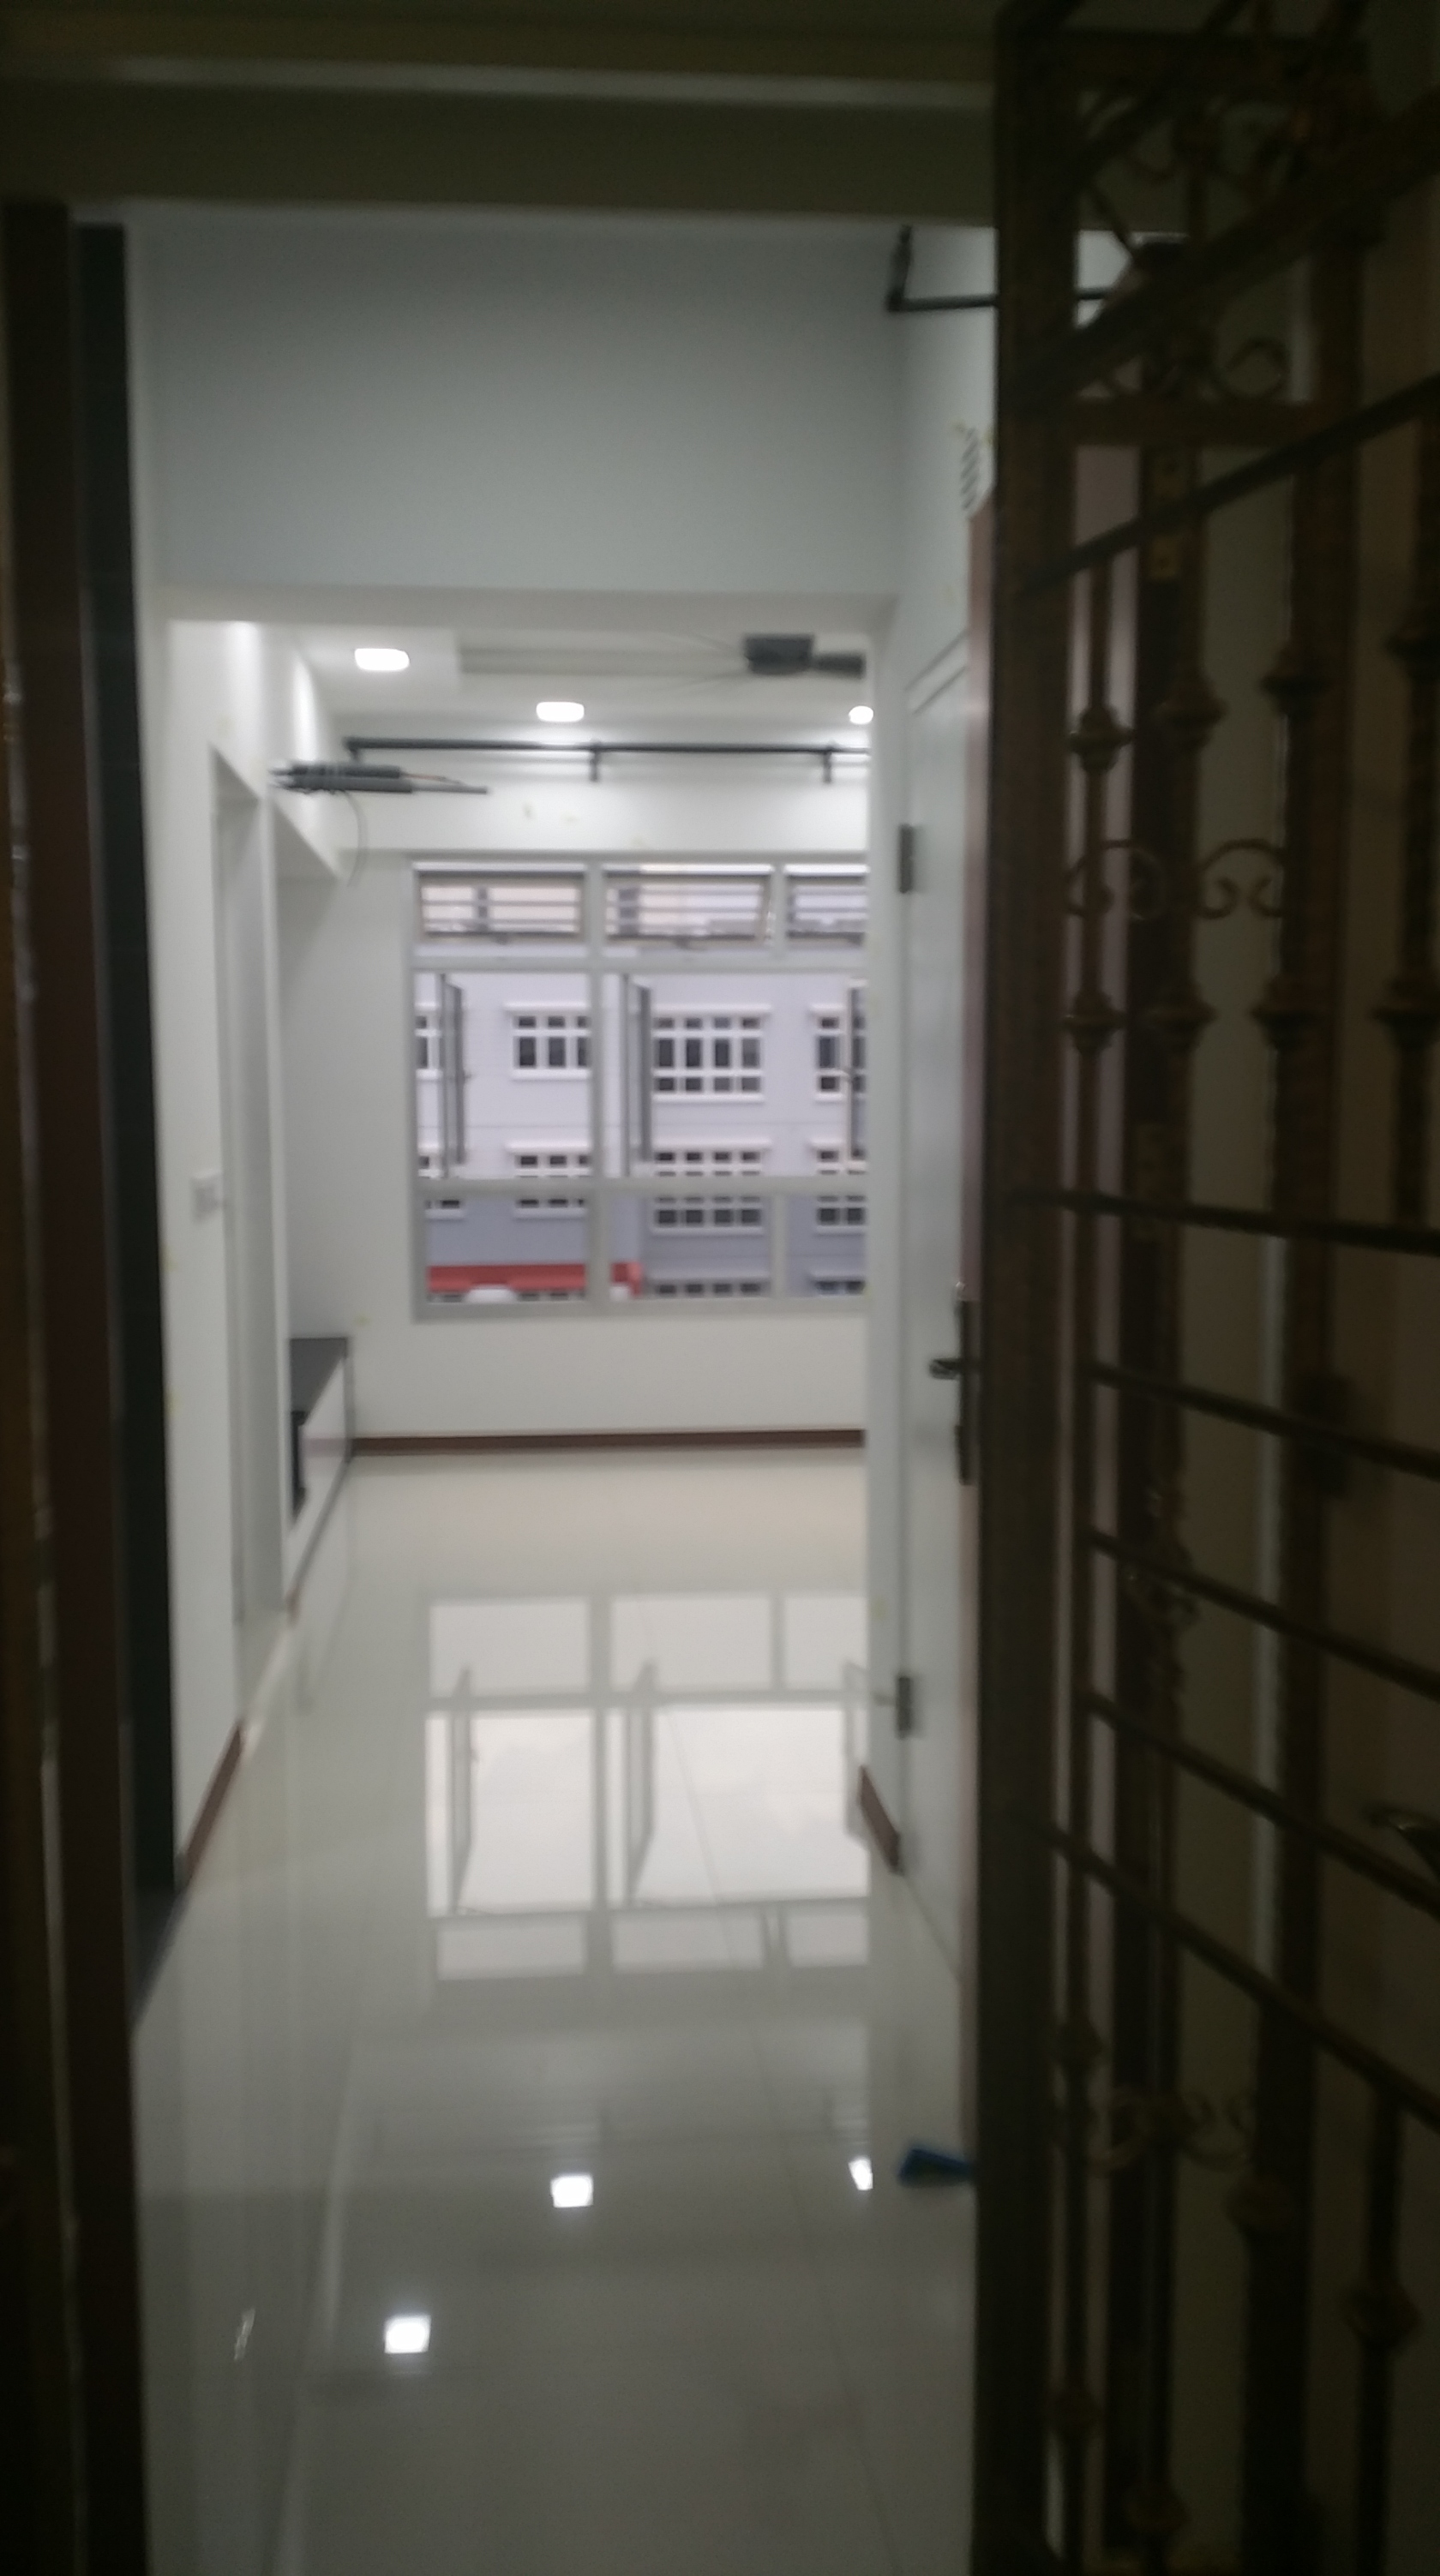
I realized just simply opening the Bomb Shelter Door will block 80% of the view, not only giving me privacy, but also allows me to open the Main Door to allow better air ventilation LOL!! For some of you wanting to build additional door or wall for privacy, you can use this method as a cheaper free option instead! 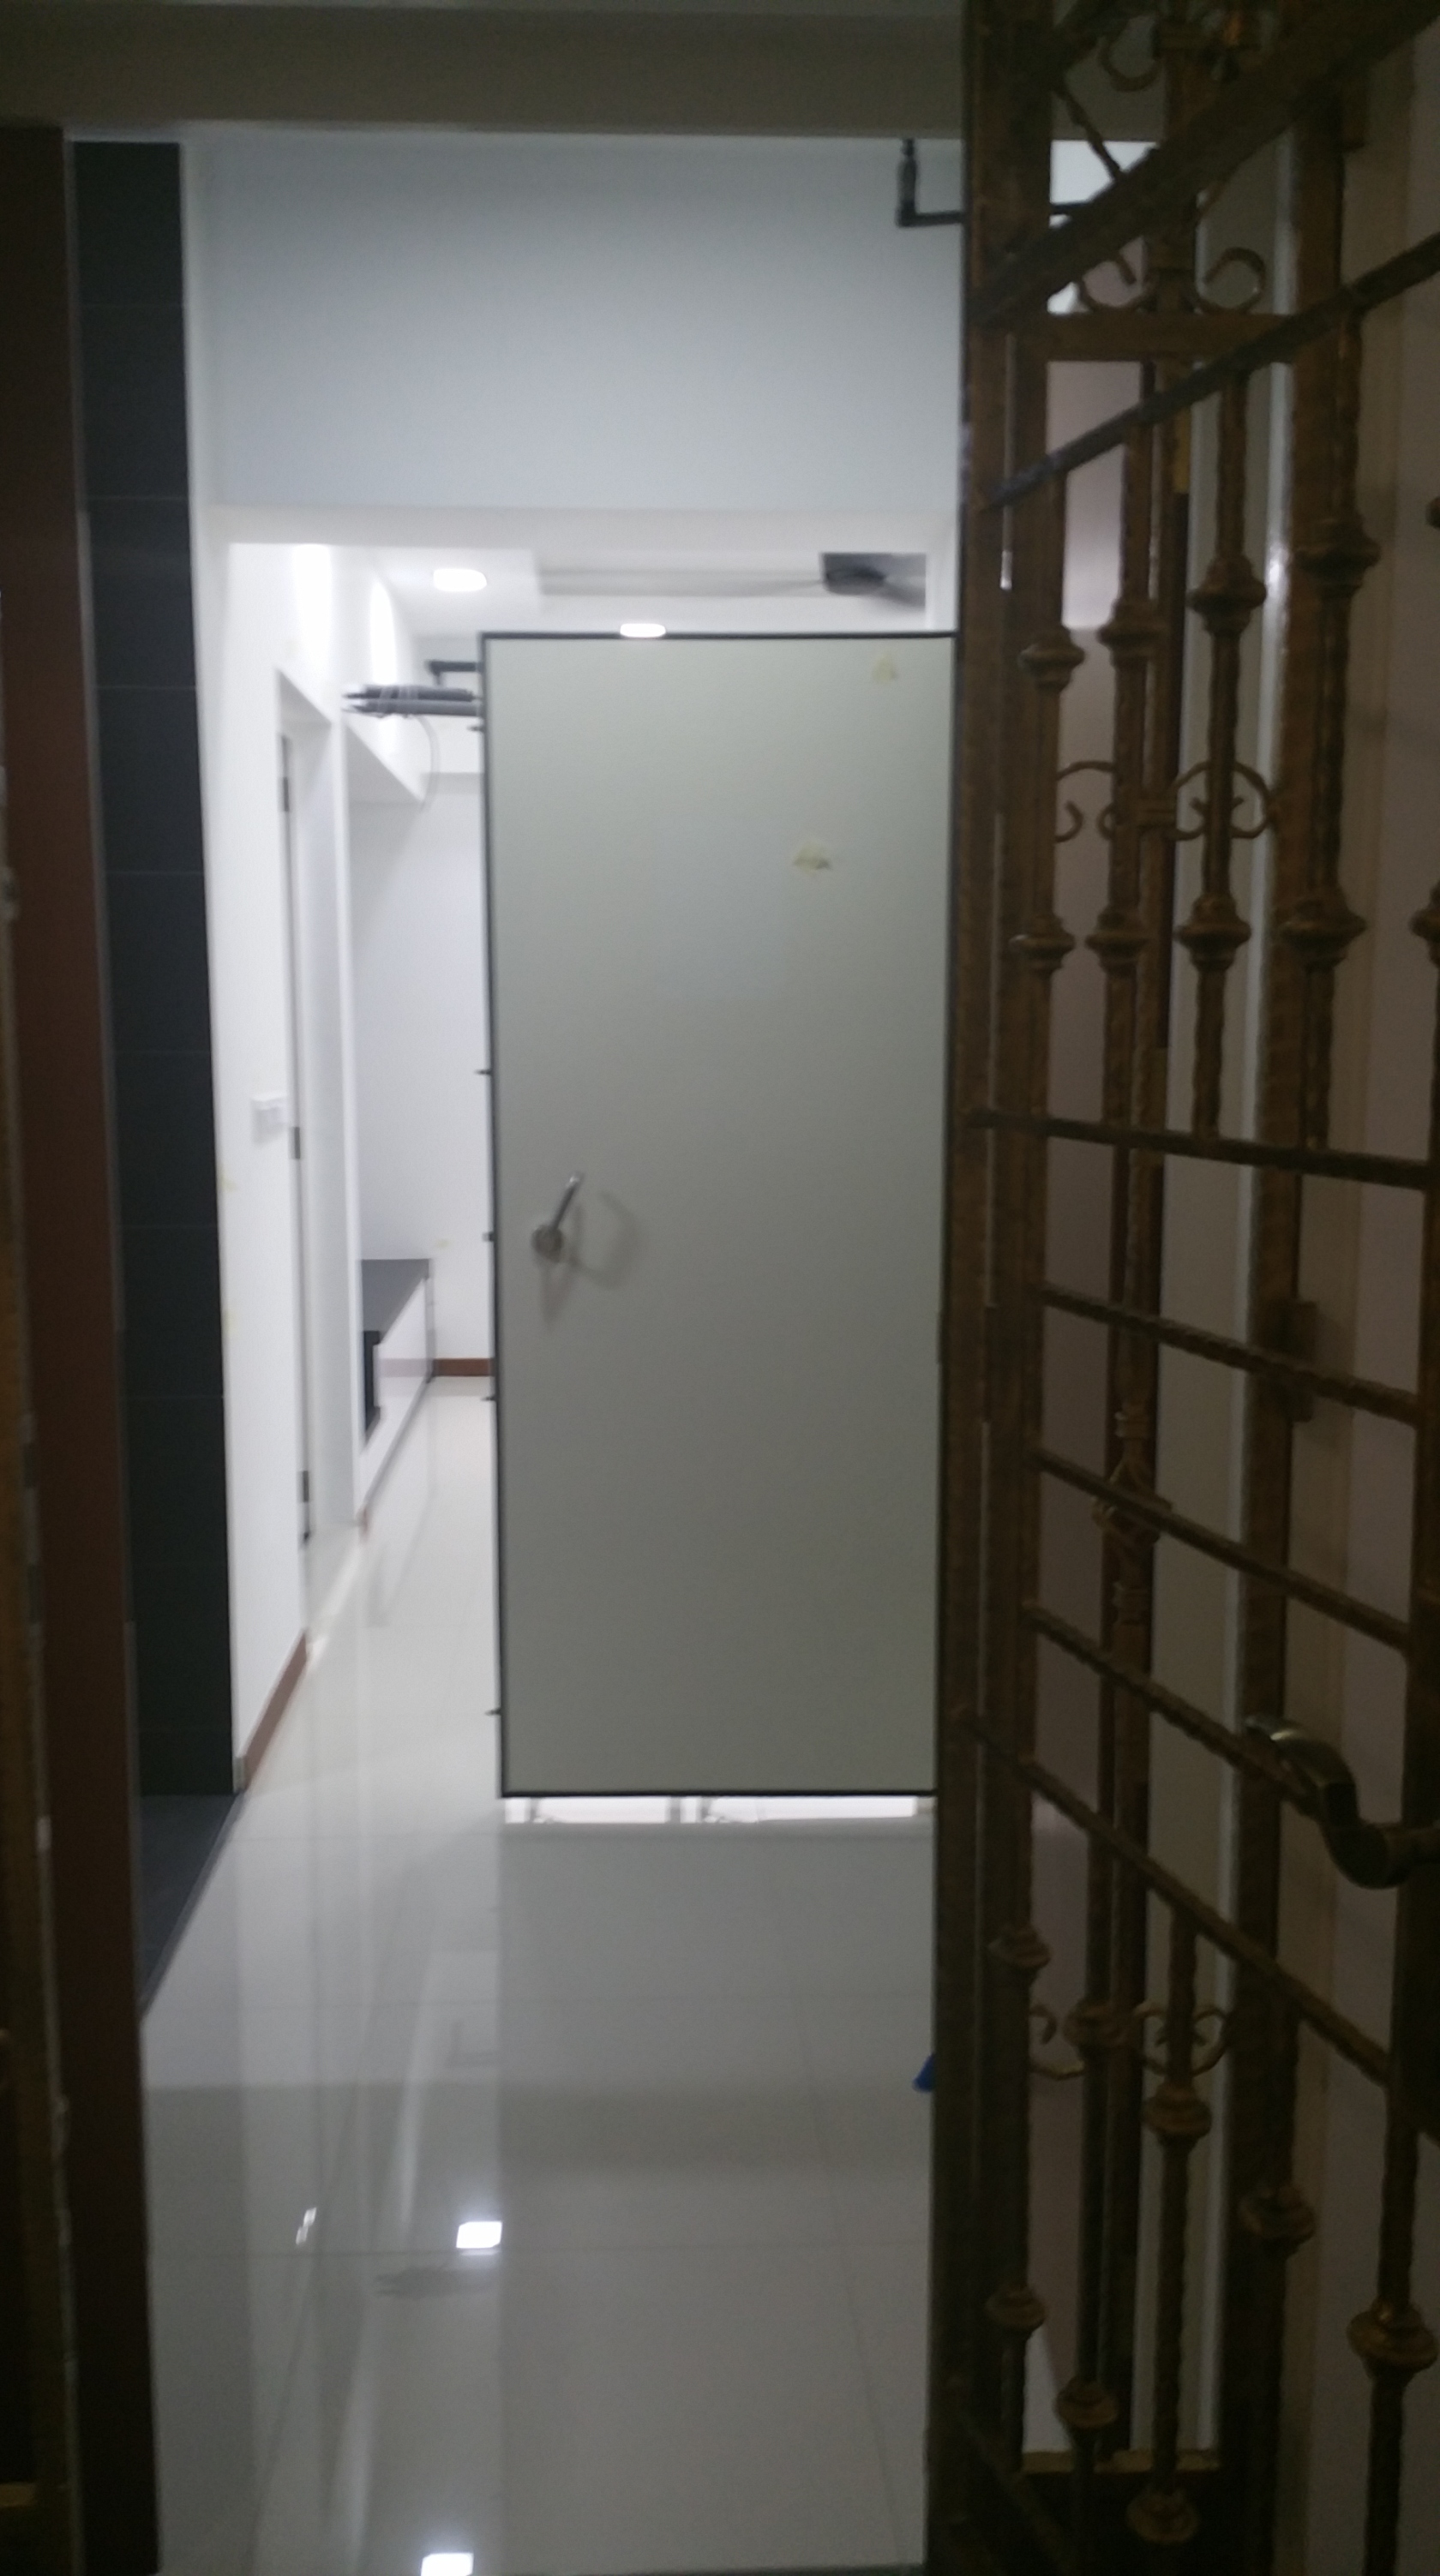
---------------------------------------------------------------------------------------
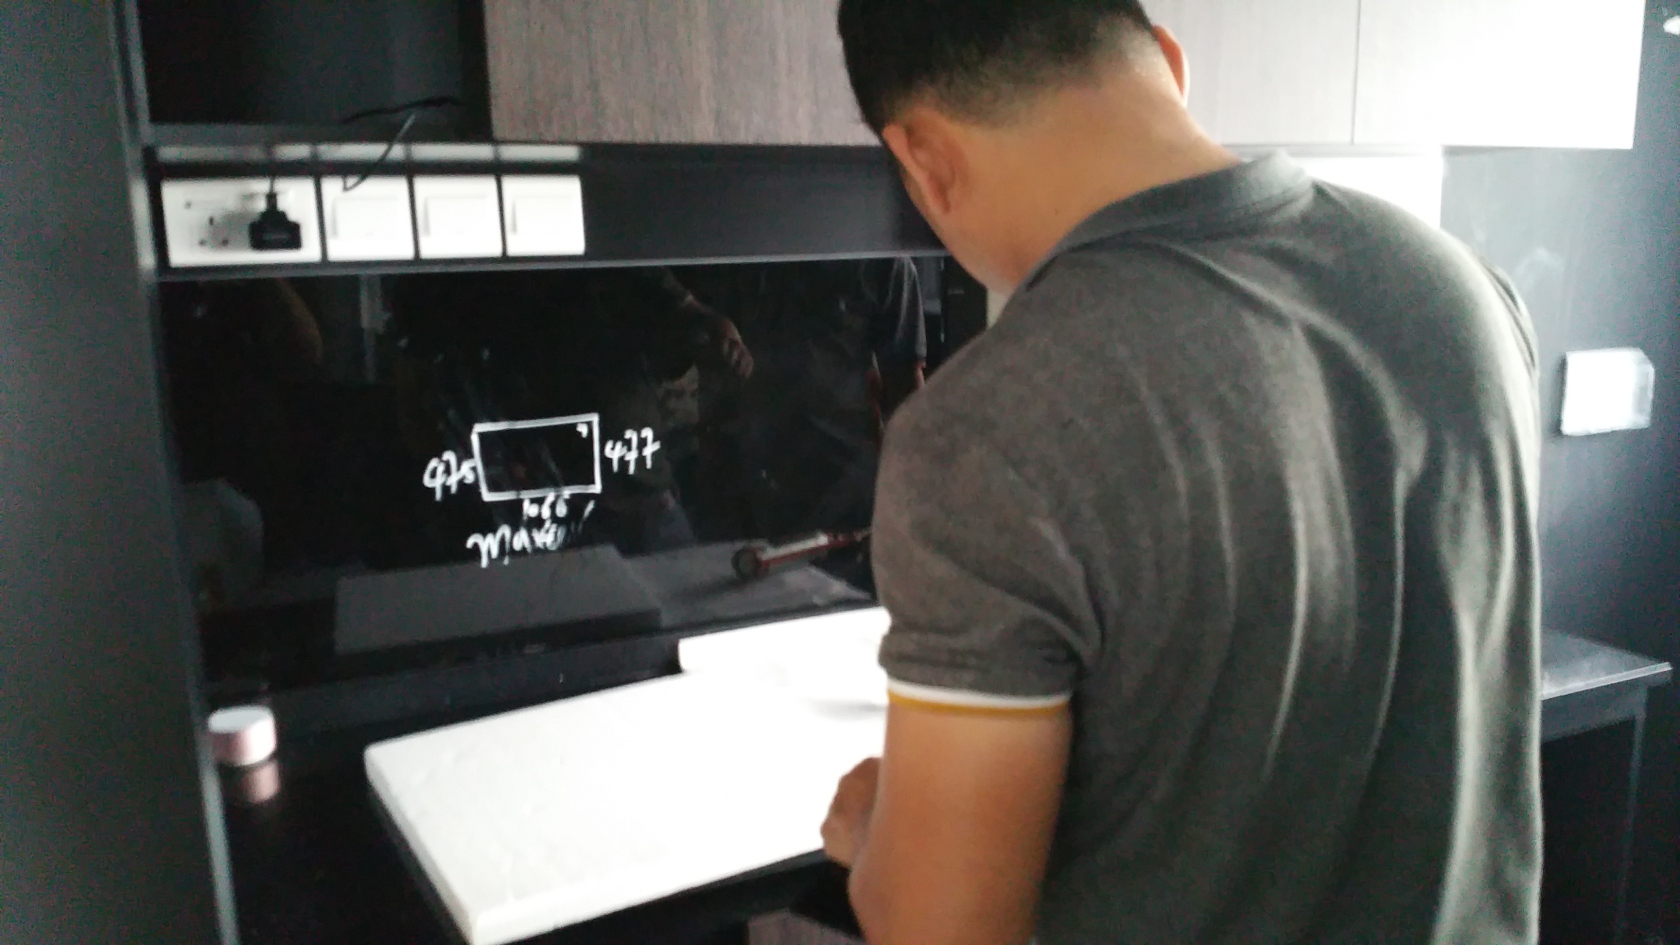
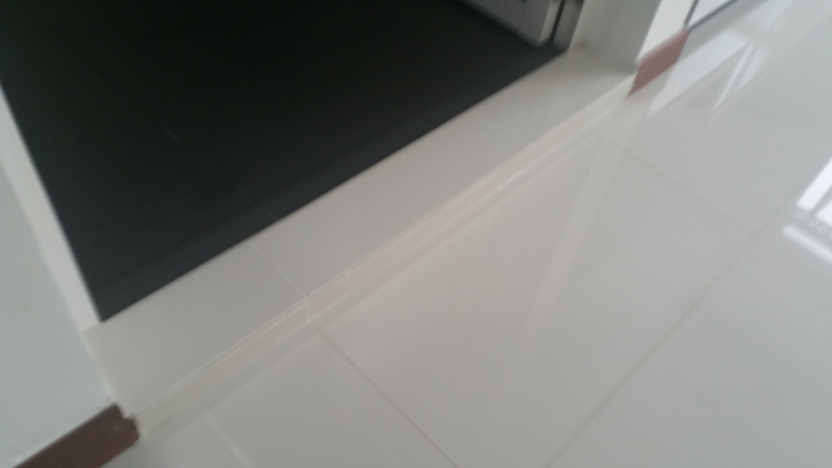
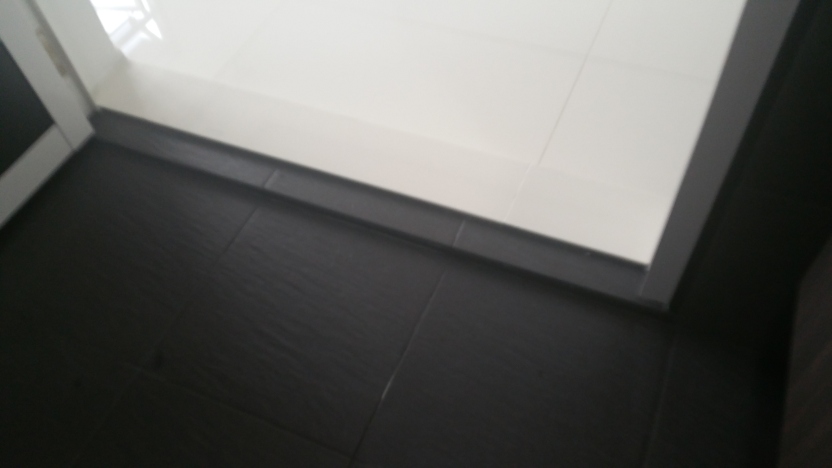
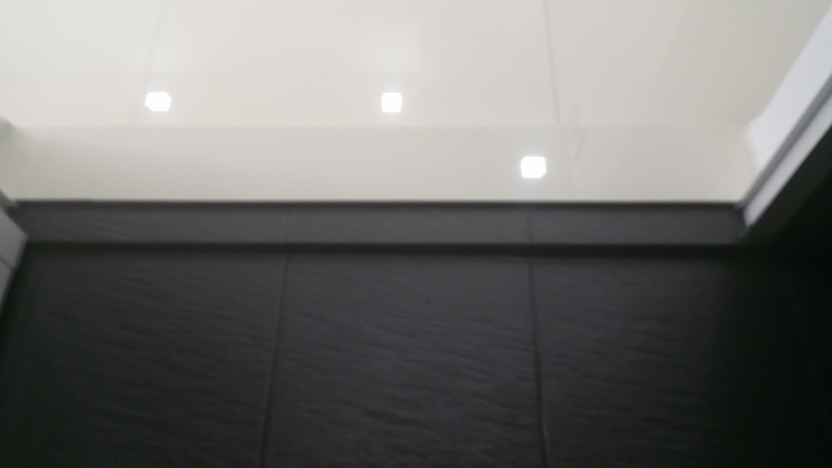
Oh and before I forgot, someone PMed me to request to have a closer look how I did the Kerb for the Entrance of my Bathroom, so here ya go! Tilers cut some extra Living Room floor tiles I got from BSC and laid them nicely.
---------------------------------------------------------------------------------------
And so thats it.
With Chemical Washing done, I can basically move into my Apartment anytime now.For most people, this would be the End of their Renovation.
For me, its just a wee bit more to go. I understand Tomorrow, the Aircon and Glass guys will come up do their installation and of course i’ll be taking pictures of their work done.So ya, thats it for now, I’ll see you in the next blog entry!!
Click Here for the Next Blog Entry:
End of 9th Week after Key Collection - Final Tasks: Aircon, Glass and Painting
Click Here to go back to Page 1 - Table of Contents-
1
-
 1
1
-
-
2 minutes ago, MiniBean said:Very nice home! The lights make a great difference.
Thank you for sharing the photos and ups & downs.
i suppose you are eager to move in soon
Thank you very much!
Oh yes, renovation really is one big rollercoaster ride lol.
Definitely definitely eager to move in, in fact next week will start moving in liao
Oh and I just gotten update from Jason that Chemical washing have been
completed, so I'll probably be posting a new blog entry today! -
6 minutes ago, CaseBlue said:I have tried two things to clean the stains both works for me...
1) toothpaste, the one i used have whitening effect, it doesnt work on my teeth so i used it to clean the sink (amazing results)
2) baking soda
Ya I've also heard of the amazing properties of baking soda. Heard its especially good for shoes.
Didn't know whitening toothpaste can be used too. Interesting. -
1 minute ago, mmoh said:melamine foam although is very good in cleaning, but I realised it spoil the smooth layer, if there is, eg. switches. It doesnt harm tiles though.
Good advice. Noted.
-
3 hours ago, huairen said:Mines at Punggol Sunray.
The wall between room and living will be gone.
I think I might get the invisible grill for the room window if I feel it's dangerous. But I still don't wish to have any grills.
Indeed bathroom window is very different. In fact this harkens back to 80s style bathroom window
Your sliding door looks good. Interesting HDB now don't use standard door anymore.
DB-Box is also intelligently designed and positioned in a nice place.
How I wish the architect who designed my place used abit of brain when designing position of my dbbox lol-
 1
1
-

My Modern Zen 2-Room 35sqm (Type 1) HDB BTO Apartment Renovation Journey
in Reno t-Blog Chat - HDB BTO Interior Design and Renovation
Posted
Thanks")