

James N Joean
-
Content Count
205 -
Joined
-
Last visited
-
Days Won
1
Posts posted by James N Joean
-
-
Venetian blinds r really pretty to look at... But will like to find out from u if u feel that it's a hassle to roll it up and down each time u want to open or close the windows as I know Venetian blinds r pretty delicate...so need to handle with love and care...Swear there'll be prettier pictures hahaha!


-
Hello! Well yes, due to the height, we compromise on the height below the bed (which is 1.5m) so to access the gaming / study area, we've to bend down a bit. But once we're seated, it's ample space. As for our mattress, we are getting the 5" foam mattress from SleepMed. The area on top is enough for us to sit up
Hello! Well yes, due to the height, we compromise on the height below the bed (which is 1.5m) so to access the gaming / study area, we've to bend down a bit. But once we're seated, it's ample space. As for our mattress, we are getting the 5" foam mattress from SleepMed. The area on top is enough for us to sit up on the mattress.
Ok... just sharing the tot that each time u want to get out of ur gaming area u need to be caution abt banging ur head.... and also each time u walk up to ur loft bed, u need to bend down as u reaches the top of the stairs.... plus each time u just wake up and feeling a little blur blur, u will need to crawl to the stairway (as u will not be able stand up on the loft platform) and carefully walk down the stairs while bending forward on the first few steps on the stairs.....
-
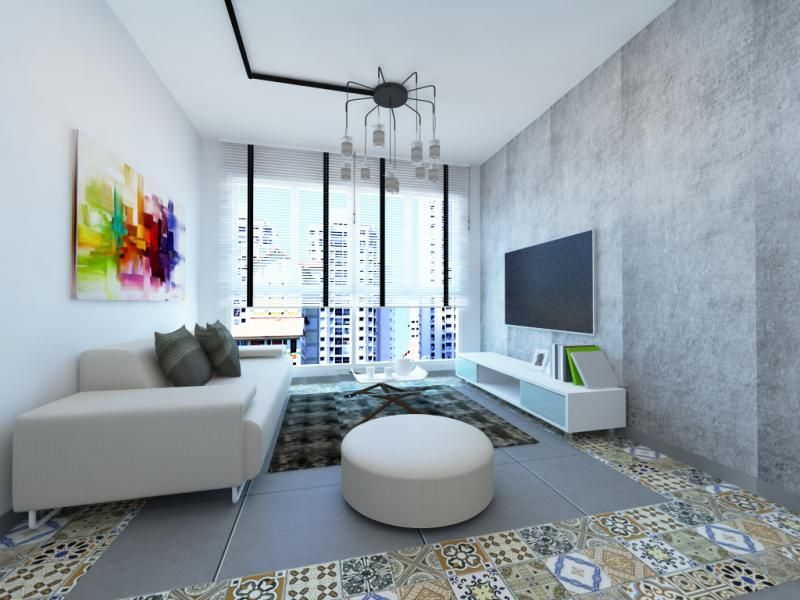
Renovation 3D
Importantly, this is for us to visual how the flooring and the boxed up 'encaved wall' will look like after (as per post above)
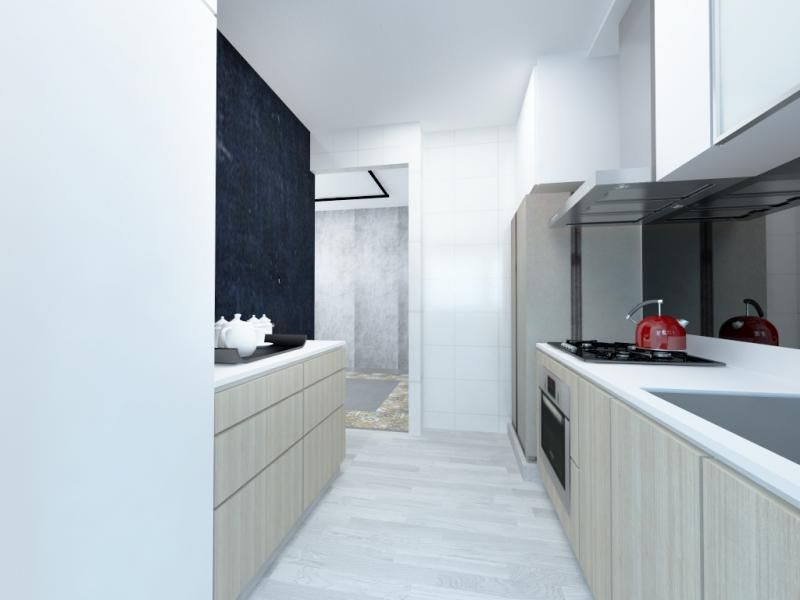
My kitchen flooring is as per pics on the post above, what's different in the aftermath is the colour of the cabinet =) and the lighting. but this is how it looks like .. roughly.
This is the loft bed for our master bedroom! hahaha very unconventional but it's cause we'd like to maximize space plus, it's like our childhood dream of a room looks like. This is our first ever home, and we'd like it the way we envisioned it to be. The other room will be our guestroom therefore it will be left bare. I have no example of our wardrobe but it is going to be a pole system. Will post pics once it's up =)
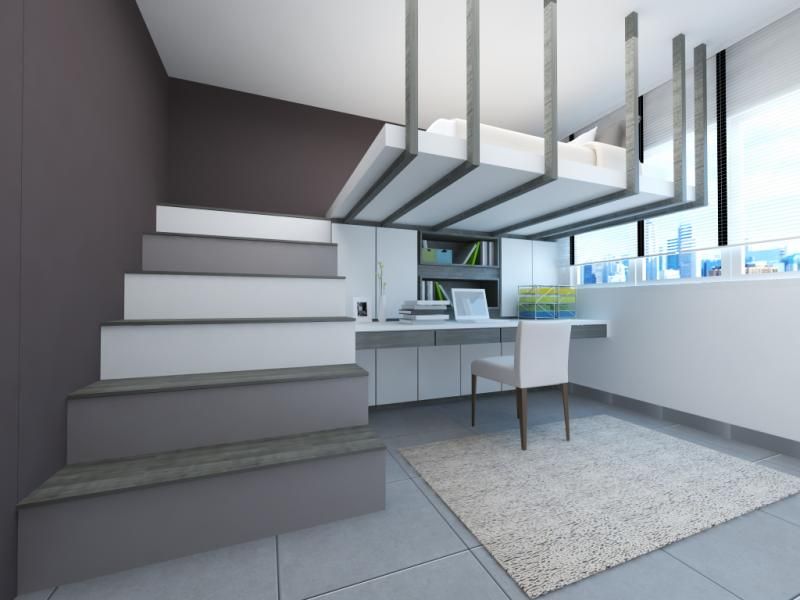
Is the loft bed possible at all? Typically the height of the ceiling is at 2.6metres... If you want to be able to walk and stand normally at the study area, the bed have to be at least 1.75metres off the ground... Which means u need to start bending down as u walk up the stairs to ur loft bed and crawl to ur mattress...I think the mattress thickness is abt 25cm, the thickness of the loft platform is about 15cm... U have abt 50cm space left between the mattress and the ceiling.... Not sure if u have space to even sit up on the mattress...
-
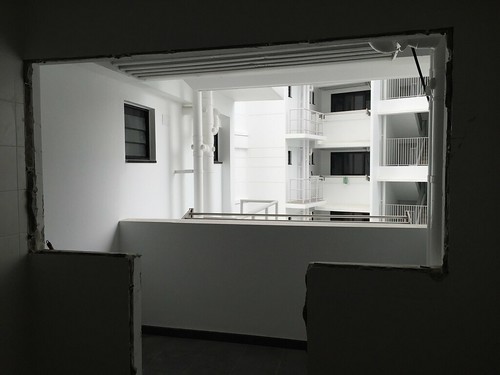
Renovation has started!
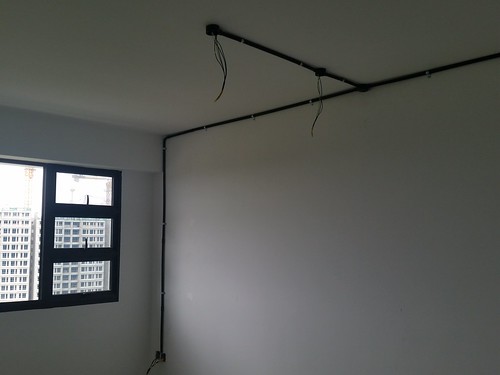
First thing to be done is the electrical works, exposed black tracks to complement the industrial theme. Toilet bows, vanity also removed to prepare for overlaying, amused to see our toilet bowl sitting in the bomb shelter
Service yards door removed (the blks are so near I can see exactly what clothes the neighbors are washing
 )
)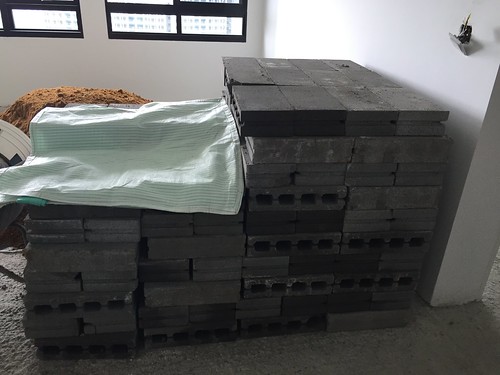
Anddd cement slabs, any guesses as to what they are going to be?

Hi Edwin,
May I know if the black conduits are matt or glossy black?
Thank you
-
I like ur place alot...very cosy.... has a subtle touch of stylishness without "trying too hard". Most importantly its both pretty and functional...
-
*deleted
-
Beautiful home. .. really beautiful. ...
-
Loved mood board and ur daring idea to hack the whole place into a stylish studio apartment.... I would suggest to seal up the common toilet door and re open it at the service yard to give it a more clean look in that area ... But it's really a lot more to spend juz for that cleaner look (plumbing, electrical, cement work)
Just sharing
-
 1
1
-
-
Ideally vinyl shld be laid 3 to 4 weeks after screeding is done to allow it to be completely dry....
-
Very inspiring DIY u got there.... I'm sure u will feel very happy looking at the wall and recalling the DIY experience for many years to come.... Love it!
-
Hi lemoncandy. ..I'm contemplating to get the oakland table becoz of the very nice color it has... but I read abt the disadvantage abt veneer table top (which is easily scratched and dent and prone to water damage). Will like to find out from u on how the table has performed so far... thanks!
-
-
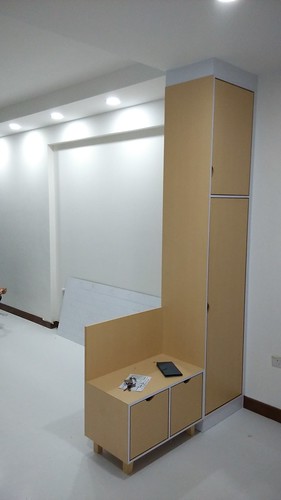
the shoe cabinet that hubby designed!
:)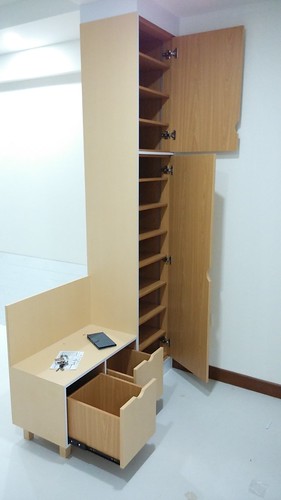
and the interior with adjustable shelving. drawers for the bench area.
sanded and vanished raw plywood frame for the passageway

master bedroom wardrobe. the doors are an off-white linen-textured laminate that i loveee.

my side of the wardrobe.
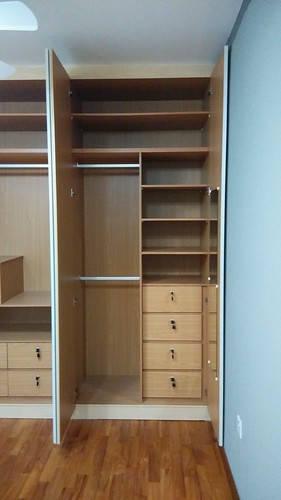
and hubby's side!
Hi Lemoncandy,
Do you roughly know how much does it cost to do up the passageway frame?
Thanks
-
Hi Jerome,
Can you pls quote me for the below combo
1) Elba Hood (F53H90) + Rinnai Hob (RB7502D SSS)
2) Elba Hood (AURASLIDER90) + Rinnai Hob (RB7502D SSS)
3) Rinnai Hood (RH991CT) + Rinnai Hob (RB7502D SSS)4) Samsung top load washer (WA75H4400SS)
5) Samsung front load 7kg (any samsung model)Thank you
-
Thanks dude.... Way out of my limited budget liao... Thanx an..
-
May I know where a d how much u got the lourved door for? I was quoted $600 per piece...kinda ex imo...thanks
-
The dining area looks really good...me like....The living looks bare at present, but I'm sure u will theme it up once u r more settled
Meanwhile, I be awaiting for the pictures of ur bedroom...I think hdb mbr is too small to create that airy bright scandi feel...I really hope to see how ur ID can work miracles on this shortcoming...
-
Air con Plan (Part 2)
In pictures...
Let's start from the master bathroom, where the trunking enters the house from the air con latch.

At first we wanted to keep the box mesh in the master bathroom and achieve this effect. (Photos from our neighbours...)

But with the amount of trunking and pipes for 5 aircons, the air con specialist said that it is was impossible to squeeze them into the box mesh that HDB provided. There will be a need to punch a huge hole in the box and the mesh cover, so sadly we decided to remove the box mesh and box it up later wih false ceiling.
With the box being removed on the other end of the toilet, it also means that we will be able to route it out at the position where it was originally blocked by the box structure.
Trunking and partition is up in master bath...

As for the discharge pipe, we had it run along the edges to be hidden by our carpentry down to the drainage below the vanity.

If we didn't remove the box, the trunking will have to run below the box mesh. And when it exits, the trunking will fall below the door frame in the master bedroom. Then it will have to be exposed as we can't box it up. Right now, it exits nicely above the door frame for us to box it up.
Hey Nick, do you have the contact of the air con installer? I'm worried those air con installer from gain city are not willing to route the piping this way, as it doesn't looks like more work....thanks
-
Thanks nick, that was really helpful !

-
Our 1st shipment of Taobao stuff is here! Will review the loots in a separate post. This post is purely dedicated to the service, Oops.sg, which we used to shipped the big items by sea.
When we ordered the items on Taobao, we chose the shipping address to be Oops.sg Guangzhou's address. After the Taobao merchant dispatch the item, we will register the package with its details (tracking number, value etc) in our Oops.sg account through their "DIY Reship Service".
(screenshot from Oops.sg)

Once Oops.sg at Guangzhou receives the items, the status of the item will be updated in our Oops.sg account. Packages are identified by their tracking number. We won't know how much volume the items occupy until we "prepare shipment", so we use our gut-feel to guess if we have purchased at least 1 cubic meter. Once all the items are received at Guangzhou, we prepare for shipment. It will take roughly 2 to 3 days for them to do so. After which, we are notified to pay for shipping fees (approx 100 sgd per cubic meter) + 7% GST (based on declared value of the items purchased). The whole transportation of the items by sea took about 9 days.
For the delivery of the items to our house, we can't choose the date and time of delivery. It depends on when they need to unload the container. So we had to take leave the whole day and the package only arrived at 4 pm. But granted, we didn't pay the extra compared to other services that allowed that flexibility.
Overall the service is rather systematic and professional with their system that you can track easily on your own...
except I wished they had been a little more "polite" when we were still figuring things out.
We ordered a couple of items from the same merchant and we didn't realised that the merchant used the same tracking number for all 4 items. While I was trying to register these items on Oops.sg, I received this error message. "Failure to register package in incoming folder". After trying a few times, thinking that it could be a problem on the service end, we contacted the admin for help and eventually we received this clarification through email.

Okay okay, yes, we could have been more careful with the tracking number, but they didn't have to be so fierce. Get scolded LOL.
 And really, from a user experience perspective, this could be easily prevented by having a error message saying that that tracking number have been used before so that it can't be input again.
 This is a minor episode that we hope Oops.sg can improve their system with, but overall we are okay with their service. We just document this in case other people who are also figuring things on Oops.sg get accused of playing with their system. Later teacher scold. HAHAH
Hi Nick,
Can I check with you a little about buying from tb and using the OOPS DIY reship service? Just give me Yes or No answer will be good enuff
1) Can I buy something from a seller now (because now got sale), and ask them to send to the OOPS warehouse at Guangzhou 2 months later?
2) Say if u order a table and a mirror from a seller
(A) Do you have to you have to request from the seller 2 different tracking number and register them as 2 different package in the OOPS website?
(B) Or does a tracking number automatically gets sent to my email upon a successful transaction with the seller? (sorry, never buy from tb before)
3) Say if I bought 10 items from taobao and all of them have reached the OOPS warehouse, can I hold it there for about 1 mth before I request for shipment to Singapore meanwhile waiting for my reno to complete?
4) Say if I bought 10 items from taobao and all of them have reached the OOPS warehouse, can I request to send Items 1, 2 and 3 first (things like sinks and lights where I need during the early stage of the reno)? Then send items 4 to 7 one mth later?
Thank you so much~~
-
-
Hi there, I didn't know how much domestic shipping would cost to send over to Oops warehouse in GZ so I was only informed after it reaches their warehouse however I heard from other buyers that it is possible to find out domestic shipping beforehand if you speak to the seller and agree on the domestic shipping price.
Hope this helps!
Thanks Lovescandi. .. actually I was asking roughly how much u paid for the domestic charges and hidden cost as you mentioned that it's quite a lot.... I just wanna agar agar get a benchmark based in the amount of craftbricks u laid on that wall.... Thank ya
-
Hello, I'm not very good with the technical details, my hubby is so I can't really explain how it is done but I'm sure it can be done since there are so many people doing feature wall. By the way, half of my brick wall is a box up to align the brick wall with my sofa so the electrician was supposed to run the concealed wiring in the box up.
Bricks from Taobao is extremely cheap but domestic shipping is the hidden cost and its quite expensive IMO.
Hi Lovescandi,
May i know how much is the "domestic shipping is the hidden cost" that you mentioned? Im considering getting it and ask oops to send over

Thank you
-
Hello guys, many of you posted PMs to enquire the links for my TB items. I appreciate if you guys could read the posts before this because I've posted them up

Some updates:
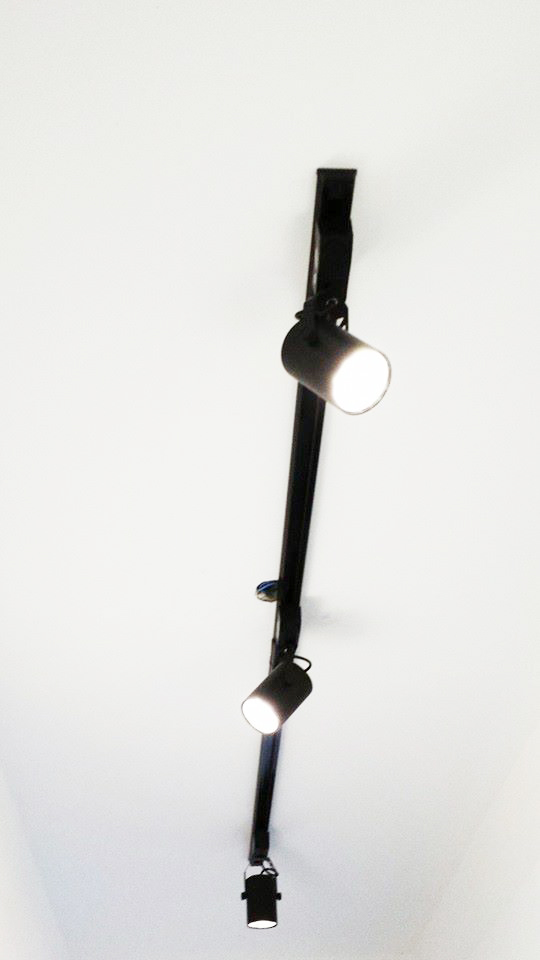
Today Contractor J's electrician came over to do up my electrical wiring - he finished up the walkway tracklights, 3bed rooms, 2 bathrooms, kitchen and service yard within a couple of hours. Tomorrow he'll be doing up the living room which is more complicated.
For those who have the same layout as me and you'd like to use tracklights too, the trick is to buy 1metre tracks if you don't want to mess up the ceiling with too many conduits and tracks. You don't even need a connector to connect 2 tracks (1metre + 1metre). Simply get your electrician to place the tracks side by side and you can run them straight without going round the living room or wasting money buying track connectors.
I'm not sure if you guys understood what I meant - but feel free to question further as it was a new idea thought by contractor J and the electrician as I told them the original conduits and tracks were too messy and complicated in the ceiling. Eventually we tried it out today to see if placing 1metre tracks side by side works without a connector and it does the trick indeed

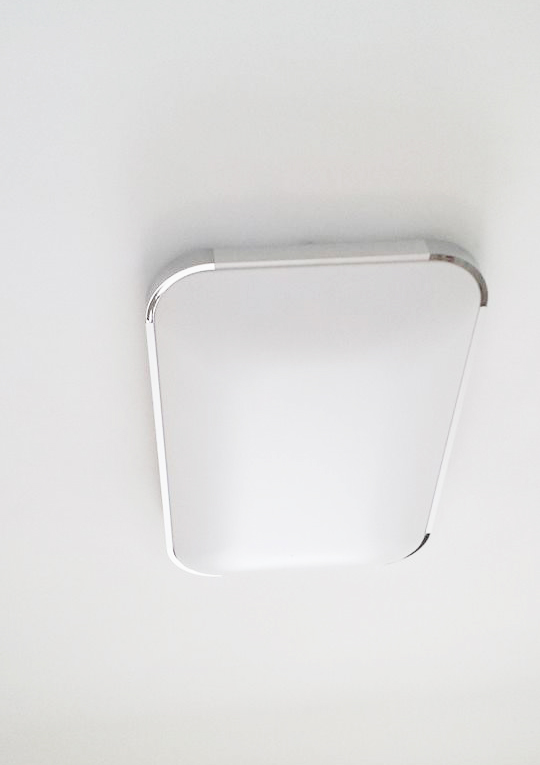
Bedrooms and kitchen light with remote control and colour of lights are interchangeable to 3 different shades (white, off white and warm)
OUR BEST BUY - HUBBY AND I LOVE THIS LIGHT SO MUCH!!
Walkway track light - using 7watts, its perfect!
(My neighbour is using 3watts, too dim. And my friend bought 12watts, too big,bulk & bright)
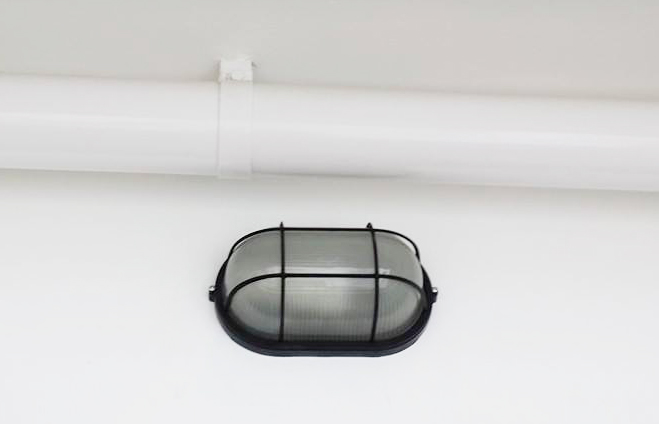
Service yard wall light (had to change the bulb to bigger watt in LED as the originaml one provided was way too dim)
Like to understand more...how does not using connectors make ur track light layout look less complicated? I tot the connector is juz for joining purpose and shld be "invisible" when joining 2 tracks together and shld look the same asethetically with or without it... can u explain abit more or shld some pics? Thanks


A Place To Call Home!
in Reno t-Blog Chat
Posted
Hi there, where did u find the bi folding half lourved doors? I searched for so long for them until I eventually gave up and gotten the half lourved PD door
Also, may I know how did u "whiten" the finishing of ur furniture? Did u used the ikea white glazing paint?
Thanks js