


Changbp
-
Content Count
455 -
Joined
-
Last visited
-
Days Won
3
Posts posted by Changbp
-
-
Rounded wall matches rounded seat. Looks quite okay really.
For nice looking rectangle shape, To mate 2 perpendicular tiles together would require 45deg angle cuts on the 2 tile ends and it will be quite sharp. Could end up with nasty cuts if accidentally brushed against.
Another method would be to add a Small radius PVC to mate the 2 edges. but will not look as nice as the color of the PVC may not exactly match. Definitely safer but still slightly round at the edge.
Sometimes I chose aesthetics over function for example my cooker hood is set at >1.7m high which will result in poor fume suction but I put it that way so I wouldn't bump my head on it. So I would recommend Safety over aesthetics. Especially if u have children.
-
Can you please post the link for the service yard sink? Thinking of doing this also as I sometimes hand wash clothes quite often and its quite troublesome to do it in the bathroom and hanging them at the service yard
-
Thanks lux,
At this point of time I have only bought some of the electronics mentioned in earlier posts and most have not been delivered yet. The rest of furnishing like dining tables, chairs curtains rugs etc... I have not purchased yet.
Though the outdoor bench DIY that I'm working on should be completing this weekend(provided no screw ups)
-
Wow so much marble... Must have cost a bomb. Wouldn't Maintenance be a problem?
-
ur heater comes with the timer? im considering install one cos my parents always forget to off heater...
Yes it's default comes with digital control panel with 2 timers.
-
wow the grill is nice, where did u get that?
Got it from mancel in tmall.
-
Thanks to your blog, I had mine made at 80mm after seeing that your foot got caught at the bottom drawer.
-
Hey there, I like your feature wall.. Btw, you didn't do anything to the toilet and it already has feature wall?
-
The contracted portion of my reno has since been completed.
I'll also provide a detail review on the ID later(after i move in) since the defect rectification portion is also important. I kept my eagle eye
 thru-out the reno so every little thing that i find is a issue I highlighted and had it corrected immediately and not leave it for handover. So I do not think there would be much defects.
The updates next will be furnishing and some DIY though the furnishing would be much slow as I ran out of $$$... need time to replenish my piggy bank and start buying stuff again.

-
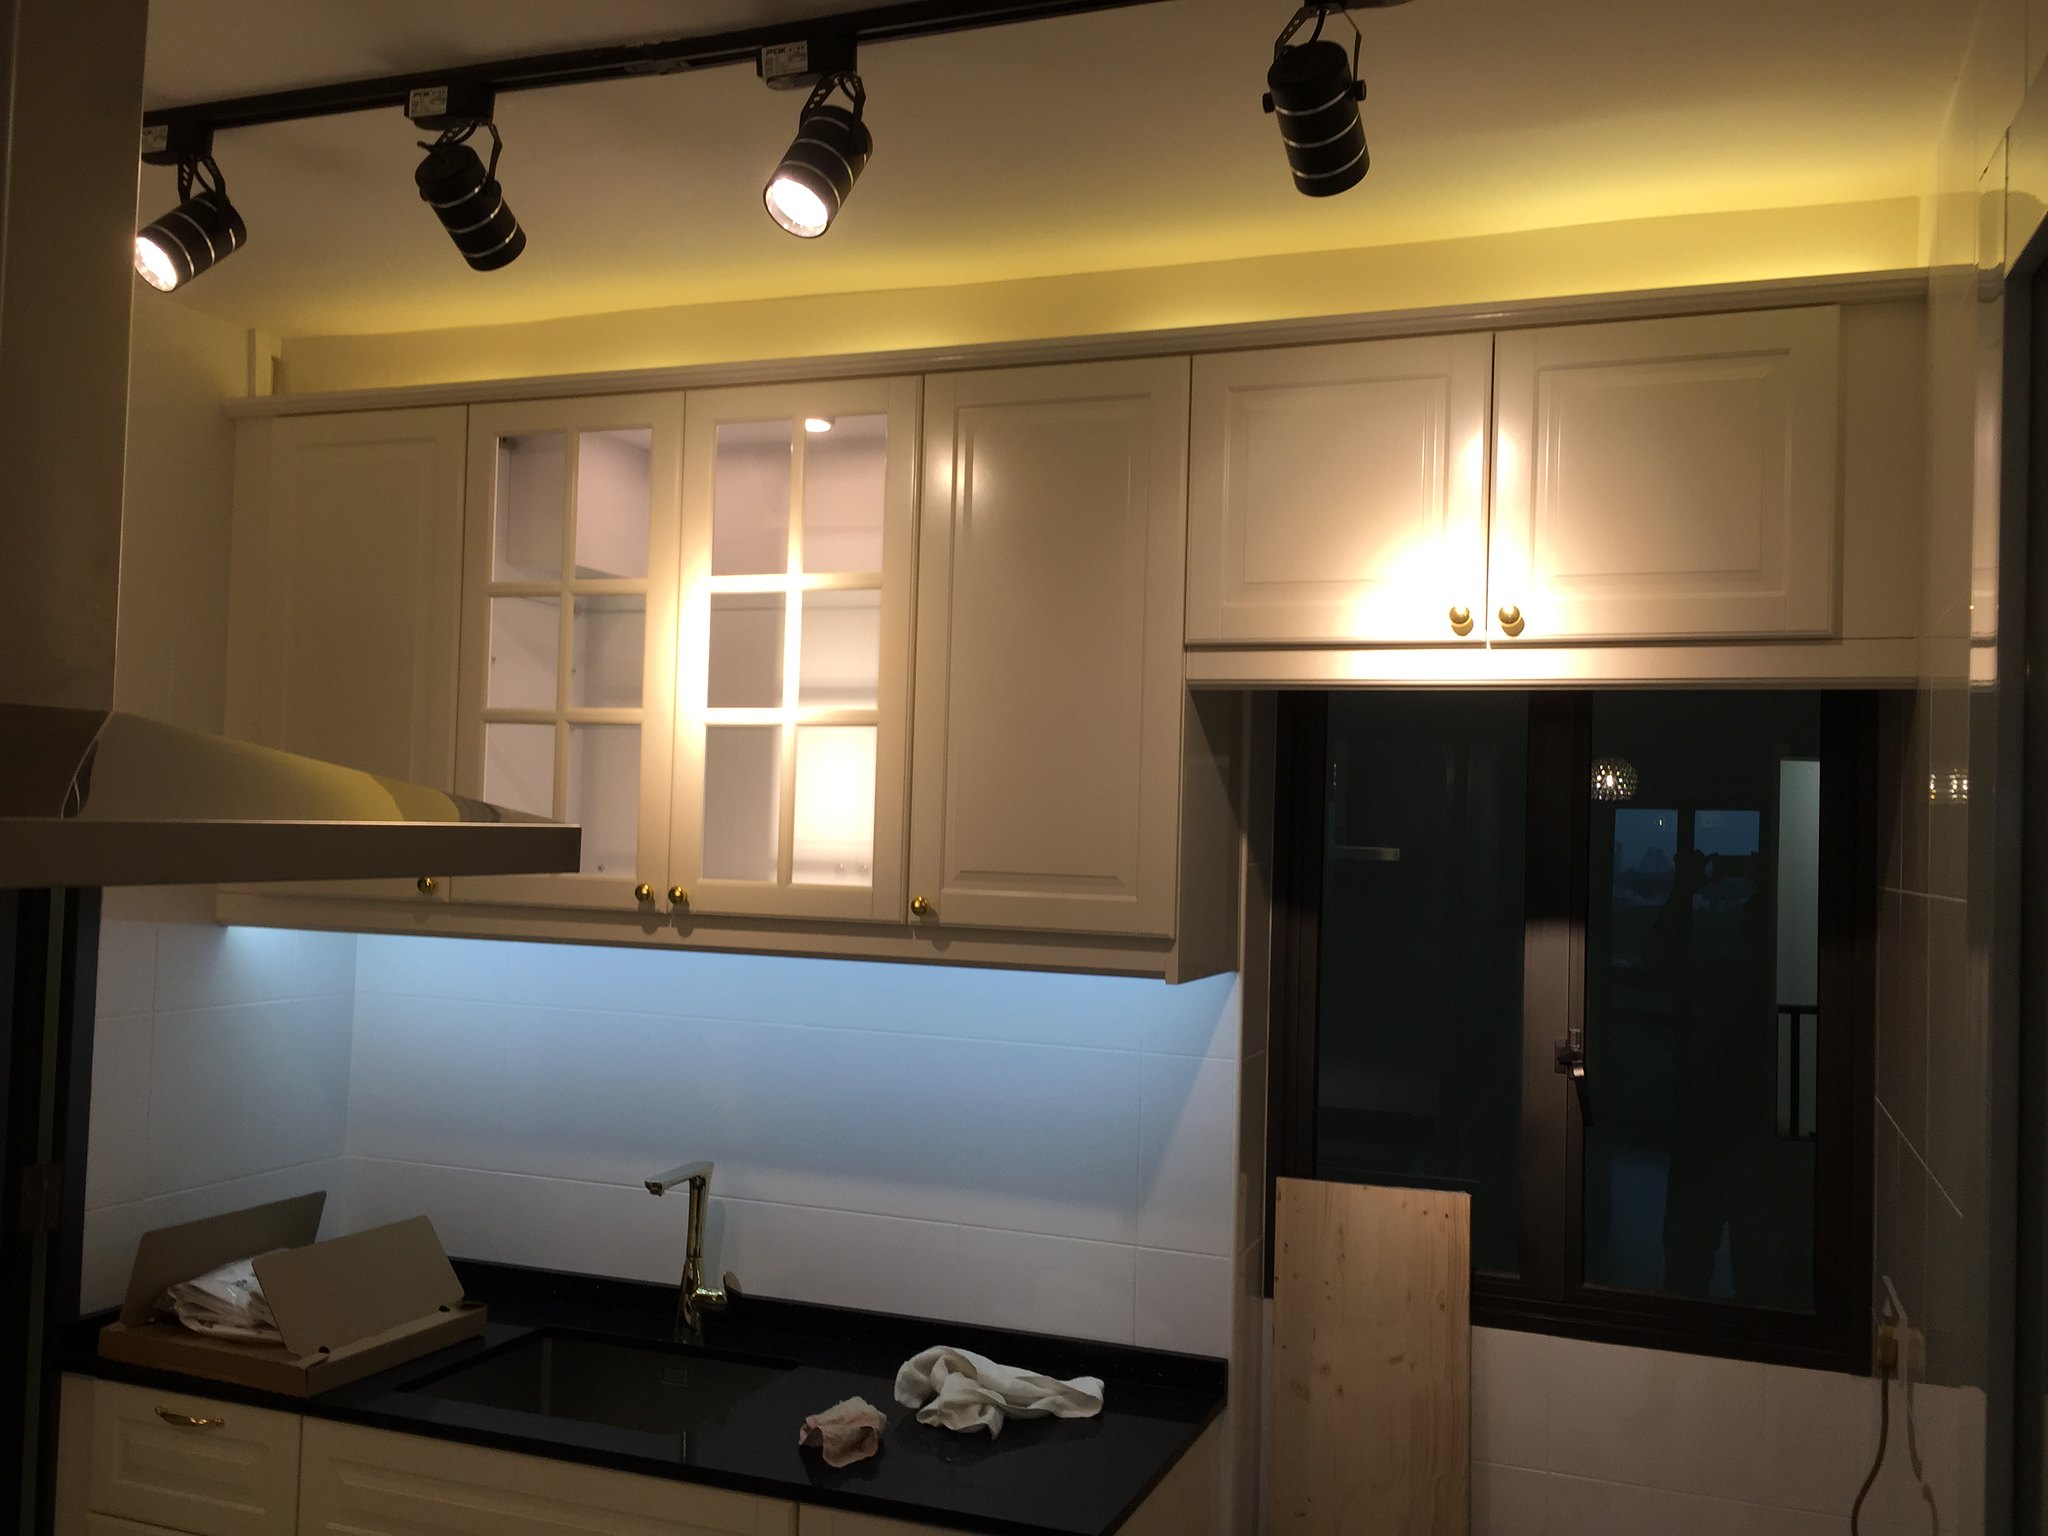
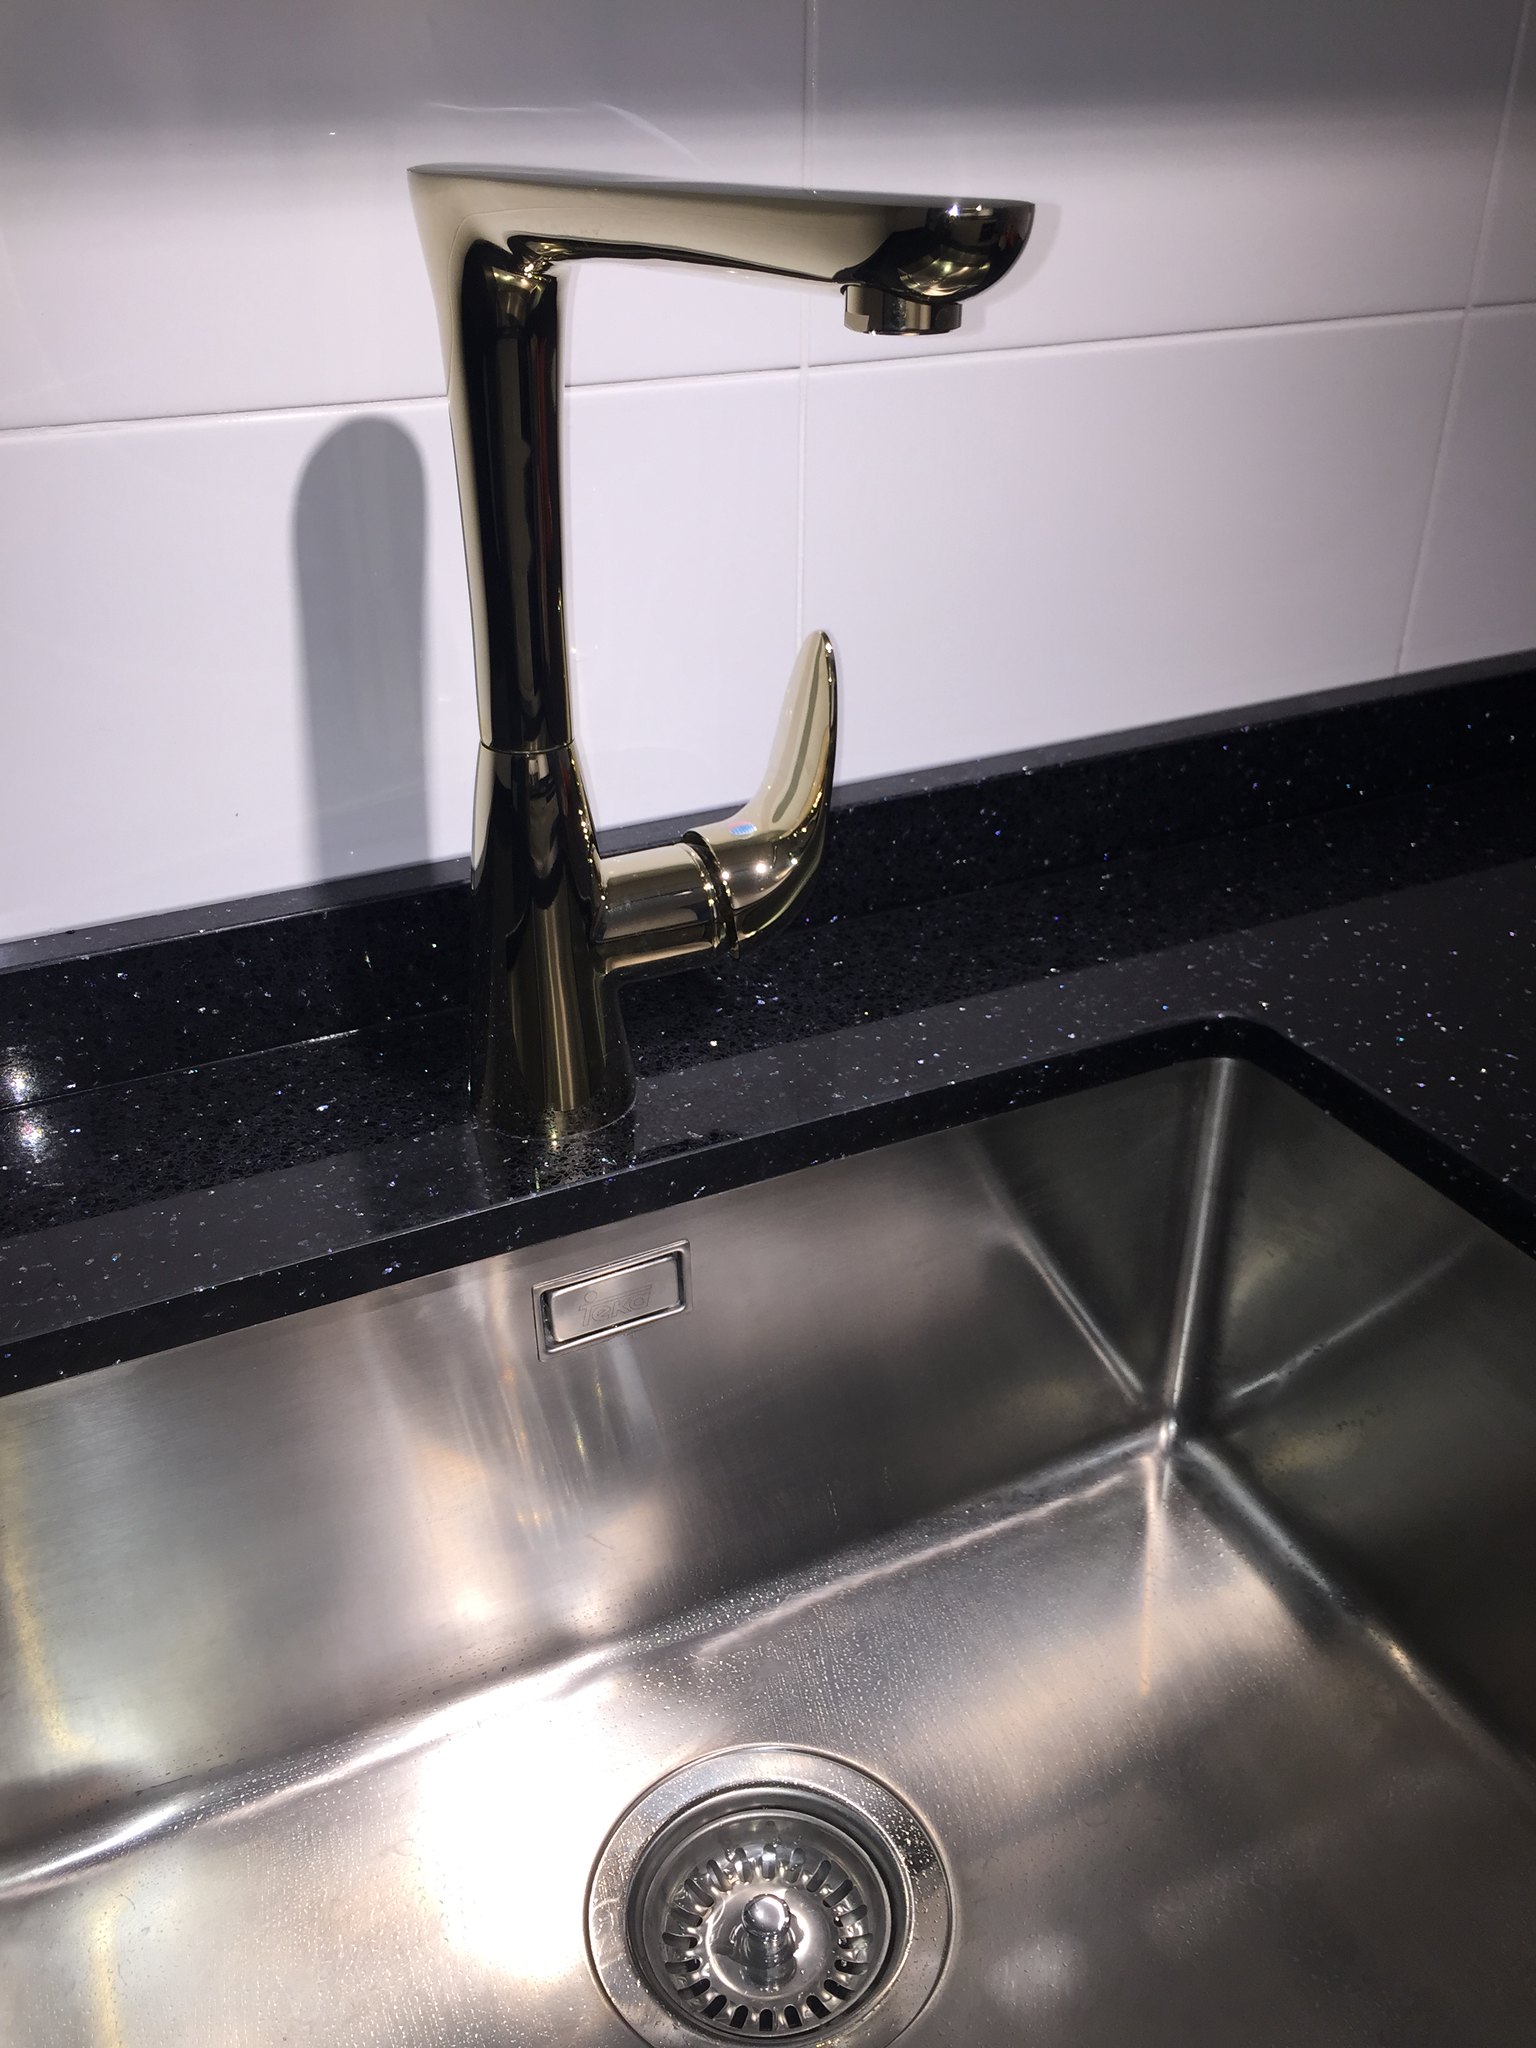
Update on Kitchen (reno completed) Except no furnishing yet.
https://www.flickr.com/photos/139714232@N05/albums/72157664418252375
Long side of the kitchen.

Close up on sink cabinet.
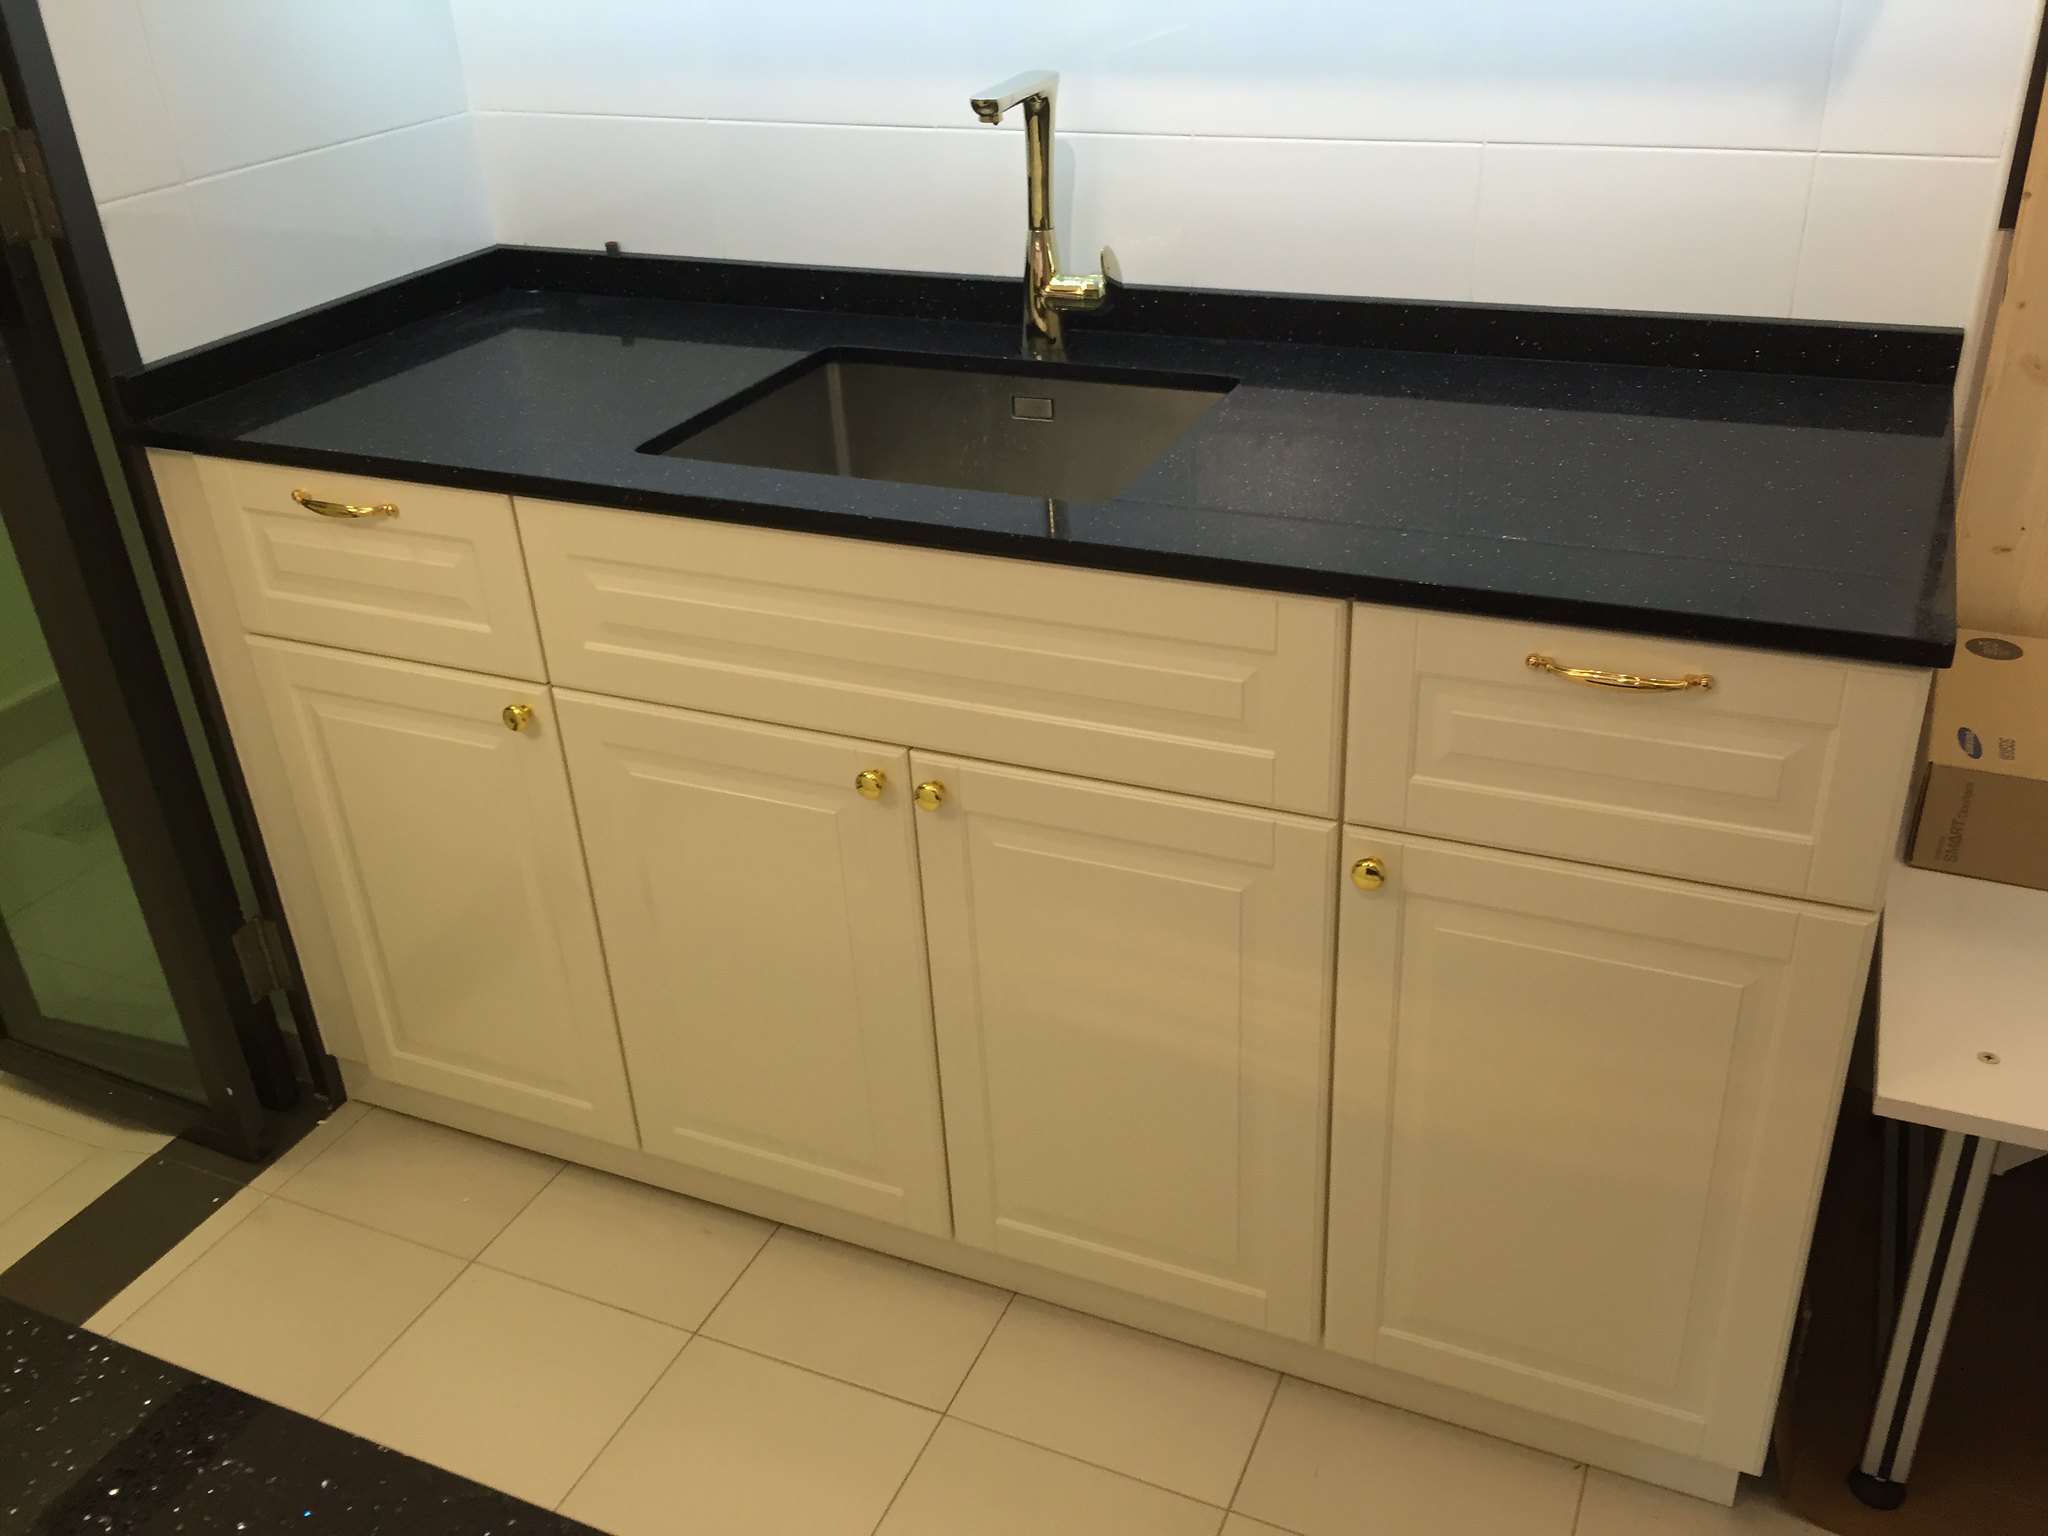
The Gold tap recommended by Bykaranne, matched with Teka Sink and Lian Hin Quartz countertop.
The short side of the kitchen. Full height glass backsplash with Teka Hob, Teka Hood, Teka Combination oven and a short length of Eubiq Power track.
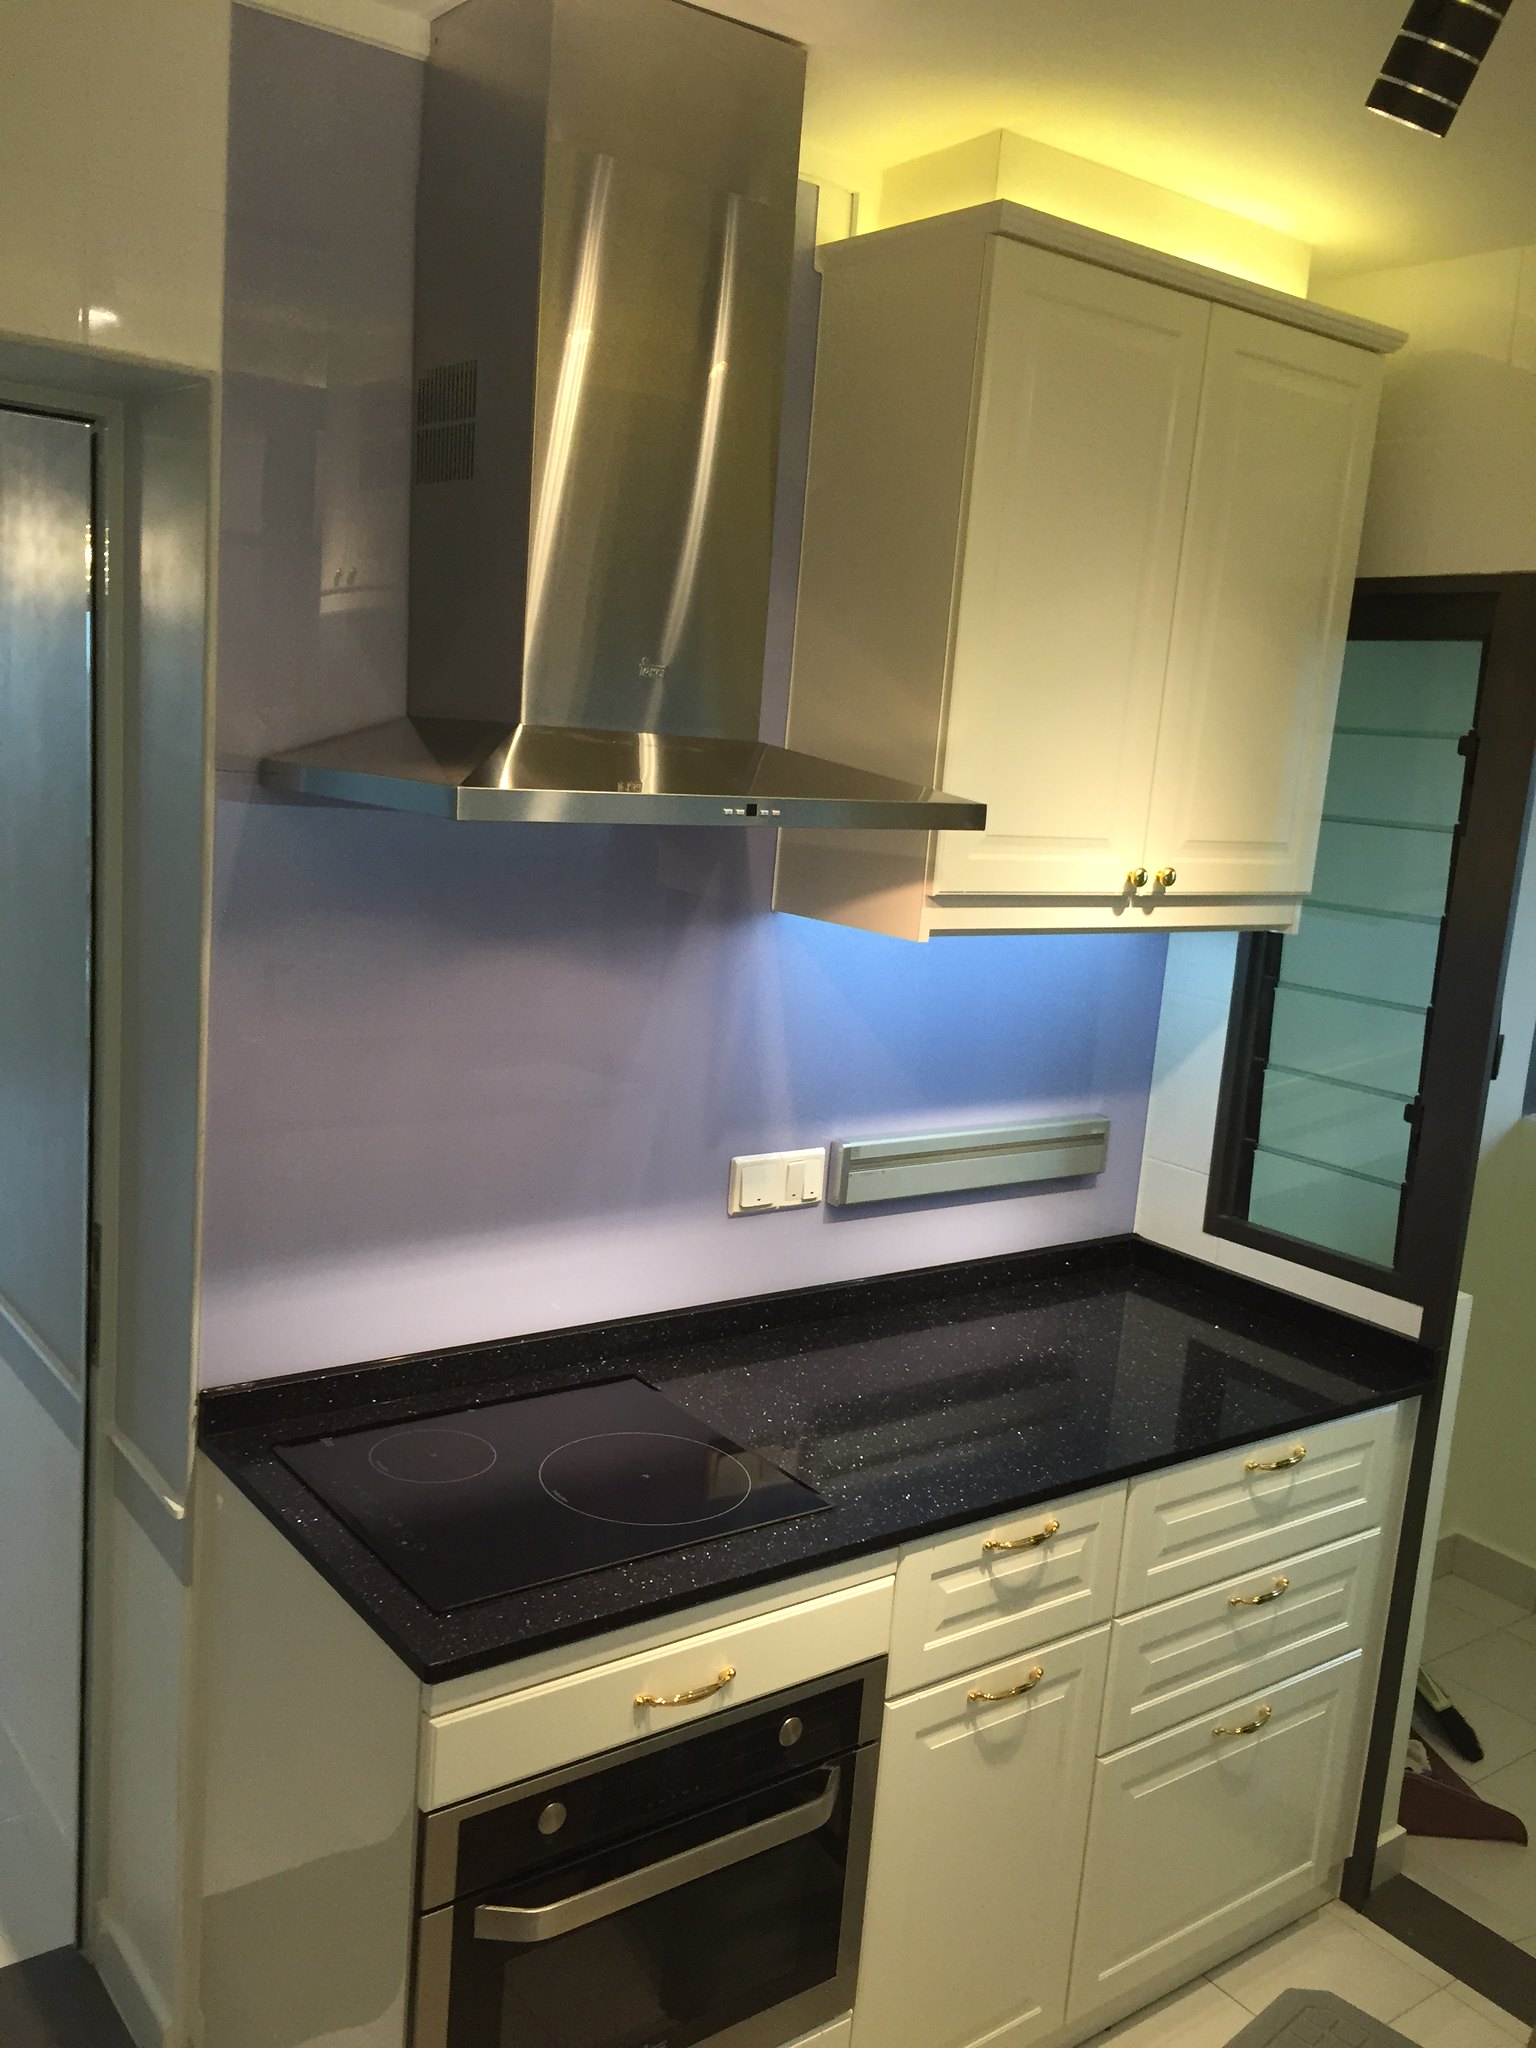
Close up shot of the bottom cabinets of the short side of the kitchen.
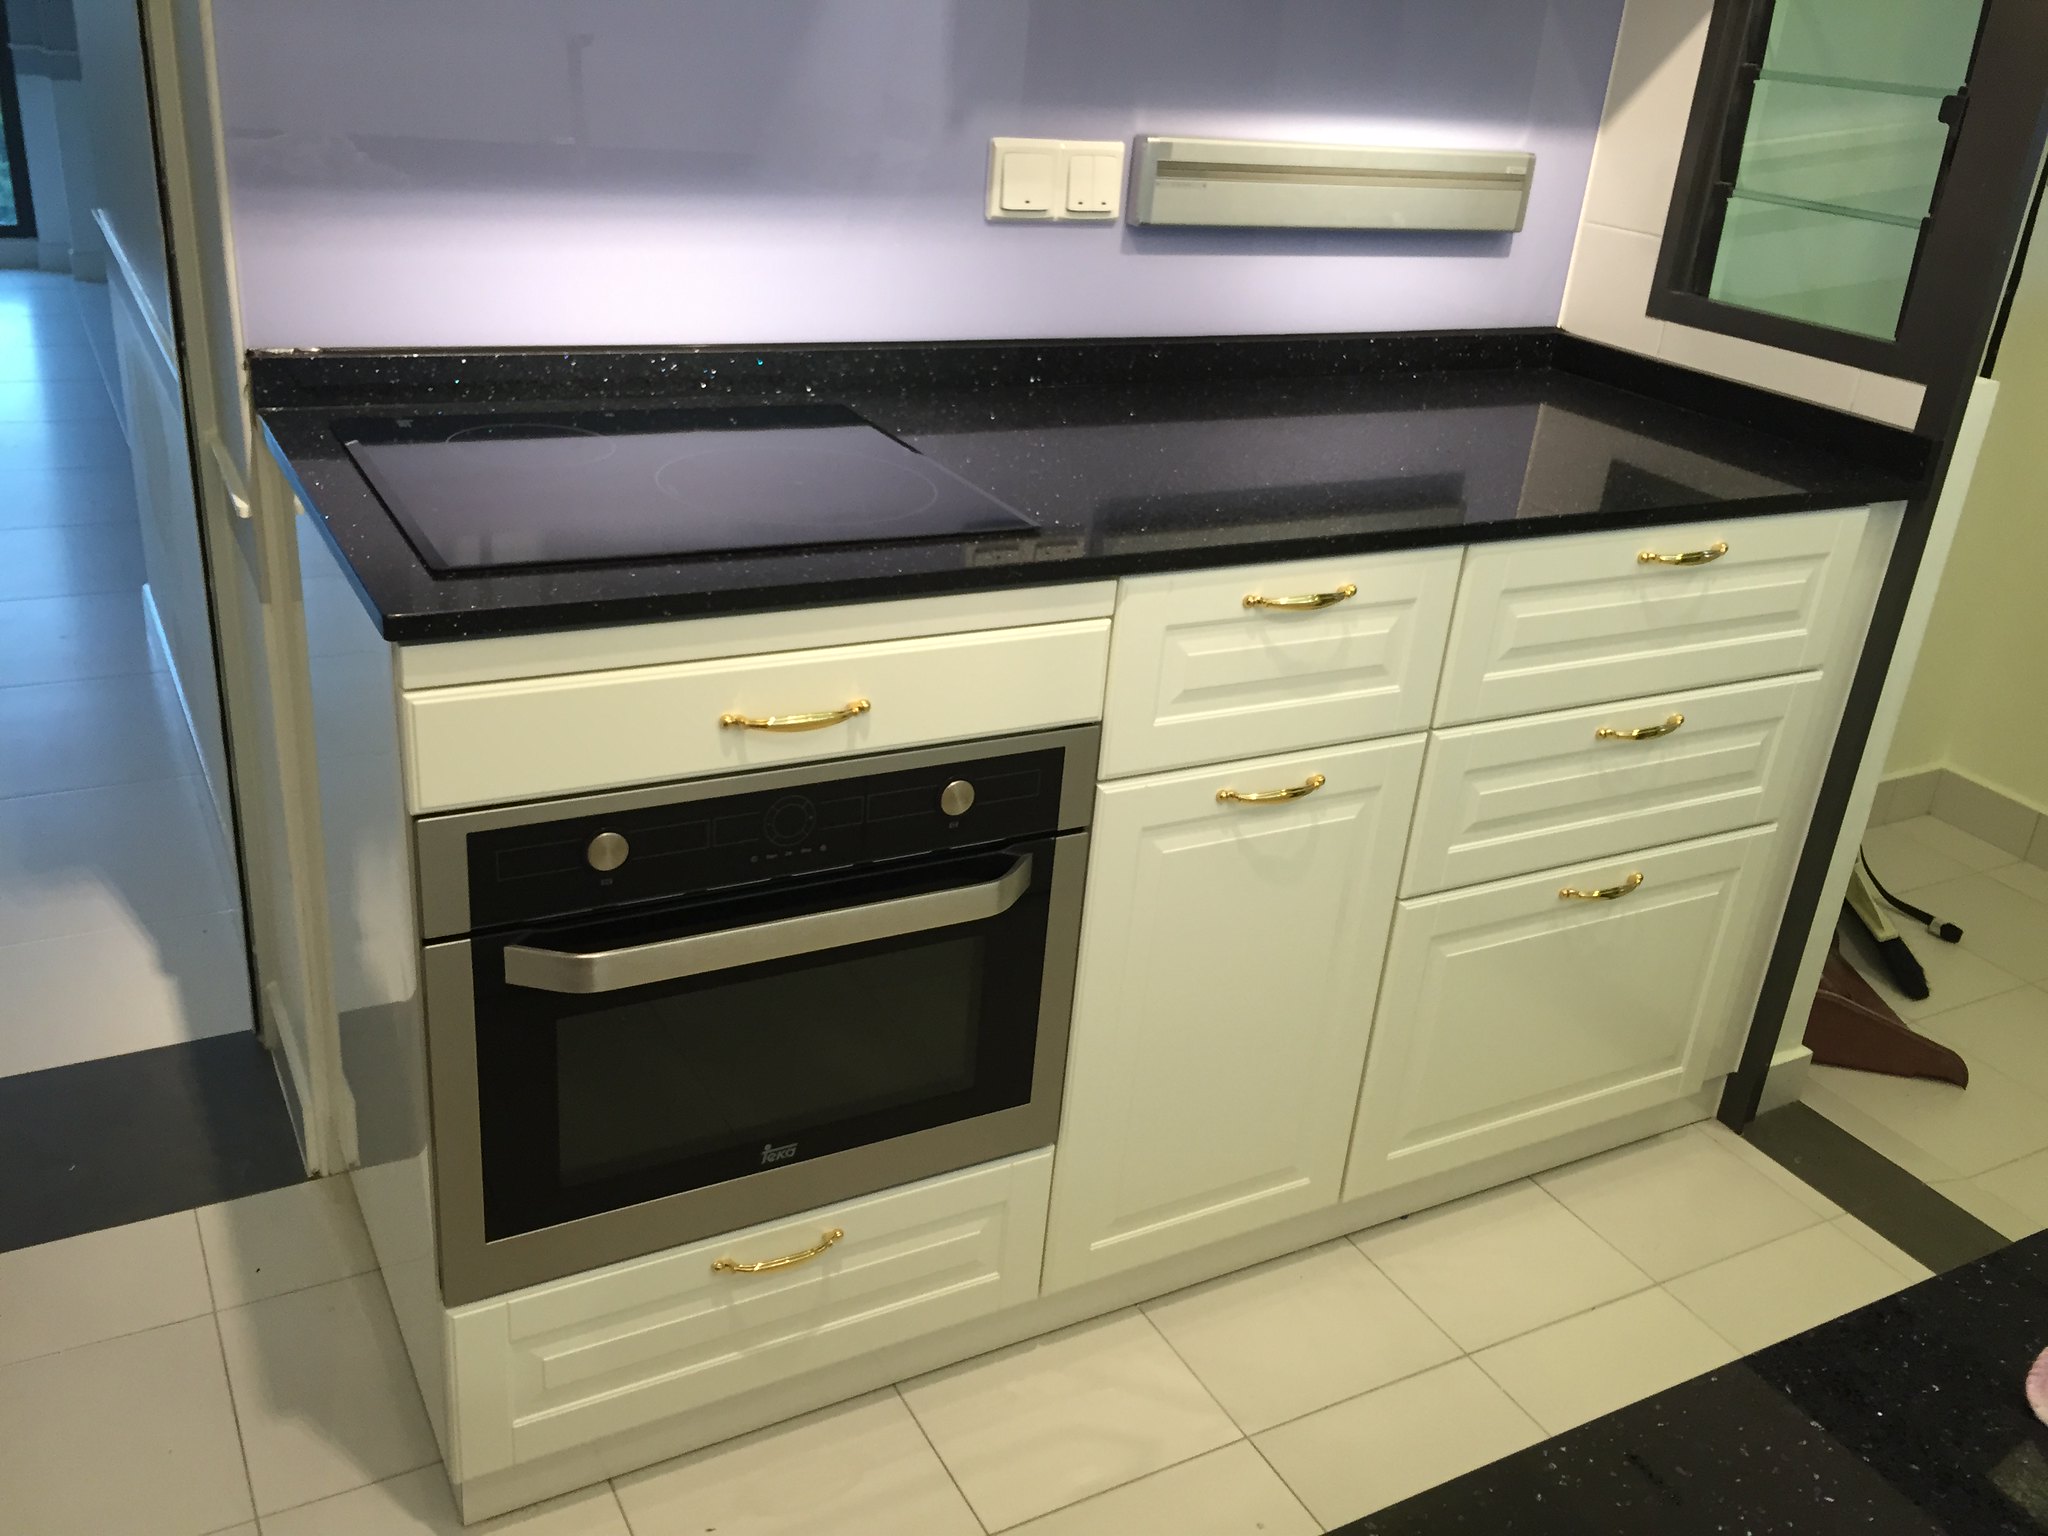
The Kitchen is my baby... i spent a long time thinking of what goes where and i'm real happy with how it turns out. Cant wait to get start purchasing pots/pan and all the other accessories to start furnishing it.

-
Its awesome with a nice view!
Congrats!
Thanks for dropping by madamloh.
Happy New Year to you.
-
Hi All, Happy Lunar New Year to all renotalkers. I've replied all PMs.
Due to big hassle trying to put pictures into RT and than link it here, i'm now using Flickr instead. Much more user friendly. And no space limitation so i dont have to keep reducing the size of the images. Hope the pic size don't overwhelm your mobile.
'
Attached pictures of the completed hall.
https://www.flickr.com/photos/139714232@N05/albums/72157663825897690
-
The cabinet recess is cement screed?
Looks very unique.
-
Hi changbp,
Thanks for e info, btw where did u get ur track lights? I got mine from ledlightsg...
From Taobao (POK LED).
http://world.tmall.com/item/44238220251.htm?id=44238220251
I have extra that i want to sell, if you interested you can PM me or after CNY i will have a list of items I will put up in my blog that i overbought and selling at cost (so buyers save on shipping)
-
Master bedroom have since completed reno. The bed and wall mount TV will come in after CNY and i'm going to custom carpets. These are not in the scope of works of my reno contract. My TV is LG and i paid additional for LG swivel mount. Although the electrician could install it for me foc but I felt its better for the TV guys to install it. Its included in the cost of the TV anyway.
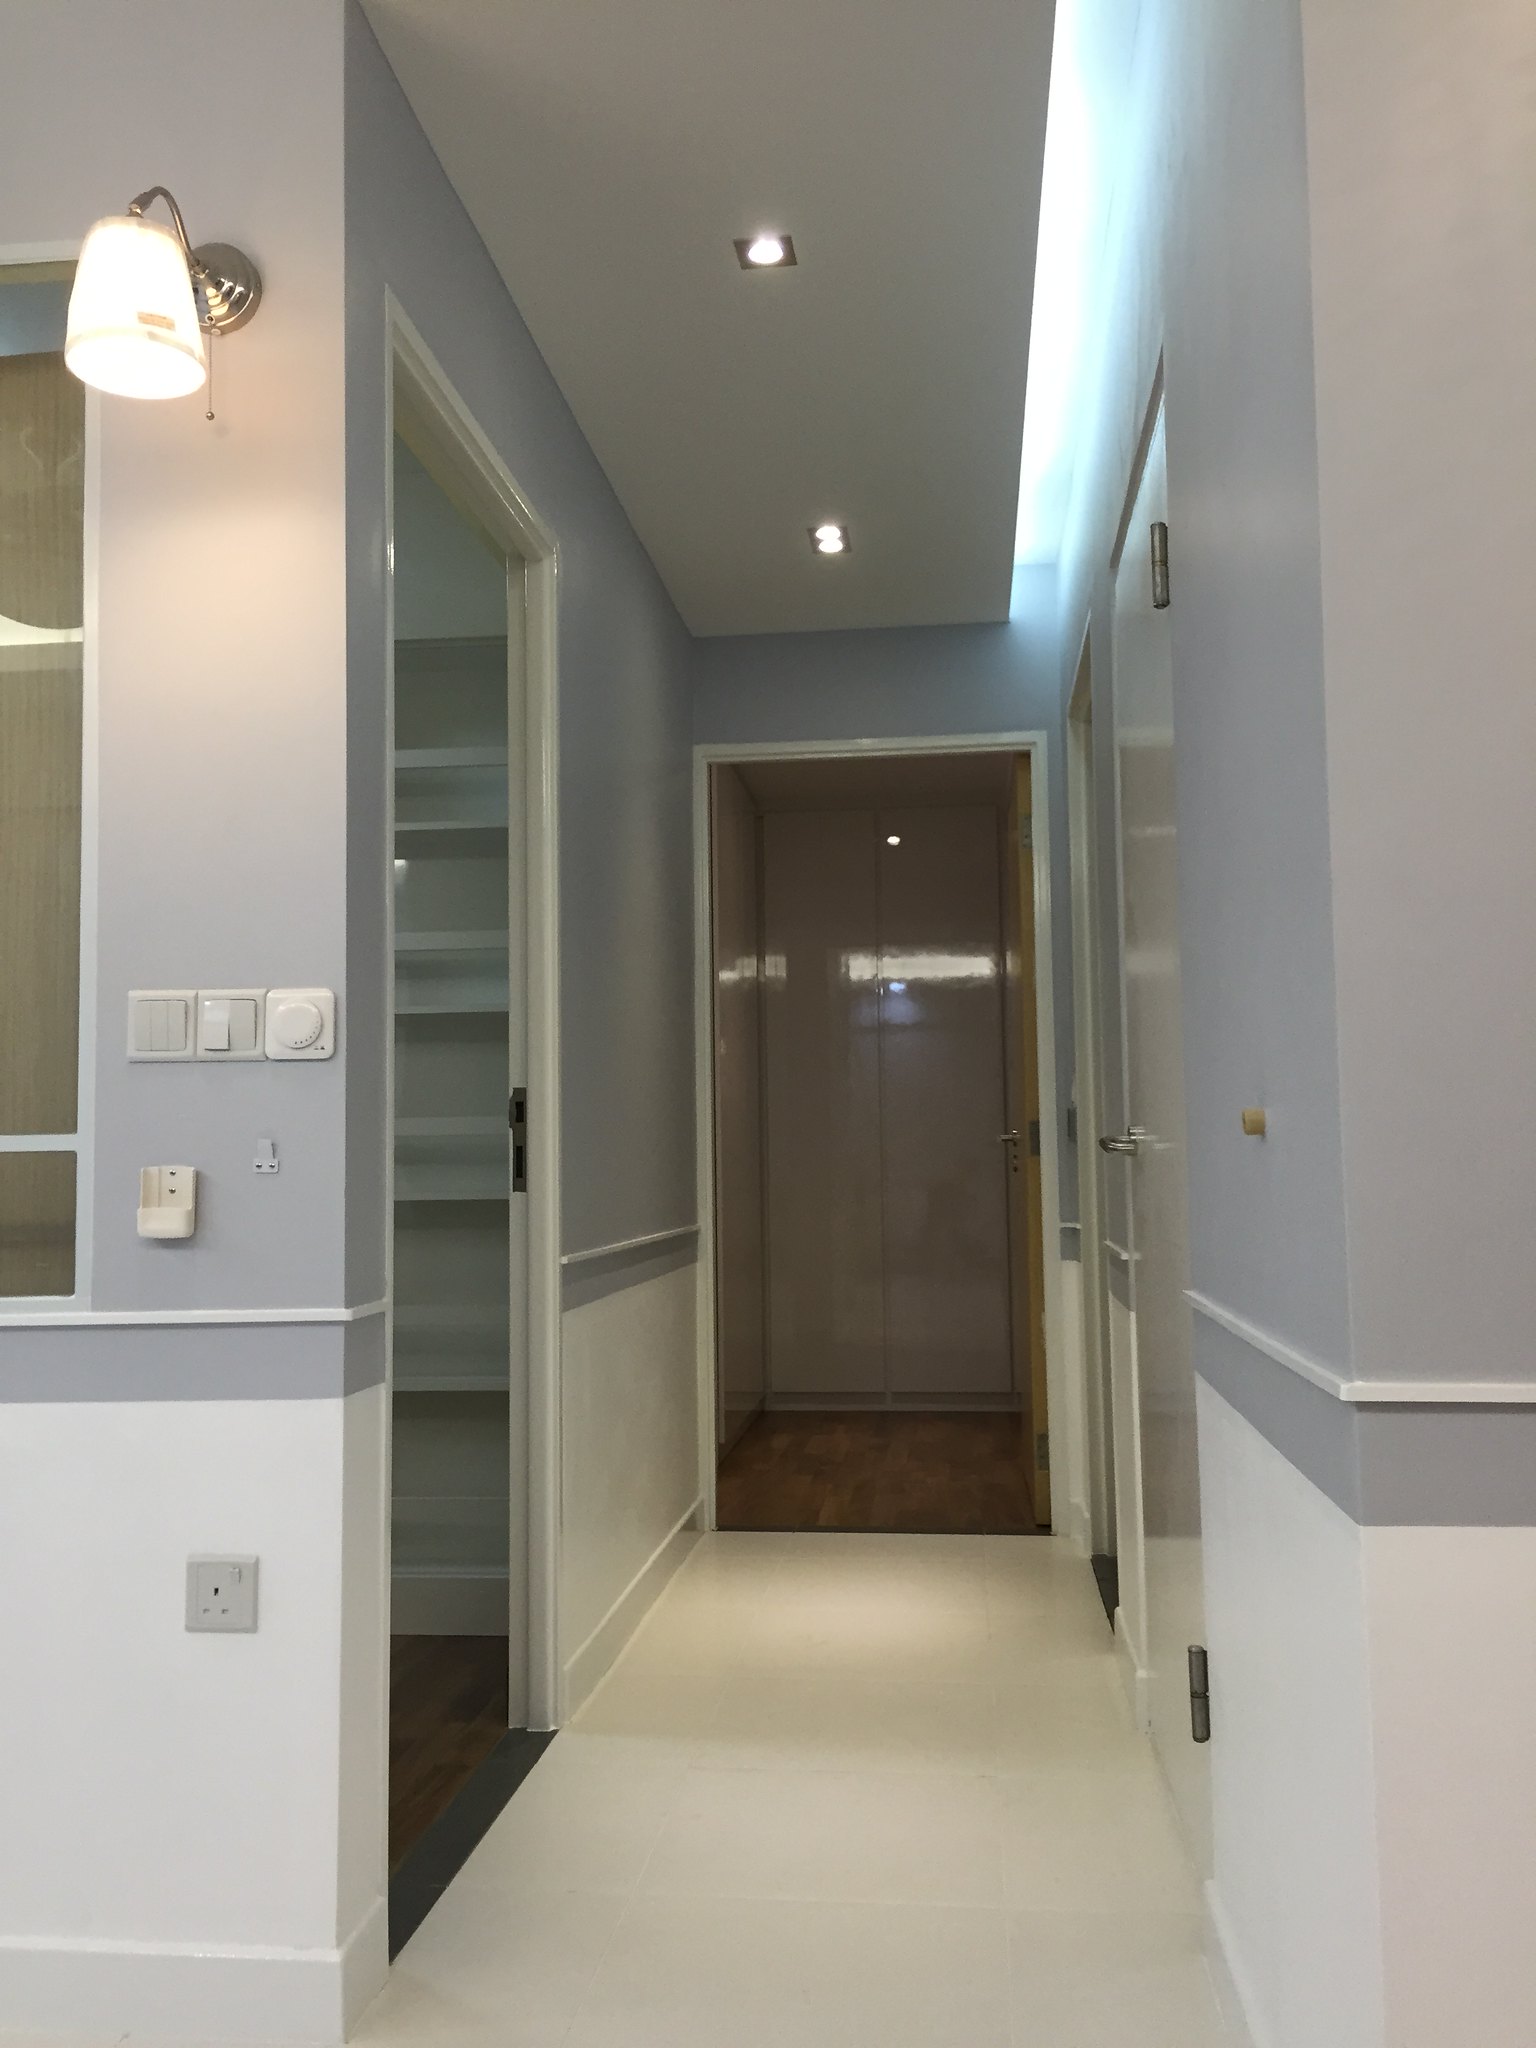
Here is a 360deg tour around the... empty bedroom.

From passageway enter the WIW.

Turn Left to enter the sleeping area (well... its empty
 ). Only have space to put a bed and a wall to mount the TV. that's it. Welcome to the smallest bedroom in Dawson.
Please ignore the white splotches on the purple wall. the 2nd round painting to entire house has this touched up but i did not take new pictures after.

Ceiling mounting Vento Fino at the corner of the light box with downlights and cove lighting. Curtain Pelmet is also installed but i have not decided on what type of curtains/blinds yet.

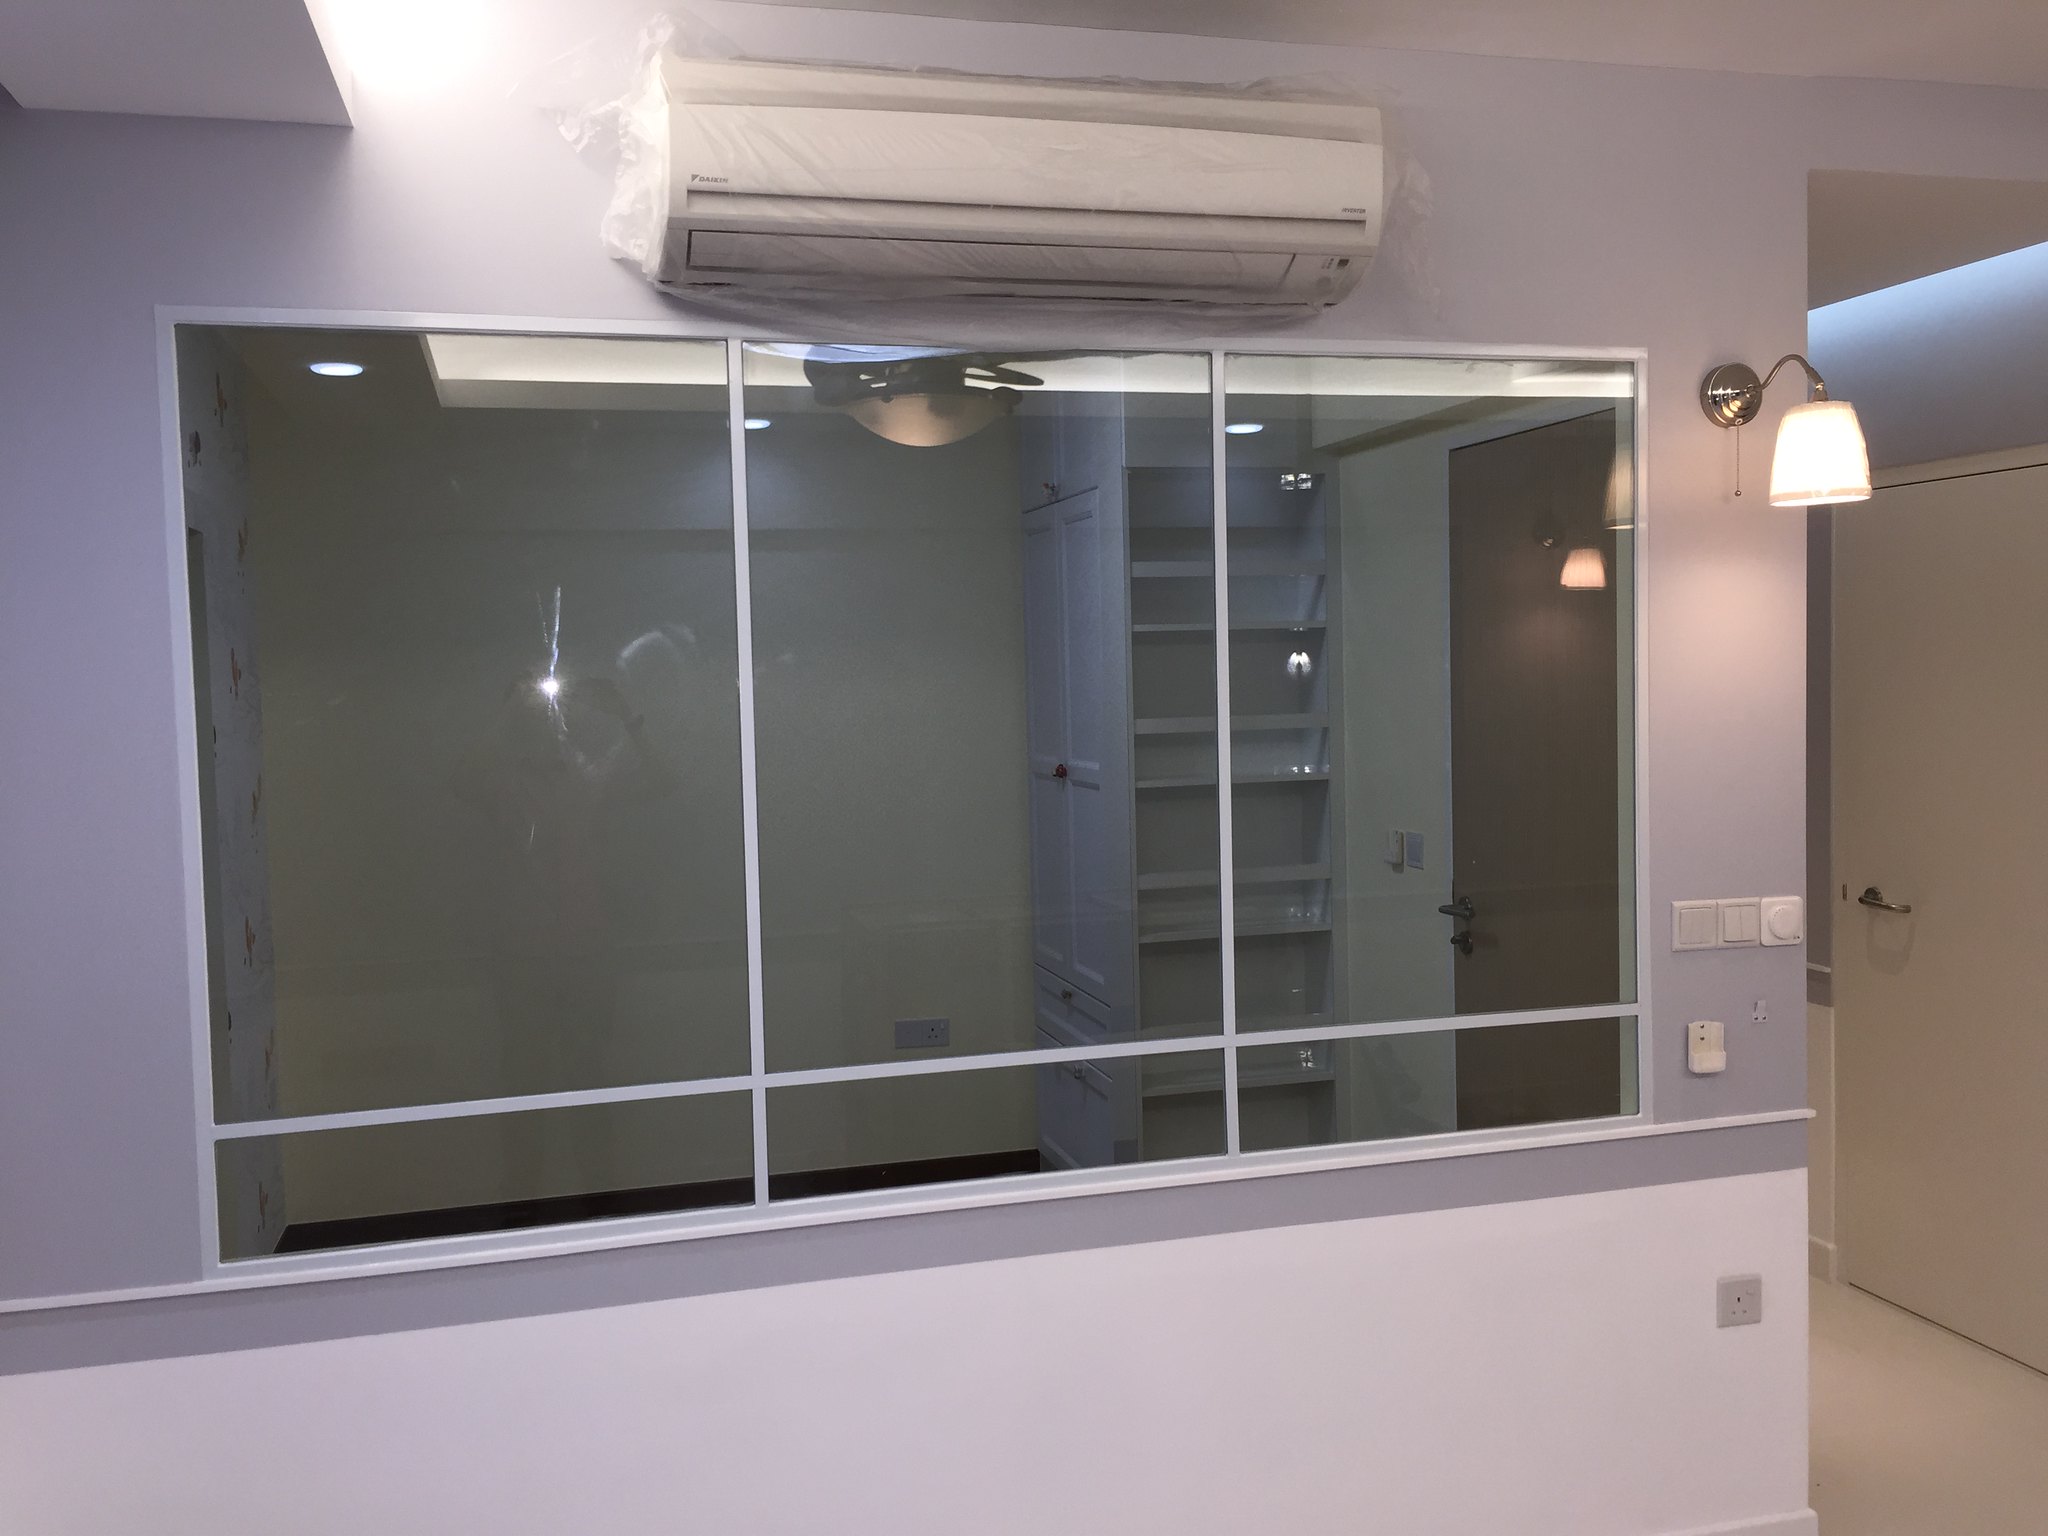
Turn 180deg right we can see the aircon ledge window on the left.. I intend to invisible grill all windows except this one since its necessary for aircon servicing. So I had this window fitted with an opening restrictor with a keylock. this shot is taken with Iphone Pano mode so it looks distorted. Front is the rear of the WIW and Right is the Daikin a/c and the exit.

thanks for viewing!
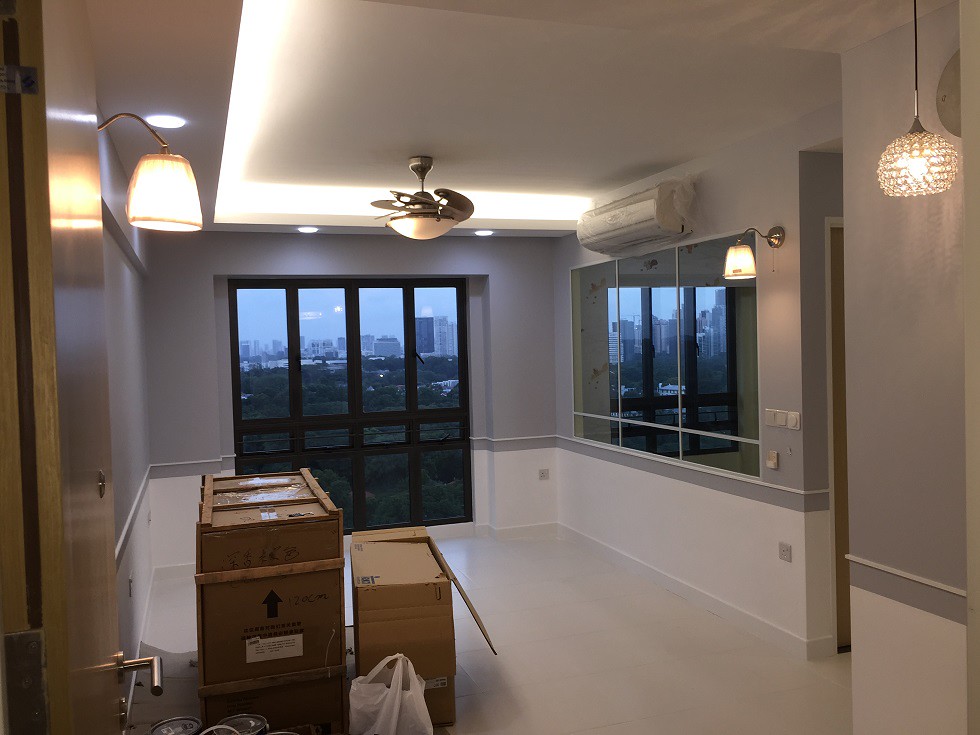
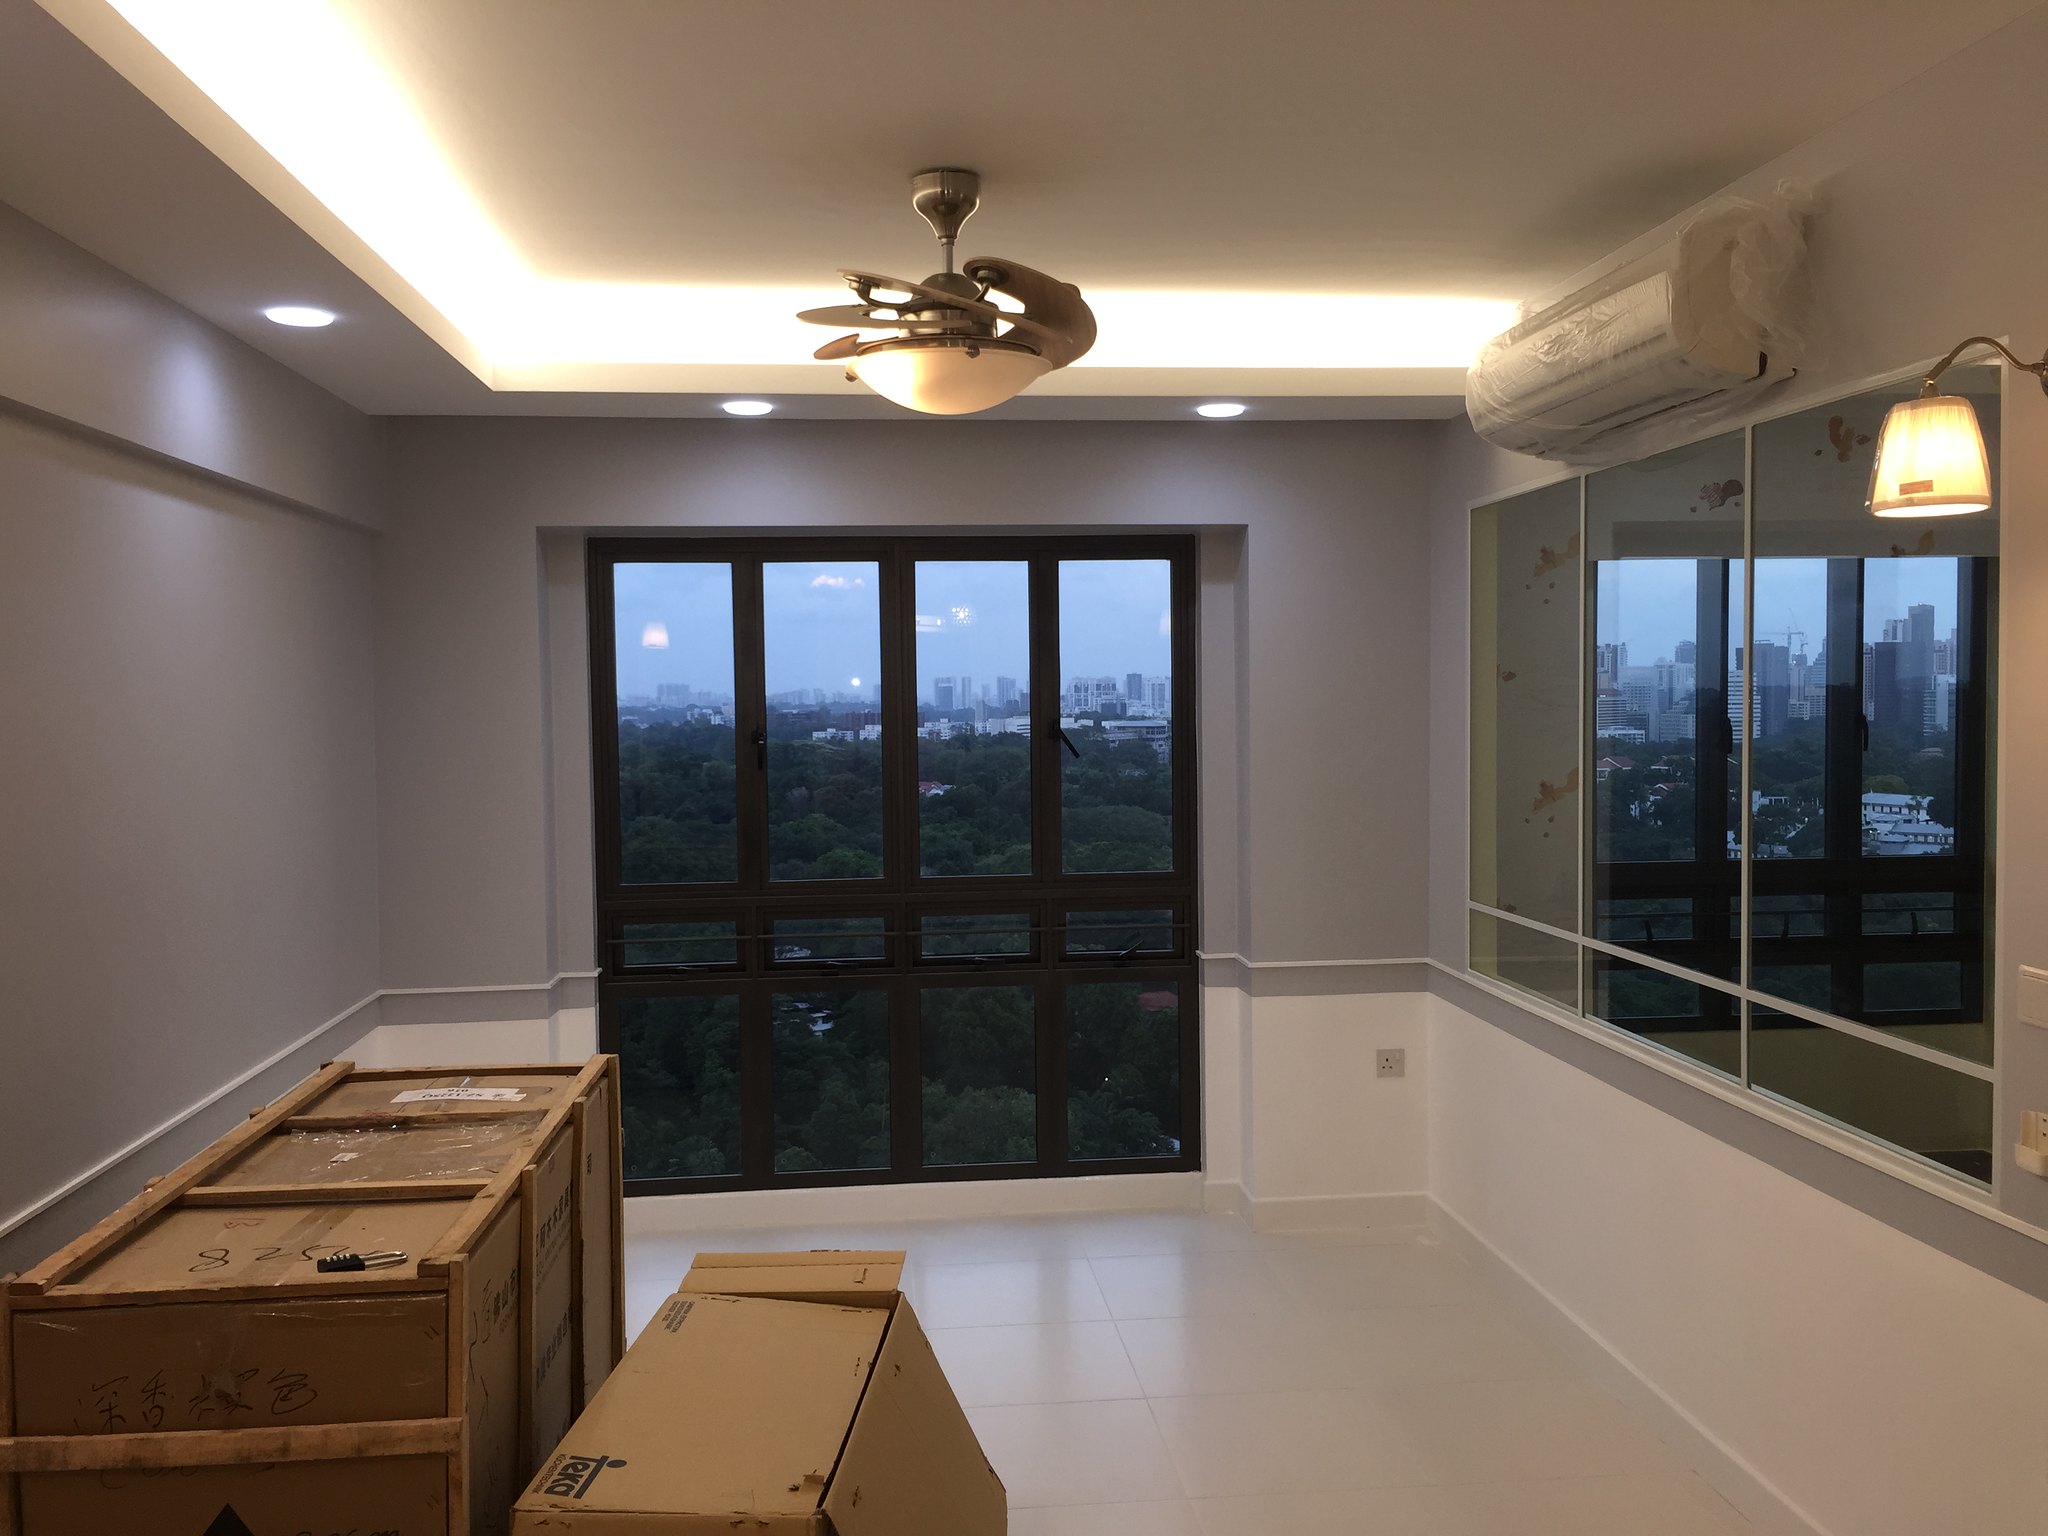
Next up will be the kids room and living room.
-
I am full of lights - 27 light points. Here is a quick light compilation display. (Some items are more than 1 per. Cove T5s and Cornice Led strips are not pictured since they are all hidden thus there are only 11 shown)
A lot of my lights are from Taobao Tmall. All came with bulbs too and no breakage! Only 1 of the spotlight bulb did not work upon arrival. The rest all work great.
1. Common toilet pendant from taobao
2. Master bathroom vanity from Amazon
3. Passageway spot light from taobao
4. Wardrobe recess spotlight from taobao
5. Phillips 3 color Living Room Downlight from lightings.com
6. Ikea Wall lamp in the hall from erm... ikea.
7. Pineapple Dining lamp from taobao.
8. Fish infinite color adjustment kids room lamp from taobao.
9. Storeroom lamp from taobao
10. Service yard lamp from taobao.
11. Tracklights from Taobao.

-
Hi Changbp,
I actually like the look of the workstation. Thank you so much for explaining to me in detail.
I just don't understand that part about "36 pieces of the fasteners just for the plywood side alone"? Isn't you need only 24?
Thanks
erm, sorry my maths failed again. Yes you are right,
12 Gussets, 24 Rhombus nuts, 24 bolts just for Plywood side.
-
Kitchen Glass backsplash was up...

WAS....Well, not any more...
It has been removed and new pieces had to be cut. There is some misalignment on the bottom piece if you could spot it. The bottom left protrudes from the countertop by a couple millimeters while the top left lines up with the upper piece. It does not run parallel to the wall. You could say I'm anal on lines and apparently my cupboard upper and lower cornices is making it difficult for the glass makers. At least my ID still made them redo it.

The Glass to be cut in 2 pieces for full wall height as cannot go into the lift. The horizontal join line was suggested by the ID as it will be covered by the chimney hood. Its a good idea. Initially without consideration of the hood i wanted the join line to be a vertical line lining up with the left cornice of the upper cabinet.
-
Hey there, where did you get the foxy prints with frame? Looking for something similar to decorate my kids room.
-
On 31/01/2016 at 11:26 AM, yewtee99 said:Hi,
May i know how much does Prestech charge you? How much is the ply? The jurong east shop also selling timber?
thanks
Hi Yewtee99, yes the Jurong east shop also selling timber. Ply for single side white laminated, 800mm square thickness 18mm. It is $30something. Sorry can't remember exact price as I bought a lot of other tools. I recently bought timber from Chip Lee in Eunos. Cheaper than the Jurong east hardware shop. For prestech stuff, its difficult to tell you the price as there are many types of profiles and prices are by per feet. See this link.
http://www.prestech.com.sg/Products.aspx?CategoryID=1
I would suggest you contact them directly.
It may look the same for the ones you see in my pic as they are all 40x40mm. but they are actually 3 different types of 40x40 profiles.
The 4 vertical ones i'm using the heavy duty type 4040H, the 4 upper horizontal ones that support the plywood the standard 4040, and the lower horizontal ones is light duty 4040L as its just bracing for rigidity.
Just the profiles alone are cheap, but if cost is a concern, you need to consider the cost of the mating parts. The Gussets and fasteners and feet all amount up to alot of cost. I like the look of clear anodized aluminium, but if its just a stand you want to DIY, I would suggest you make them all out of wood. Its cheaper that way.
An upside down look FYI. If you look at the vertical profiles connecting to the horizontal profiles are made with the triangle pieces; the gussets, Each leg I have 3 pieces, so total 12 pieces. Each gusset requires 2 bolts and 2 Rhombus nuts. So you need 36 pieces of the fasteners just for the plywood side alone. Its probably not necessary but I tend to over-engineer stuff. No warranty if the washer falls off the stand.
I have too much LED strip left so i ran it around the stand. Makes the service yard more cool.

Completed Washer/Dryer Pedastal. I left the front side bottom horizontal profile out as that space is reserved for my laundry basket and need it to be able to slide in/out without obstruction.

-
Completed Master Bed Room Wardrobe.
https://www.flickr.com/photos/139714232@N05/24601098832/in/album-72157661796284074/
Its an L Shape in with EDL laminates. In 2 Tone, with the closet access area with pearl white gloss look and bed facing side a wooden look since I don't wish to see my reflection when i wake up.
I had a recess cut out at the rear of the cabinet so that i can place/charge my phone, alarm clock, keys etc... I wanted more recesses actually to put magazines or display some stuff, but commanding officer wanted more closet space so end up with only 1. The recess location was chosen specifically for lazy access. ie. when I can reach into the access when lying on the bed. So that i can hit the alarm clock snooze button with just an arm movement

View from Passageway

View from Bathroom

The Innards.

Top drawer is for watches. (picture was taken before the cupboard was completed so see exposed plywood sides and hole at the right side).
Originally wanted to put a tempered glass on top . But then again I wear I don't have Rolex to display. Only have cheap Casios so no point displaying them. The glass will end up be covered by full of the makeup stuff and my CO's junk anyway...

See the hole above the drawer, it is half depth, the other half on the other side is the bedside recess. It has a thick upper area to hide the wires and LED driver.

My clothes was assigned to this tiny space...
 , the rest belongs to the CO.

The dead space caused by the aircon trunking was converted into a small slotted hole at the top and a pull out. I intend to stick stealthy clear or white hooks to the pullout and use it to hang scarfs, belts, freshly ironed clothes for events,or whatever thin stuff. For the slotted hole at the top, can only think of 1 thing to put there. Its for something that cost 2 arms and 3 legs but used only once and kept in closet for the next 20 years... "The Wedding Photo album".
 . So if its put in here i assume we will be reminded of it enough to fully make use of it to bring it out to show guests.

The BedSide view. As mentioned earlier, as i could not add more recess to display stuff, it looks kind of plain, I will add some poster frames later.
The recess, with a power point and recessed lighting.
-
Hey lux, you might want to get a rug or some floor protection under your rocking chair.
-
Completed Common Bathroom. This has an opposing color as my living room.
Again, this is quite bare, bought some toiletries from Amazon but not arrived yet.
Full sized pictures here. https://www.flickr.com/photos/139714232@N05/albums/72157663383477189
This is a pretty small bathroom with combined wet and dry area.

Using iphone Pano Mode for a wider view, which makes the picture looks a bit distorted.

Business zone

This mirror is a bit small. Just ordered a replacement oval shaped one from Tmall. Hopefully this is more suited for that space.
-
Completed Master Bathroom.

Though it looks pretty bare now as I have limited accessories installed. I intend to use mostly suction cup stuff to hold(not purchased yet). Trying to minimize the drilling.
Full sized pics taken with Iphone here.
https://www.flickr.com/photos/139714232@N05/sets/72157661745793244
The following are some resized pics.
Dry area - Vanity cabinet.


Wet Area


Thinking area... with phone holder.


Owl & Bear's Parisian-Chic-Lookalike Nest
in Reno t-Blog Chat - HDB Resale Renovation & Interior Design
Posted · Edited by Changbp
But erm... the pipes...
could be better ran